|
Thread Number: 1194
1950's Maytag model 641 dryer |
[Down to Last] |
| Post# 56062 2/5/2005 at 19:01 (7,012 days old) by rickr (.) | ||

I have a couple of questions about my Maytag dryer. It has an ozone lamp and socket attached to a brace on the outside of the drum,and a ?? watt ballast bulb mounted behind the filter at the inside rear of the drum. Is the wattage forty watts,like my 56 Whirlpool? The lamp is burnt out,and I want to replace it. Also,why is the ozone bulb mounted ouside the drum?? Whats up with that?? It would be impossible for that lamp to shine on the clothing like that. I think this dryer was made in 1959. Now for the second question. The dryer is electric,and has a short of some sort. When you touch the timer dial as the dryer is on,you can feel a slight trickle if you are barefoot. I am ok with that. However, I replaced the vent hoses on both dryers with new metal hoses today. The metal hose from the Maytag's exhaust brushed against the metal 220 volt outlet box while the dryer was running,and sparks flew!! I am NOT ok with that!! I removed the back panel,after disconnecting the dryer.It was very clean inside,and I did not see any obvious shorts,like a bare wire,or terminal pushed against the cabinet,etc. One of the teminals from the 220 volt power cord was loose at the bakelite connector block on the rear of the dryer,and the bakelite was slightly charred from that. I tightened that,and reinstalled the back panel and tried the dryer out again. This time I pushed the metal dryer vent hose against the outlet box (with a piece of wood) sparks flew again,so I unplugged the dryer,and here I am!! (: I did notice a ground terminal on the rear of the cabinet,that is not in use. On these "oldies" does that need to be connected even with the three wire 220 volt power cord? Obviously this dryer is NOT safe to use in this condition. Any tips from anyone with knowledge on the old school Halo of Heat dryers will be appricated. Thanks, Rick 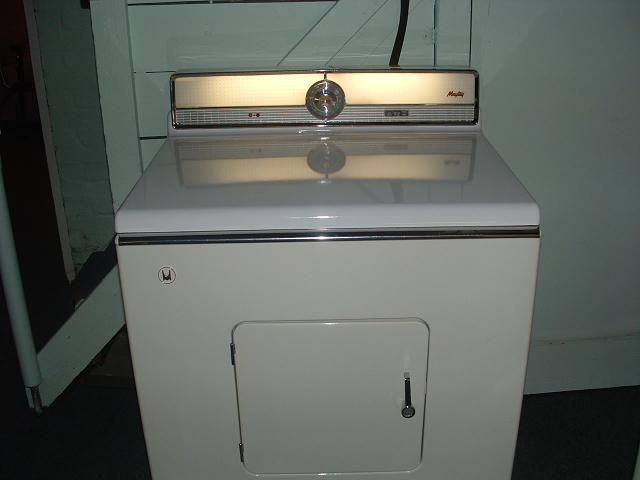
| ||

|
Post# 56064 , Reply# 2 2/5/2005 at 19:33 (7,012 days old) by gansky1  (Omaha, The Home of the TV Dinner!) (Omaha, The Home of the TV Dinner!) |
||

Hi Chris - You just need a regular 40 watt appliance bulb for that dryer. The ozone bulb emits a "gas" (?) that supposedly sanitized clothes, as long as the dryer can "pull" it into the air going into the drum, it makes no difference where the bulb is. I've seen others mounted outside the drum - I think Speed Queen did this for a while on very early 60's machines too. What do your buttons on the panel read? You might have the first of the electronic control models. You might want to remove the cabinet and check the heating element string in front of the drum. If it's touching the galvanized metal shroud, you'll get a tingle - actually, more like a deadly shock at 220v! My 906 had a warped coil touching the heater shroud and was running 220v on the cabinet. Check that problem and then when you've resolved what is wrong, this dryer should be grounded at all times to a cold water line or other suitable ground, not only for safety but the electronic control system needs to be grounded as well. | ||
| Post# 56067 , Reply# 3 2/5/2005 at 20:12 (7,012 days old) by kenmore1978 () | ||
|
Grounding I'm assuming you're using the original 3 wire cord, so after doing all the things suggested already, there should be a connection between the green grounding lug and the white terminal of the power cord. | ||
| Post# 56070 , Reply# 4 2/5/2005 at 20:25 (7,012 days old) by rickr (.) | ||
|
Thanks Coldspot66 and Greg, I will get a forty watt bulb for the dryer drum.i understand how it was design to work now. The buttons on the dryer controls read: "Air Fluff"---"Regular Drying"---"Wash N Wear" On the control dial it reads: "Drying Time" Twice. And the numbers go to 100 on the dial. How do I get to the heating element to inspect it? I understand I have to remove the cabinet,however what is involved with doing that? I see the three screws on either side at the bottom of the cabinet. It the top to be removed also? Or the front? If so how are those removed? (Please) (: I added a better view of the dryer. Thanks, Rick 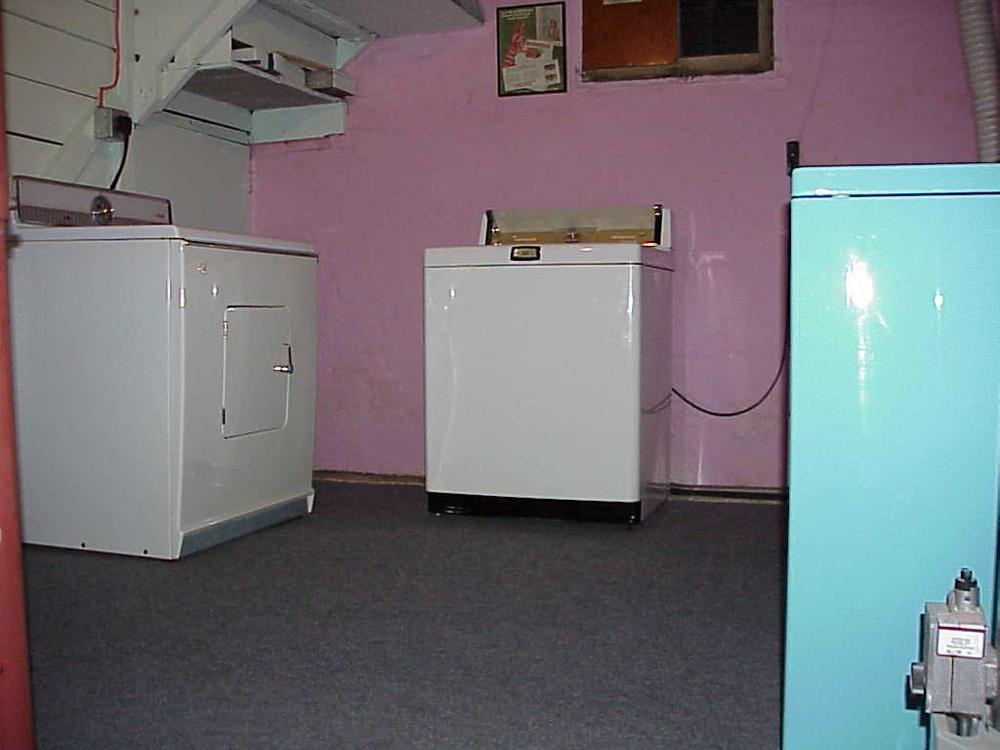
| ||
| Post# 56071 , Reply# 5 2/5/2005 at 20:29 (7,012 days old) by rickr (.) | ||
|
Picture toooooo Big!! | ||
|
Post# 56076 , Reply# 7 2/5/2005 at 20:59 (7,012 days old) by coldspot66 (Plymouth, Mass) |
||
|
Oops, I see there are no screws on the front of the cabinet. All the less to remove!!!!!!!!!! | ||
|
Post# 56107 , Reply# 10 2/6/2005 at 05:03 (7,011 days old) by goatfarmer (South Bend, home of Champions) |
||
 | ||
| Post# 56112 , Reply# 12 2/6/2005 at 07:32 (7,011 days old) by coldspot () | ||
|
Also the element might need to be unpluge also to remove the cabinet. | ||
| Post# 56128 , Reply# 13 2/6/2005 at 12:14 (7,011 days old) by rickr (.) | ||
|
OL' Sparky
Thanks for the tips guys! I tried the dryer this morning,on "Air Fluff" setting and it still sparked like crazy. I know the power could still feed back through a grounded element even if it is not powered up,so that doesn't really prove anything. Don't have a volt meter at home,however they have one at work I could borrow. I will tear the dryer down and take a peek anyway. I won't trust it until I can take a look at that element now anyway. Thank's Rick | ||
| Post# 56130 , Reply# 14 2/6/2005 at 13:05 (7,011 days old) by rickr (.) | ||
|
Found the Problem!!
Hey Guys! Just found the problem! An old fashioned baby diaper pin wedged in the element coil,and welded to the shroud! Talk about a direct short.... I carefully pried the pin loose from the shroud,and then "unwound" it from the heating element coil. Next took the heating assembly out to the garage and gave it a good cleaning with the shop vac. Now to put it back together... Rick | ||
| Post# 56133 , Reply# 15 2/6/2005 at 13:56 (7,011 days old) by rickr (.) | ||
|
No more
Took the shop vac down the basement and cleaned lots of lint from areas covered by the element shroud,and not accessable when the element assembly is in place. Then reassembled the dryer and tried it out. Pushed the metal vent pipe with a piece of wood until it touched the metal 220 volt outlet box and NO SPARKS!!! YAY!!! I will add the ground wire before pushing the dryer back against the coal bin,and we will be in business!! Thanks again for all your help guys. I will dry a load in the dryer later today,and will let you know how it does. Rick | ||
| Post# 56135 , Reply# 16 2/6/2005 at 14:03 (7,011 days old) by fixerman () | ||
|
I have found the reason things get in the element is because there is suppposed to be a felt seal glued to the front of the drum opening. Soometimes this seal disintegrates or comes loose. Make sure it is there and in good shape. | ||
| Post# 56141 , Reply# 17 2/6/2005 at 15:06 (7,011 days old) by retromom () | ||
|
A what? Rick: Bet you were "shocked" to find that in there ;-) Glad you got it fixed. It's a really nice dryer. Venus | ||
|
Post# 56142 , Reply# 18 2/6/2005 at 15:18 (7,011 days old) by goatfarmer (South Bend, home of Champions) |
||
|
| ||
| Post# 56143 , Reply# 19 2/6/2005 at 15:20 (7,011 days old) by rickr (.) | ||
|
The Shock of it ALL!
Yes Venus,it was a "shocking" experiance"! How long do you think that diaper pin was in there? I mean REALLY! Women have been using disposables for how many decades?? That poor woman that owned this dryer had prolly gotten shocked every washday Monday since the Kennedy administration,or there abouts. LOL! Rick | ||
| Post# 56144 , Reply# 20 2/6/2005 at 15:21 (7,011 days old) by rickr (.) | ||
|
| ||
| Post# 56164 , Reply# 21 2/6/2005 at 19:59 (7,011 days old) by rickr (.) | ||
|
Dryer works A-ok!
I just dried a set of bed sheets with this Maytag. Worked just great. I even got the ozone bulb and drum lights working. I did not see any evidence of a felt ring as a seal,or gasket at all. Does anyone know if a felt ring was used on a Halo of Heat dryer this old,(1950's)or was that something they added in the 1960's or 1970's?? I do notice a gap appx 1/4 wide between the drum,and heater shroud. If a sealing ring (other than the rubber door seal,which is in place) should be there,I want to install one,if I have to purchase,or fabricate it. Thank's Rick | ||
| Post# 56176 , Reply# 22 2/6/2005 at 22:03 (7,011 days old) by bpetersxx (laf in on the banks of the Wabash River) | ||
mystery appliances | ||
| Post# 56198 , Reply# 24 2/7/2005 at 03:45 (7,010 days old) by kenmore1978 () | ||
|
shocking So let us know the resolution of the "shocking" HB mixer. | ||
| Post# 56237 , Reply# 25 2/7/2005 at 10:07 (7,010 days old) by rickr (.) | ||
|
whats on the other side of the water heater? | ||
| Post# 56241 , Reply# 26 2/7/2005 at 10:35 (7,010 days old) by retromom () | ||
|
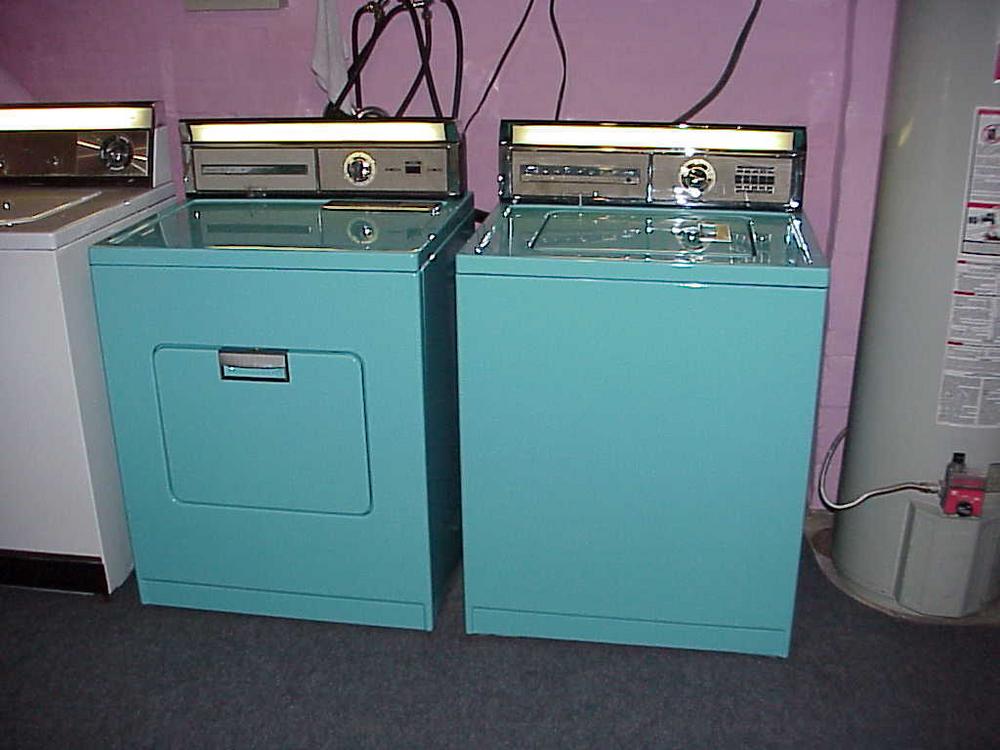
A perfect pair Wow Rick, that is a really nice looking set. I guess I'm just a sucker for lighted controls :-) Venus | ||
|
Post# 56243 , Reply# 27 2/7/2005 at 10:53 (7,010 days old) by Unimatic1140 (Minneapolis) |
||
Please do make sure the dryer is properly grounded, hopefully the dryer was properly grounded at the pervious owners home so they never knew there was an electrical leakage. Rick those pictures are beautiful and they are perfect viewing size. I added a new routine in the code recently that if an uploaded picture is too big, the server will automatically resize the picture to 1000x750, very conveinient to view in 1024x768. So no one has to worry about having to resize their pictures anymore. | ||
| Post# 56252 , Reply# 28 2/7/2005 at 11:47 (7,010 days old) by rickr (.) | ||
|
Dryer seal | ||
| Post# 56253 , Reply# 29 2/7/2005 at 11:56 (7,010 days old) by rickr (.) | ||
|
Dryer grounding
Hi Robert, I did ground the dryer when I was finished. This was a scary situation! I had bought the dryer about a year ago for $100.00 at a used appliance store.I had nver used it as I only had one dryer vent until Saturday when I installed another vent.The appliances store had checked it out,serviced it,and even cleaned the lint out of it,so I figured all was ok. I have learned it is best to check these vintage appliances yourself, and ground them also. Thanks, Rick | ||
|
Post# 56256 , Reply# 30 2/7/2005 at 12:33 (7,010 days old) by coldspot66 (Plymouth, Mass) |
||
|
Rick, I have one of those 311534 seals that I prolly will never use. If you can't get it froma aprts dealer, let me know. My email is in my profile. John | ||
| Post# 56276 , Reply# 31 2/7/2005 at 14:45 (7,010 days old) by partscounterman (Cortez, Colorado) | ||
|
Felt seal That felt seal is only for use on the GAS halo of heat dryer. The ELECTRIC model does not use the felt seal | ||
| Post# 56301 , Reply# 33 2/7/2005 at 16:01 (7,010 days old) by fixerman () | ||
|
Felt seal Partscounterman, You may be thinking of the felt seal that goes around the outer ring of the element housing. It is correct that the electric dryers don't use them. The 311534 goes around the front of the drum opening. | ||
| Post# 56323 , Reply# 34 2/7/2005 at 17:40 (7,010 days old) by partscounterman (Cortez, Colorado) | ||
|
Ooops-Your right | ||
| Post# 56330 , Reply# 35 2/7/2005 at 18:12 (7,010 days old) by rickr (.) | ||
|
So the jury is in...
Looks like I have a Sunday afternoon job to do.... LOL!! I will call my appliance parts source tomorrow and see if they have a felt seal for the dryer. Might as well get the door seal too I guess. It was a little "crunchy" around the edges. May as well fix up the old Halo of Heat to it's "original splendor". Now I want a Maytag washer to match it!! (and I was saving that space for a Frigidare!!!) (: Thanks for all your input guys!! This club is a GREAT place to be!! Rick | ||
| Post# 57056 , Reply# 36 2/12/2005 at 15:37 (7,005 days old) by rickr (.) | ||
|
Dryer job all done....
Well I got the felt seals and special heat proof cement at the appliance parts store this morning. The repair people told me to install the small (port) felt seal,and include the large(drum) felt seal also,even though my dryer is not the gas model. They said that they always added the extra seal whenever they had a Halo of Heat dryer down that far. So I took their advise and it is now back together and works fine. Cost $44.27 Large drum seal:$27.00/Port seal:$10.98/Glue pack:$3.78 The rubber port to door seal was not in stock and had to be ordered. I think I can install that part without much disassembly. I did not ask the $$$ on the rubber door seal. I guess it will be a surprise!! LOL I am really impressed by how quiet this dryer is. It is much quieter than my 1965 Kenmore 800,and the Kenmore has been rebuilt with:new rollers,motor,belt,all felt seals,etc,etc.... The Kenmore seems "tinny" in comparison to this 59 Maytag. It was evident while both were in use at the same time for the first time.(last night) I guess they started "cheating" on quality even in the 1960's. The 1960's stuff is still "megatons" better that what is manufactured today though. Thanks to all once again for all your advice and help!! Rick | ||
| Forum Index: | 
| Other Forums: |

|

|

|

|

|

 Comes to the Rescue!