|
Thread Number: 12518
Speed Queen Centerposts 101 |
[Down to Last] |
Post# 219183 6/28/2007 at 16:34 (6,136 days old) by gansky1  (Omaha, The Home of the TV Dinner!) (Omaha, The Home of the TV Dinner!) |
||
 | ||

|
|
Post# 219186 , Reply# 1 6/28/2007 at 16:37 (6,136 days old) by gansky1 (Omaha, The Home of the TV Dinner!) |
||
|
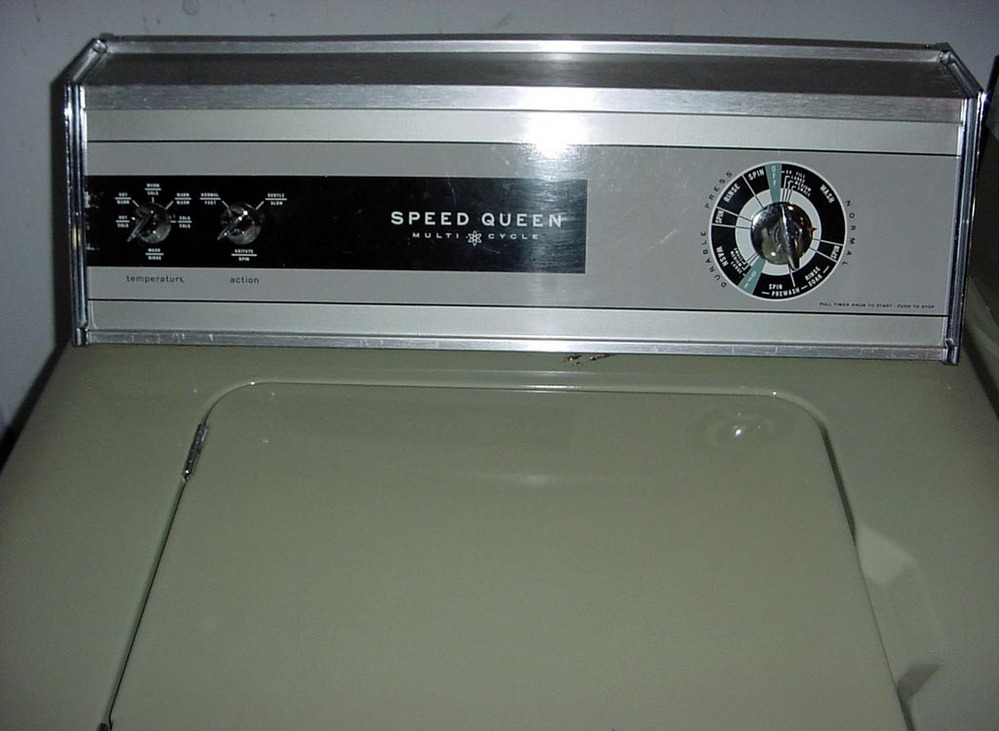
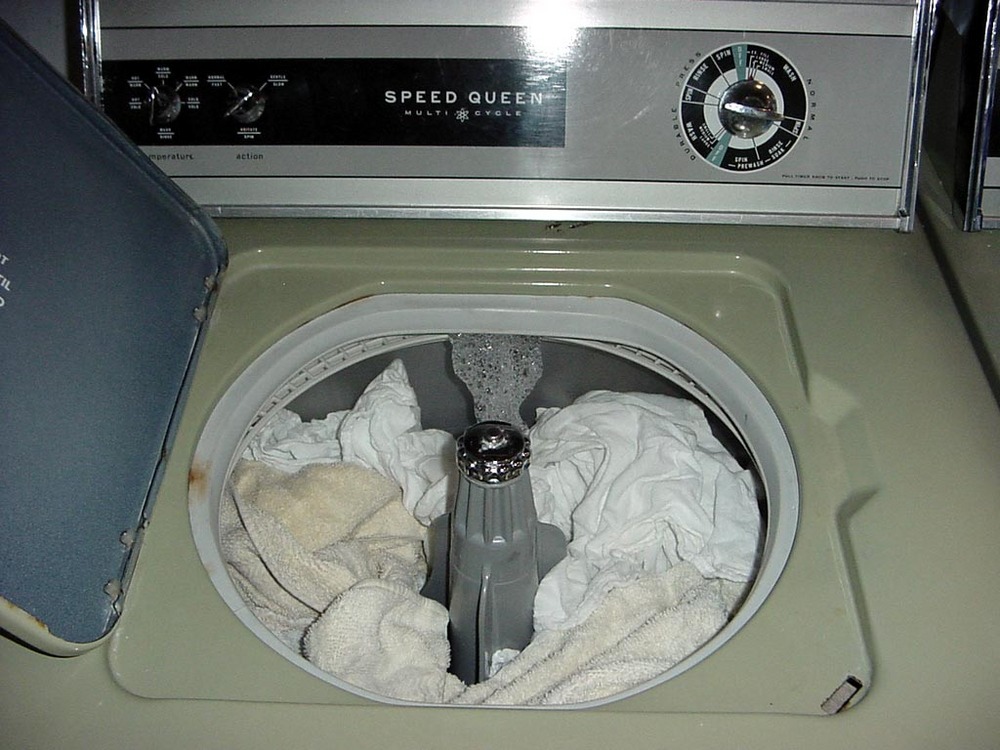
Of course, the first thing we need to do is unplug the machine, move it out from the wall and remove the front panel and the top of the washer. Speed Queens by this point were relatively easy to access, only four screws to remove the front panel, two bolts holding the top down in front, then pull the top forward and raise it. Disconnect the quick-plug wiring harness and you can put the machine top out of your way. Here is the machine 'topless'.
| ||
|
Post# 219187 , Reply# 2 6/28/2007 at 16:41 (6,136 days old) by gyrafoam (Wytheville, VA) |
||
|
I'll don a HAZMAT outfit real quick---this should be good------ | ||
|
Post# 219188 , Reply# 3 6/28/2007 at 16:42 (6,136 days old) by gansky1 (Omaha, The Home of the TV Dinner!) |
||
|
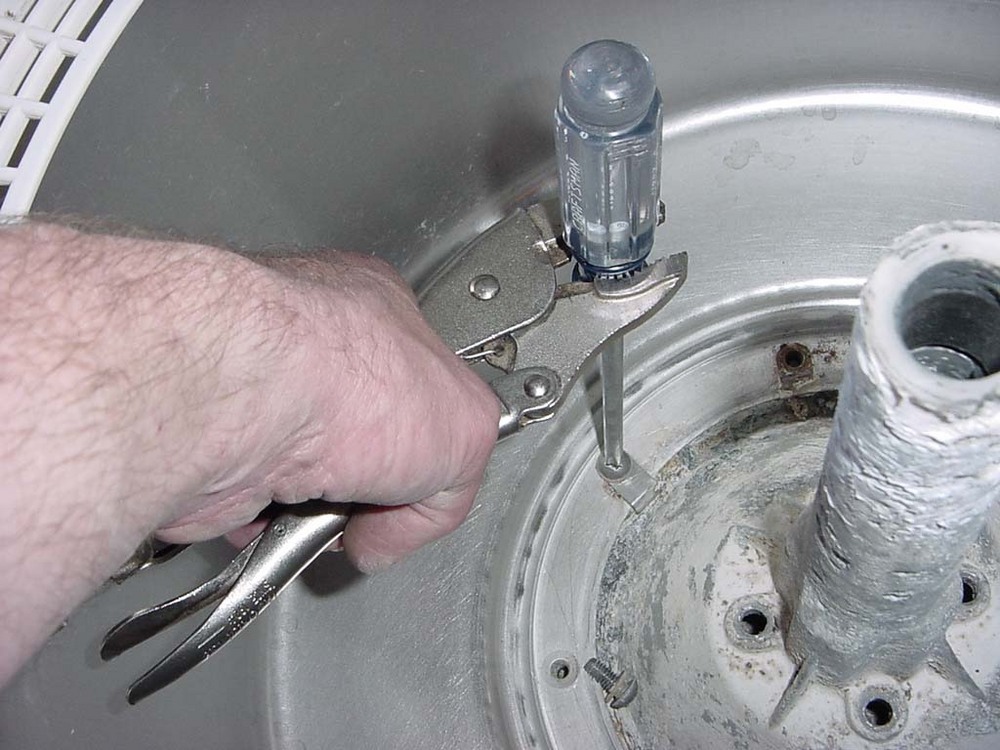
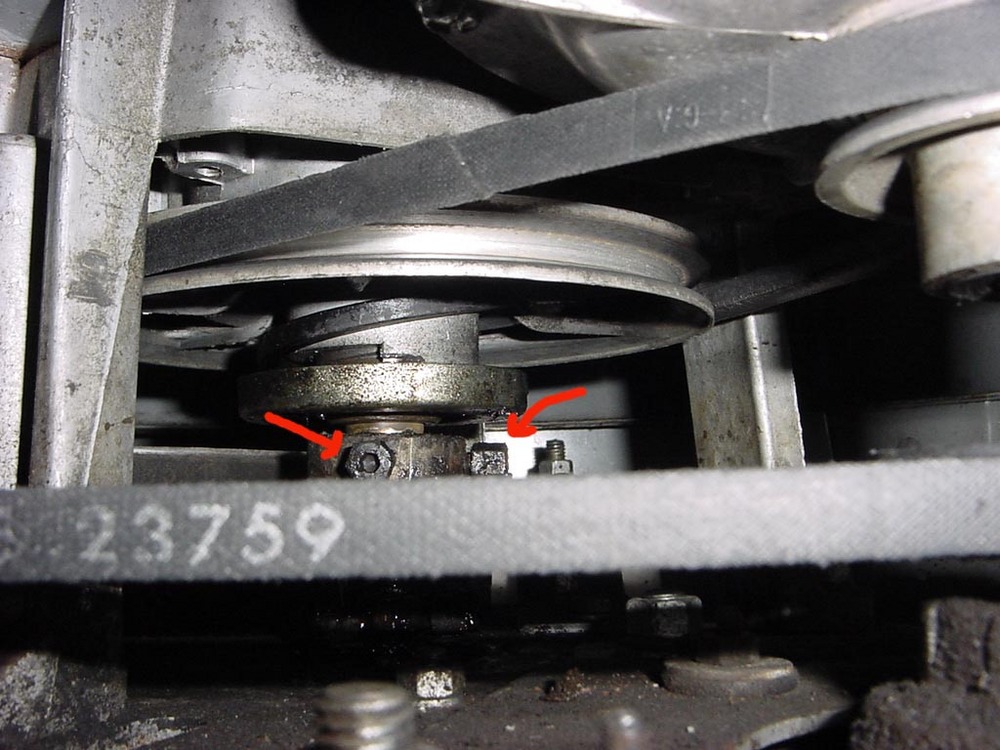
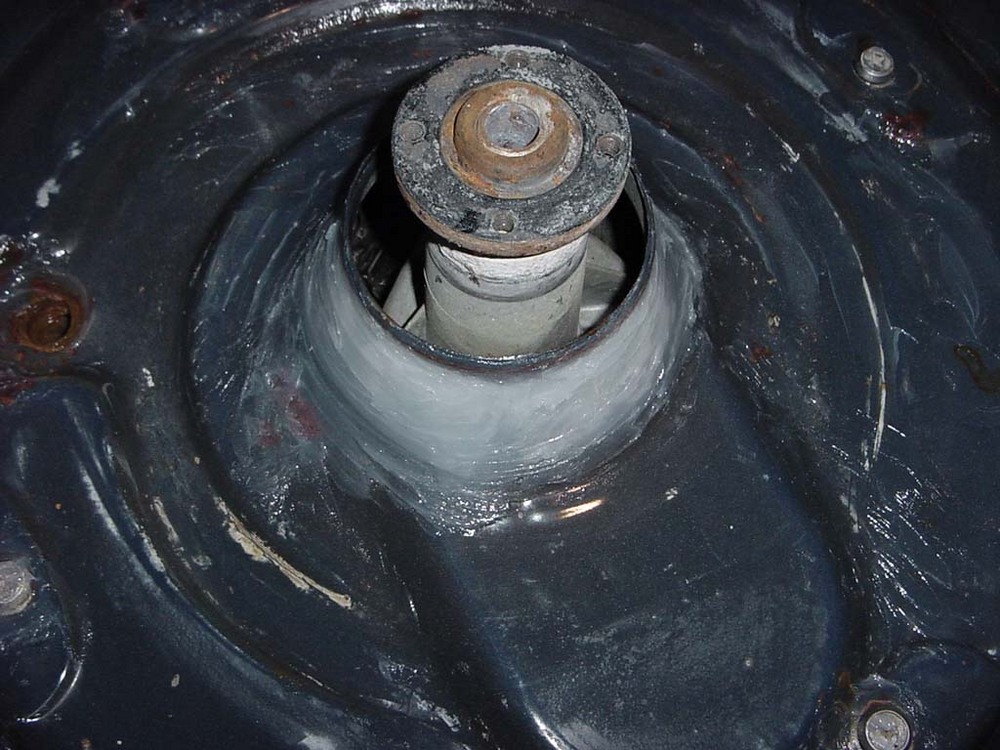
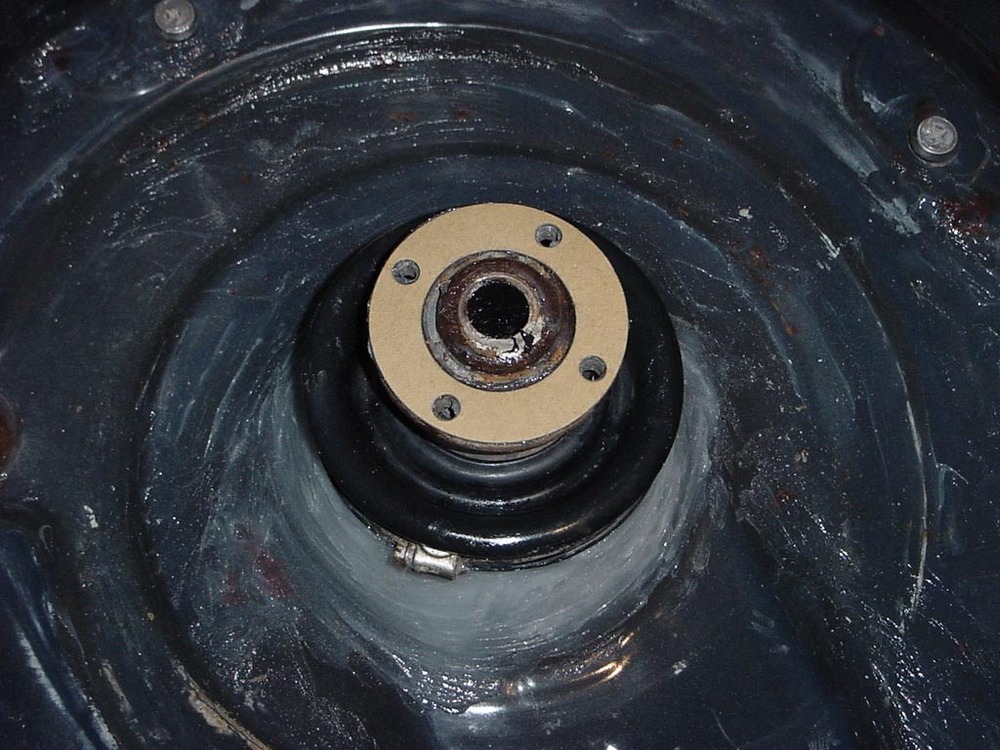
As you can see, I've removed the agitator and now it's time to remove the agitator shaft. The thrust collar on the agitate shaft, found just below the main spin-bearing housing is to keep the agitator shaft in place. There are two bolts on the thrust collar that I've pointed to in red. There is a hex-head screw in the center of each one and on these "newer" models, they are also 3/8" heads so a socket wrench and extension can be used. We loosen those and let the thrust collar drop down.
| ||
|
Post# 219189 , Reply# 4 6/28/2007 at 16:42 (6,136 days old) by gansky1 (Omaha, The Home of the TV Dinner!) |
||
|
Mr. Riley! | ||
|
Post# 219190 , Reply# 5 6/28/2007 at 16:44 (6,136 days old) by gansky1 (Omaha, The Home of the TV Dinner!) |
||
|
| ||
|
Post# 219191 , Reply# 6 6/28/2007 at 16:46 (6,136 days old) by gansky1 (Omaha, The Home of the TV Dinner!) |
||
|
| ||
|
Post# 219192 , Reply# 7 6/28/2007 at 16:49 (6,136 days old) by gansky1 (Omaha, The Home of the TV Dinner!) |
||
|
| ||
|
Post# 219197 , Reply# 8 6/28/2007 at 16:54 (6,136 days old) by gansky1 (Omaha, The Home of the TV Dinner!) |
||
|
OH NO! It's a horrible rust hole! Well class, it looks like we're going to have to take a break and go over the chapter on "Patching outer tub holes"! Let's have a snap quiz! What would you use to patch this hole? Remember, this part of the tub is flanged and the boot must still be clamped onto the tub (pictured in the previous photo) BUT this has no structural support for the tub or the machine - all of that is below the tub so this is primarily just a flange for the boot and a water-dam. 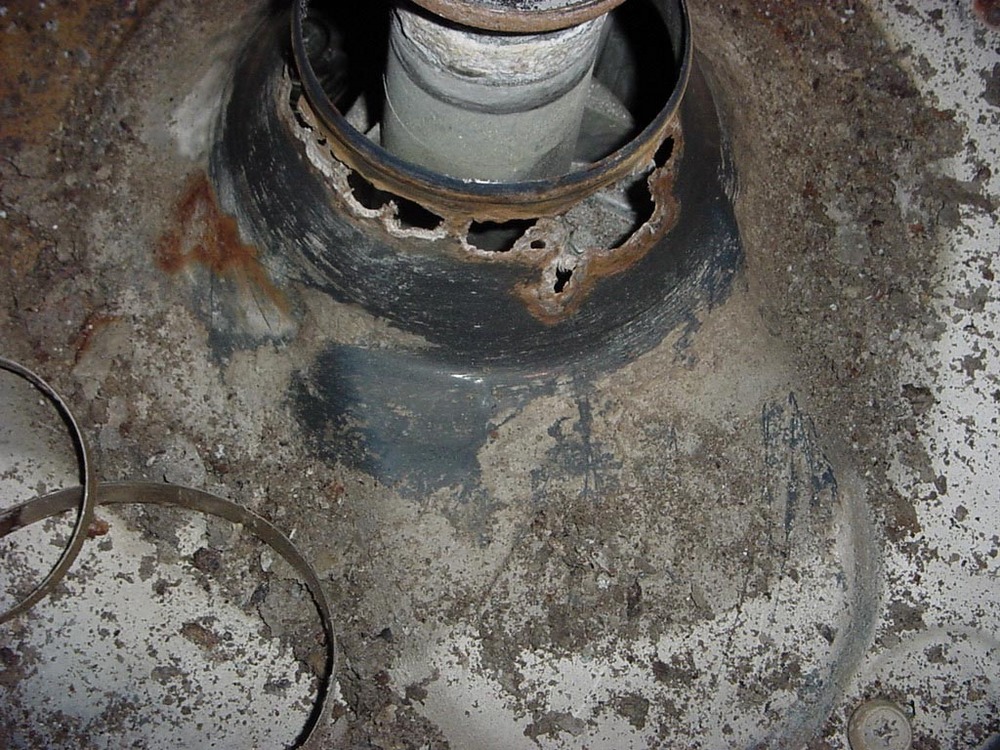
| ||
|
Post# 219198 , Reply# 9 6/28/2007 at 16:56 (6,136 days old) by gansky1 (Omaha, The Home of the TV Dinner!) |
||
|
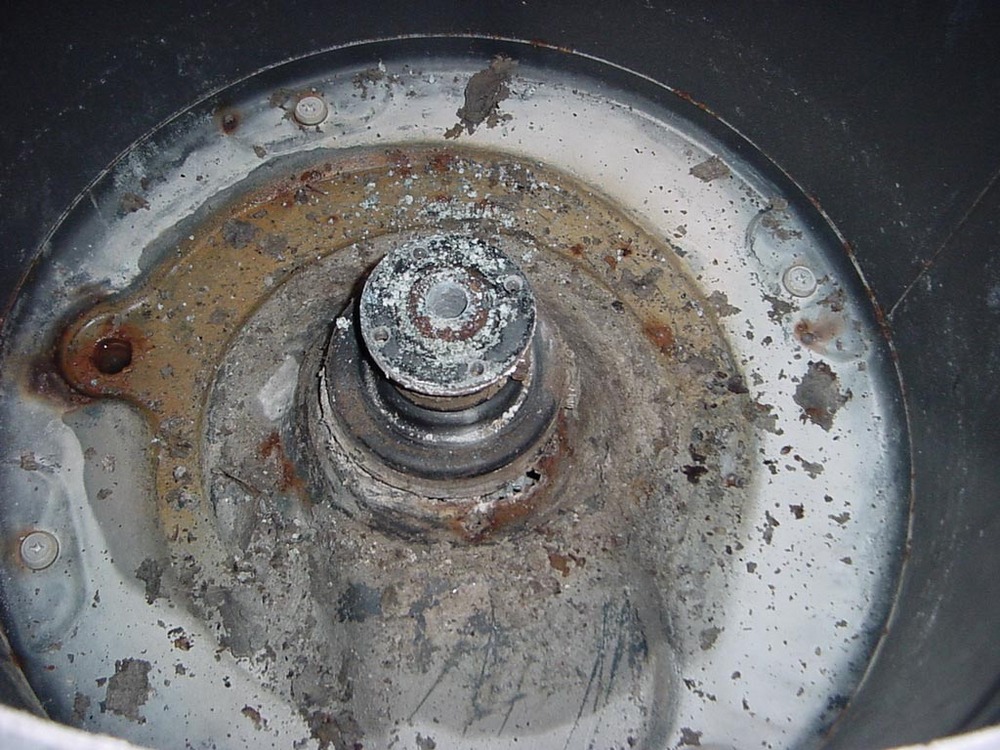
Just for fun, this is the bottom of the tub and center post. You can see a hole in the corroded mess that was leaking water from the washtub into the outer tub so as it was agitating, the water level was constantly going down. The funny thing is that when I was using this washer last weekend, it didn't leak a drop of water! All those layers of crud held back the water in the outer tub. Not a drop got out! Yuk! 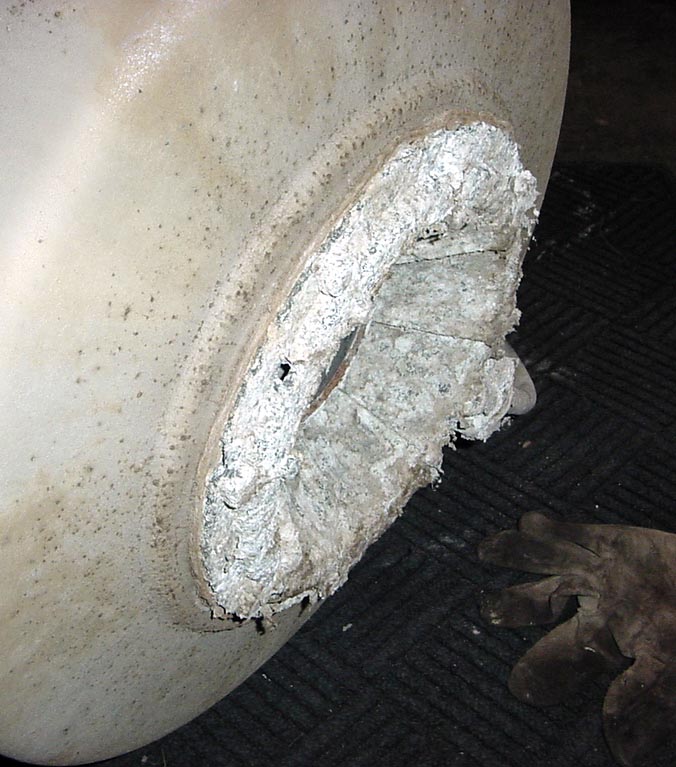
| ||
| Post# 219231 , Reply# 10 6/28/2007 at 18:44 (6,136 days old) by blackstone (Springfield, Massachusetts) | ||
 | ||
|
Post# 219286 , Reply# 11 6/28/2007 at 22:10 (6,136 days old) by jetcone (Schenectady-Home of Calrods,Monitor Tops,Toroid Transformers) |
||
Those are like the GE FilterFlos
If you can't get those three tub bolts out its Krushers for the machine! I am amazed at how SQ touted Stainless Steel this and that and had it sparkling for the consumer but just underneath it all was cheap dum dum pot metal. THE MOST Corrosive annoying stuff to build into a washing machine! Even heavily enamelled porcelain would have held up better than that stuff. Look at how the lint clings to it. I love Filmstriip Greg, more please. I'll sit down now. | ||
|
Post# 219287 , Reply# 12 6/28/2007 at 22:13 (6,136 days old) by unimatic1140 (Minneapolis) |
||
 | ||
|
Post# 219292 , Reply# 13 6/28/2007 at 22:30 (6,136 days old) by jetcone (Schenectady-Home of Calrods,Monitor Tops,Toroid Transformers) |
||
|
Thats what I would do too and | ||
|
Post# 219345 , Reply# 14 6/29/2007 at 05:49 (6,135 days old) by foraloysius (Leeuwarden, Friesland, the Netherlands) |
||
 | ||
| Post# 219407 , Reply# 15 6/29/2007 at 11:48 (6,135 days old) by mickeyd (Hamburg NY) | ||
You can't know how much it means to me to sit in on thes | ||
| Post# 219414 , Reply# 16 6/29/2007 at 13:24 (6,135 days old) by hoover1060 () | ||
|
Very cool! What is the center post made out of? It looks like its been wrapped in duct tape! | ||
| Post# 219432 , Reply# 17 6/29/2007 at 16:08 (6,135 days old) by brettsomers () | ||
|
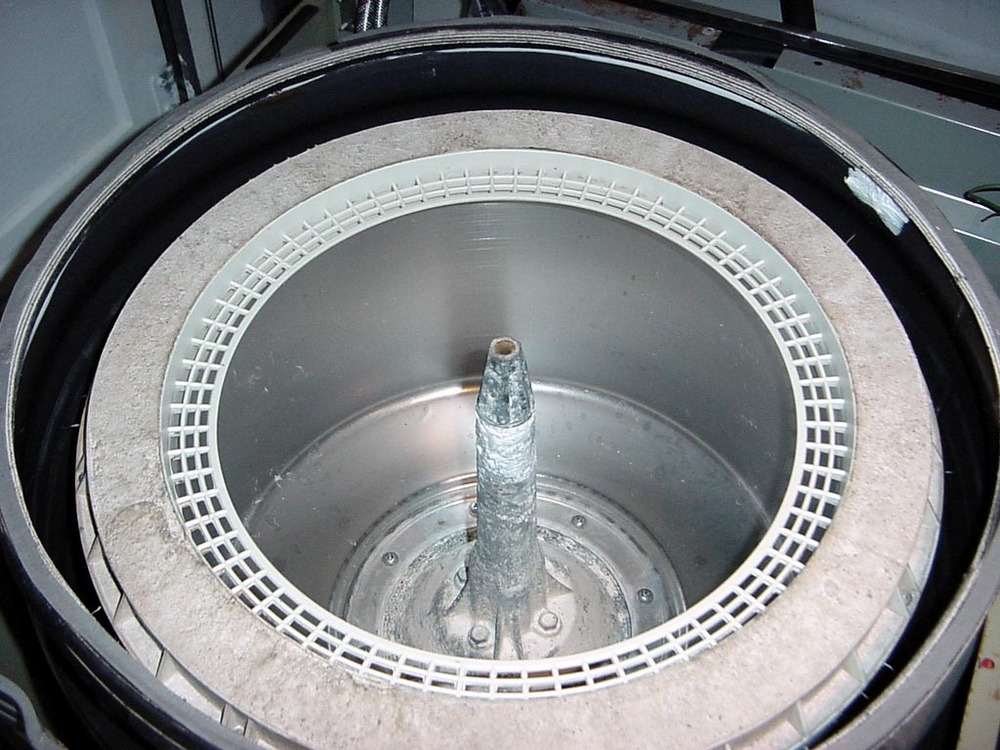
so that texture going up the centerpost is mostly corrosion? and the wash water gets thown over the top of the clothes guard and balance ring, or are there holes under the clothes guard i cant see? | ||
|
Post# 219438 , Reply# 18 6/29/2007 at 17:04 (6,135 days old) by gansky1 (Omaha, The Home of the TV Dinner!) |
||
|
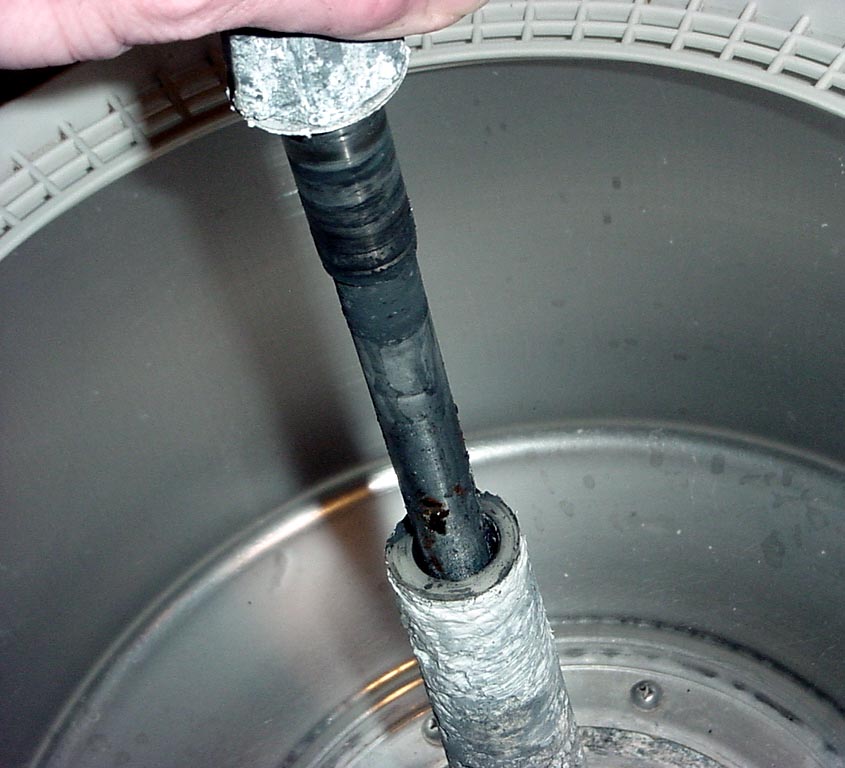
The centerpost is cast aluminum alloy (a.k.a. pot-metal) and the texture you see on the outside is all from corrosion. I have a couple of centerposts that are painted (probably powder-coated) that would stand up to corrosive water and detergents much better. That is a blue flame coming out of the torch, it's actually much larger but the flash distorts the visual (how many times have you heard that?) and I usually heat the bolts for a minute or two all around before I try to pop them with a socket (9/16"). I've done this quite a few times and never had any trouble getting the bolts to come out. Once the bolts are removed, I heat that area again to aid in releasing the tub from the spin-hub underneath. The other trick will be to get the screws holding the centerpost to the SS tub - sometimes they don't want to let go. | ||
| Post# 219493 , Reply# 19 6/29/2007 at 23:35 (6,134 days old) by buffster () | ||
|
Mr. Gansky You are brave! That would be the point where I would pull out the plastic and say "charge it" and "don't scratch it while you unload my new washer from your truck young man." You're also a good instructor. You should write a book. You'd make a fortune. | ||
| Post# 219516 , Reply# 20 6/30/2007 at 01:48 (6,134 days old) by roto204 (Tucson, AZ) | ||
Oh my!!!
Holy schnikies!! I agree with Robert--2-part plumber's epoxy. JB Weld might be lovely and sandable, but would need some sort of backer material to cover such a large hole. Lordy, what a hole, too! (Let it go; otherwise we'll talk about the flash versus visual thing.) I wonder what caused it? Shizzy porcelain? Thank you for the awesome step-by-step info and pics! You are a good instructor indeed :-) | ||
|
Post# 219535 , Reply# 21 6/30/2007 at 06:37 (6,134 days old) by gyrafoam (Wytheville, VA) |
||
|
Since the area does not have the pressure of a tub full of water pressing on it----at least not constantly-----I am thinking a piece of mesh like one would use to Bondo for support, then JB Weld over the top. Come to think of it, with a good coat of JB Weld, pressure is a non-issue. | ||
|
Post# 219715 , Reply# 23 6/30/2007 at 23:46 (6,133 days old) by gansky1 (Omaha, The Home of the TV Dinner!) |
||
|
Hi Nathan - saw you called tonight but was on the phone already! If at all like the Speed Queen, your agitate shaft may be stuck inside the spin shaft or in the centerpost itself - I've had to remove the thrust collar screws and then pull the tub and agitate shaft out at the same time, then you can use a rubber mallet to whack it out of the post. When lifting the tub and shaft together out of the machine, use two people as you have to lift higher than you're used to or might think you will. Hope that helps! G | ||
|
Post# 219719 , Reply# 24 6/30/2007 at 23:50 (6,133 days old) by gansky1 (Omaha, The Home of the TV Dinner!) |
||
|
Well, the work continues! Since we're taking a step aside from our lesson plans, we'll get right back to the pressing problem of our overly-holey drain tub. I decided to use a fast, easy and cheap method to patch these holes as soon as I saw them. I've used this quite a few times before for outer tub problems and have always had good luck. You'll need plastic pail (like cheap ice cream comes in) or a cool-whip container, etc. - and a pair of scissors or a sharp blade to cut the plastic. 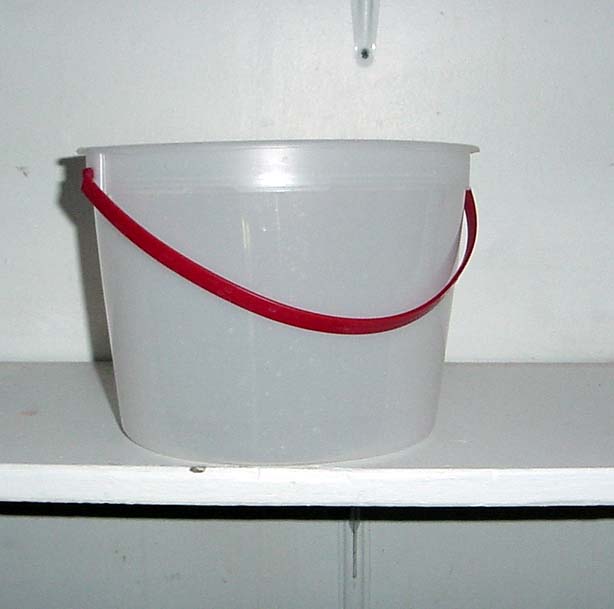
| ||
|
Post# 219720 , Reply# 25 6/30/2007 at 23:54 (6,133 days old) by gansky1 (Omaha, The Home of the TV Dinner!) |
||
|
I simply cut two strips of this plastic and used 100% silicone to seal them over the holes. I completely covered the plastic patches and all around them to hold them in place and provide a permanent water seal over the holes. This part has no structural purpose other than to (normally) hold the water until it can be pumped away. The silicone and new boot will do that nicely and other than some sticky-gloved fingers, the whole job was over in 15 minutes. I also used the same silicone to cover and seal up any other rusty bits in the tub and inside the flange for the hose to the pump.
| ||
|
Post# 219722 , Reply# 26 12/31/2069 at 18:00 (19,829 days old) by gansky1 (Omaha, The Home of the TV Dinner!) |
||
|
Now that our hole is patched and we've resealed and protected the outer tub from the perils of water, we can get back to the center post replacement. From inside the wash tub, you can see the eight screws that bolt the wash tub to the center post unit. These are stainless steel screws which is good, but they have been tightly locked into an aluminum base for so many years - they can be a reall PITA to remove. After a few tries, I discovered a relatively simple solution. 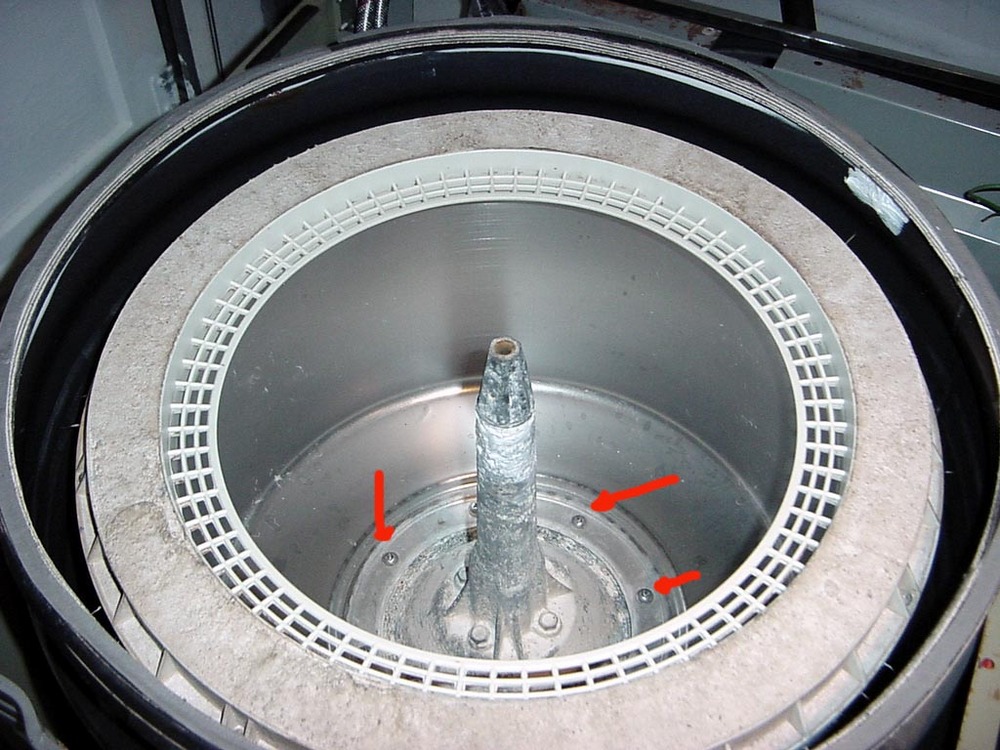
| ||
|
Post# 219723 , Reply# 27 12/31/2069 at 18:00 (19,829 days old) by gansky1 (Omaha, The Home of the TV Dinner!) |
||
|
With my torch, I heat the screw holes from under the tub, then drip penetrating oil onto the bottom of the screw which is wicked down into the threads of the screw and around the aluminum threads. The heat makes everthing expand and the cool oil makes everthing contract quickly, breaking and lubing the bond quickly. (Remember though, the oil is flamable, so you have to be very careful not to overheat the metals.)

| ||
|
Post# 219724 , Reply# 28 12/31/2069 at 18:00 (19,829 days old) by gansky1 (Omaha, The Home of the TV Dinner!) |
||
|
| ||
|
Post# 219725 , Reply# 29 12/31/2069 at 18:00 (19,829 days old) by gansky1 (Omaha, The Home of the TV Dinner!) |
||
|
Luckily, this heat and oil trick worked beautifully, I was able to remove six of the eight screws this way in good enough shape that I was able to reuse them! Two of the scres had to be a little more trouble though and I used a Dremel cutting blade to cut away the pot-metal around the screw. Look at that nasty centerpost and gasket! 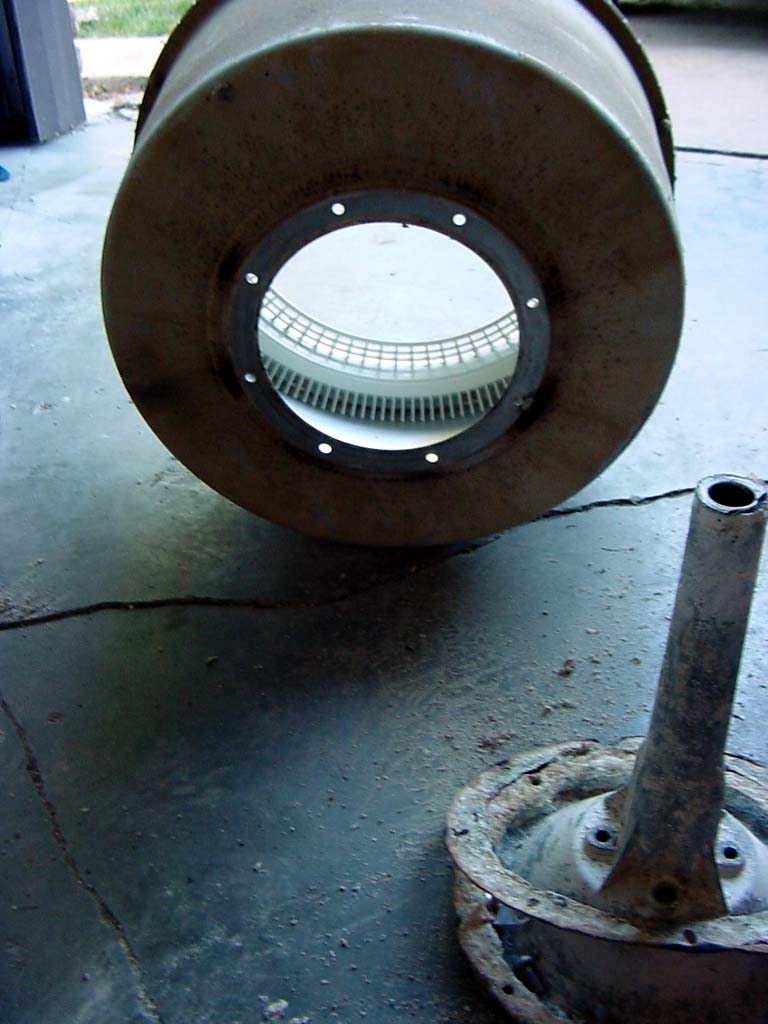
| ||
|
Post# 219727 , Reply# 30 12/31/2069 at 18:00 (19,829 days old) by gansky1 (Omaha, The Home of the TV Dinner!) |
||
|
That's better! The new post is installed and done, ready for years of washing and spinning! I don't have the gaskets to fit between the tub and the centerpost so I cut one by hand from sheet-cork material - available at most hardware and auto parts stores. You can see where I will trim away the excess. Job done! Less than two hours, not as bad as I thought! 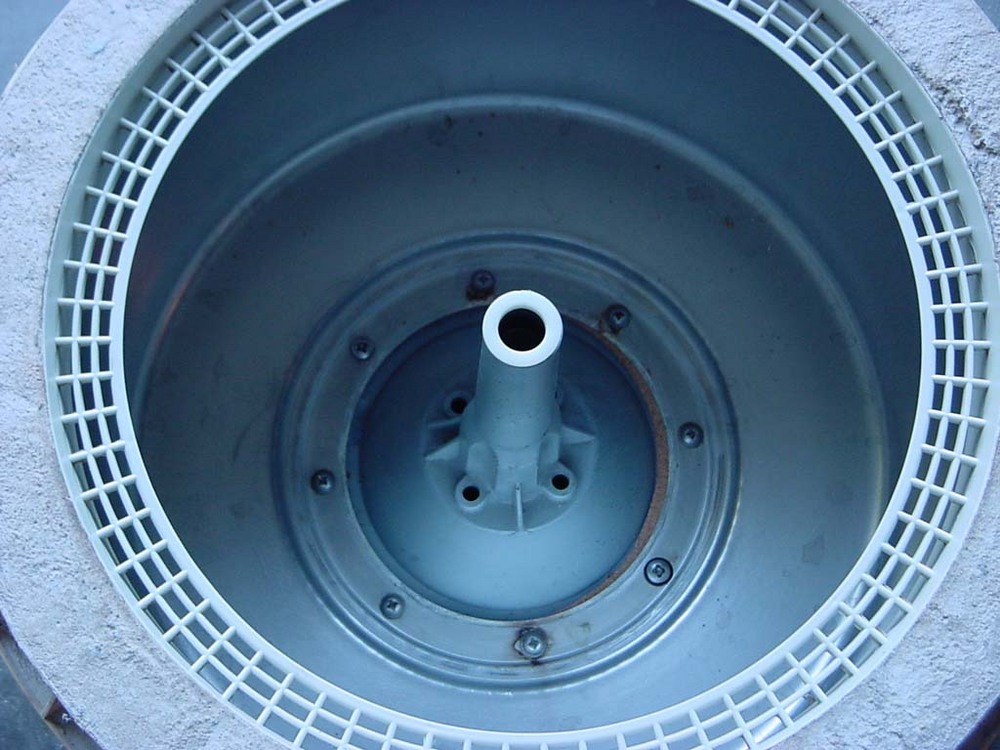
| ||
|
Post# 219759 , Reply# 31 7/1/2007 at 03:10 (6,133 days old) by gyrafoam (Wytheville, VA) |
||
|
Did you decide to leave the PITA sediment ejector in place, or did you remove it and silicone the gap all the way round? | ||
| Post# 219818 , Reply# 32 7/1/2007 at 09:41 (6,133 days old) by rickr (.) | ||
 | ||
|
Post# 219820 , Reply# 33 7/1/2007 at 09:48 (6,133 days old) by unimatic1140 (Minneapolis) |
||
|
| ||
|
Post# 219821 , Reply# 34 7/1/2007 at 09:54 (6,133 days old) by gansky1 (Omaha, The Home of the TV Dinner!) |
||
|
Sediment Ej...
I didn't replace the sediment tube - the old one was clogged beyond hope (as most are) and I usually don't fool with them. I used silicone to seal the ejector hole in the bottom of the centerpost but I didn't put silicone in the channel at the bottom of the tub - yet. I'd like to see how much water remains in that after the spin and then may decide to do that. As you can see by the pictures, I've used quite a bit of silicone already - I mused last night that I mosiquito or housefly will never even fly over that machine with all the gasses that are leaching out of the silicone ;-)
| ||
|
Post# 219838 , Reply# 35 7/1/2007 at 11:32 (6,133 days old) by jetcone (Schenectady-Home of Calrods,Monitor Tops,Toroid Transformers) |
||
|
I LOVE filmstrip hour! | ||
|
Post# 219840 , Reply# 36 7/1/2007 at 11:40 (6,133 days old) by swestoyz (Cedar Falls, IA) |
||
 | ||
|
Post# 219945 , Reply# 37 7/1/2007 at 23:05 (6,133 days old) by gansky1 (Omaha, The Home of the TV Dinner!) |
||
|
Last night, after the silicone & ice cream bucket patch had a chance to set up, I installed the new tub boot. This morning after everything was completly dry and solid, I replaced the spin-hub gasket and re-installed the tub and the four bolts holding it to the hub, the agitator shaft, thrust collar and finally the agitator & cap. We're ready to wash again!
| ||
|
Post# 219946 , Reply# 38 7/1/2007 at 23:06 (6,133 days old) by gansky1 (Omaha, The Home of the TV Dinner!) |
||
|
| ||
|
Post# 219947 , Reply# 39 7/1/2007 at 23:07 (6,133 days old) by gansky1 (Omaha, The Home of the TV Dinner!) |
||
|
| ||
|
Post# 219948 , Reply# 40 7/1/2007 at 23:08 (6,133 days old) by gansky1 (Omaha, The Home of the TV Dinner!) |
||
|
| ||
|
Post# 219952 , Reply# 41 7/1/2007 at 23:13 (6,133 days old) by gansky1 (Omaha, The Home of the TV Dinner!) |
||
|
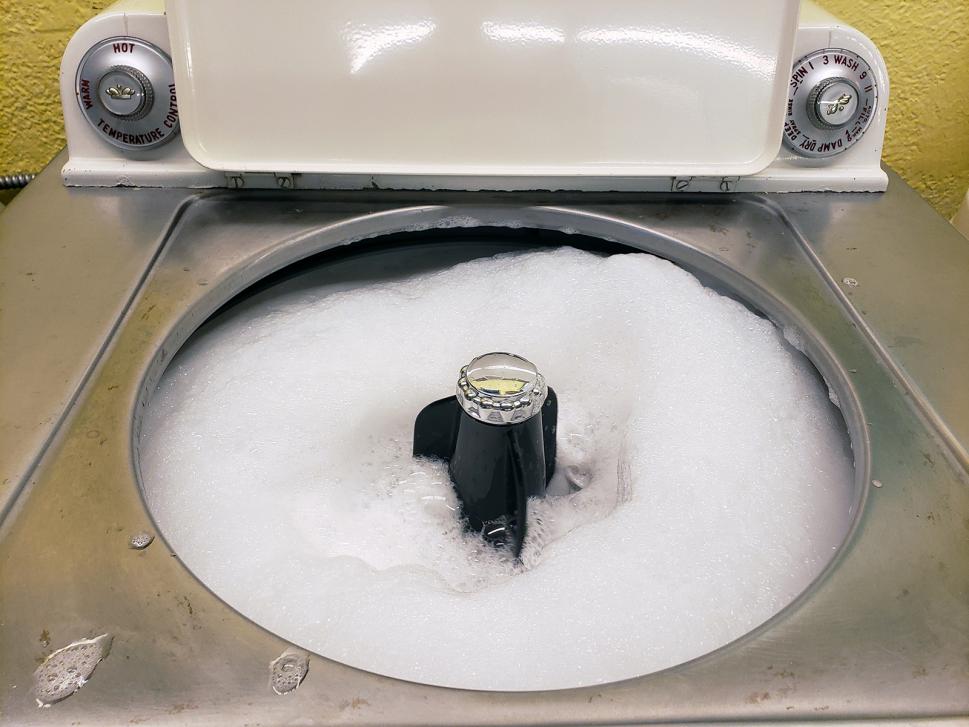
The washer is now finishing it's fifth load for the day, all is well - quiet as a Speed Queen can be and so far, water-tight! Thanks for all your great comments and support during this rebuild job. After a few loads in the dryer, I need to hunt for a few minor parts to make it "whole" again as well. Door latch catches and possibly new drum rollers will make it run like new. It never ends, there is always something more to work on! Hope everyone had a great weekend! | ||
|
Post# 219986 , Reply# 42 7/2/2007 at 07:11 (6,132 days old) by jetcone (Schenectady-Home of Calrods,Monitor Tops,Toroid Transformers) |
||
|
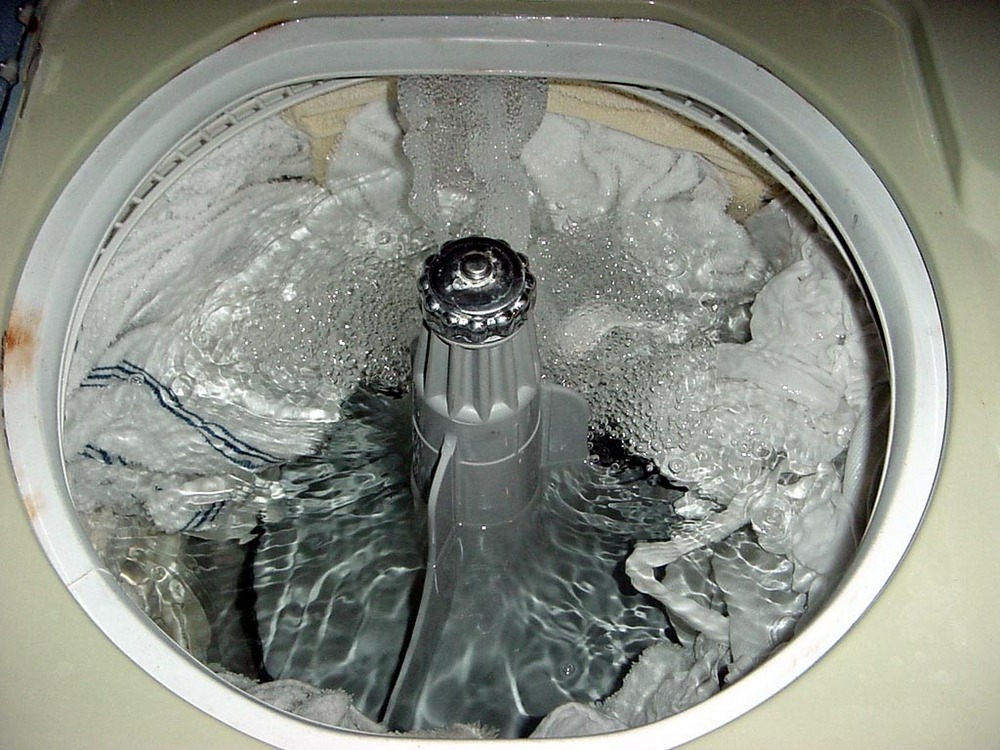
That Rinse shot | ||
| Post# 219998 , Reply# 43 7/2/2007 at 08:07 (6,132 days old) by tlee618 () | ||
|
Great pictures Greg and another wonderful restoration!! I just love the rinse water shot, such fun! Thanks for sharing the entire process with us. | ||
| Post# 220000 , Reply# 44 7/2/2007 at 08:15 (6,132 days old) by mayken4now (Panama City, Florida) | ||
 | ||
|
Post# 220051 , Reply# 45 7/2/2007 at 12:57 (6,132 days old) by pdub (Portland, Oregon) |
||
Thank You Greg | ||
| Post# 220052 , Reply# 46 7/2/2007 at 13:00 (6,132 days old) by christfr (st louis mo) | ||
 | ||
| Post# 220077 , Reply# 47 7/2/2007 at 14:28 (6,132 days old) by roto204 (Tucson, AZ) | ||
|
Fabolicious! | ||
|
Post# 220082 , Reply# 48 7/2/2007 at 14:55 (6,132 days old) by swestoyz (Cedar Falls, IA) |
||
|
Boo Yah~! | ||
| Post# 220090 , Reply# 49 7/2/2007 at 15:19 (6,132 days old) by rickr (.) | ||
|
| ||
| Post# 220095 , Reply# 50 7/2/2007 at 15:55 (6,132 days old) by washertalk () | ||
|
thanks for showing your work. It is rather similar to older model GEs. Even the outer tub looks similar. I have never seen a Speed Queen dismantled. Thank-you. great pictures. | ||
| Post# 220160 , Reply# 51 7/2/2007 at 23:12 (6,132 days old) by 70series ( Connecticut.) | ||
|
I love the pics of the Her Majesty. Greg you did a great job. She just needs a crown. Have a good one, James | ||
| Forum Index: | 
| Other Forums: |

|

|

|

|

|

 Comes to the Rescue!