|
Thread Number: 20636
Requesting tips on Maytag repair |
[Down to Last] |

|
| Post# 327814 , Reply# 1 1/30/2009 at 18:48 (5,557 days old) by laundromat (Hilo, Hawaii) | ||

For regular maintainance on the true Maytags,The inlet,and drain hoses,drive and pump belts and the jet flow spray tube all need to be replaced every 5 years.Anualy,the washer should be run using 1/2 gal. of meradic acid to thoroughly clean out the entire inside of the unit and where all the wash and rinse water goes.This cleans out all the "guts" and keeps it from having rust or corosion build up.It also keeps the unit in great working order.I have a friend in B'more who still has the set they got in 1968 in avacado green. All push button washer and gas dryer. think they had to replace the control panel once or twice but eveything works great and they were not too happy to hear about Whirlpool taking over!!
| ||
| Post# 327821 , Reply# 2 1/30/2009 at 19:24 (5,557 days old) by redcarpetdrew (Fairfield, CA) | ||

First, your washer was made in Nov, 98. If you repair it, you should expect a reasonable life span. On this series (I recognize the series you have but the model number isn't right) there isn't much to do other than the belts and the stem&boot job you already know about. If you can give me a correct full model number, I can scan and post some directions for you and all others who will have to do this. I'll also give you a couple of tricks to do while fixing it that SHOULD make the repair last longer. RCD | ||
| Post# 327995 , Reply# 3 1/31/2009 at 20:31 (5,556 days old) by qsd-dan (West) | ||
|
"The inlet and drain hoses, drive and pump belts and the jet flow spray tube all need to be replaced every 5 years." What the.....? All of that stuff is still original on my 1985 A-490 with exception of the trans belt. Got 21 years out of that one though. Replacing all of those parts that soon is hardcore overkill. | ||
Post# 328004 , Reply# 4 1/31/2009 at 21:36 (5,556 days old) by sambootoo  (Moody, AL) (Moody, AL) |
||
|
Sorry about the mod #. The complete # is LAT9356AAE. Hope this helps and thanks for the advice. Sam | ||
| Post# 328012 , Reply# 5 1/31/2009 at 22:40 (5,556 days old) by qsd-dan (West) | ||
|
If I replace the leaky seal, how likely is it to fail again
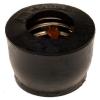
Depending on how much of a rush you are on the repair, get the stem seal and tub repair kit from ebay. You'll save lots of $$ doing so. In addition, get part# Y0A4298. Maytag stopped using this part after they redesigned the mounting stem (for the worse), but this part can still be used to prevent the newer, crappier design from leaking. Grease it well before installing under the stem seal.
CLICK HERE TO GO TO qsd-dan's LINK on eBay | ||
| Post# 328014 , Reply# 6 1/31/2009 at 22:41 (5,556 days old) by qsd-dan (West) | ||
|
| ||
| Post# 328446 , Reply# 7 2/2/2009 at 20:47 (5,554 days old) by redcarpetdrew (Fairfield, CA) | ||
|
| ||
| Post# 328454 , Reply# 8 2/2/2009 at 21:40 (5,554 days old) by qsd-dan (West) | ||
|
Dan, you gave away one of my tricks! ;) | ||
| Post# 328812 , Reply# 9 2/4/2009 at 21:00 (5,552 days old) by redcarpetdrew (Fairfield, CA) | ||
|
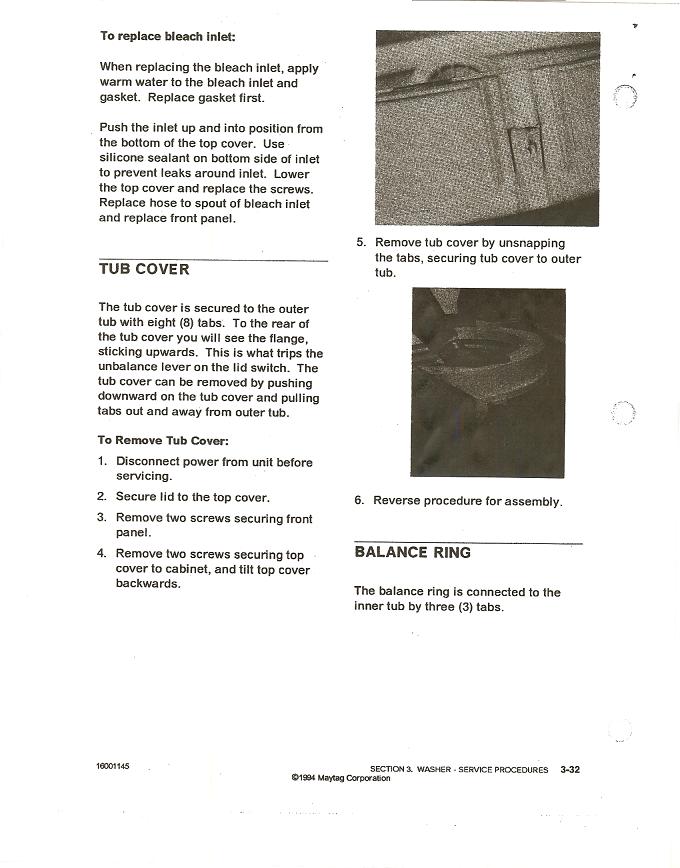
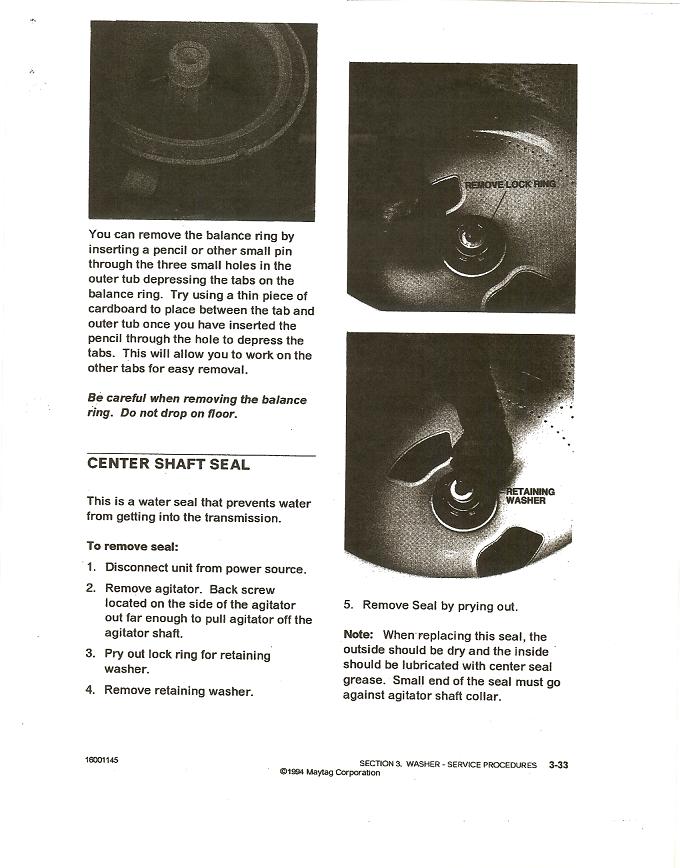
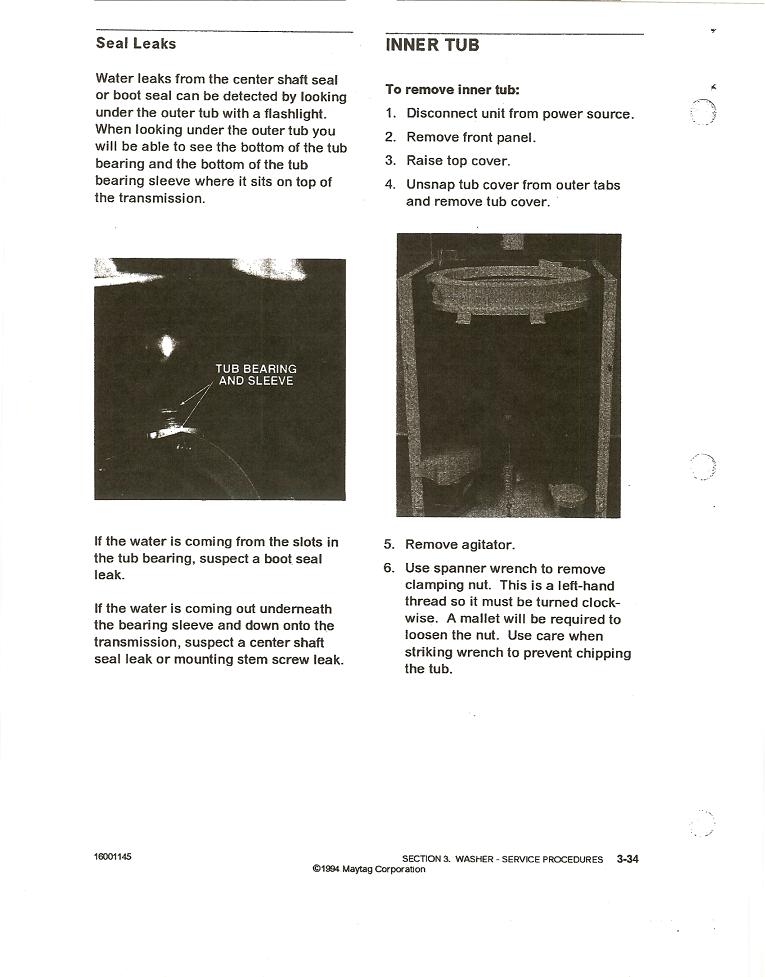
O.K. Here we go...
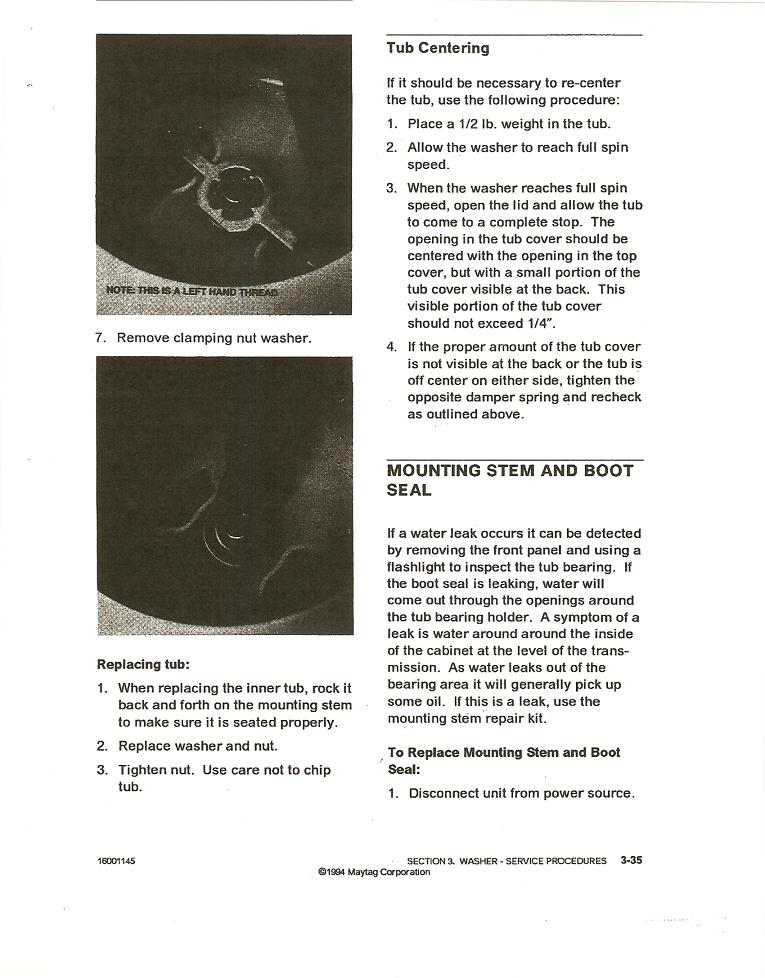
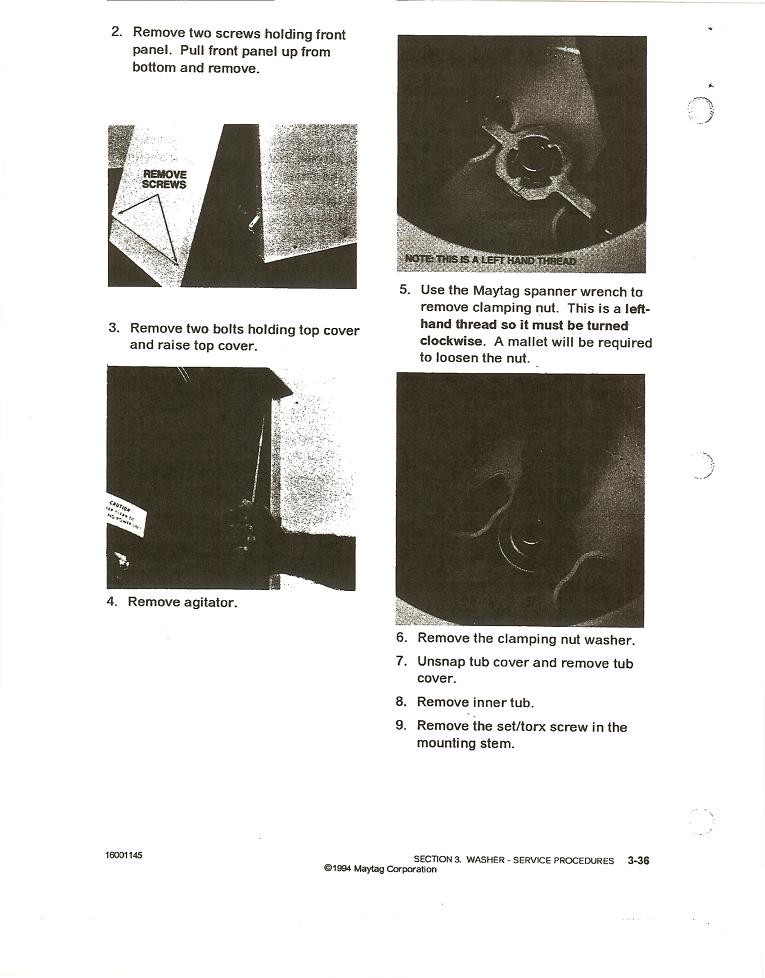
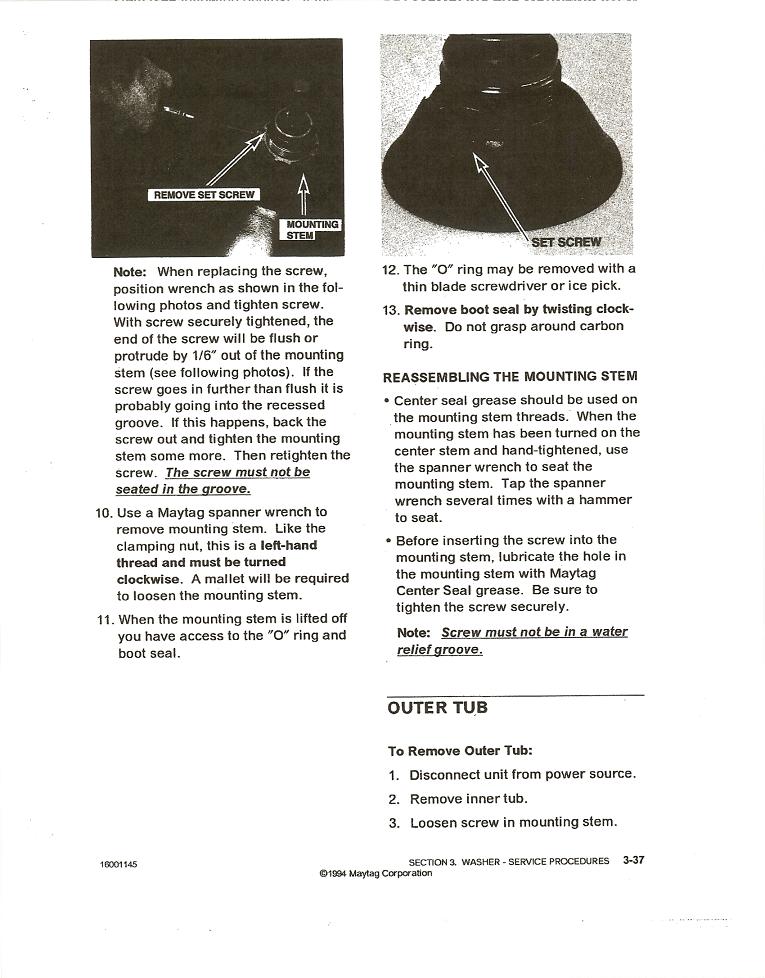
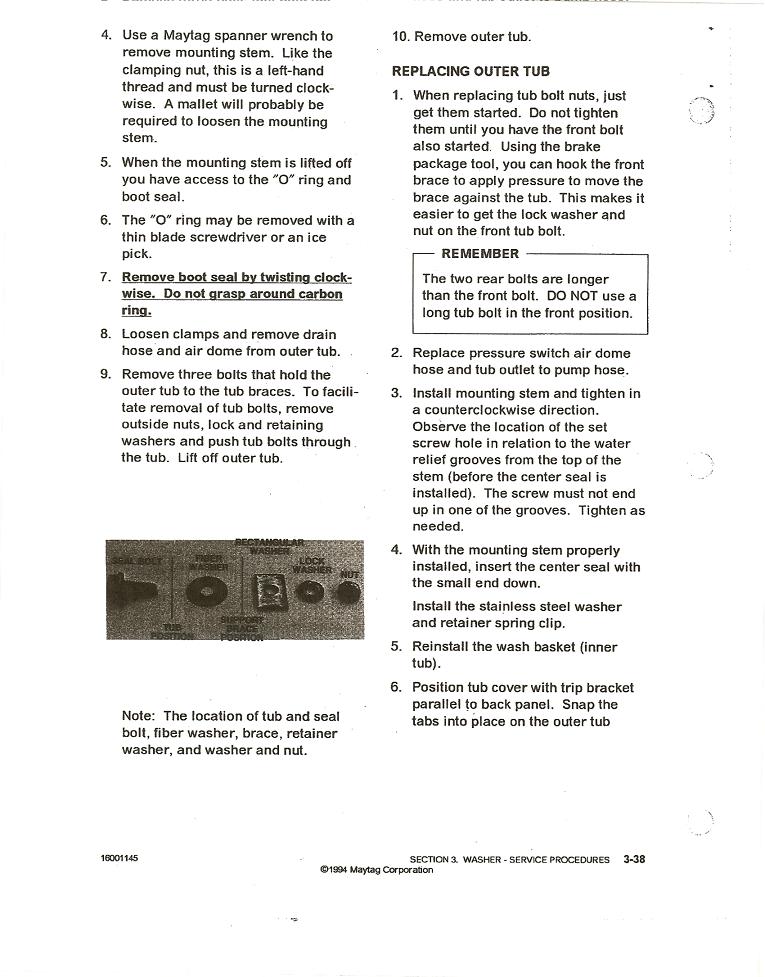
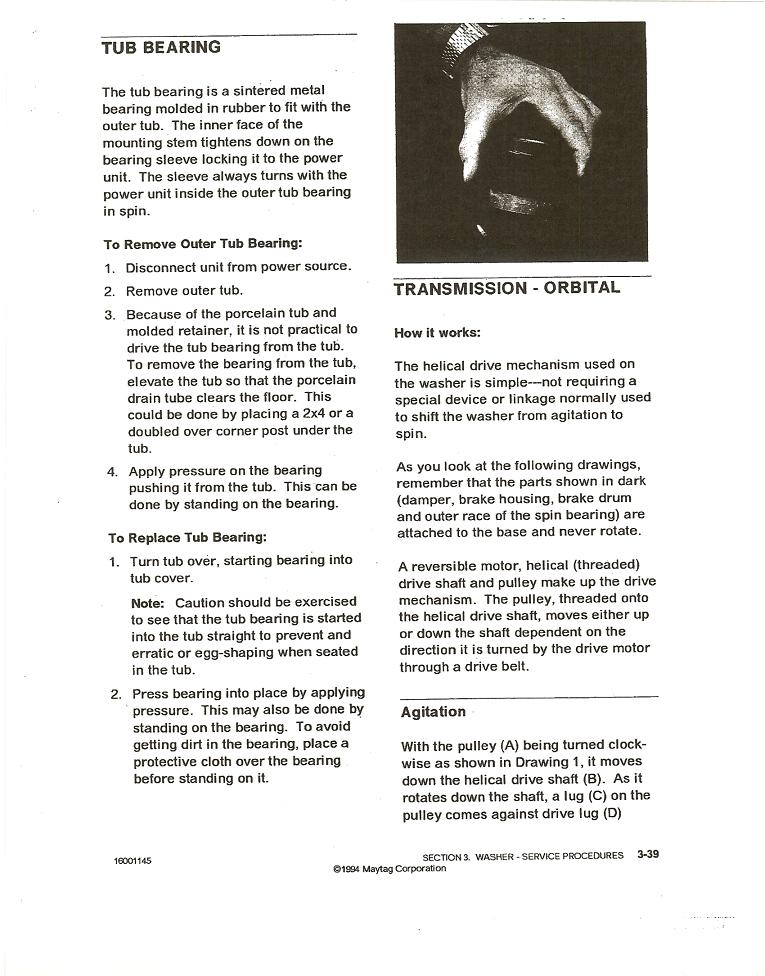
First off, please excuse the quality of the pictures. I pulled these off the online manual for your washer and the pictures were awful as all Maytag did was scan the original manual and not care about quality. They should give you the idea. I scanned data from pulling the tub cover to doing the bearing. Several things to remember: First: the new stem and boot you'll get will not be the same as the old one. Like Dan and I said, you can use the extra seal shown above (It used to be the seal that came with the old style stem...) by installing it on the shaft and compressing it down with the new stem. It does help for a classier and longer lasting repair. Second, use the Maytag tool shown for the tub nut and the stem. Borrow, steal, buy it. If you are serious about keeping this washer and/or working on any other dependable care Maytag, you should have this in your toolbox! Third. When putting the new stem on the washer, I've learned to hand tighten it and then use the wrench and mallet to 'tap' it a little tighter. The set screw must not end up in a groove just as it will say below. If it does, you'll get a 'knock' as the washer agitates due to the set screw moving side to side in the groove as the tub moves. Fourth. 'Dry' spin the washer after you're done. Twice through the final spin to help seat the new carbon ring seal on the bellows. Then wet test it. Fifth (and most important). PATIENCE! Do the job slowly and carefully and you will have a greater chance of it working right the first time. If you think you will have a hard time remembering where things will go during re-assembly, get your digital camera and picture it before you take it apart! Good luck and congrats on fixing a good washer that should serve you well and long! RCD | ||
| Post# 328813 , Reply# 10 2/4/2009 at 21:01 (5,552 days old) by redcarpetdrew (Fairfield, CA) | ||
|
| ||
| Post# 328814 , Reply# 11 2/4/2009 at 21:05 (5,552 days old) by redcarpetdrew (Fairfield, CA) | ||
|
| ||
| Post# 328815 , Reply# 12 2/4/2009 at 21:06 (5,552 days old) by redcarpetdrew (Fairfield, CA) | ||
|
| ||
| Post# 328816 , Reply# 13 2/4/2009 at 21:07 (5,552 days old) by redcarpetdrew (Fairfield, CA) | ||
|
| ||
| Post# 328817 , Reply# 14 2/4/2009 at 21:08 (5,552 days old) by redcarpetdrew (Fairfield, CA) | ||
|
| ||
| Post# 328818 , Reply# 15 2/4/2009 at 21:08 (5,552 days old) by redcarpetdrew (Fairfield, CA) | ||
|
| ||
| Post# 328819 , Reply# 16 2/4/2009 at 21:11 (5,552 days old) by redcarpetdrew (Fairfield, CA) | ||
|
| ||
| Post# 328820 , Reply# 17 2/4/2009 at 21:12 (5,552 days old) by redcarpetdrew (Fairfield, CA) | ||
|
| ||
| Post# 329032 , Reply# 18 2/6/2009 at 07:43 (5,550 days old) by kinnakeettom () | ||
|
If I recall right the A4298 was the wringer center post seal, that transitioned to the automatic design. Replaced many of them in the wringers. and early autos. They were included in the stem kit,also. | ||
|
Post# 329038 , Reply# 19 2/6/2009 at 09:25 (5,550 days old) by sambootoo (Moody, AL) |
||
|
Thanks Drew and others. I'm looking forward to getting started now. I'll keep you posted as to the progress. Sam | ||
| Post# 329756 , Reply# 20 2/11/2009 at 10:09 (5,545 days old) by smokey2367 (NW PA) | ||
|
Can I ask a stupid question? I'd like to order the tub seal kit from the link--is the other part #Y0A4298 ordered separately? I tried keying in that # on the Midwest Appliance web site, but nothing came up. Or does that part come with the stem seal kit? | ||
| Post# 329809 , Reply# 21 2/11/2009 at 14:28 (5,545 days old) by qsd-dan (West) | ||
|
is the other part #Y0A4298 ordered separately?
Yes. It used to be part of the stem seal kit 20 years ago before they went to the newer inferior design. Try ordering from partstore.com.
CLICK HERE TO GO TO qsd-dan's LINK | ||
| Post# 329816 , Reply# 22 2/11/2009 at 14:57 (5,545 days old) by smokey2367 (NW PA) | ||
|
Thanks for the info--I ordered it today. | ||
| Forum Index: | 
| Other Forums: |

|

|

|

|

|

 Comes to the Rescue!