Thread Number: 21061
No oil for 1-18! well mabie some...
[Down to Last]

automaticwasher.org's exclusive eBay Watch:
scroll >>> for more items --- [As an eBay Partner, eBay may compensate automaticwasher.org if you make a purchase using any link to eBay on this page]
Post# 333171   3/2/2009 at 12:05 (5,524 days old) by fltcoils (South Bend, Indiana)        

I was reviewing the rebuild procedure for the 1-18 agitate arm. In it the ball joint is dis-assembled.

There is a felt oil wick pad sandwiched between the upper and lower plastic ball shaped bushing. "lubricate with 24 drops of oil applying to both sides"
So there IS oil used on that ball...

I cleaned the felt, then applied some mobile1.
not really hard to do if the agitate arm is already loose from the agitate shaft, and the washdrum/works are upside down on the shop floor.


Post# 333173 , Reply# 1   3/2/2009 at 12:08 (5,524 days old) by fltcoils (South Bend, Indiana)        
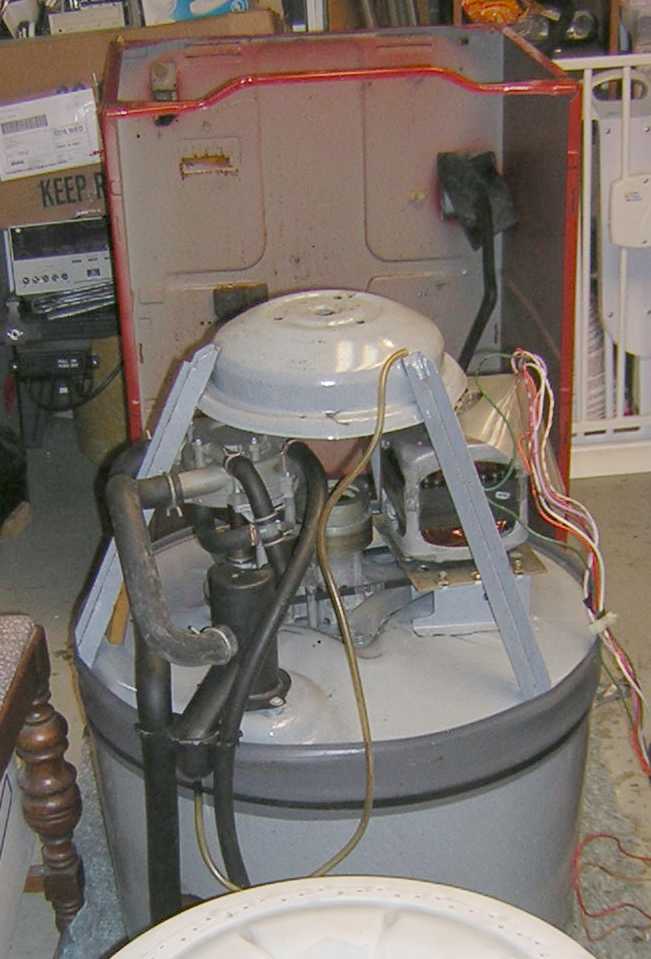
another pic

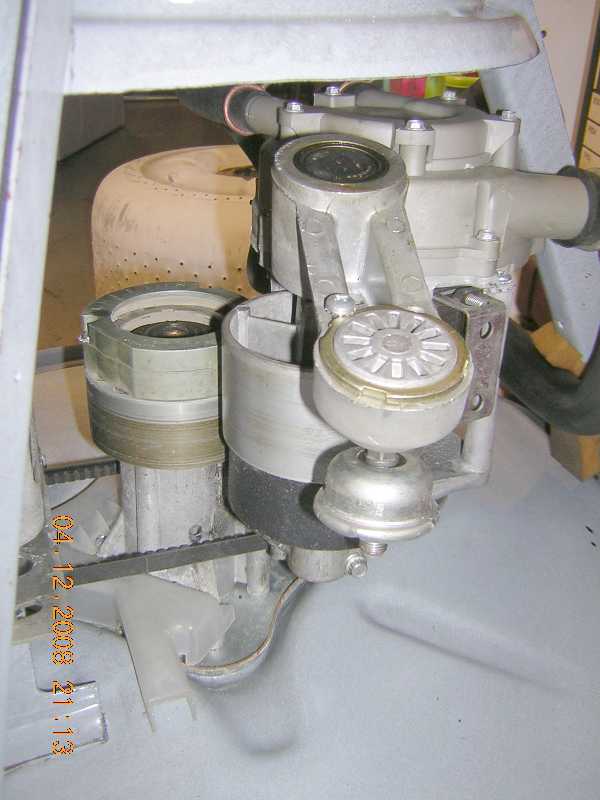
Post# 333174 , Reply# 2   3/2/2009 at 12:10 (5,524 days old) by fltcoils (South Bend, Indiana)        
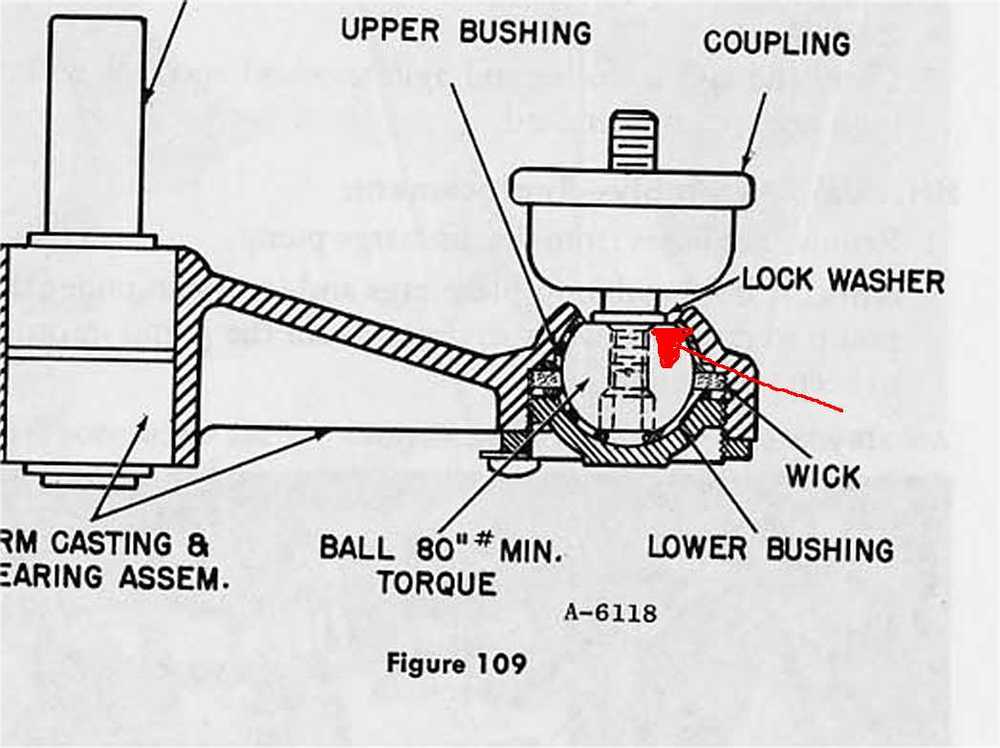
and rebuild instr

Post# 333175 , Reply# 3   3/2/2009 at 12:11 (5,524 days old) by fltcoils (South Bend, Indiana)        

pic of arm, showing wick

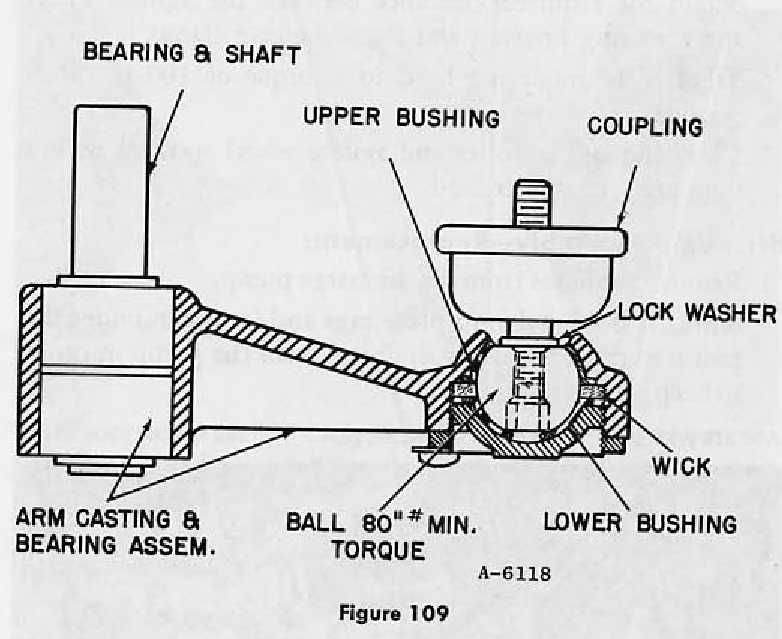
Post# 333214 , Reply# 4   3/2/2009 at 14:04 (5,524 days old) by joelippard (Hickory)        
How interesting.

joelippard's profile picture
I wonder if you could do this as well by using a syringe and needle to drop the oil around the top of the ball and let it sit for about a week without disassembly. Thanks for posting this information.

Post# 333248 , Reply# 5   3/2/2009 at 16:21 (5,523 days old) by fltcoils (South Bend, Indiana)        
A tight fit

Good to hear from you Joe.
You're the brave daily driver of that nice poppy 1-18.

What I noticed when I had the agitator arm ball joint apart was how tightly the ball fits into the bushing cups and they into the casting. One might get some oil into the cups via the assy nut threads, or via the exposed portion of the ball at the side where the stem attaches. However this wouldn't do anything for the resevoir in the middle where the wick is.

It was easy to get the assy nut off, considering the disassembly state my machine was in. I suggest doing it for anyone with things upside down and the agitator cone off.

Re-assembly was also easy, but less than 5 deg of nut rotation (1/3 nut index slot) was the difference between floppy and just-enough installed tension on the ball. There's no real resilience in the assembled joint, so it's quickly tight or not.

What torque does one use to reattach the agitator arm to the agitator shaft? I used 80 in-lbs like the spec torque for the ball to coupling.. Golly given that thread undercut beneath the coupling, there's not much shaft cross-section taking all the load. I'm surprised it doesn't fracture there.


Forum Index:       Other Forums:                      


Comes to the Rescue!

The Discuss-o-Mat has stopped, buzzer is sounding!!!
If you would like to reply to this thread please log-in...

Discuss-O-MAT Log-In


New Members
Click Here To Sign Up.


automaticwasher.org home
Discuss-o-Mat Forums
Vintage Brochures, Service and Owners Manuals
Fun Vintage Washer Ephemera
See It Wash!
Video Downloads
Audio Downloads
Picture of the Day
Patent of the Day
Photos of our Collections
The Old Aberdeen Farm
Vintage Service Manuals
Vintage washer/dryer/dishwasher to sell?
Technical/service questions?
Looking for Parts?
Website related questions?
Digital Millennium Copyright Act Policy
Our Privacy Policy