|
Thread Number: 29227
rollermatic pulsator stud removal- finally got it!!!!!!!!!!!! |
[Down to Last] |
| Post# 444767 6/26/2010 at 18:54 (5,042 days old) by rollermatic (cincinnati) | ||
|
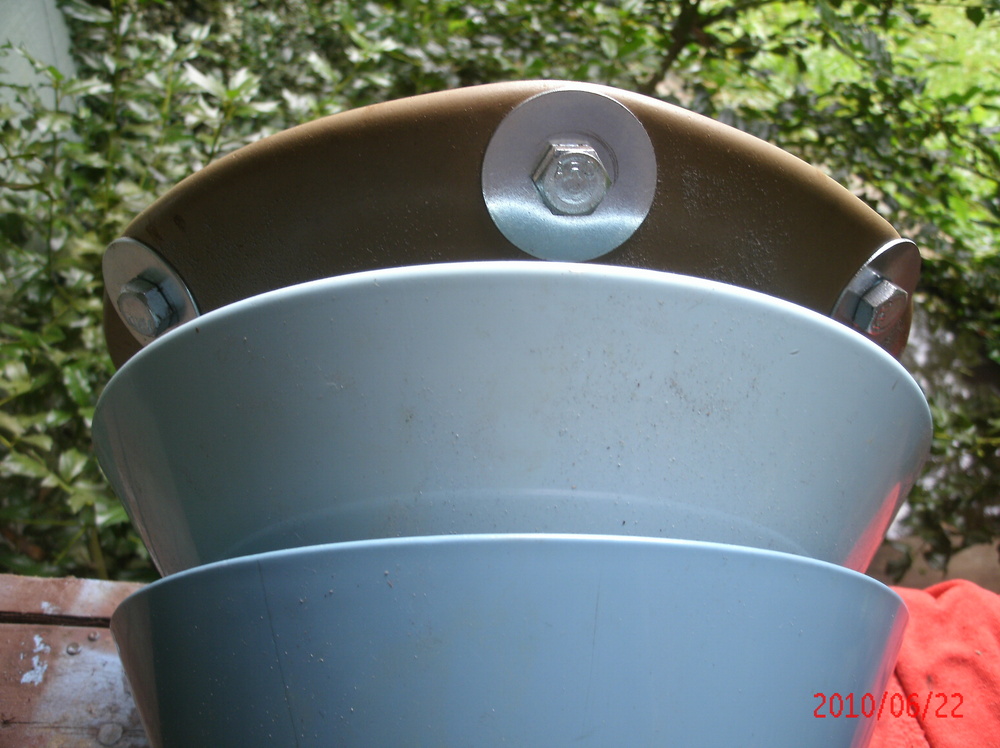
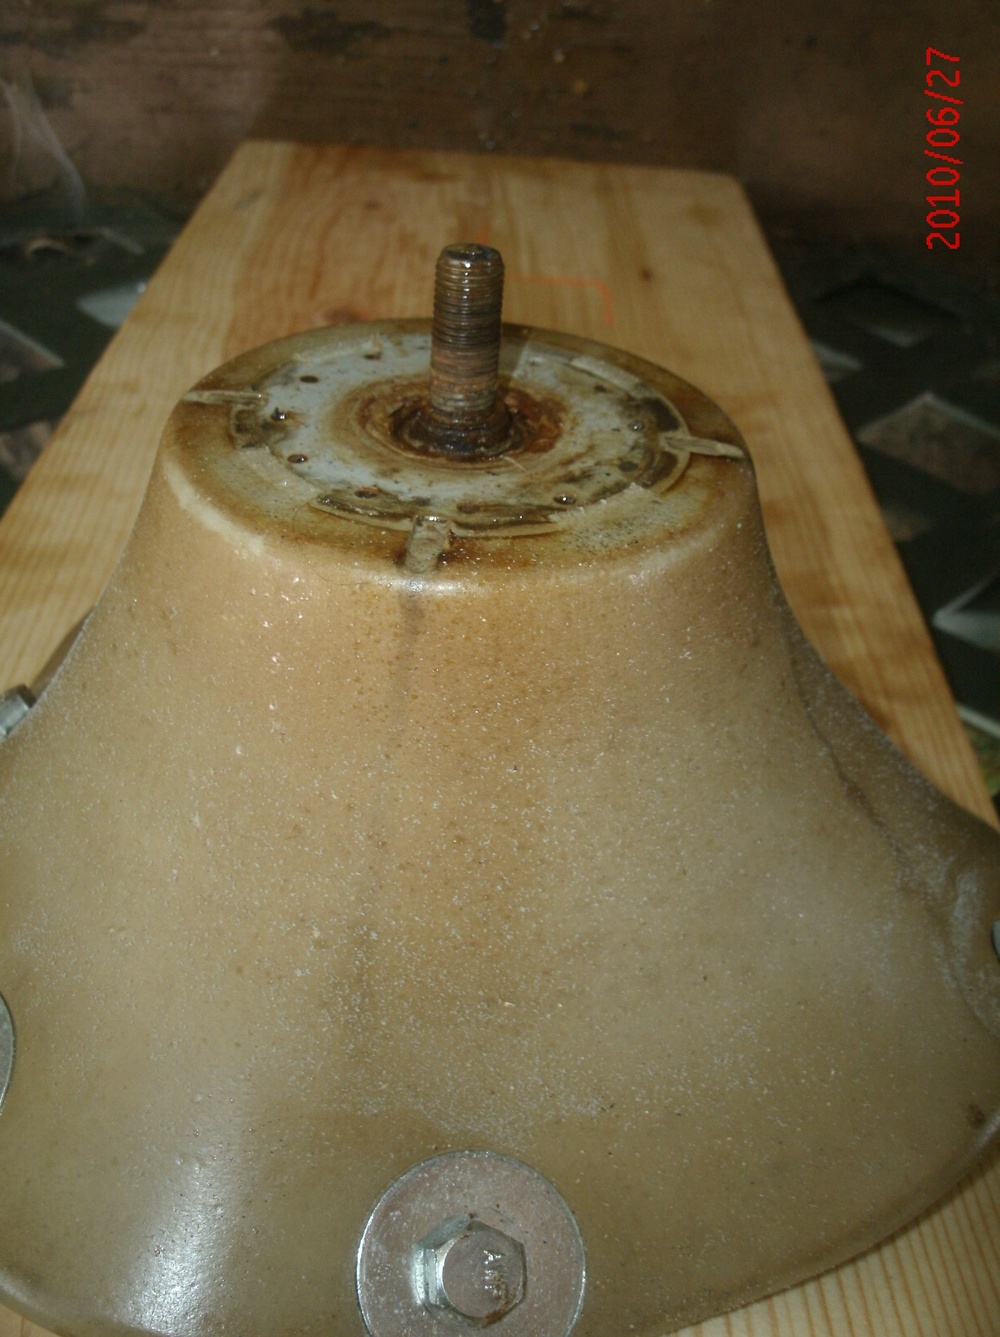
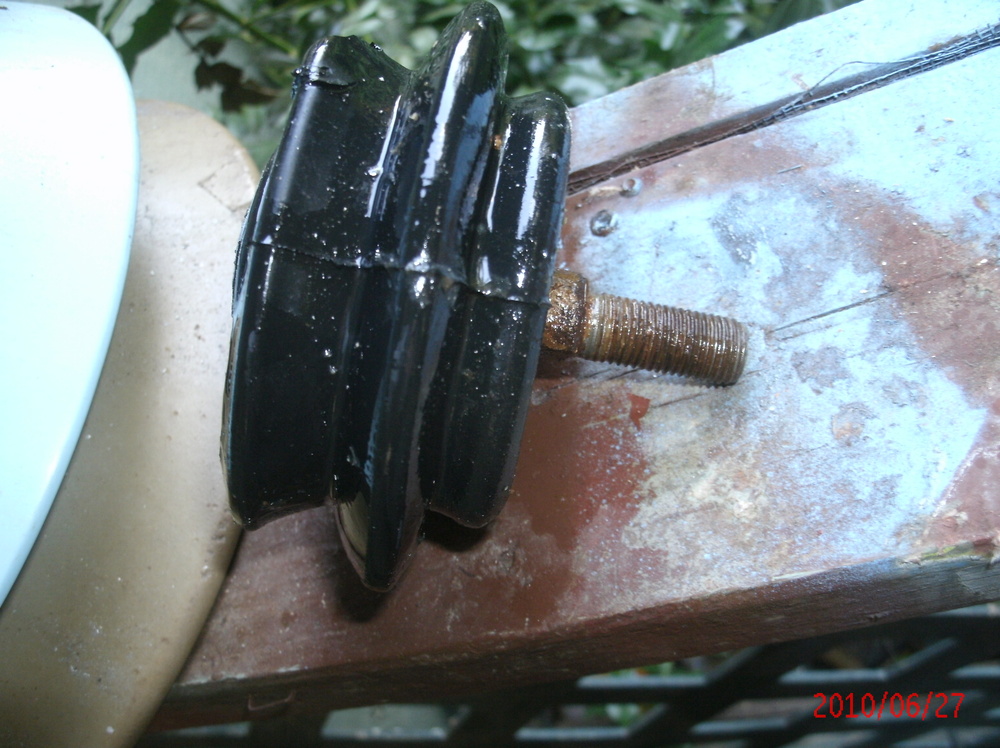
how do i explain here! on a rollermatic the agitator shaft is in 2 peices. the main shaft connects at the bottom to the agitate arm and the top connects to a "stud" they call it, a nipple like peice about 3 inches long. the pulsator fits on this stud and is held down by the agitator nut.
on 2 of my rollermatics when i went to remove the agitator nut by holding the agitate shaft solid at the bottom instead of the nut coming off, the stud unscrewed from the main shaft. hence the pulsator came off tearing out both water and oil bellows and leaving the stud attached to the bottom of the pulsator. i know another member here has the same problem, i think it is "lebron", correct me if i am wrong. i am glad to say i found a way to remove this stud from the nut and did it tonite! here is a pictorial! first, bottom of pulsator with stud still attached. you can see the remains of the bellows. 
| ||

|
| Post# 444768 , Reply# 1 6/26/2010 at 18:59 (5,042 days old) by rollermatic (cincinnati) | ||
|
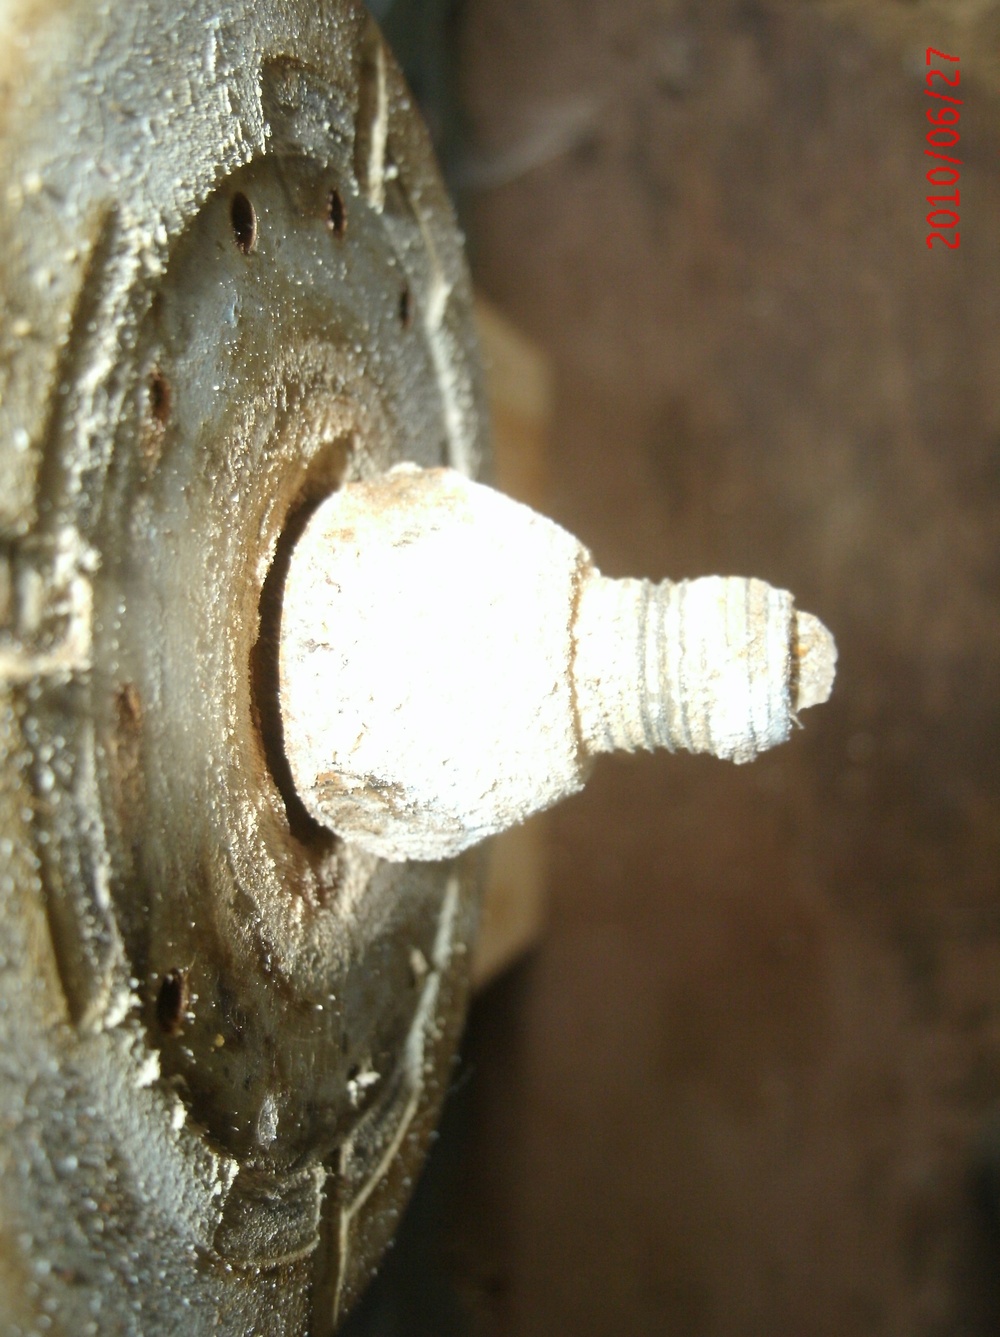
top of pulsator looking down
into it you can see the agitate nut
they say to hold inner tub while turning the socket wrench to loosen the nut. this may have worked back in 1967 but after 40 plus years no way! one you risk tearing up the keyway that keys the inner agitate shaft to the outer tub shaft by doing this. two if the nut is really stuck like on 2 of my machines it could still loosen at the stud instead. i have always held the shaft at the bottom using vice grips and this worked fine on 3 of my machines. but not on the last two. 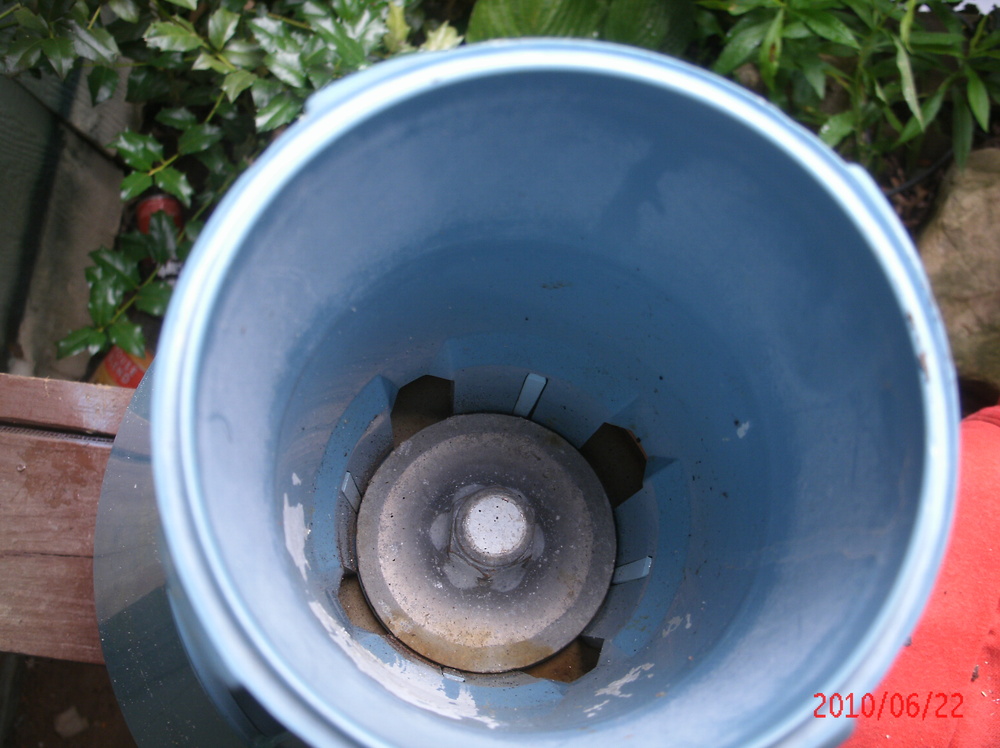
| ||
| Post# 444770 , Reply# 2 6/26/2010 at 19:05 (5,042 days old) by rollermatic (cincinnati) | ||
|
i let it set for a few months
and pondered the whole thing. i came up with this plan.
the bottom rubber pulsator is made of heavy rubber like material with steel in it's top where it sets on the stud. it is actually keyed to the stud with a half circle shape hole that the hald circle shape stud goes thru. so if you can hold that lower pulsator tight then the nut will have to come off the stud, which is keyed to that pulsator. at least in theory! 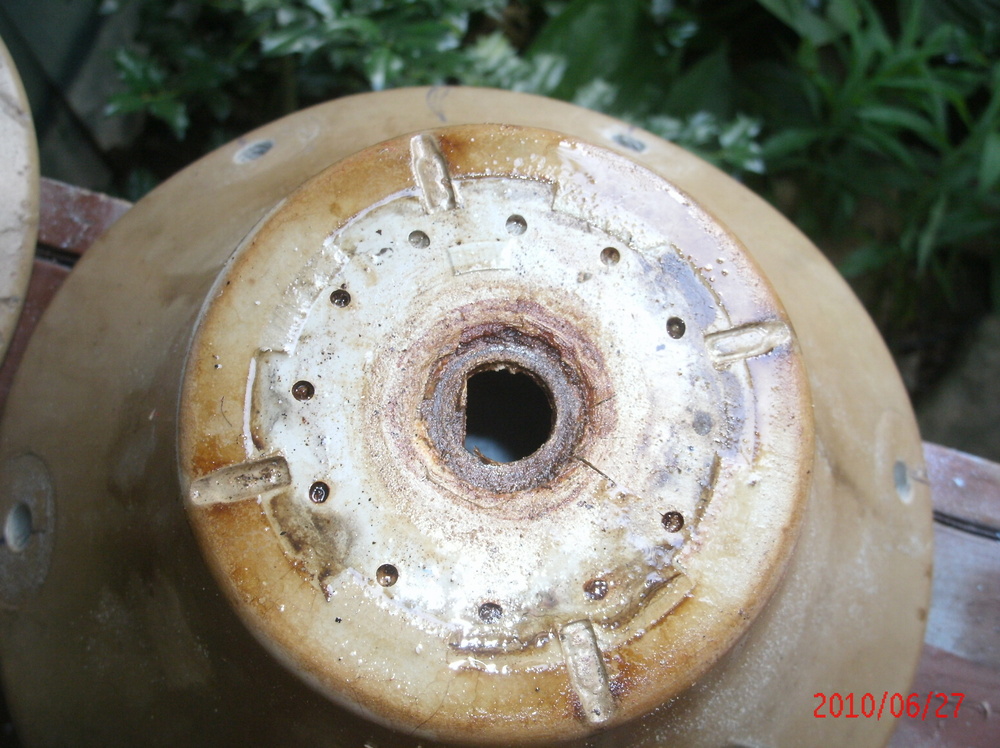
| ||
| Post# 444771 , Reply# 3 6/26/2010 at 19:09 (5,042 days old) by rollermatic (cincinnati) | ||
|
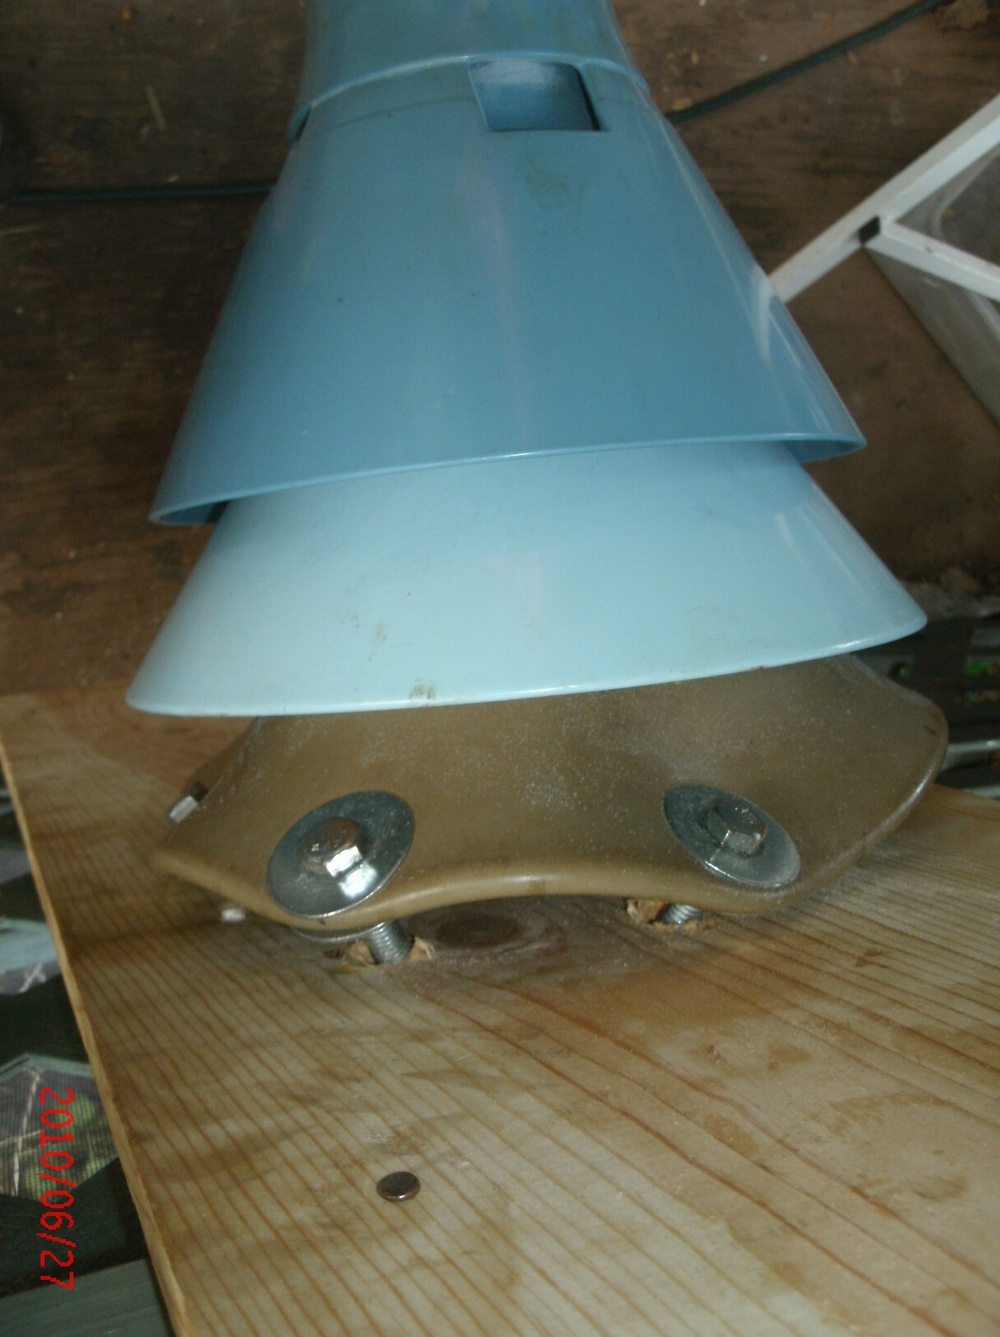
so i decided to mount that pulsator
to a board.
i drilled 6 holes around the bottom of the lower pulsator and used 3/8 inch bolts, fender washers, and nuts. i put a washer on each side of the rubber pulsator and a nut on it tight to keep the bolts from possibly tearing the pulsator due to the torque and stress applied. i used 3 1/2 inch long bolts. 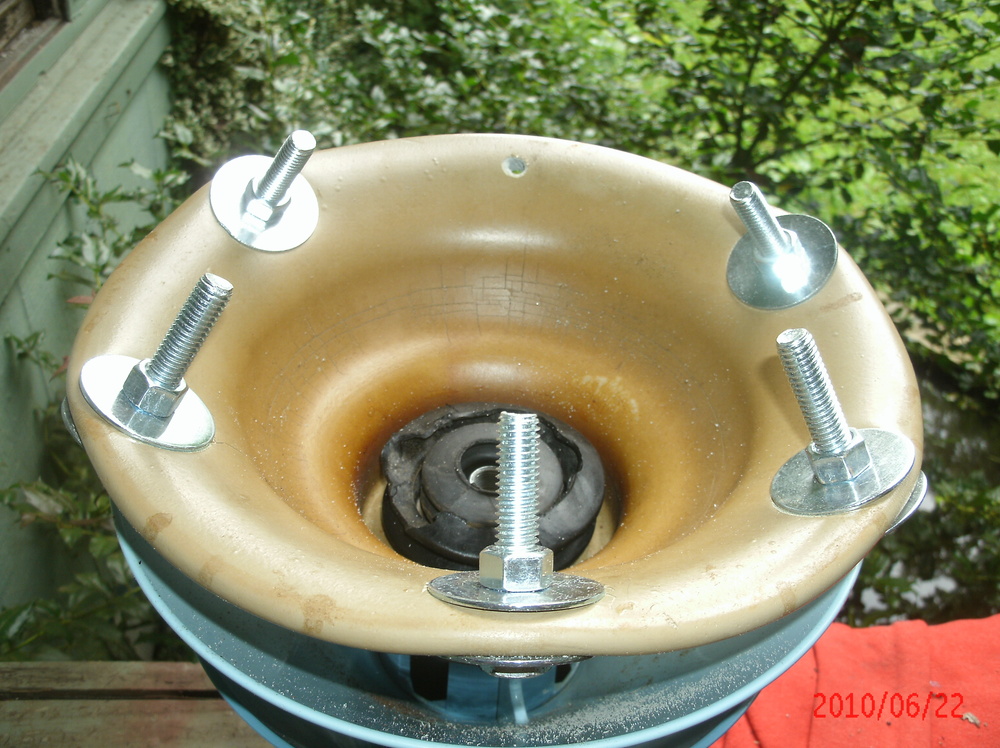
| ||
| Post# 444772 , Reply# 4 6/26/2010 at 19:10 (5,042 days old) by rollermatic (cincinnati) | ||
|
another view | ||
| Post# 444773 , Reply# 5 6/26/2010 at 19:14 (5,042 days old) by rollermatic (cincinnati) | ||
|
i then mounted the pulsator | ||
| Post# 444774 , Reply# 6 6/26/2010 at 19:17 (5,042 days old) by rollermatic (cincinnati) | ||
|
i was originally going to
nail the board to the porch floor and work that way. i decided instead to nail the board up the side of the porch!
when you live in a little country shack of a house you can do that without fretting about it! just like when i drill holes thru the floor to gravity drain my machines! no great loss! here it is nailed to the side of the porch. gotta replace that porch floor next year anyway! 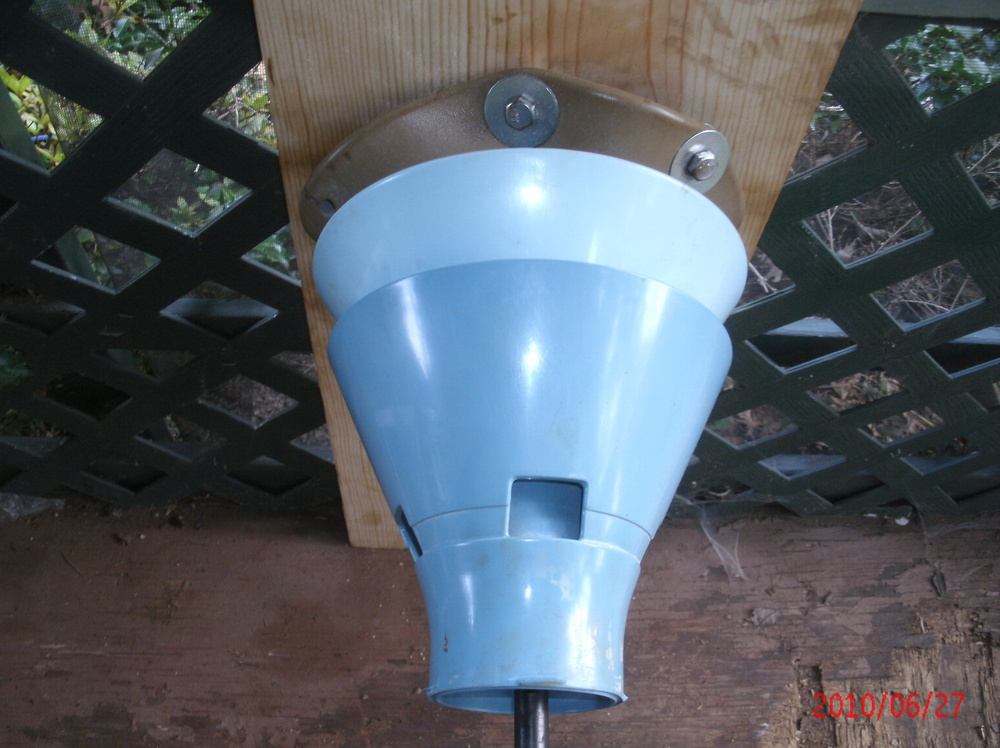
| ||
| Post# 444775 , Reply# 7 6/26/2010 at 19:21 (5,042 days old) by rollermatic (cincinnati) | ||
|
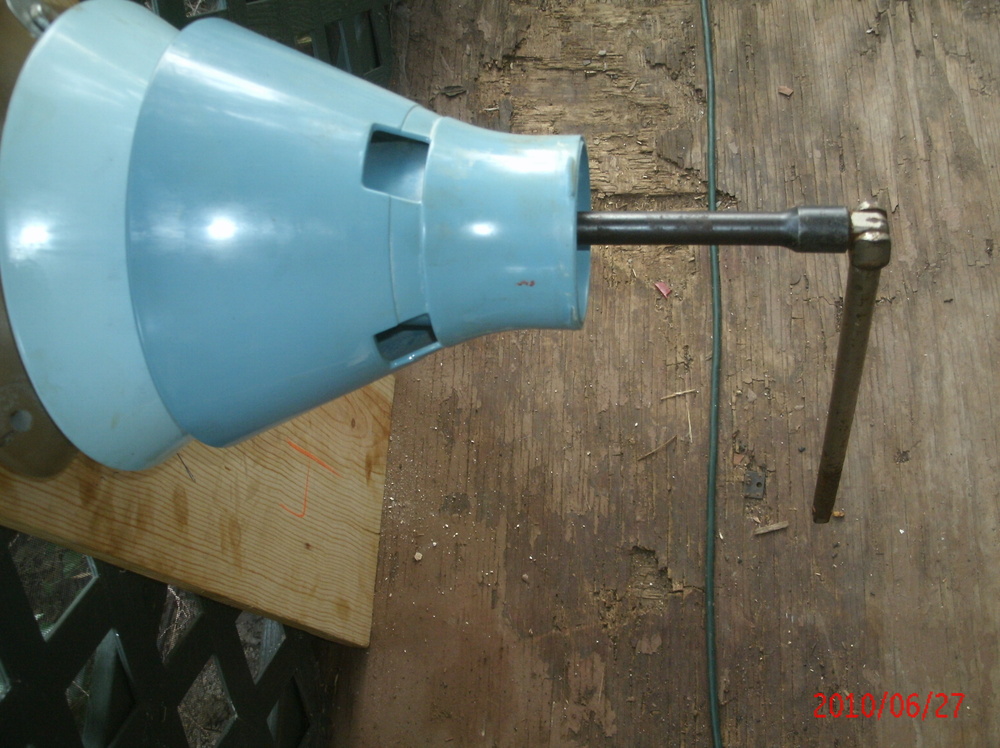
i used a 1/2 inch socket | ||
| Post# 444776 , Reply# 8 6/26/2010 at 19:26 (5,042 days old) by rollermatic (cincinnati) | ||
|
i said a little prayer
that was more like a plea bargain, you know the "please God let this work and i'll do blaa blaa blaa etc etc etc!!!!
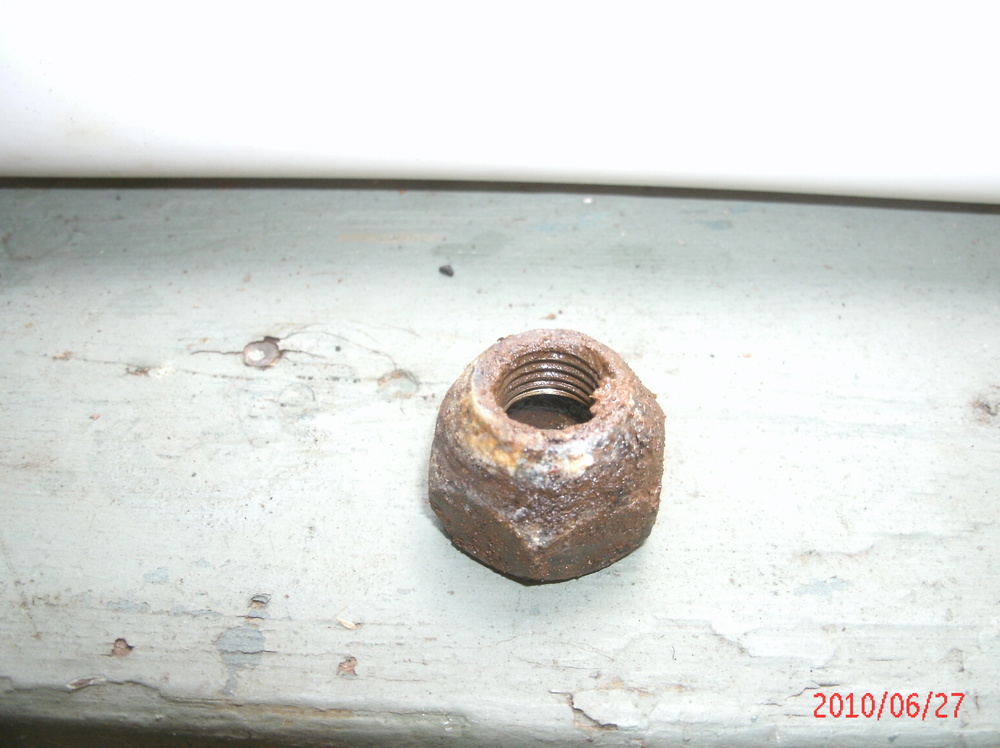
like i ever live up to my end of those bargains! but i gently yet forcefully applied torque and that nut started turning!!! i was ecstatic to say the least!!! i had to look to make sure the pulsator wasn't turning and ripping and i was also concerned that maybe that steel reinforced key plate in it's top may have ripped out of the rubber. but it did not! that sucker came off!!!!!!!!!!!!!!!!!!!!! that is one corroded nut! 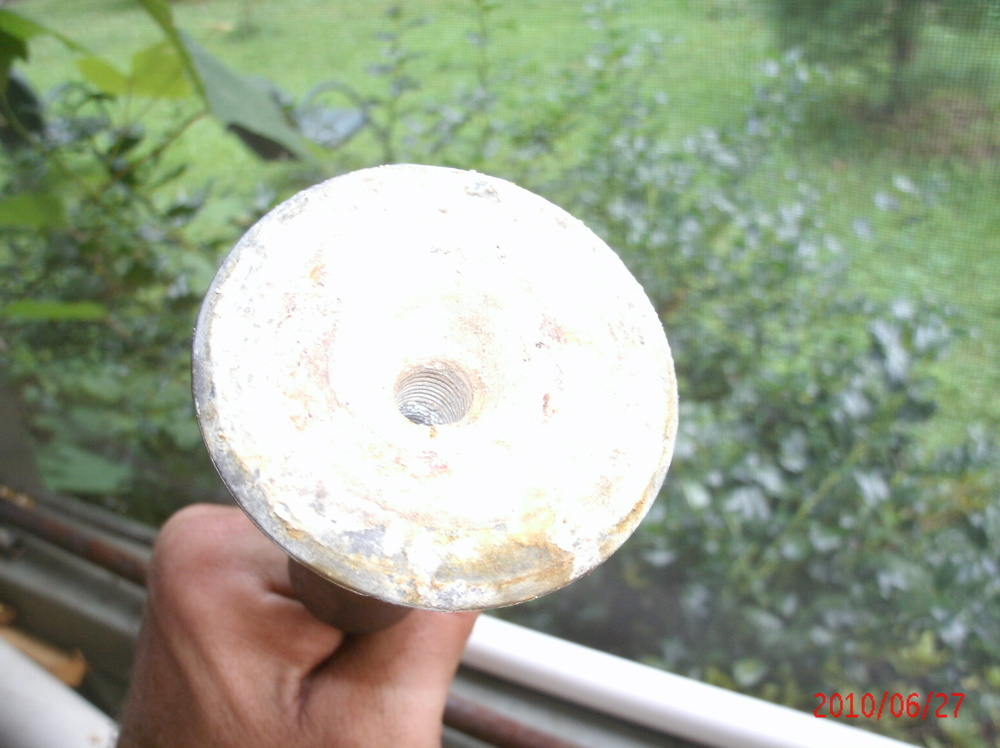
| ||
| Post# 444777 , Reply# 9 6/26/2010 at 19:28 (5,042 days old) by rollermatic (cincinnati) | ||
|
nut is off, | ||
| Post# 444778 , Reply# 10 6/26/2010 at 19:29 (5,042 days old) by rollermatic (cincinnati) | ||
|
here is bottom rubber | ||
| Post# 444779 , Reply# 11 6/26/2010 at 19:31 (5,042 days old) by rollermatic (cincinnati) | ||
|
backing up a minute | ||
| Post# 444780 , Reply# 12 6/26/2010 at 19:33 (5,042 days old) by rollermatic (cincinnati) | ||
|
here is that nut before | ||
| Post# 444781 , Reply# 13 6/26/2010 at 19:39 (5,042 days old) by rollermatic (cincinnati) | ||
|
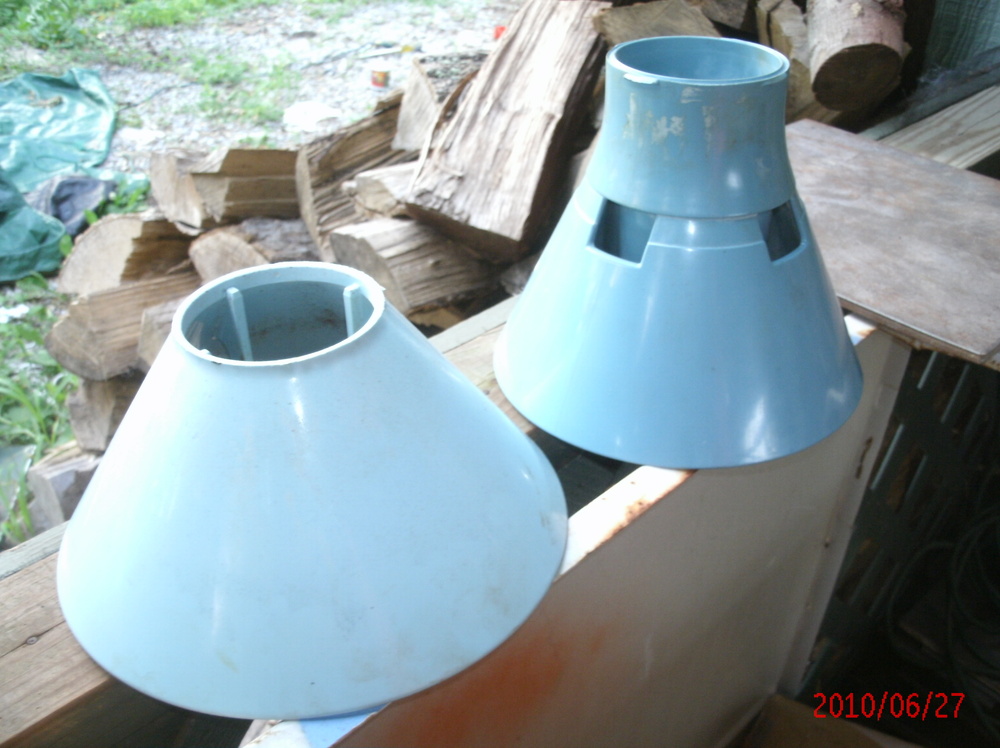
here are some of the parts
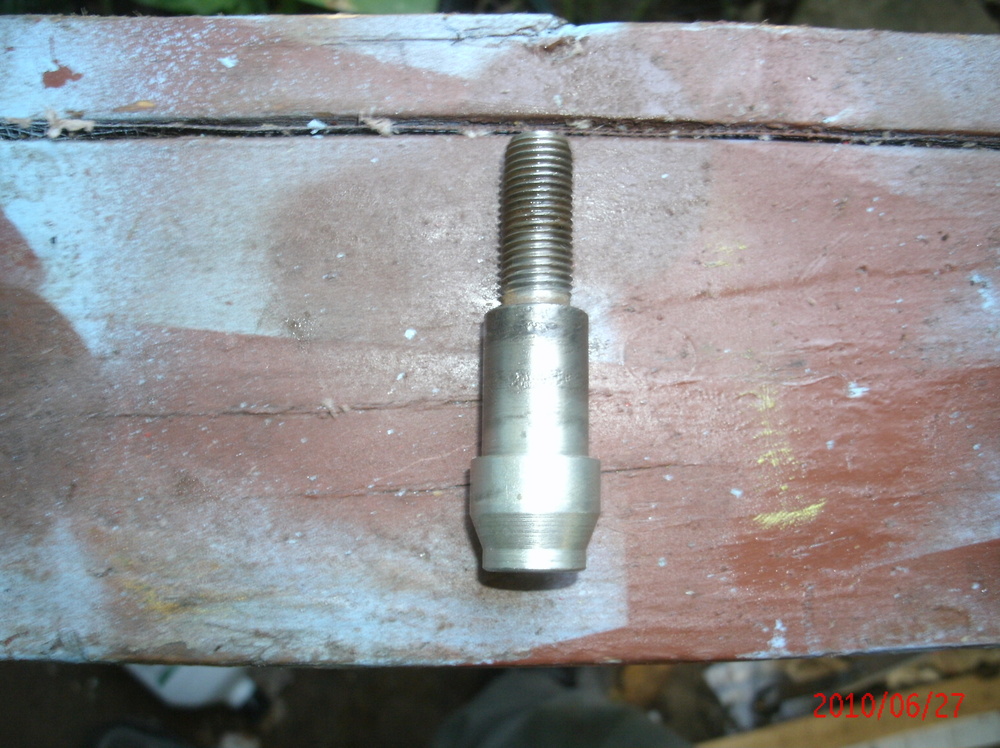
all shiny and new including that stud itself!
what a bad design! when the 1-18 was introduced later i see they went with a one peice agitate shaft eliminating this problem once and for all! the manual i have calls for "lock tight" to be applied to the point where the stud screws onto the main shaft. but it also calls for the use of lock tight on the agitaor nut too! so it's a real possibility that the agitator will stay frozen the the stud and the stud will unscrew from the main shaft! it happened to me, twice here! 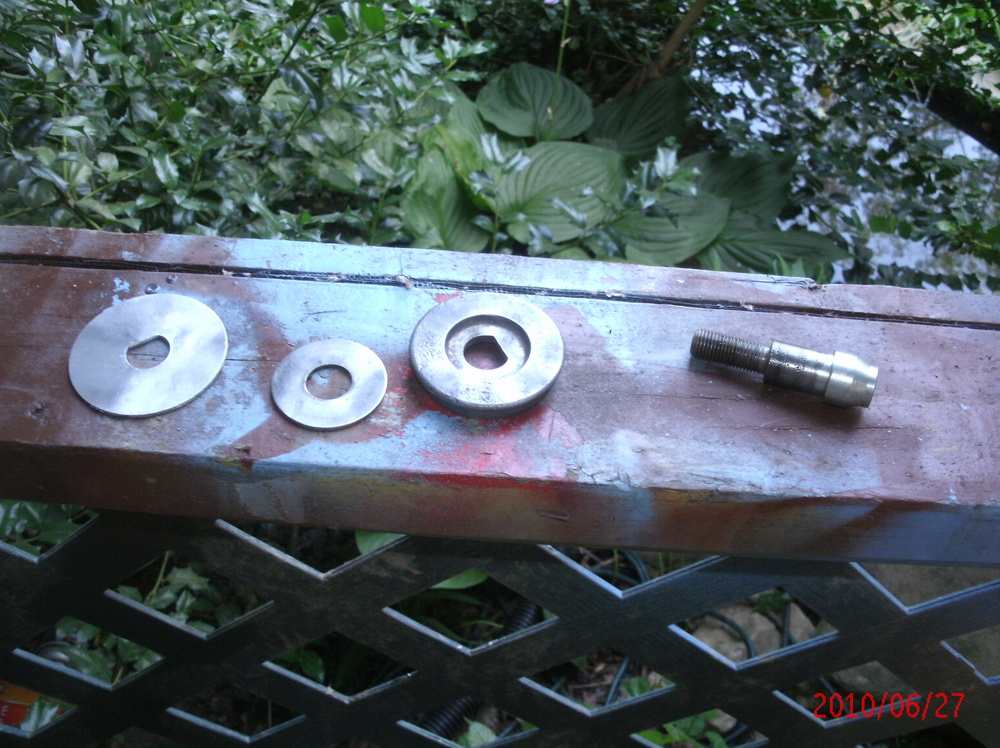
| ||
| Post# 444782 , Reply# 14 6/26/2010 at 19:40 (5,042 days old) by rollermatic (cincinnati) | ||
|
that stud | ||
| Post# 444785 , Reply# 15 6/26/2010 at 19:41 (5,042 days old) by rollermatic (cincinnati) | ||
|
what is left of the torn water bellows | ||
| Post# 444786 , Reply# 16 6/26/2010 at 19:44 (5,042 days old) by rollermatic (cincinnati) | ||
|
all that remains of the oil and | ||
| Post# 444788 , Reply# 17 6/26/2010 at 19:52 (5,042 days old) by rollermatic (cincinnati) | ||
|
so it was a success!
i have 3 machines up and running now and machine number 4 will be back together by the end of july.
that leaves one more machine, the coppertone 1965 custom deluxe i got in tenn last summer. gotta figure out a way to remove the agitator nut without this happening again. somehow i will have to both hold the agitator shaft from turning by using vice grips on it's lower end like i always do but also hold the lower pulsator cone too! that way that stud cannot unscrew from the shaft! i am thinking of drilling holes in the lower cone as i did here and mount some type of wooden peice to it that i can anchor against the side of the inner tub. or some type of wooden peice that i can anchor apart from the inner tub. something to keep that lower cone from turning when i loosen the nut. any ideas here will be appreciated! and here is that agitator nut all shiny and new again! 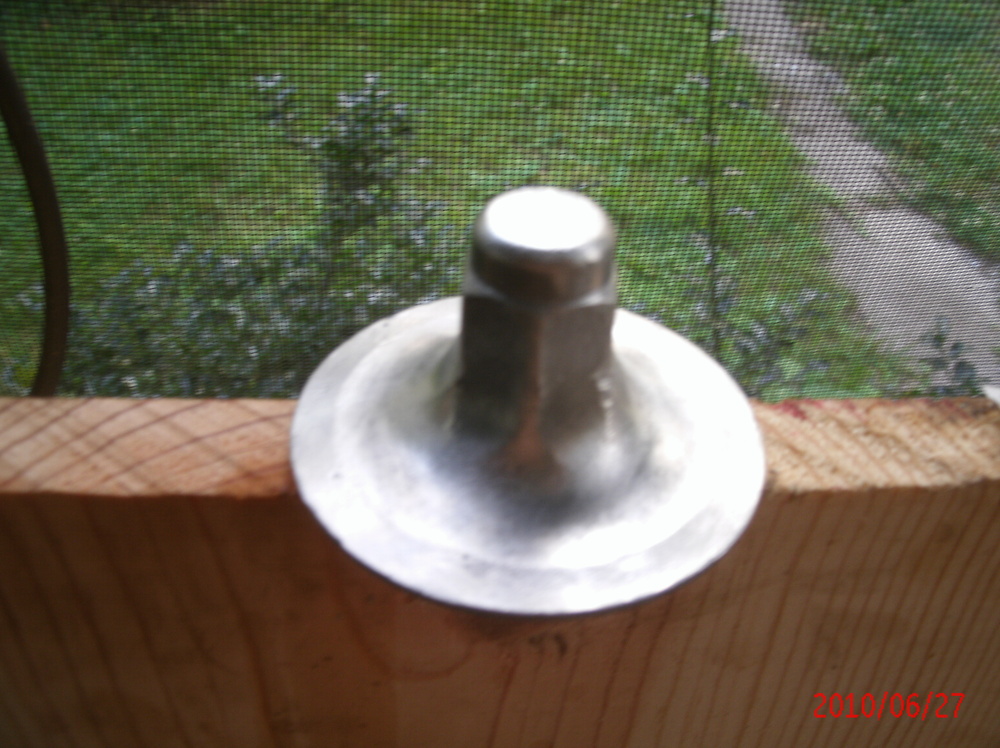
| ||
| Post# 444790 , Reply# 18 6/26/2010 at 19:57 (5,042 days old) by rollermatic (cincinnati) | ||
|
my other pulsator that has the same
problem i have ruined i think.
i can't use this solution on it as i started grinding away at that agitator nut a couple months ago with a dremel! so now the nut is pretty much destroyed and i fear i have hurt the stud threads too! i will have to finish drilling and grinding it out then hopefully the stud can be repaired. i will take it to a mchine shop to see if they can re thread it so i can get a nut on it. hopefully so. i do not want to break the pulsator to save the stud and nut, the nut is gone anyway, i would rather sacrifice the stud and keep the pulsator cones intact. maybe i could get a new stud made at a nmachine shop. 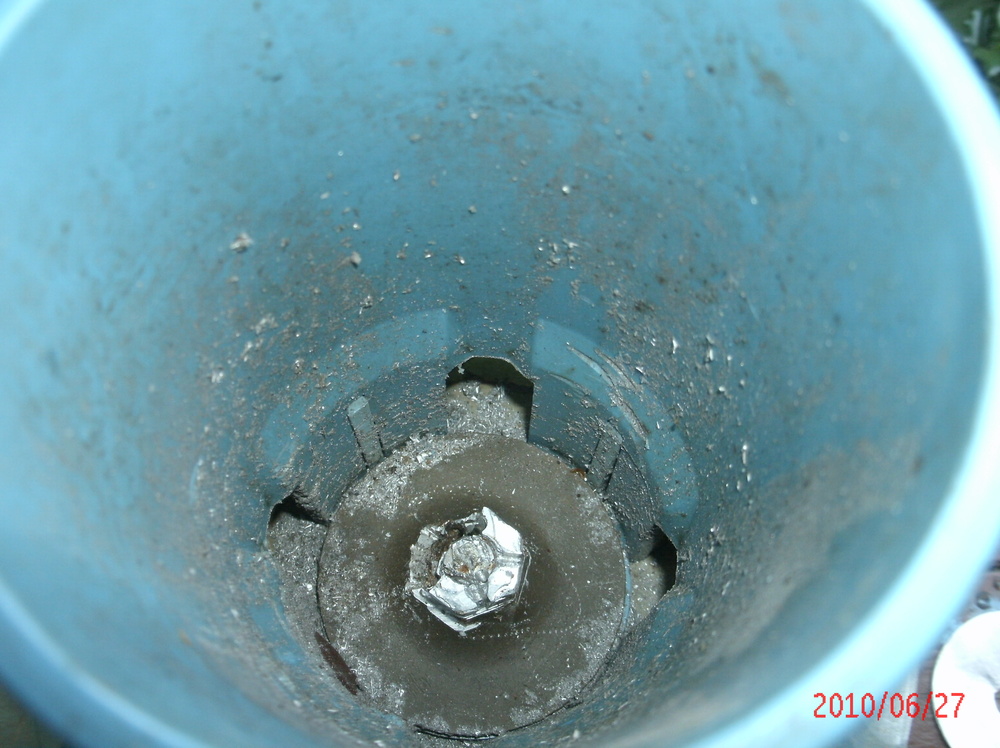
| ||
| Post# 444791 , Reply# 19 6/26/2010 at 20:03 (5,042 days old) by rollermatic (cincinnati) | ||
|
oh well live and
learn. destroying this nut and dropping my custom imperial off the truck last summer are the only 2 things i have really screwed up working on these machines. and the custom imperial is back running great! hopefully i can salvage this boo boo too!
for now i'm going to just leave this little pulsator alone and come back to it later! i got the one off, that's a big deal for me! hopefully this pictorial will help anyone else here with the same problem, especially the member who i discussed this problem with last fall. sorry i don't remember who you were exactly, it's been a hectic spring and summer and i've had some health issues and stuff that has been kinda rough on me. haven't posted on here for awhile actually. hope this helps you too! pete 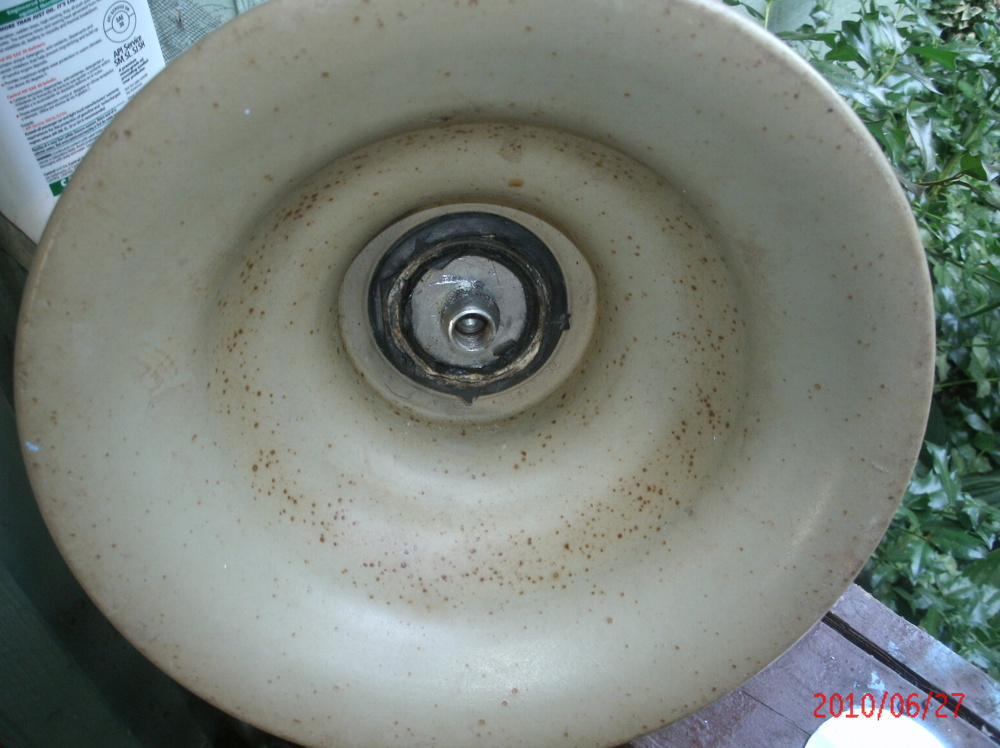
| ||
Post# 444879 , Reply# 21 6/27/2010 at 07:52 (5,041 days old) by joelippard  (Hickory) (Hickory) |
||
I'll second that Steve! | ||
|
Post# 445036 , Reply# 22 6/27/2010 at 16:59 (5,041 days old) by combo52 (50 Year Repair Tech Beltsville,Md) |
||
HOW TO REMOVE THE ALUMINUM AGITATOR NUT
I have been using this technique for over thirty years and it has always worked. Take a propane torch and adjust it to a medium flame and turn it upside down and slowly lower it into the agitator column. Heat the nut very hot it will take 5 minutes or more, until things start smoking a little. Then have a helper hold agitator while you unscrew the nut, If you working alone use a vice-grip pliers on the agitator shaft from below to keep the shaft from turning, meanwhile being careful to protect the shaft from damage.
| ||
| Post# 445245 , Reply# 23 6/28/2010 at 12:07 (5,040 days old) by mickeyd (Hamburg NY) | ||
Great pics, Pete!
The drilling, bolting, and hanging of the agitator was quite something. God, do you get serious! And it brought back an old memory: My friend Reno's father once bolted and hung and Easy Spin from the basement rafters to remove a stuck spinner. It didn't work !!! ;-> He should have called you.
When a water bellows was torn here, after finally getting it loose, I gave it a tug, and off came the perfectly good oil bellows underneath, with it. The water bellows had melded to the metal fitting in the top of the oil bellows. It took me a year to finally fix it. | ||
| Post# 445954 , Reply# 24 6/30/2010 at 22:19 (5,038 days old) by rollermatic (cincinnati) | ||
|
yes i am definately serious when
it comes to my rollermatic repair. very determined! i just love those washers so much i can't stand to see anything stand in my way of getting all my machines operating again.
i agree guys, no lock tite at all, i also used grease on my machines that i do have finished! i want that nut to easily remove next time, if there is a next time (hopefully not). i also thought of a torch but was afraid i might accidentally melt the agitator cones. i did think about putting a heat shield of aluminum inside the cone to keep the fire away from the plastic. i'm just glad i got it apart and nothing was damaged. i can plug those holes with plastic bolts and nuts if i like but i want to leave it as is and see if it makes any difference in washing, which i doubt it will. next step is to remove the mechanism support and transmission assembly from the outer tub, paint and prime the outer tub and reassemble the whole thing. this machine should be running by august! thanks | ||
| Forum Index: | 
| Other Forums: |

|

|

|

|

|

 Comes to the Rescue!