Thread Number: 31297
CODE BLUE, I NEED BEARINGS STAT!!!
[Down to Last]

automaticwasher.org's exclusive eBay Watch:
scroll >>> for more items --- [As an eBay Partner, eBay may compensate automaticwasher.org if you make a purchase using any link to eBay on this page]
Post# 472445   10/30/2010 at 20:40 (4,920 days old) by supremewhirlpol ()        

I finally had the time to replace the bearings and seal in my Maytag Commercial Neptune A link about where I got this machine is posted below. In order to do this repair you need the following:
-security torx bits
-short sledge hammer
-6206 bearing
-6207 bearing
-replacement seal FSP P/N:12002022
-lots of muscle
-metal pipe
-time and patience

I've placed her in the OR, and now it's time to correct the loud noise she makes and the mud butt issue.


CLICK HERE TO GO TO supremewhirlpol's LINK


Post# 472448 , Reply# 1   10/30/2010 at 20:52 (4,920 days old) by supremewhirlpol ()        

It took me ~10 hours, which I spanned out over 4 days to do this repair. It's not hard to do, just requires lots of time and patience. It's best to have the parts and tools before tearing into the machine, as if you don't pay attention to where things go, and how they go, you are certain to forget how to put it back together.


Post# 472449 , Reply# 2   10/30/2010 at 21:08 (4,920 days old) by supremewhirlpol ()        
Bearings

There are 2 bearings that need to be replaced, 6206 and 6207.
6206: 30mmX62mmX16mm
6207: 35mmX72mmX17mm
It's best to get -rs or -2rs bearings, as these have rubber seals on the ends to keep the lubricant in the bearings and to protect against debris. Standard bearings are made of Chrome Steel->which will rust when exposed to water. These are also the cheaper bearings as well. My choice for this project is Stainless Steel bearings->S6207-2RS and S6206-2RS. Normal bearings will cost~$10 each. The SS bearings cost~$30-$50 each.


Post# 472450 , Reply# 3   10/30/2010 at 21:25 (4,920 days old) by supremewhirlpol ()        
Seal kit

The seal kit is FSP P/N:12002022. The kit has seals for both newer and older machines, along with the metal spacer, the seal installation tool, seal/bearing spacer, and instructions for the seal replacement. They are easy to follow, but skip some steps, and don't really say how to remove and install the spider. Also the instructions show to replace the bearings and seal with the outer tub still installed in the machine. Given the required force to remove the old bearings, leaving the outer tub installed while doing the bearing replacement is a BAD idea.

Post# 472452 , Reply# 4   10/30/2010 at 21:31 (4,920 days old) by supremewhirlpol ()        

My Neptune has security torx screws that hold the door and front panel on the machine. There are 2 on both sides of the door.

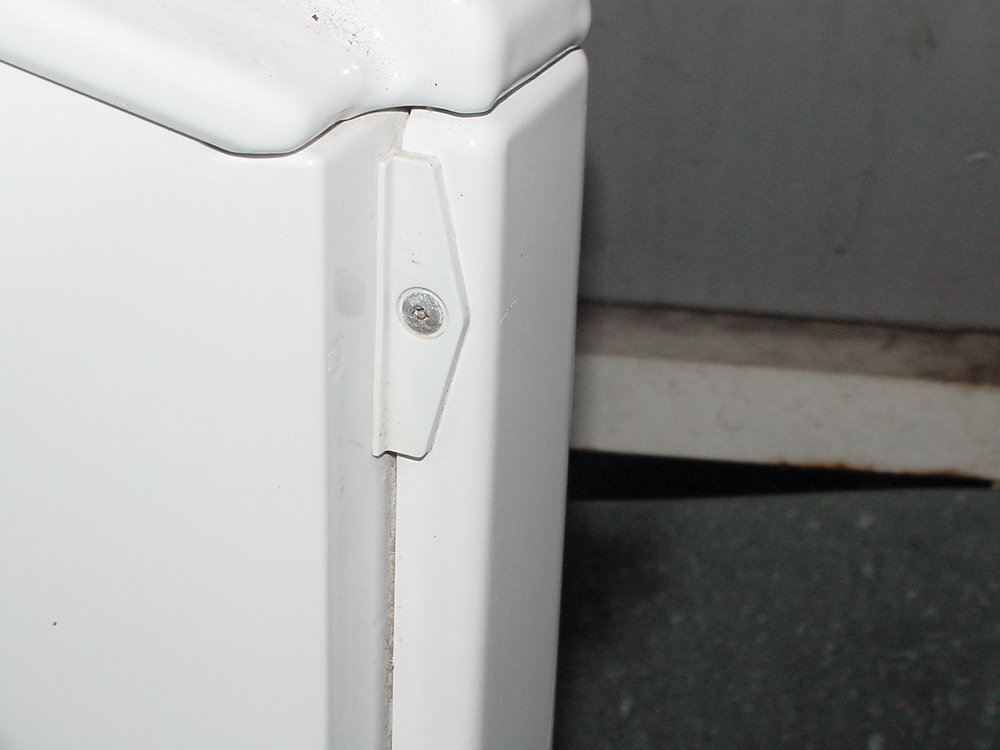
Post# 472453 , Reply# 5   10/30/2010 at 21:32 (4,920 days old) by supremewhirlpol ()        

Hinges need to be replaced too, That will have to come later.

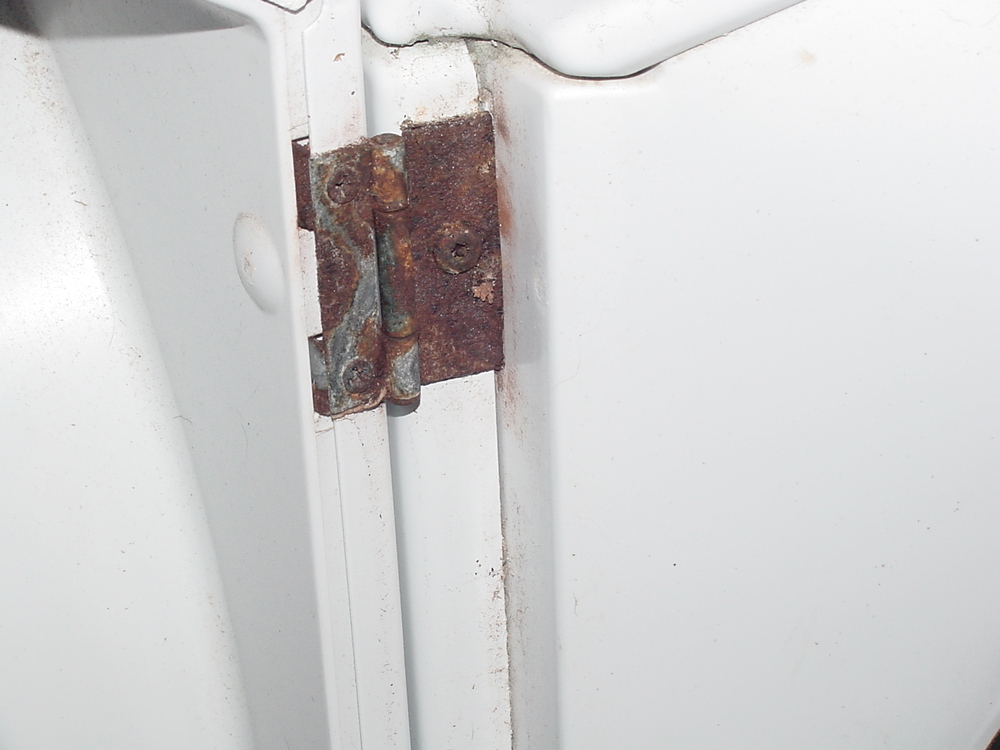
Post# 472454 , Reply# 6   10/30/2010 at 21:34 (4,920 days old) by supremewhirlpol ()        

Remove the door, remove the front panel. Looks nasty!

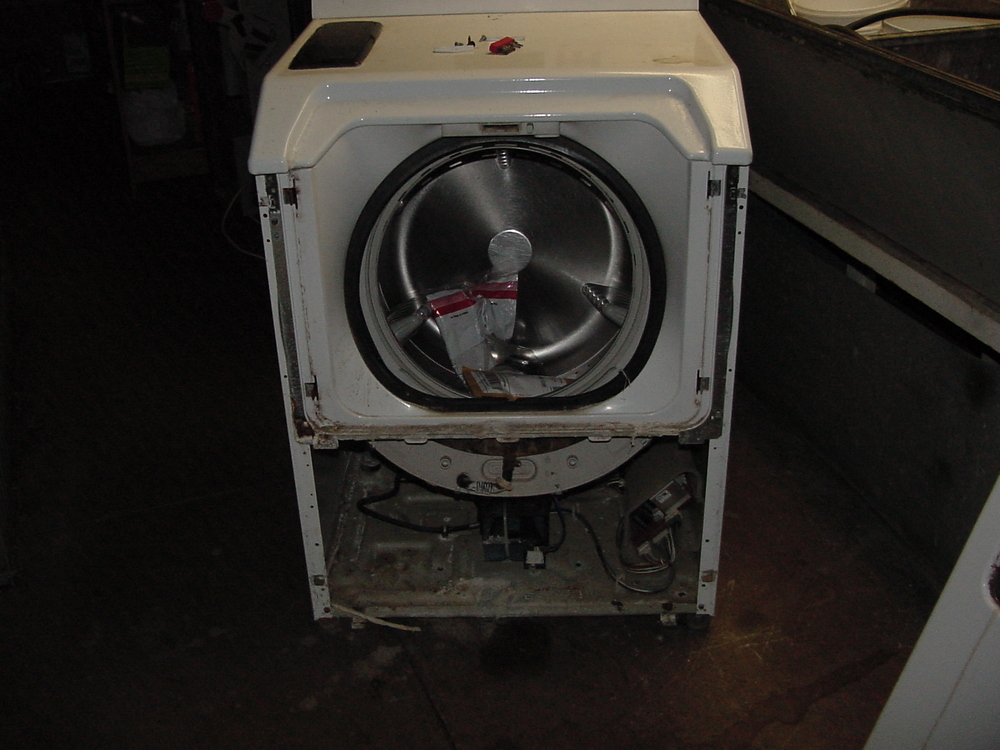
Post# 472455 , Reply# 7   10/30/2010 at 21:35 (4,920 days old) by supremewhirlpol ()        

A lot of that crud is actually soap-> more about that later.

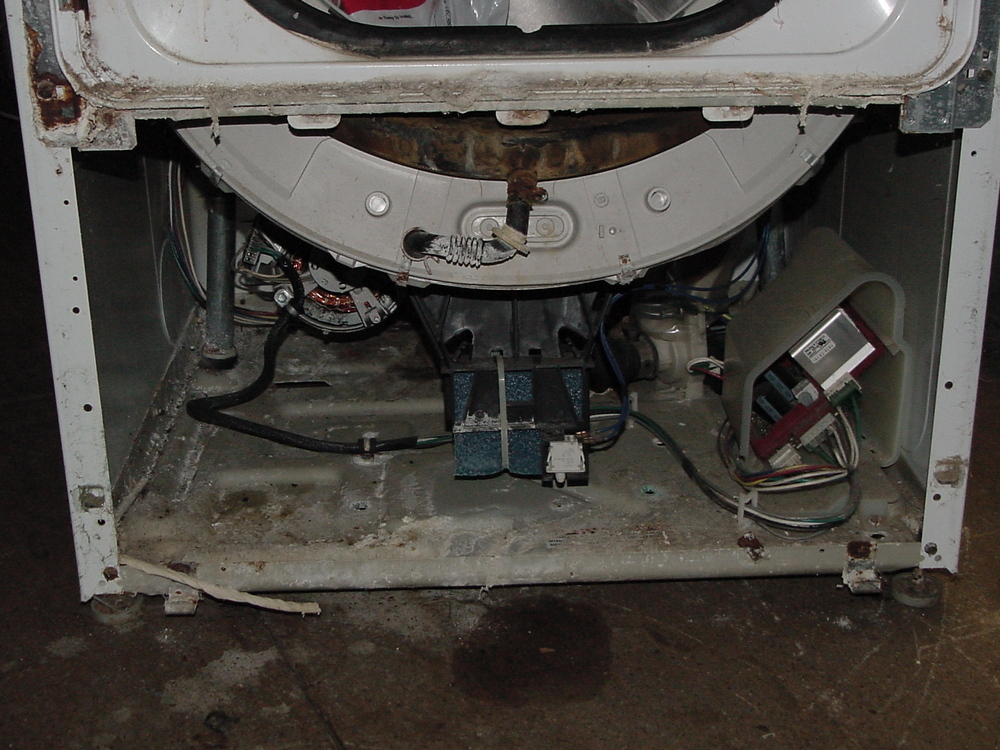
Post# 472460 , Reply# 8   10/30/2010 at 21:58 (4,920 days old) by supremewhirlpol ()        

The top is held down by a lock bracket on each side of the machine and the top of the of the dispenser

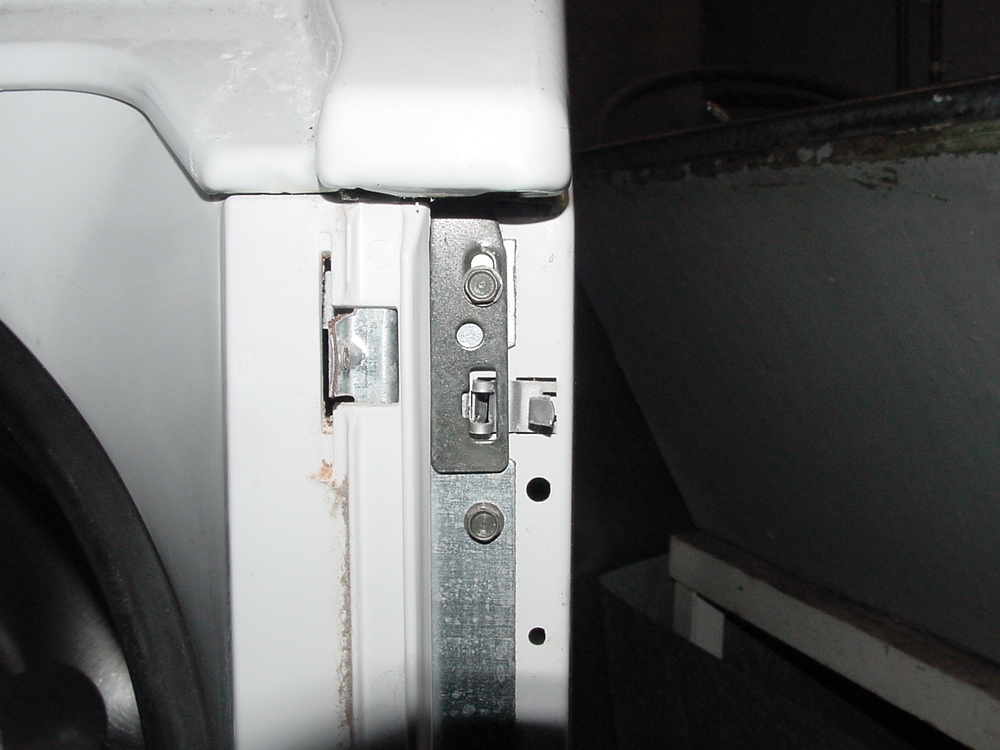
Post# 472461 , Reply# 9   10/30/2010 at 21:59 (4,920 days old) by supremewhirlpol ()        

lock bracket

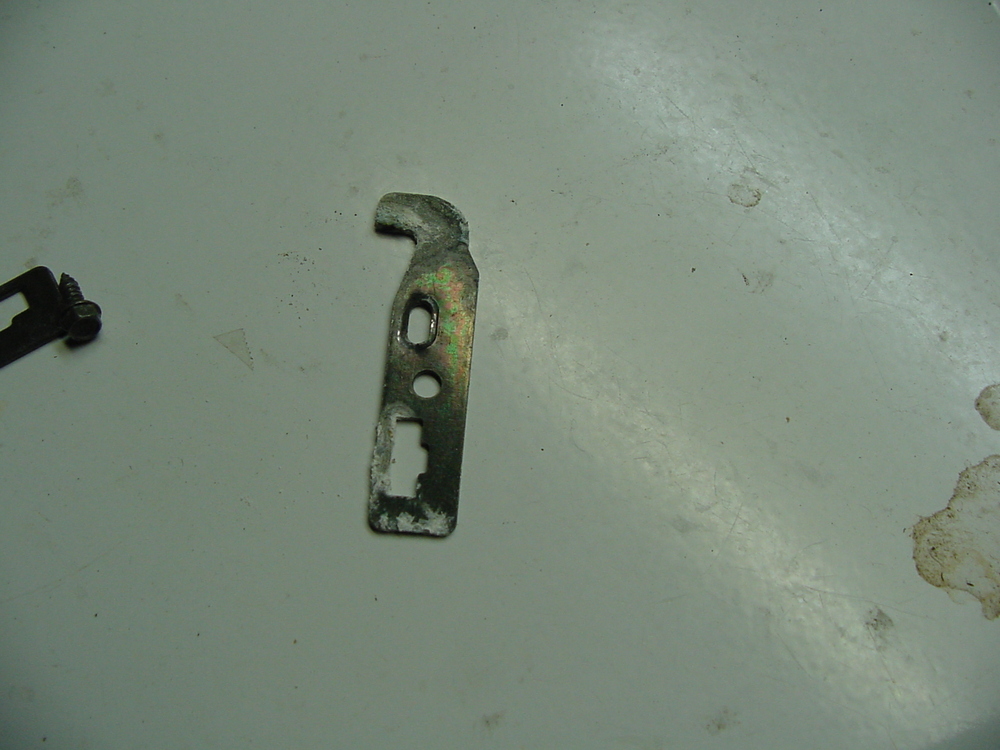
Post# 472463 , Reply# 10   10/30/2010 at 22:02 (4,920 days old) by supremewhirlpol ()        
dispenser

The top of the dispenser is held on by 4 Philips screws.

Post# 472465 , Reply# 11   10/30/2010 at 22:04 (4,920 days old) by supremewhirlpol ()        
Top up

Top comes up

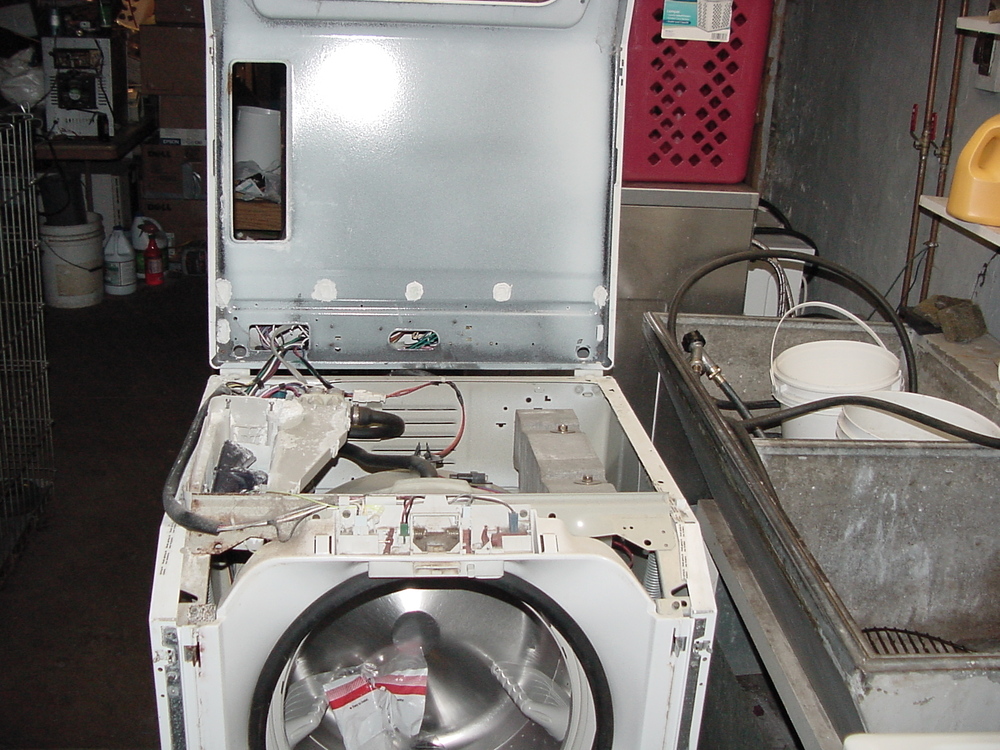
Post# 472466 , Reply# 12   10/30/2010 at 22:06 (4,920 days old) by supremewhirlpol ()        

Looks Gnarly!

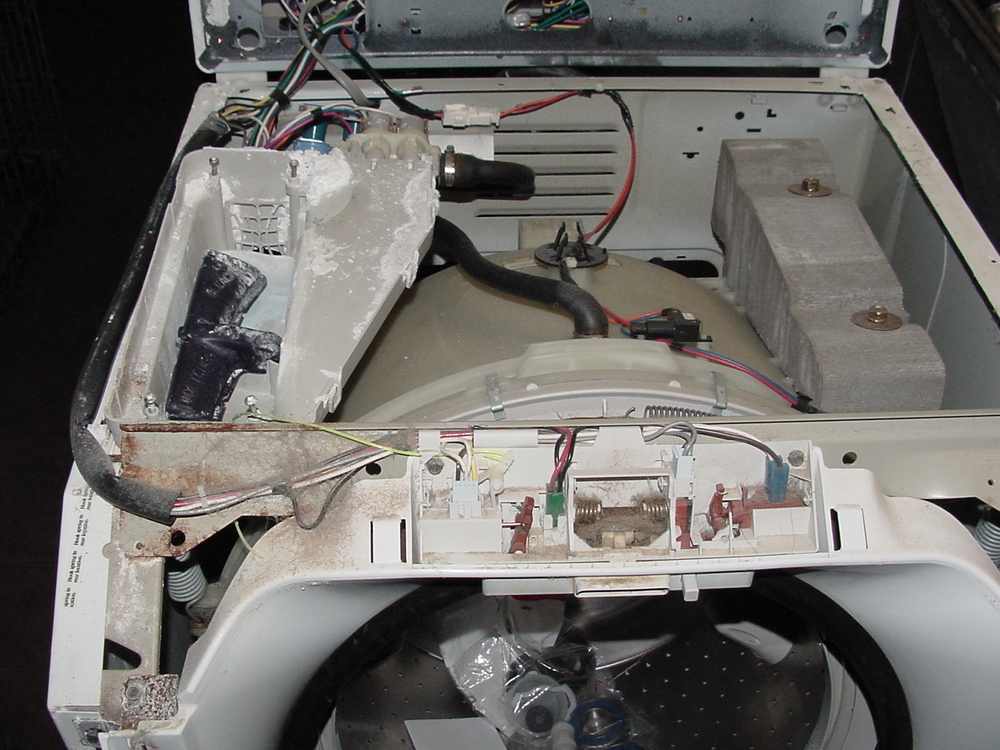
Post# 472468 , Reply# 13   10/30/2010 at 22:12 (4,920 days old) by supremewhirlpol ()        
removing outer drum

In order to remove the outer drum, the dispenser has to be removed, along with the counter-weight, wiring for swiches/sensors, hoses, motor wire harness, lower drum out of balance switch, springs.

Post# 472471 , Reply# 14   10/30/2010 at 22:16 (4,920 days old) by supremewhirlpol ()        

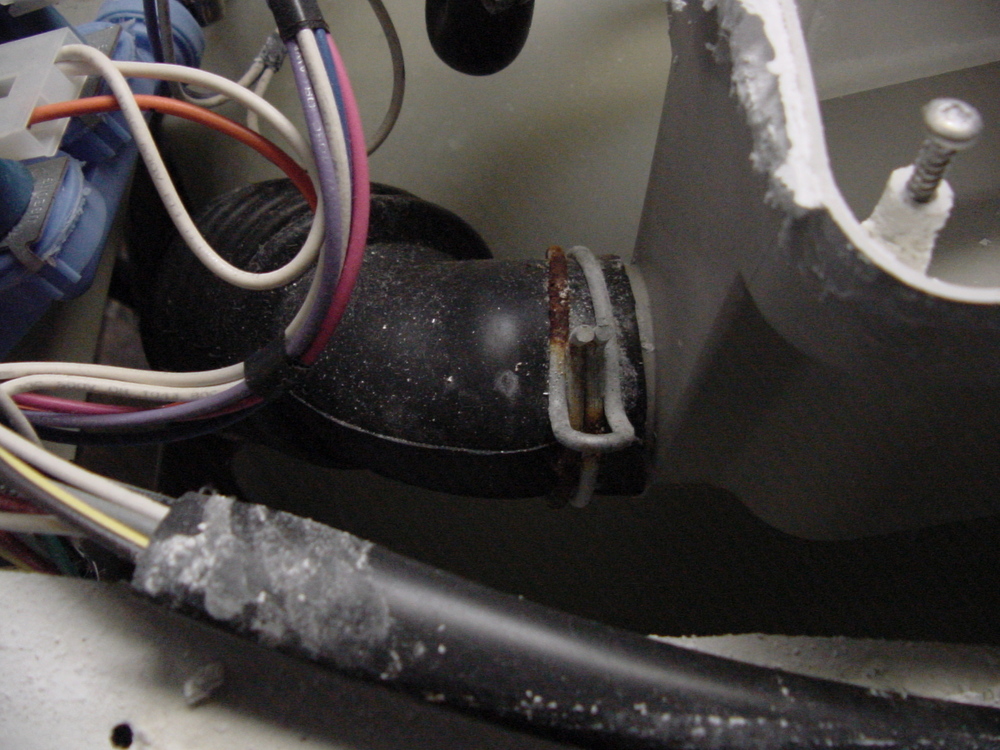
Hose in the middle of the top of the drum, has to go-> it's goes from the dispenser to the outer drum. Also remove sensor next to the hose.

Post# 472472 , Reply# 15   10/30/2010 at 22:21 (4,920 days old) by supremewhirlpol ()        

Hose from the back of the dispenser goes to the back of the outer drum->remove end from rear of the outer drum. A hose from the primary water valves goes to the dispenser->remove that end goes to the water valves. 2 terminals are used to power the FS and LCB compartments->remove those, and remember which goes where.

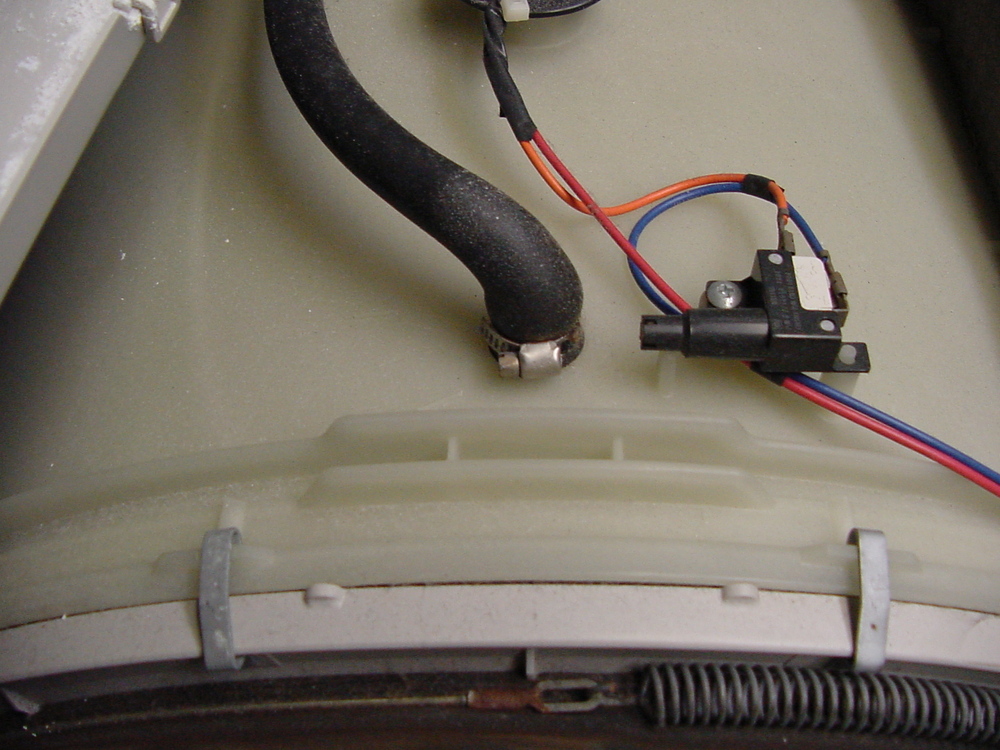
Post# 472473 , Reply# 16   10/30/2010 at 22:24 (4,920 days old) by supremewhirlpol ()        
Counter-weight

Remove counter-weight->save/separate which bolts, screws go where

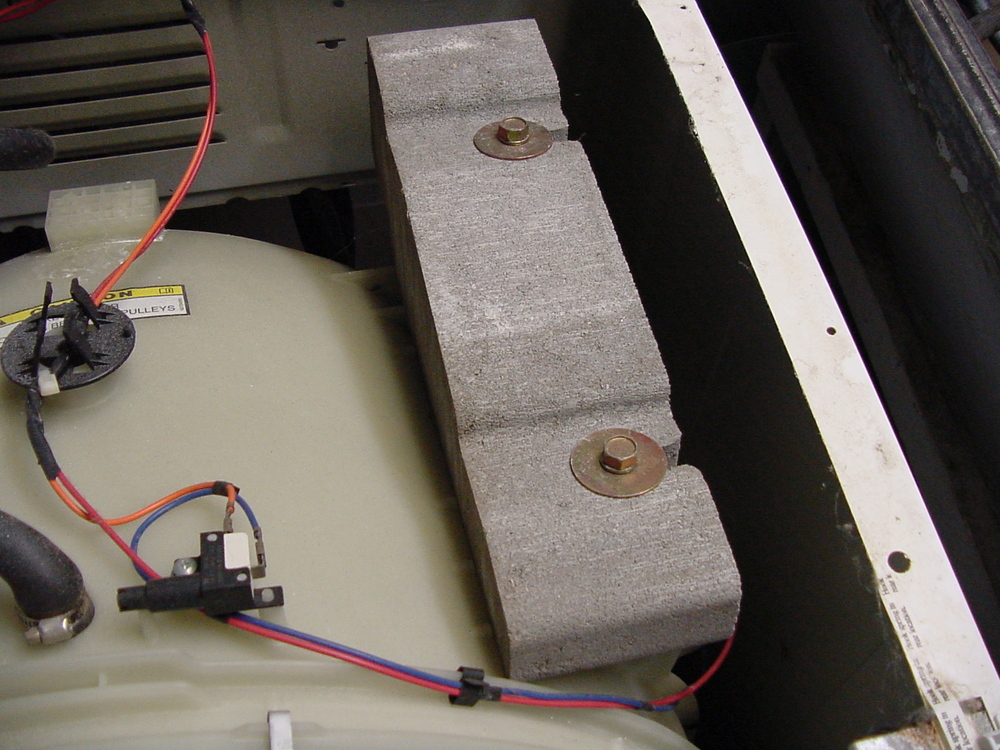
Post# 472474 , Reply# 17   10/30/2010 at 22:26 (4,920 days old) by supremewhirlpol ()        
Door-lock module

Remove the door lock module->2 screws on each side hold it in place.

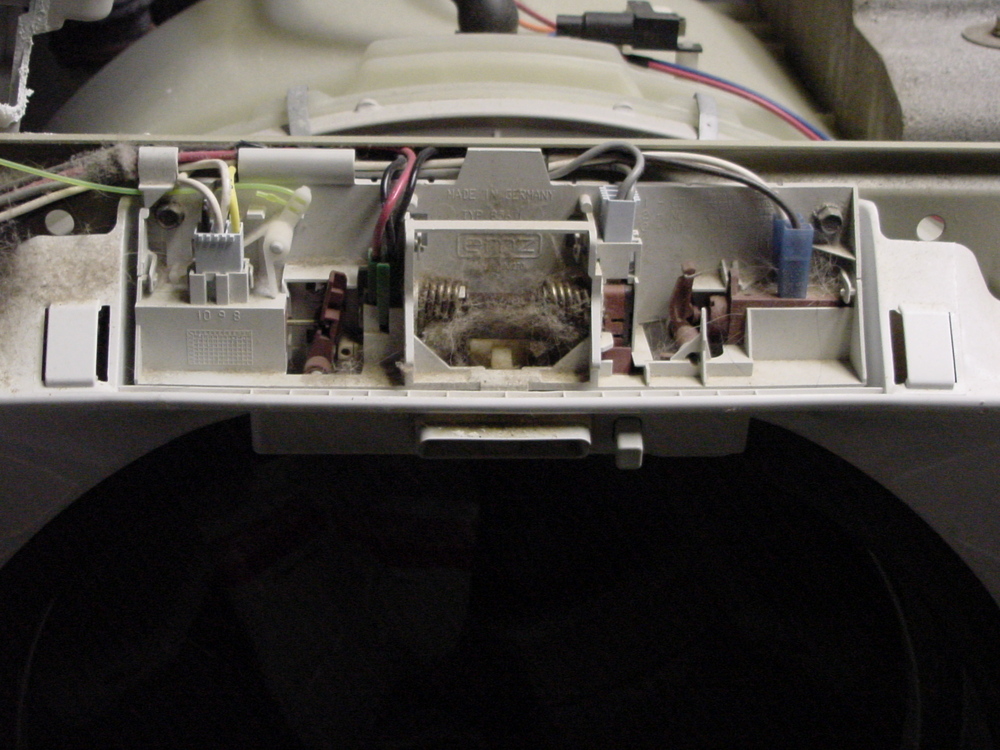
Post# 472475 , Reply# 18   10/30/2010 at 22:28 (4,920 days old) by supremewhirlpol ()        

Tilt forward and remove.

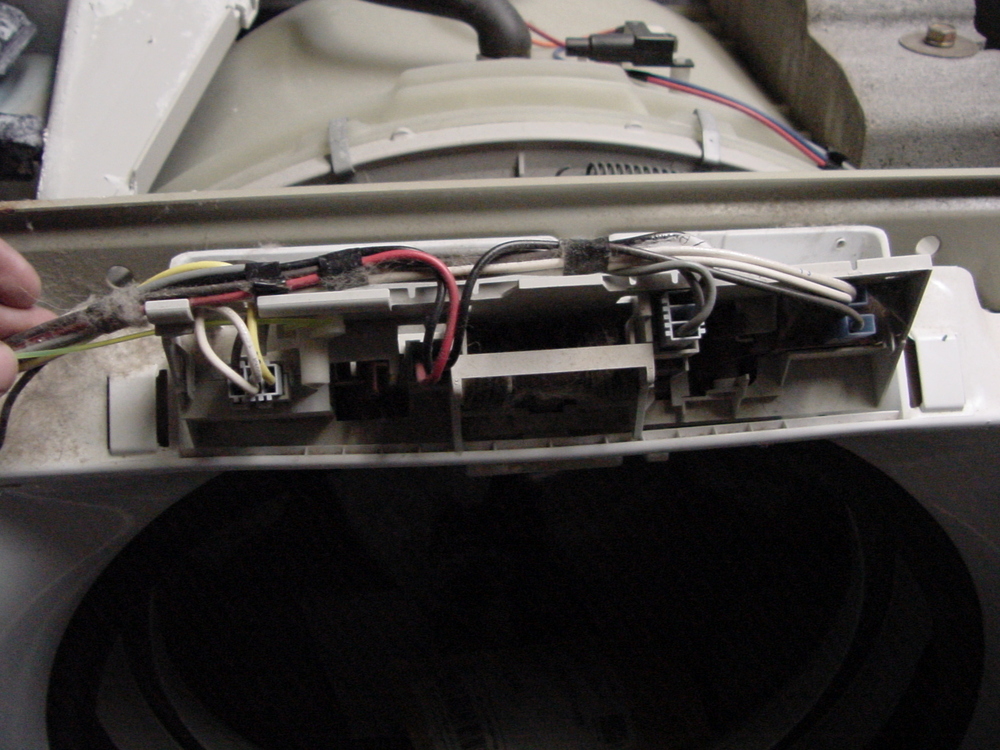
Post# 472491 , Reply# 19   10/30/2010 at 23:13 (4,920 days old) by supremewhirlpol ()        

The front bottom of the outer tub can be removed by two bolts on each side->move it out of the way

Post# 472493 , Reply# 20   10/30/2010 at 23:14 (4,920 days old) by supremewhirlpol ()        

Remove the drain hose.

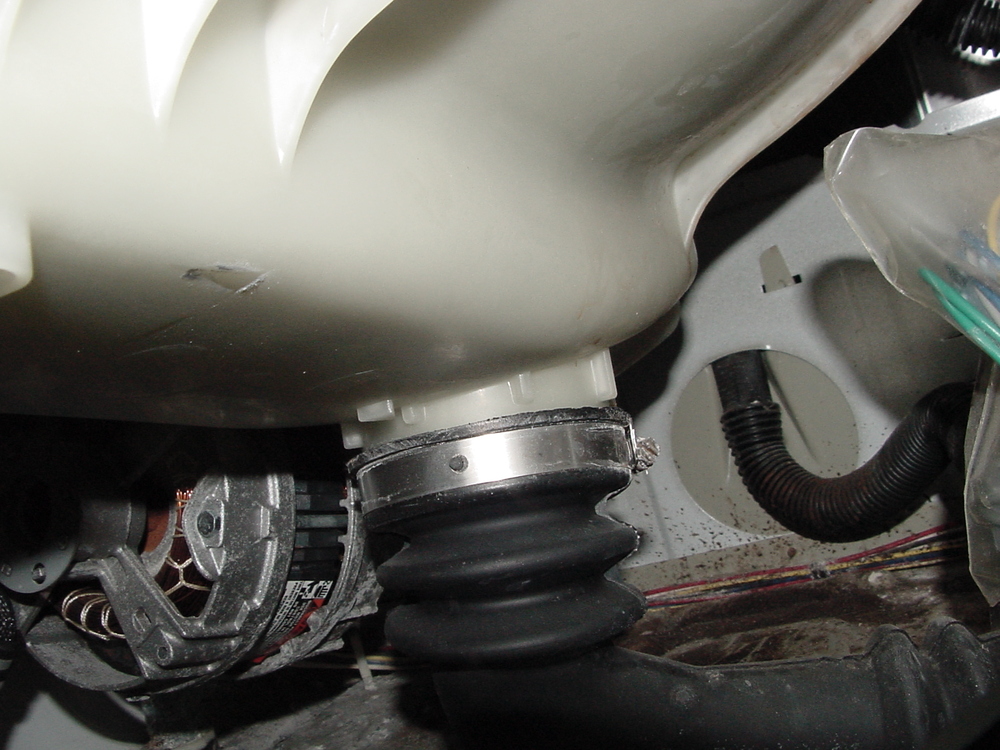
Post# 472498 , Reply# 21   10/30/2010 at 23:21 (4,920 days old) by supremewhirlpol ()        

Remove the harness to the motor from the control board.

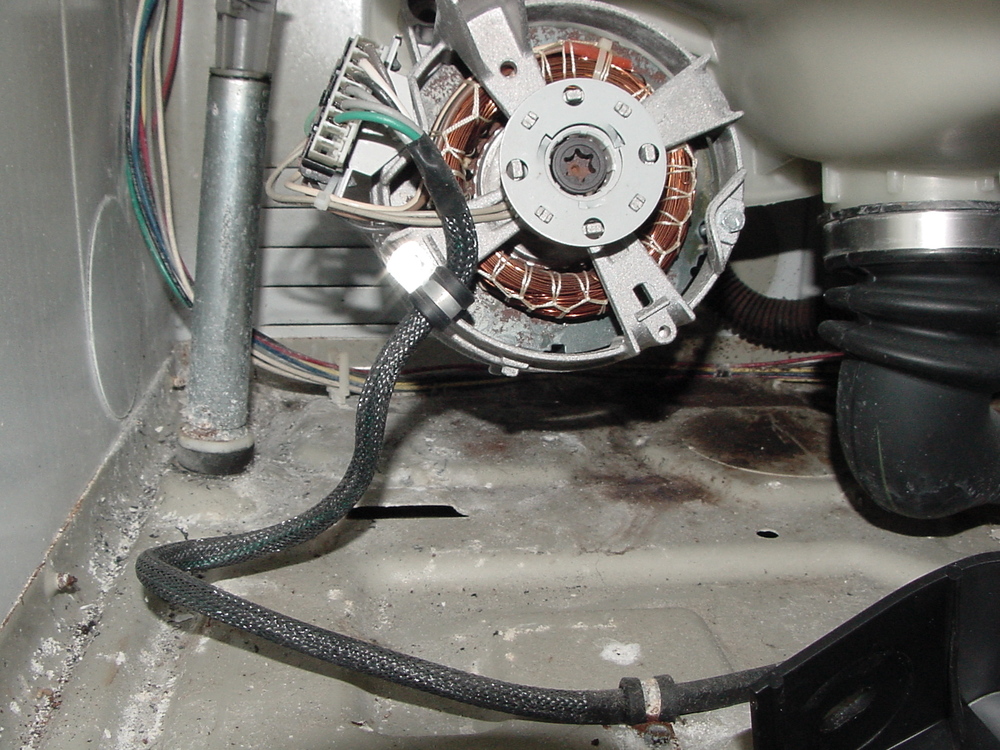
Post# 472499 , Reply# 22   10/30/2010 at 23:24 (4,920 days old) by supremewhirlpol ()        

Remove the front of the outer drum->the front of the outer drum is held on by a series of small clips. Just remove the clips, do not remove the boot!!

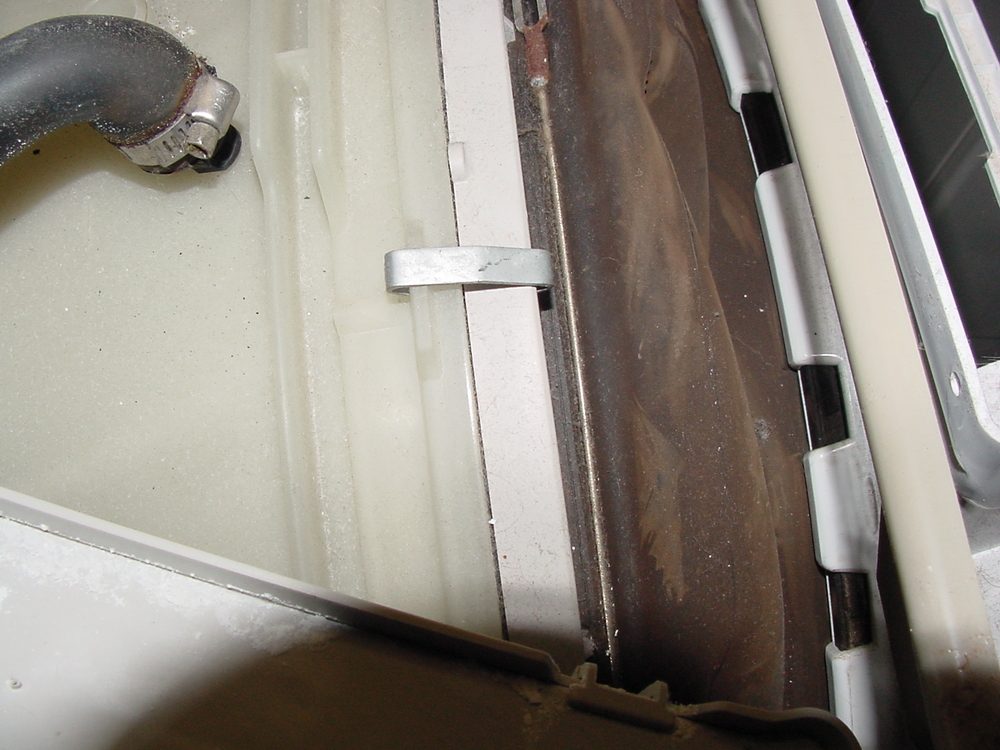
Post# 472500 , Reply# 23   10/30/2010 at 23:25 (4,920 days old) by supremewhirlpol ()        

Here is what the clips look like.

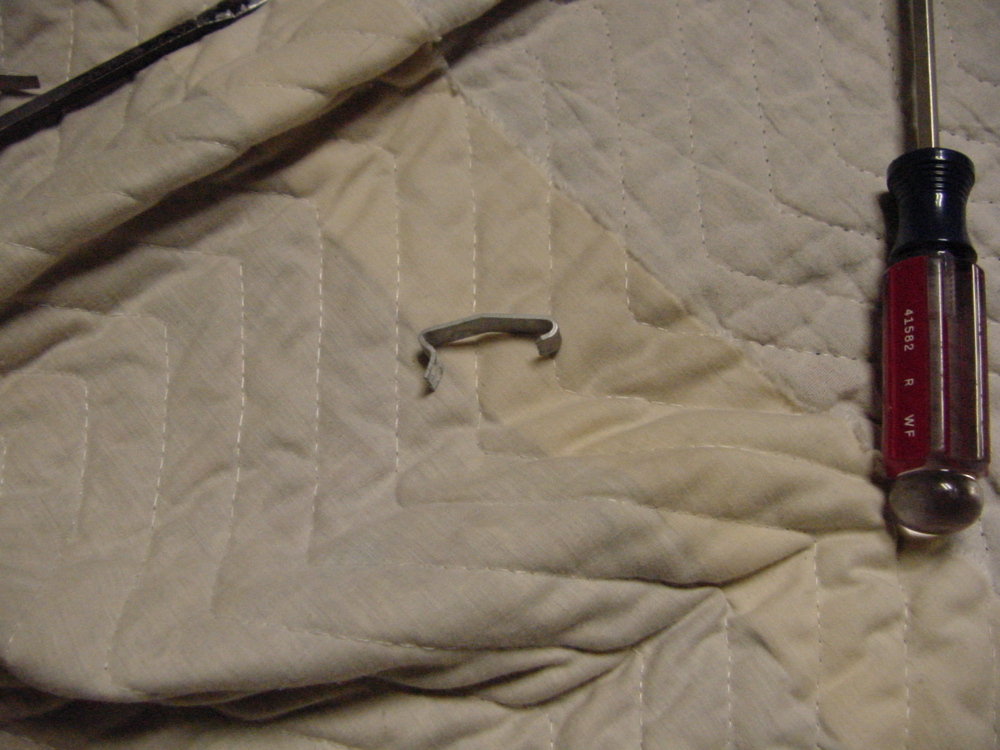
Post# 472503 , Reply# 24   10/30/2010 at 23:28 (4,920 days old) by supremewhirlpol ()        

The front is also held to the frame of the machine by 4 bolts->remove those, carefully remove the outer tub front and boot.

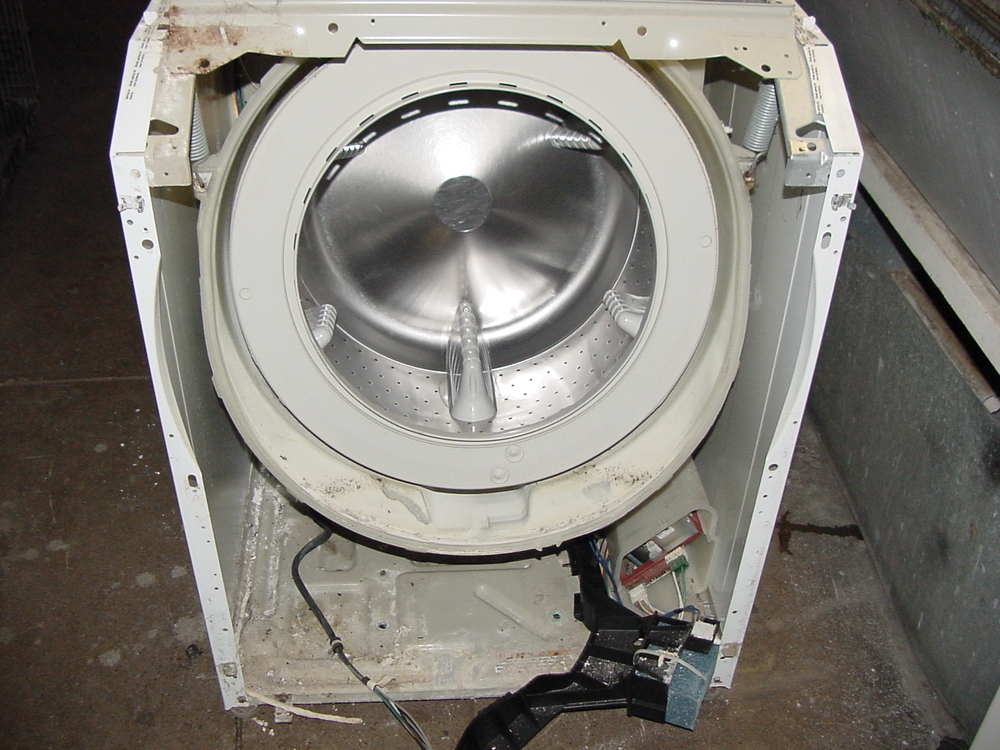
Post# 472504 , Reply# 25   10/30/2010 at 23:34 (4,920 days old) by supremewhirlpol ()        
Remove the cylinder!

To remove the cylinder, locate the three big baffles, each baffle if held to the cylinder by 2 torx screws. Remove the screws, and baffles.

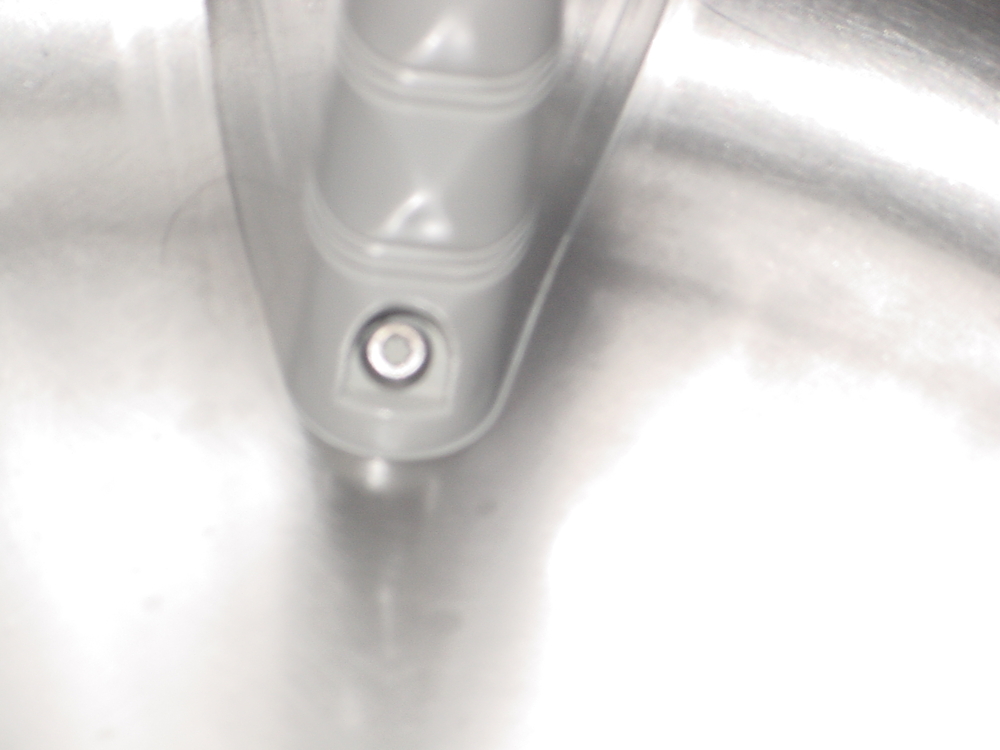
Post# 472505 , Reply# 26   10/30/2010 at 23:36 (4,920 days old) by supremewhirlpol ()        

Removing the baffles exposes three bolts that hold the cylinder to the spider assembly.

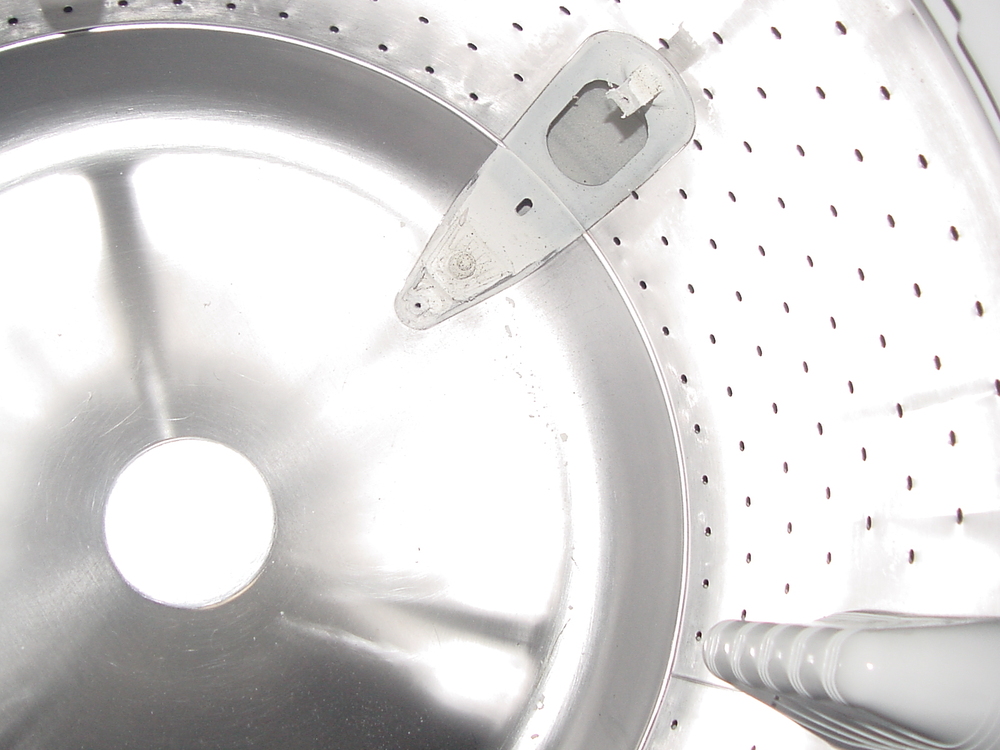
Post# 472508 , Reply# 27   10/30/2010 at 23:41 (4,920 days old) by supremewhirlpol ()        

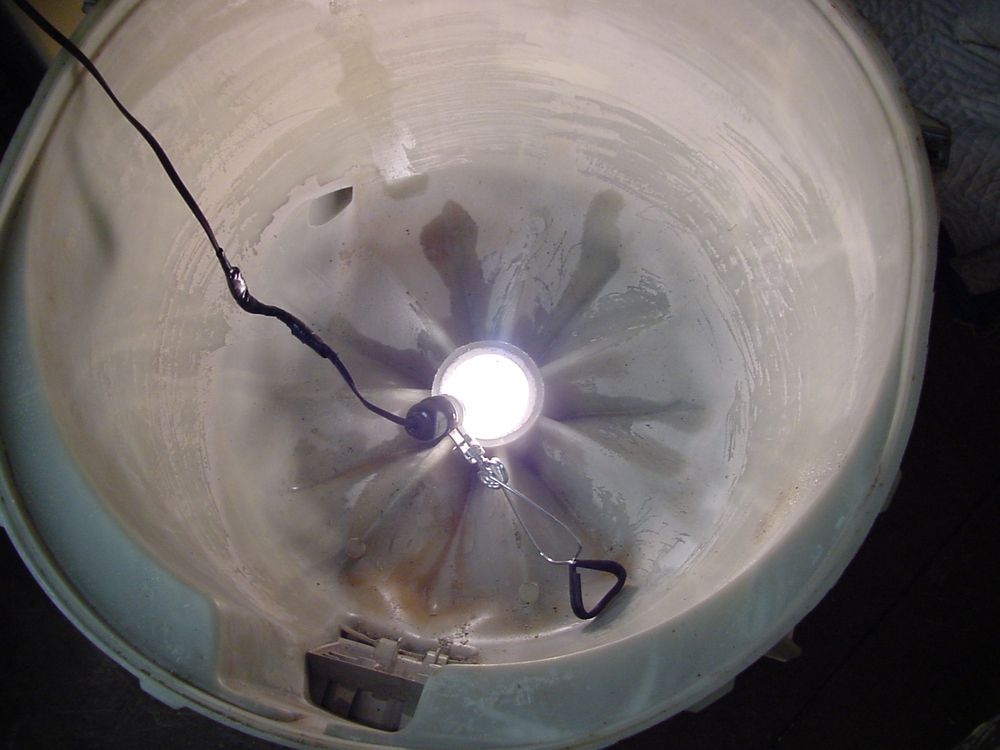
Remove the cylinder, remove the springs that hold the outer tub in place. CAREFULLY remove the outer tub-> lift up and forward. Remember that you have a motor that may or may not be open-framed, attached to the outer tub.

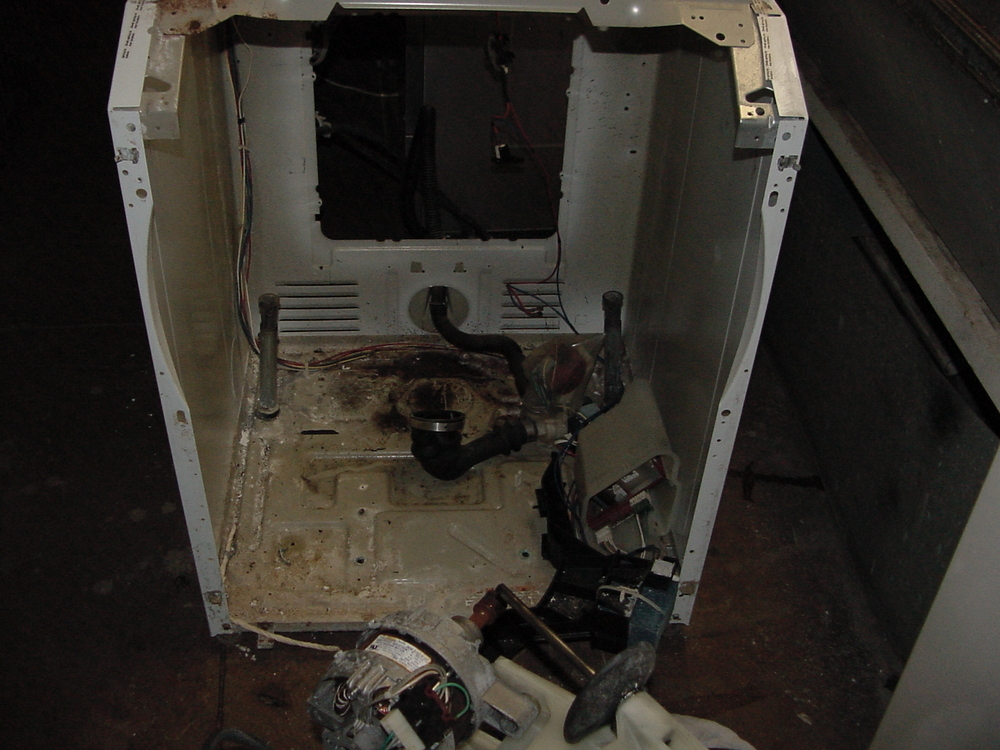
Post# 472649 , Reply# 28   10/31/2010 at 19:24 (4,919 days old) by supremewhirlpol ()        

Remove the belt. It has multiple grooves, carefully slide the belt off the shaft of the motor. The motor is mounted by one bolt and a pivot arm. Remove the bolt, use a hammer to tap the top of the pivot arm->motor will slide out, be ready to catch it.

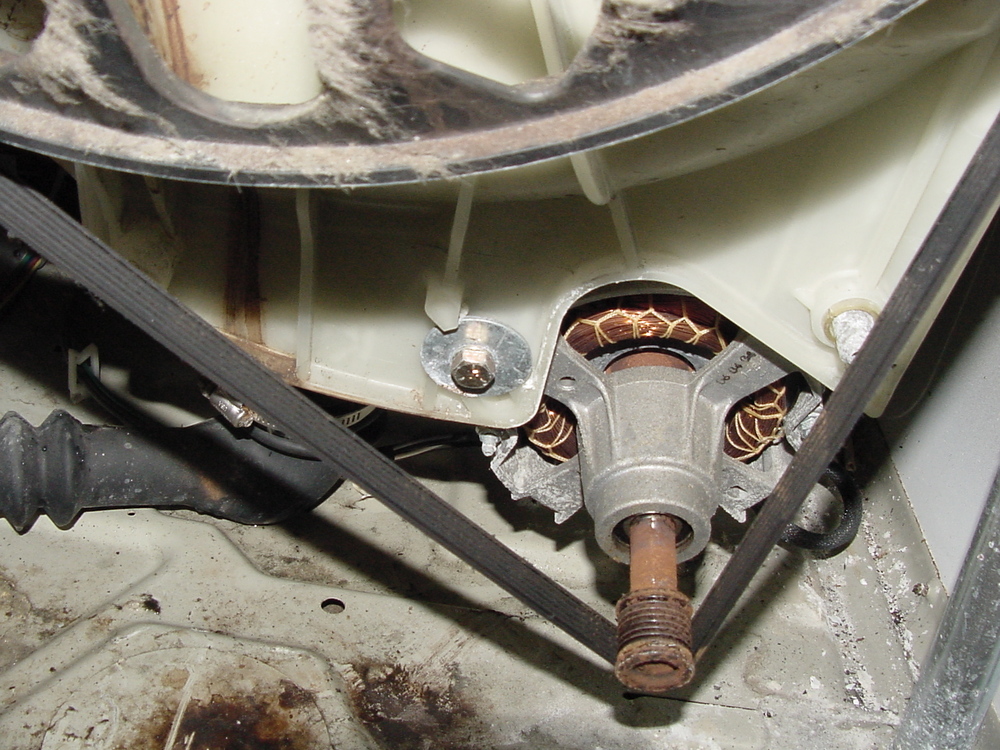
Post# 472666 , Reply# 29   10/31/2010 at 20:23 (4,919 days old) by supremewhirlpol ()        

One bolt holds the pulley into place->usually this bolt is on VERY tight.

Post# 472670 , Reply# 30   10/31/2010 at 20:30 (4,919 days old) by supremewhirlpol ()        

Remove the spider assembly->Screw the bolt back on to the shaft, use a hammer to release the spider assembly from the bearings. Hit ONLY the bolt, otherwise if you divert from the bolt, you WILL damage the shaft.

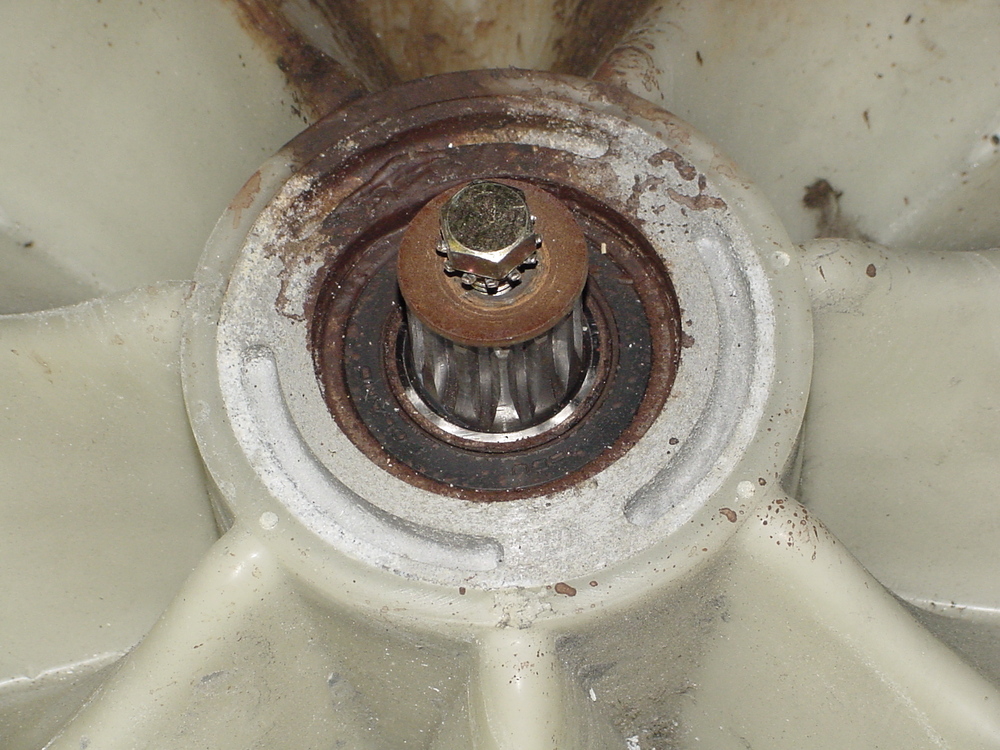
Post# 472672 , Reply# 31   10/31/2010 at 20:35 (4,919 days old) by supremewhirlpol ()        

Before hitting the shaft, place the outer tub on a blanket to protect the edges of the tub from being damaged from the force applied by the hammer. Spider-> After spider is removed, set it aside, along with the three plastic spacers.

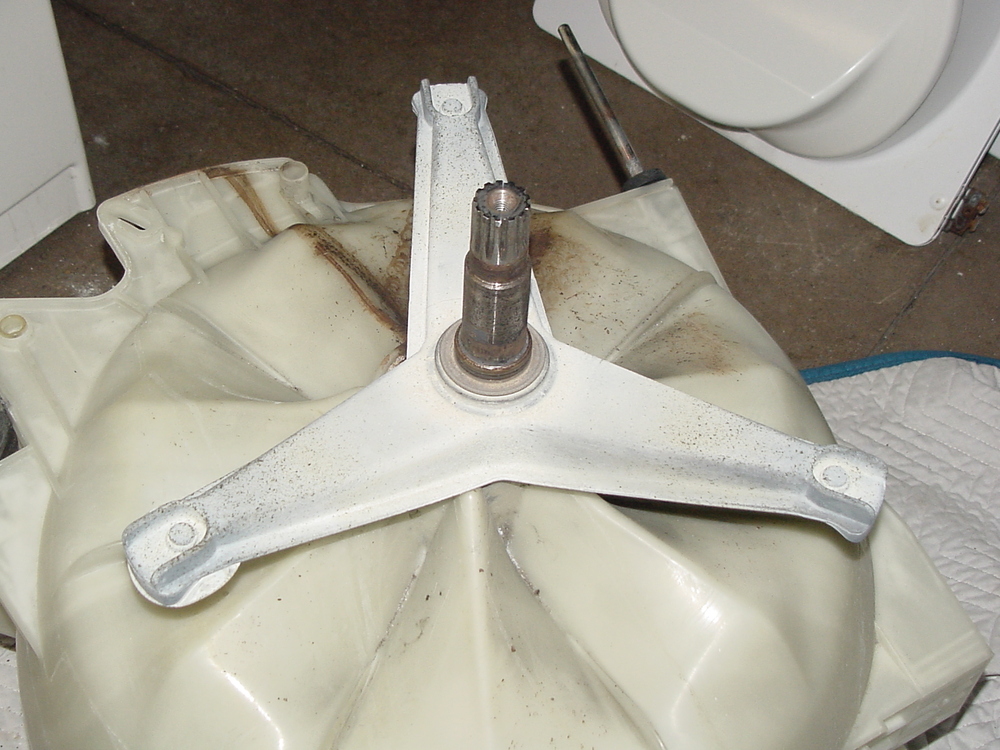
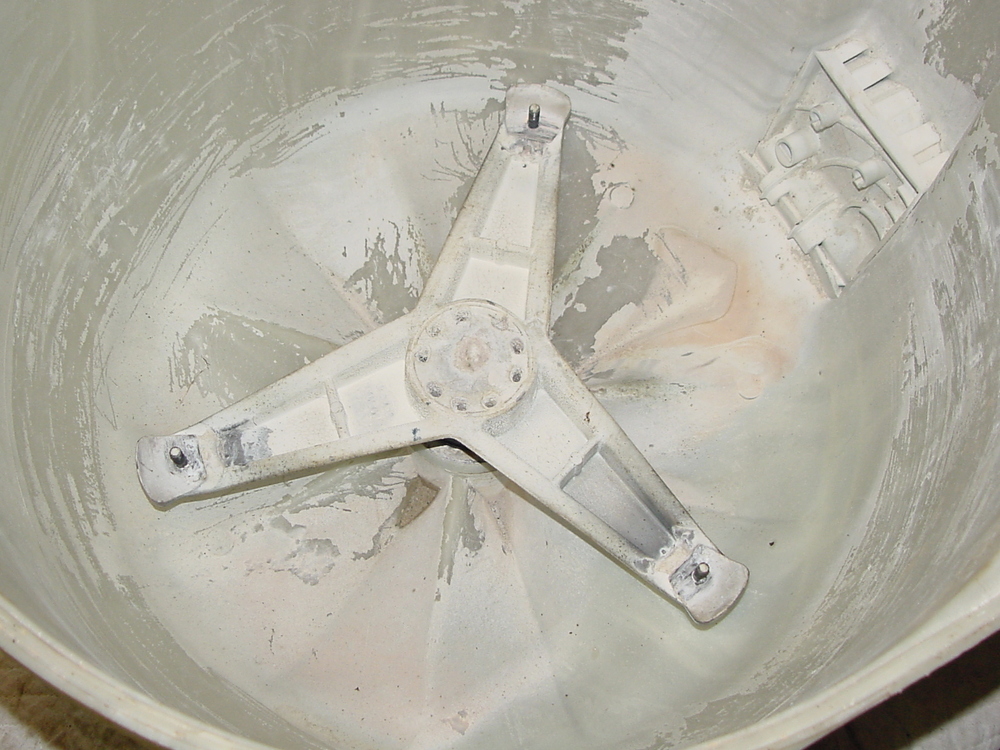
Post# 472673 , Reply# 32   10/31/2010 at 20:36 (4,919 days old) by supremewhirlpol ()        

Top view of the spider and one of the spacers.

Post# 472674 , Reply# 33   10/31/2010 at 20:44 (4,919 days old) by supremewhirlpol ()        
Removing the bearings

The bearing in the rear is the smallest of the 2 bearings. If you don't have a hydraulic press, the easiest way to remove the bearings is to use a pipe and a short sledge hammer. Get a pipe in which the outer diameter meets up with the outer diameter of the inner race of the bearing. Insert the pipe through the front of the outer tub, through the coller, which between the bearings. In my case the rear bearing was the easiest to remove->just 5 whacks.

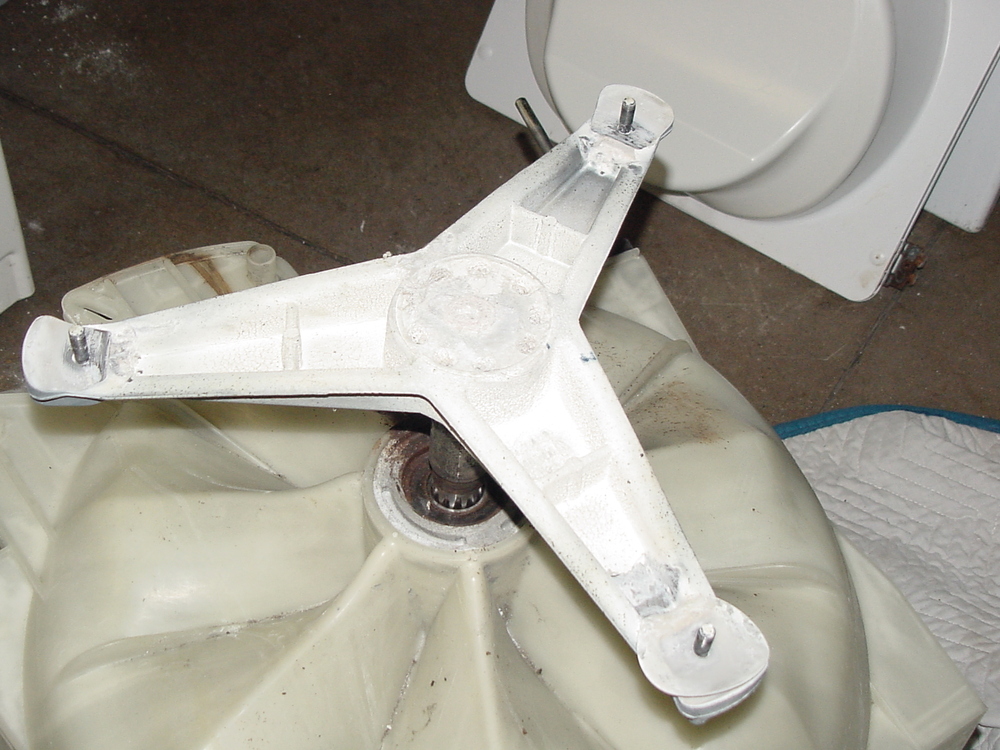
Post# 472676 , Reply# 34   10/31/2010 at 20:49 (4,919 days old) by supremewhirlpol ()        

The front bearing requires a bigger diameter pipe. In my case this bearing was the hardest to remove. It took ~30 minutes of solid pound to get it out. Here is the pipe afterward

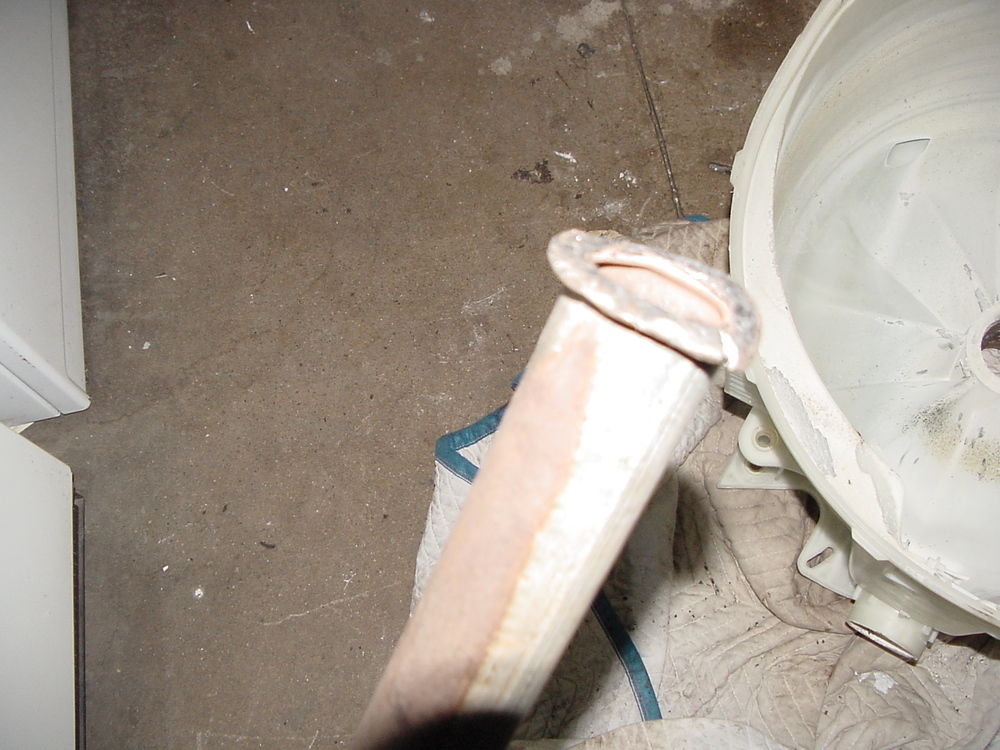
Post# 472677 , Reply# 35   10/31/2010 at 20:50 (4,919 days old) by supremewhirlpol ()        

rear bearing and collar

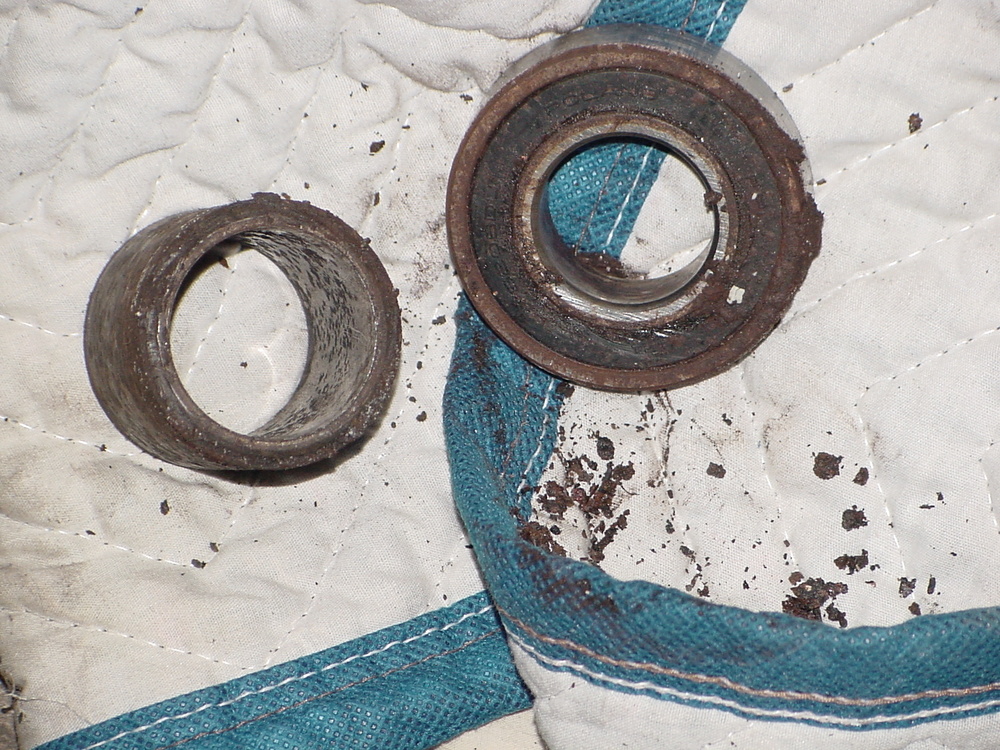
Post# 472678 , Reply# 36   10/31/2010 at 20:55 (4,919 days old) by supremewhirlpol ()        

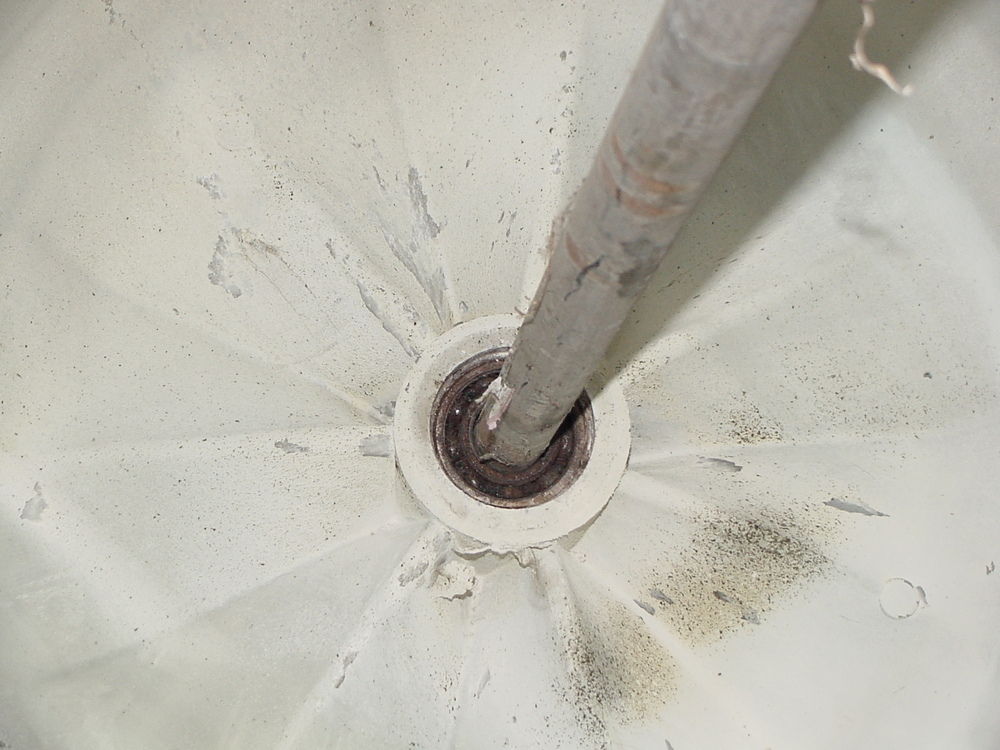
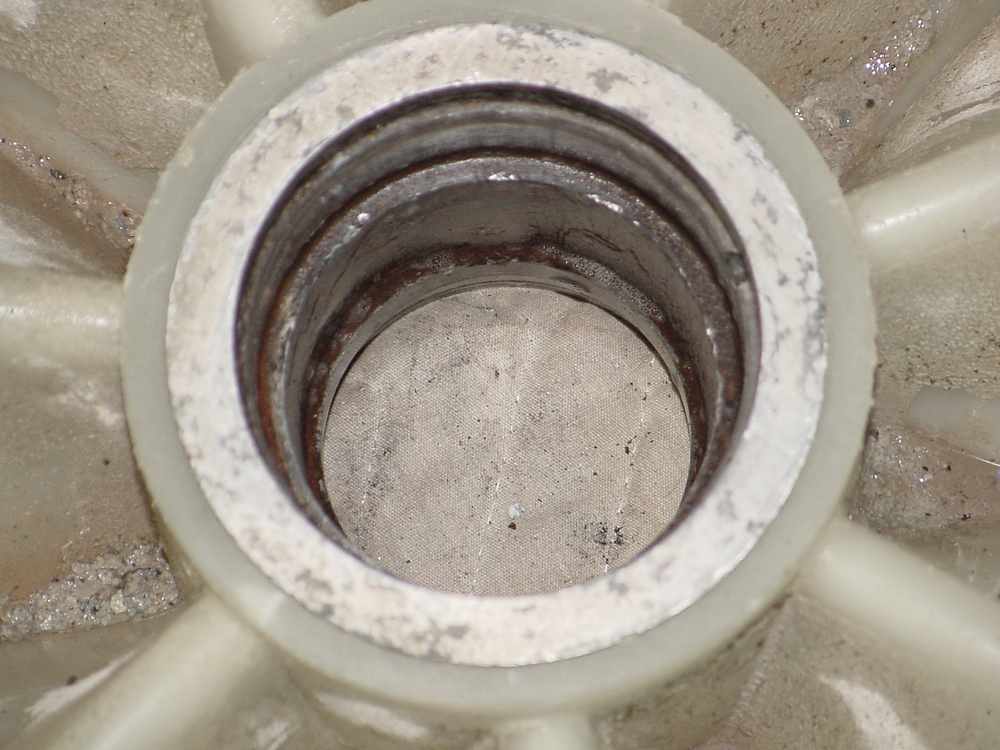
As you can see it is impossible to confuse which bearing goes where, or how far they have to go in. Also there is a weep hole for water run off

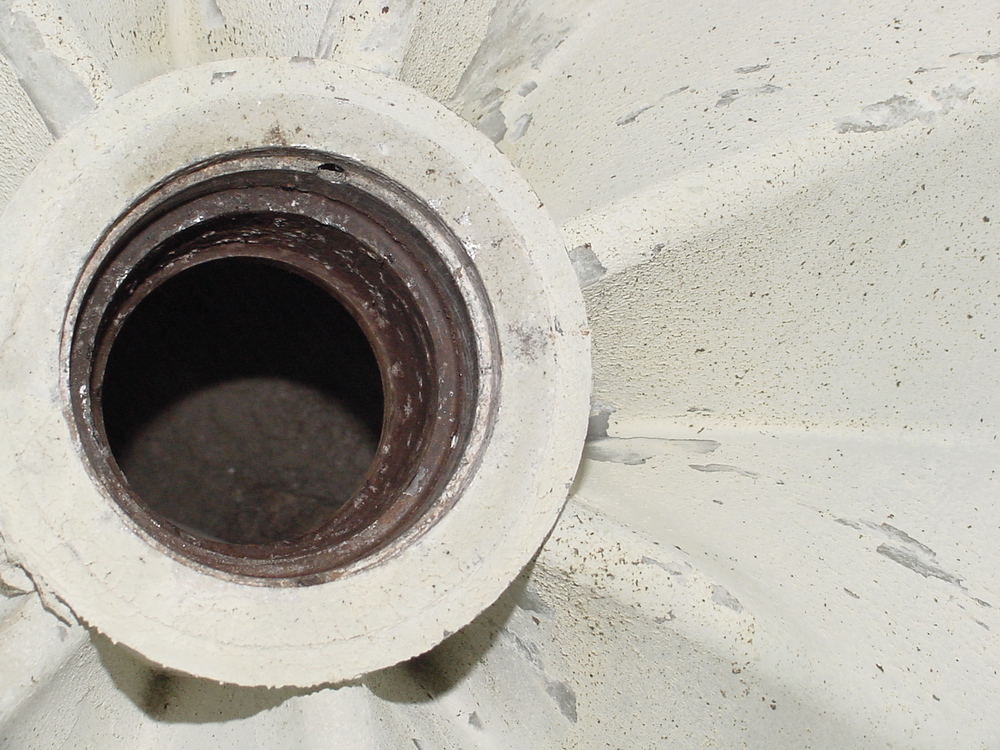
Post# 472679 , Reply# 37   10/31/2010 at 20:57 (4,919 days old) by supremewhirlpol ()        

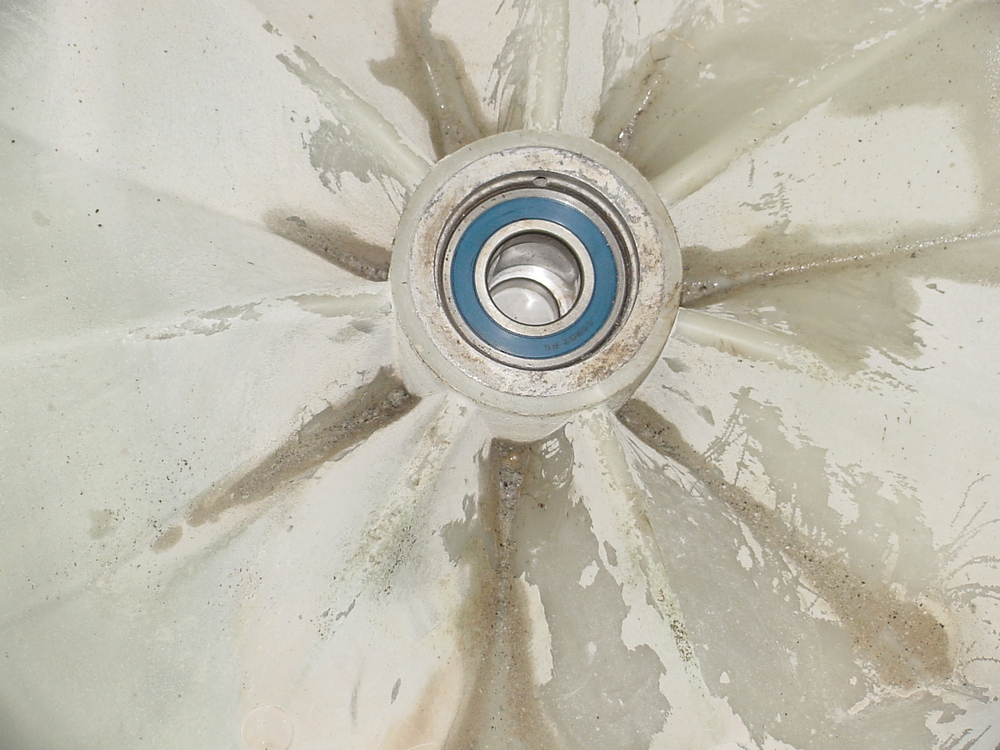
Where rear bearing goes.

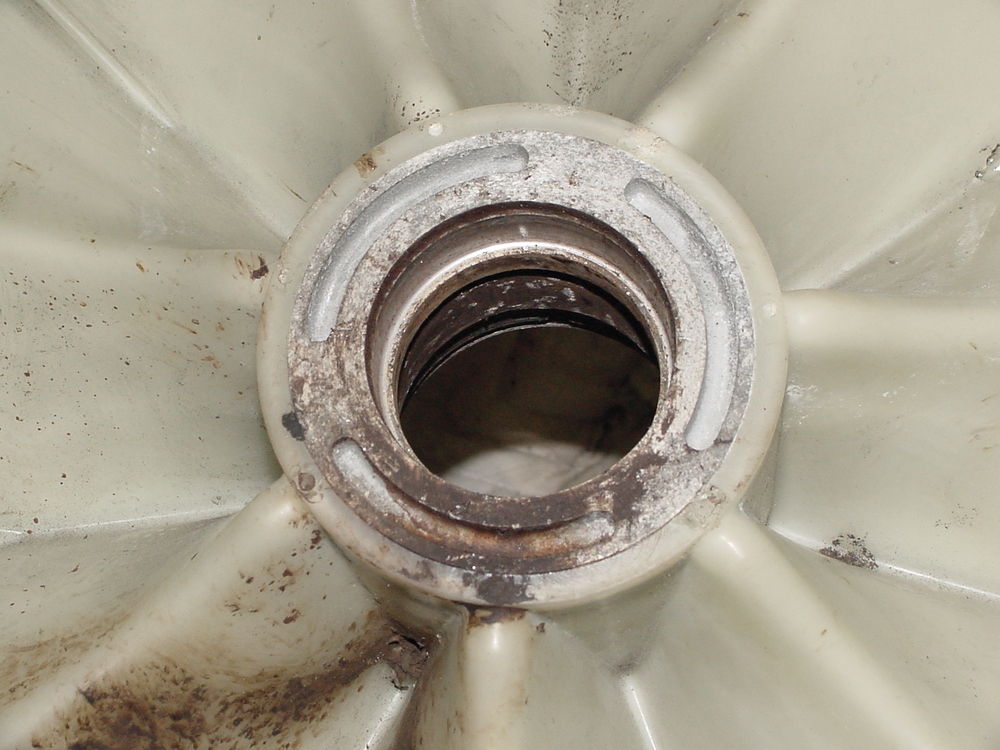
Post# 472680 , Reply# 38   10/31/2010 at 20:59 (4,919 days old) by supremewhirlpol ()        

Both bearings-> they do differ in size.

Post# 472684 , Reply# 39   10/31/2010 at 21:08 (4,919 days old) by supremewhirlpol ()        
Cleaning

Clean The area where the bearings go, as well as the area where the seal will be. In my case The original owners of this machine used way too much soap->so much that it formed a tough layer on the spider, outer side of the cylinder, and inner side of the outer tub. This had to be removed with a chisel. Cleaning took 2-3 hours.

Post# 473073 , Reply# 40   11/2/2010 at 19:36 (4,917 days old) by supremewhirlpol ()        

Here is the outer tub with the bearing area cleaned. Also clean the top, as the seal will sit here. You can use a wire brush to clean the metal a little, but be careful not to strip too much metal away, otherwise you will change the bore size, and the bearings will not seat as well.

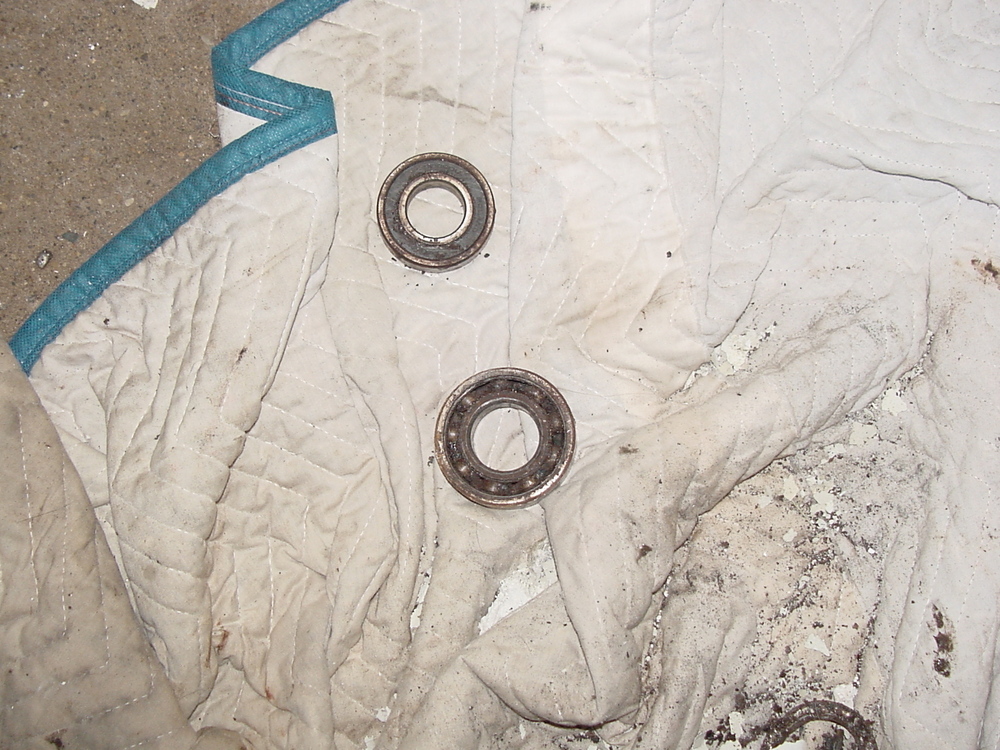
Post# 473074 , Reply# 41   11/2/2010 at 19:38 (4,917 days old) by supremewhirlpol ()        

Here is a picture of the new vs old bearings.

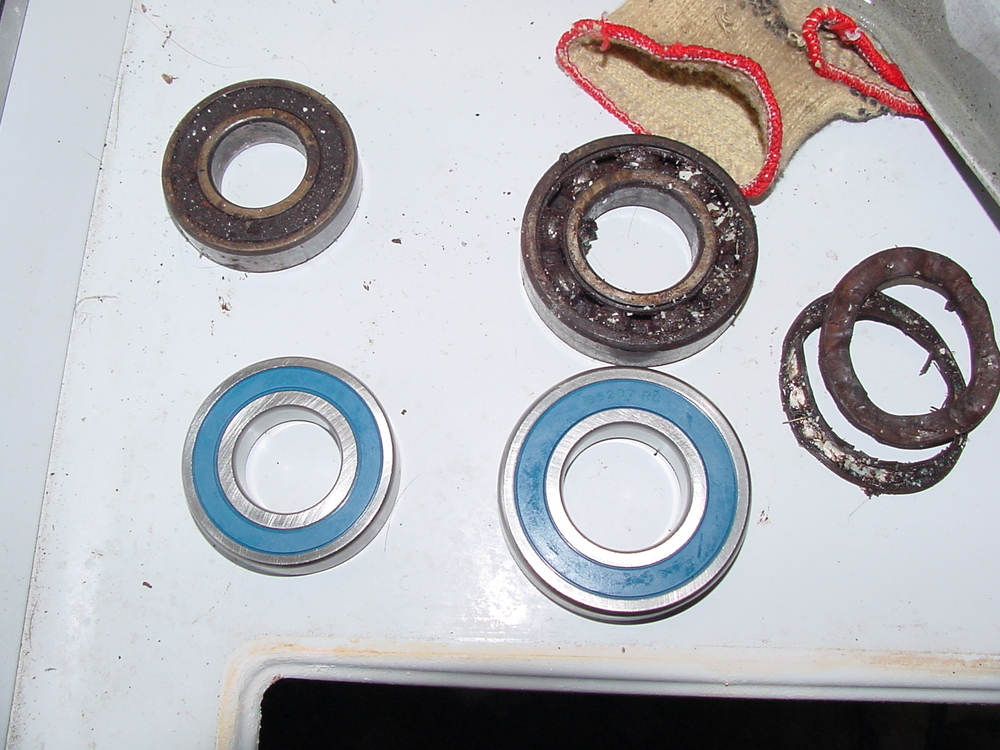
Post# 473077 , Reply# 42   11/2/2010 at 19:42 (4,917 days old) by supremewhirlpol ()        

Here is the collar, I cleaned it up a little, BUT again I don't want to change the bore sizes.

Post# 473079 , Reply# 43   11/2/2010 at 19:47 (4,917 days old) by supremewhirlpol ()        

It would be best if I had a bearing oven to heat the bearings up so that the metal expands when I insert the bearings. Since I don't have such a thing, I used 100W light bulb to heat up the area where the bearings will be installed. Place the bulb in the hole where the bearings go, let the area heat up for ~30-45 minutes.

Post# 473082 , Reply# 44   11/2/2010 at 20:00 (4,917 days old) by supremewhirlpol ()        

After the area is heated, insert bearing 6207 into the front of the outer tub. Make sure that it is inserted evenly and is not crooked. Use the old bearing to help put the new bearing into place. Align the old bearing on top of the new one and use the hammer to pound evenly around the old bearing. Keep doing this until the top of the new bearing is just past the flange that fits snugly around the bearing. Flip the outer tub over insert the collar first, then insert the 6206 bearing evenly. Use the old bearing to hammer it into place. This bearing can be inserted as far as it slightly going past the top of the metal of the area that it is inserted.

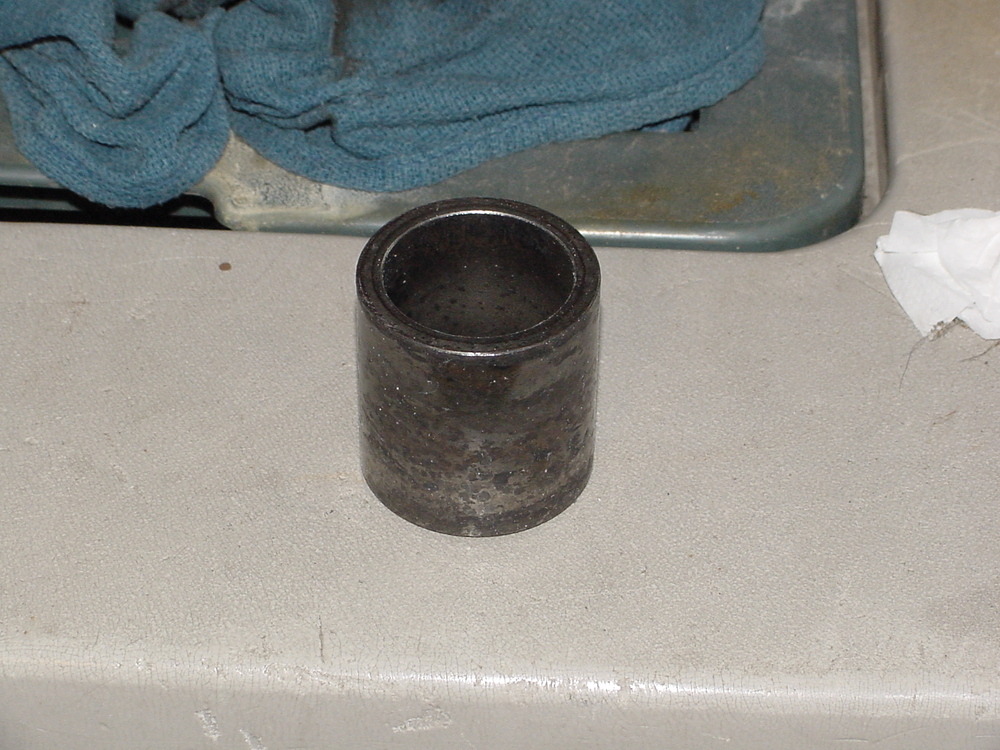
Post# 473083 , Reply# 45   11/2/2010 at 20:02 (4,917 days old) by supremewhirlpol ()        

New bearing inserted into rear of outer tub.

Post# 473085 , Reply# 46   11/2/2010 at 20:07 (4,917 days old) by supremewhirlpol ()        

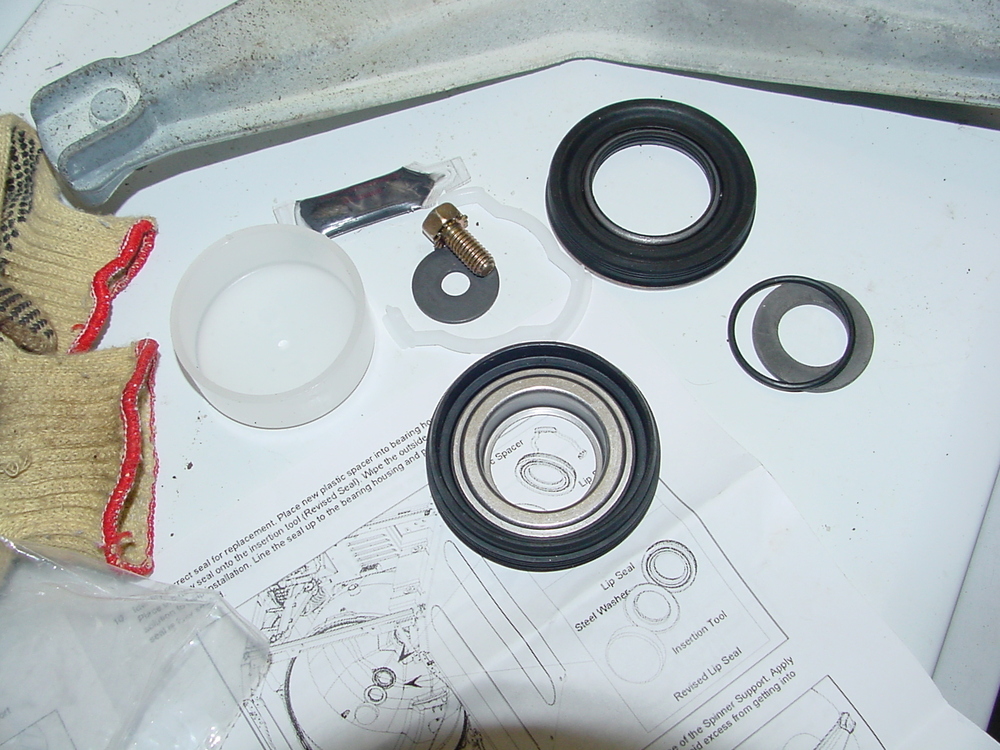
You want the 12002022 Seal kit from FSP. This kit has seals for both the new and old tub styles. The kit also has instructions.

Post# 473086 , Reply# 47   11/2/2010 at 20:24 (4,917 days old) by supremewhirlpol ()        

Look at the old seal and determine which new seal is appropriate. Remove the metal ring around the spider assembly. If you have the old seal, insert the bearing spacer, moisten the seal with either soap water or a tad bit of petroleum jelly. Use the provided tool to insert the seal. Inserting the seal will require a bit of force. Insert the new metal ring into the seal. Clean the shaft of the spider assembly, be careful not to strip too much metal off the shaft. Insert the new rubber ring seal into the shaft. Use the provided grease to put a light layer on the shaft. Insert the spider assembly firmly. Flip the outer tub over, put the pulley on with the old bolt and washer. Start tightening the bolt down. The force from the tightening will pull the shaft into place and into the correct position for the seal. Unscrew the bolt and use the bolt that is provided with the kit. Tighten the bolt. Give the pulley a spin, make sure it spins freely. Parts from the kit.

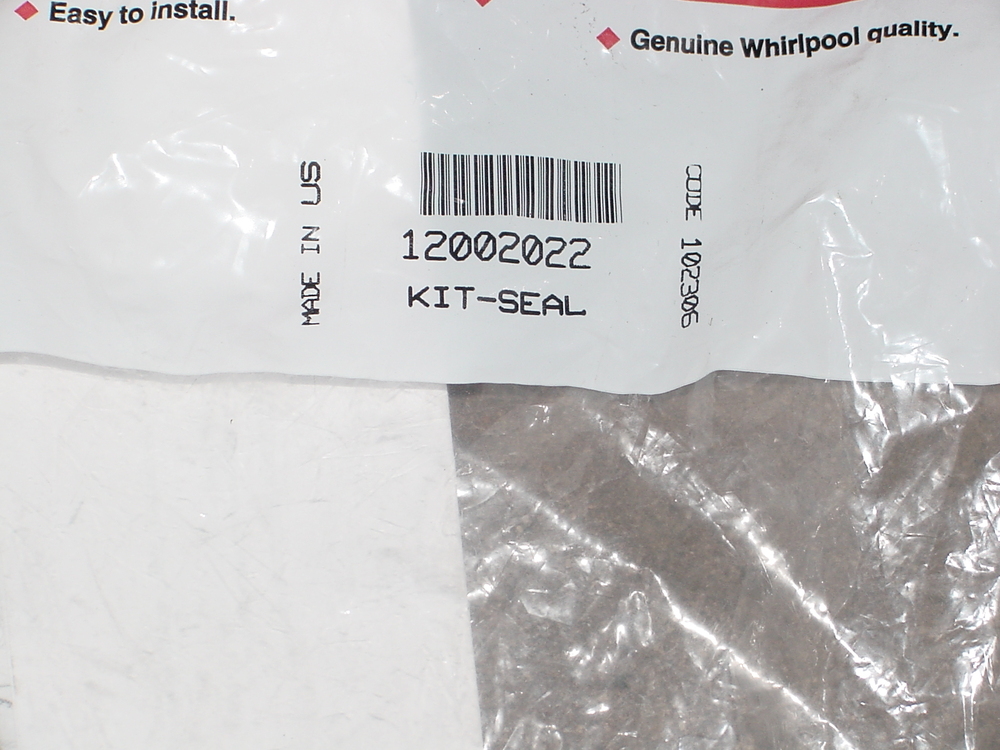
Post# 473087 , Reply# 48   11/2/2010 at 20:26 (4,917 days old) by supremewhirlpol ()        

bearing spacer installed

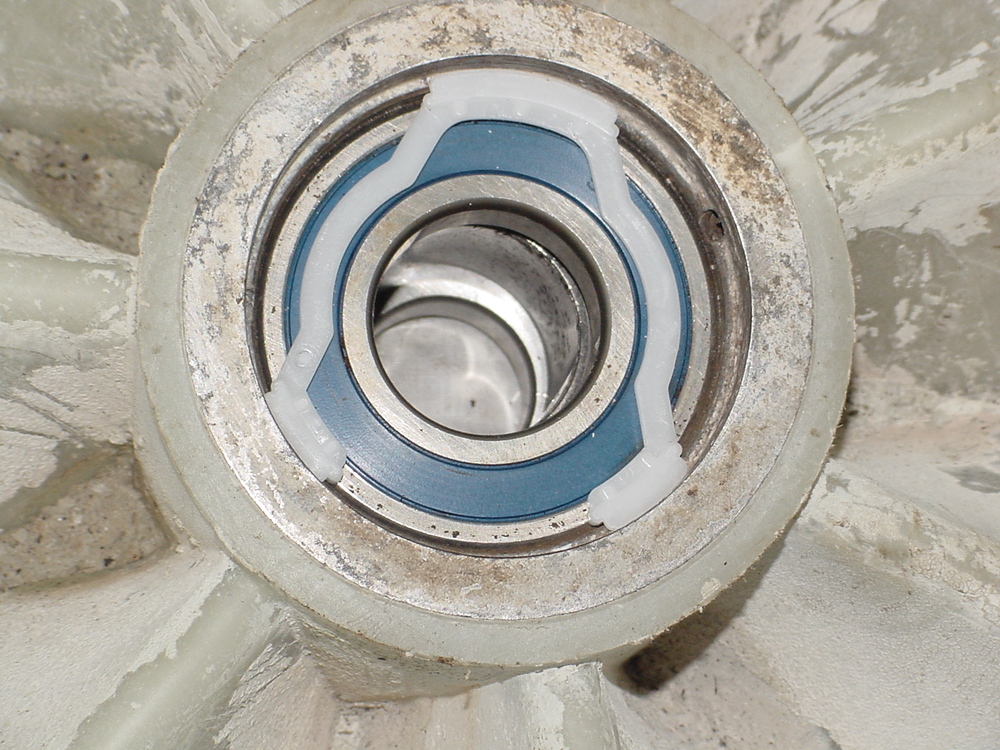
Post# 473088 , Reply# 49   11/2/2010 at 20:27 (4,917 days old) by supremewhirlpol ()        

Old metal spacer coming off shaft.

Post# 473089 , Reply# 50   11/2/2010 at 20:29 (4,917 days old) by supremewhirlpol ()        

New seal being installed with provided tool.

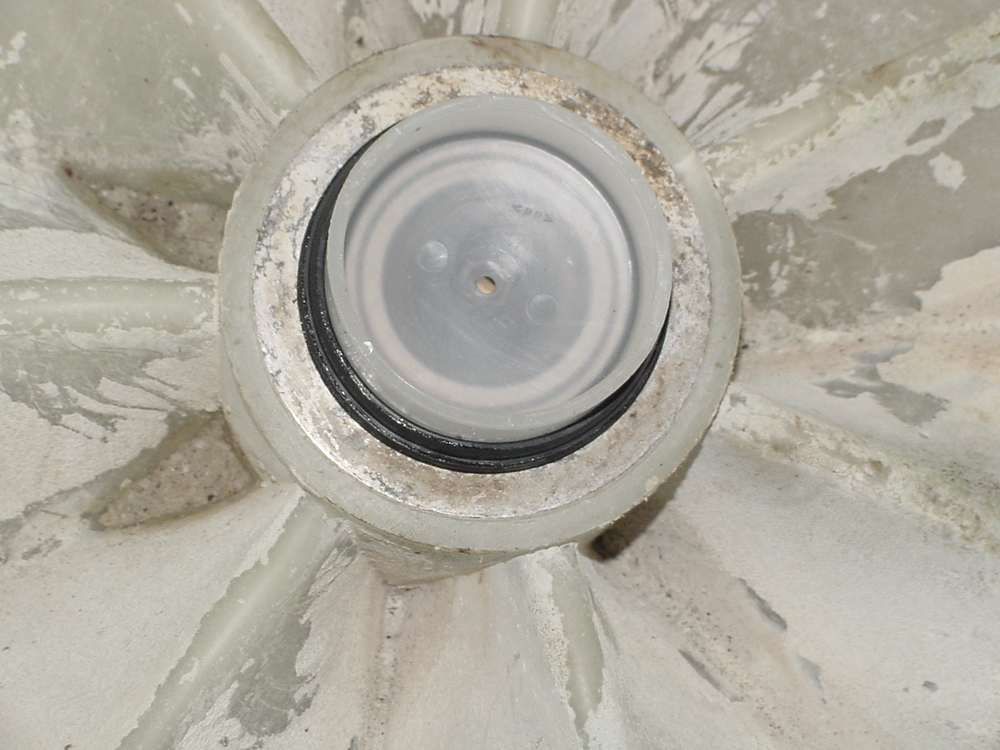
Post# 473090 , Reply# 51   11/2/2010 at 20:30 (4,917 days old) by supremewhirlpol ()        

Seal installed

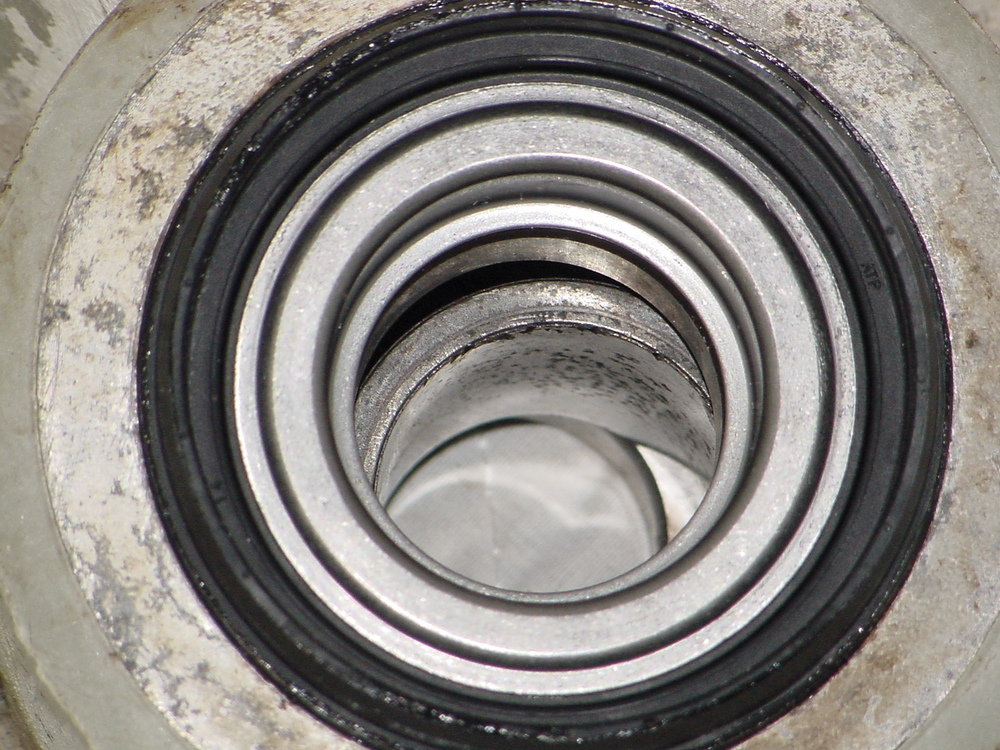
Post# 473091 , Reply# 52   11/2/2010 at 20:32 (4,917 days old) by supremewhirlpol ()        

Spider assembly shaft cleaned with new plastic ring seal.

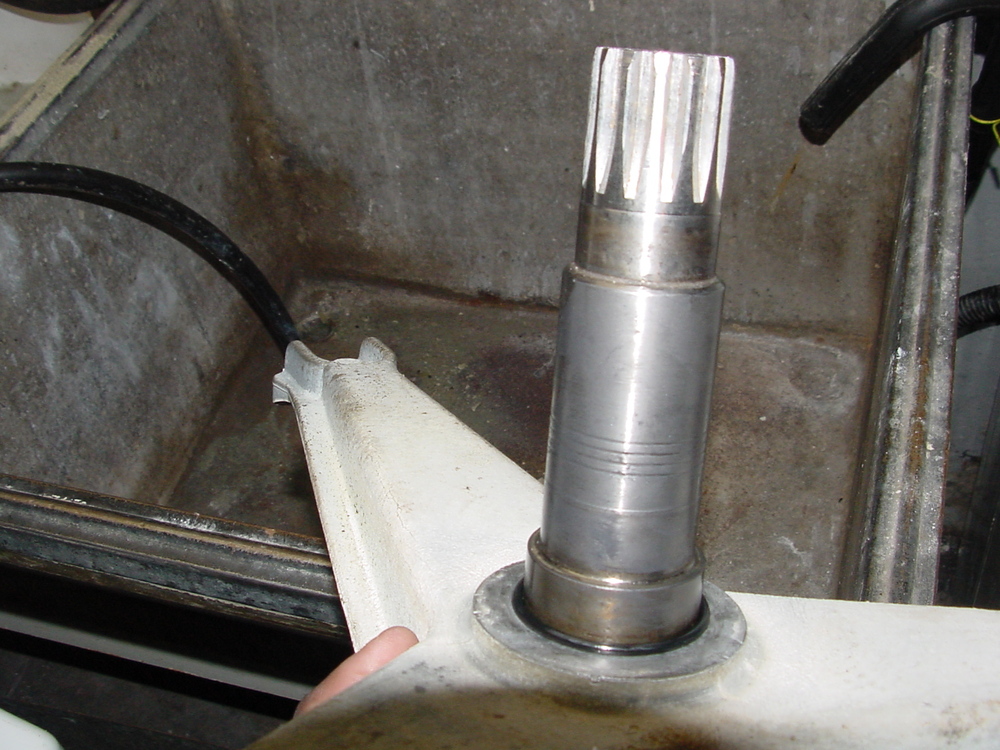
Post# 473092 , Reply# 53   11/2/2010 at 20:34 (4,917 days old) by supremewhirlpol ()        

Shaft coming out the rear of the outer tub(shaft just inserted)

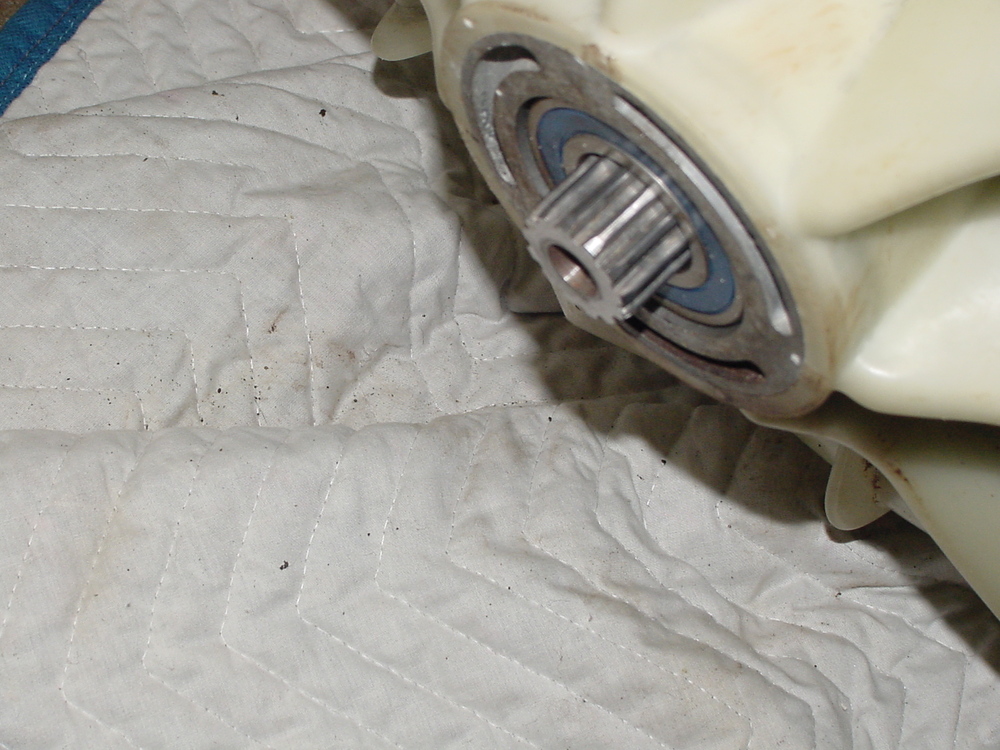
Post# 473093 , Reply# 54   11/2/2010 at 20:37 (4,917 days old) by supremewhirlpol ()        

Starting to put things back together-> it's best to install the motor while the tub is still out of the machine.

Post# 473095 , Reply# 55   11/2/2010 at 20:46 (4,917 days old) by supremewhirlpol ()        

Spider installed-> Remember those plastic spacers, you'll need them!! Getting that soap crud off the spider is impossible-> best to leave it be. Put the spacers back on the 3 arms-> they keep the SS cylinder from touching the cast Aluminum->preventing corrosion VERY IMPORTANT!!! Assemble the machine with CARE. Test the machine for leaks. The bearing area has weep holes, so if there is a problem with the repair, water leak from the Weep hole first. If this happens, the machine needs to come a part again, and you need to investigate what happened.

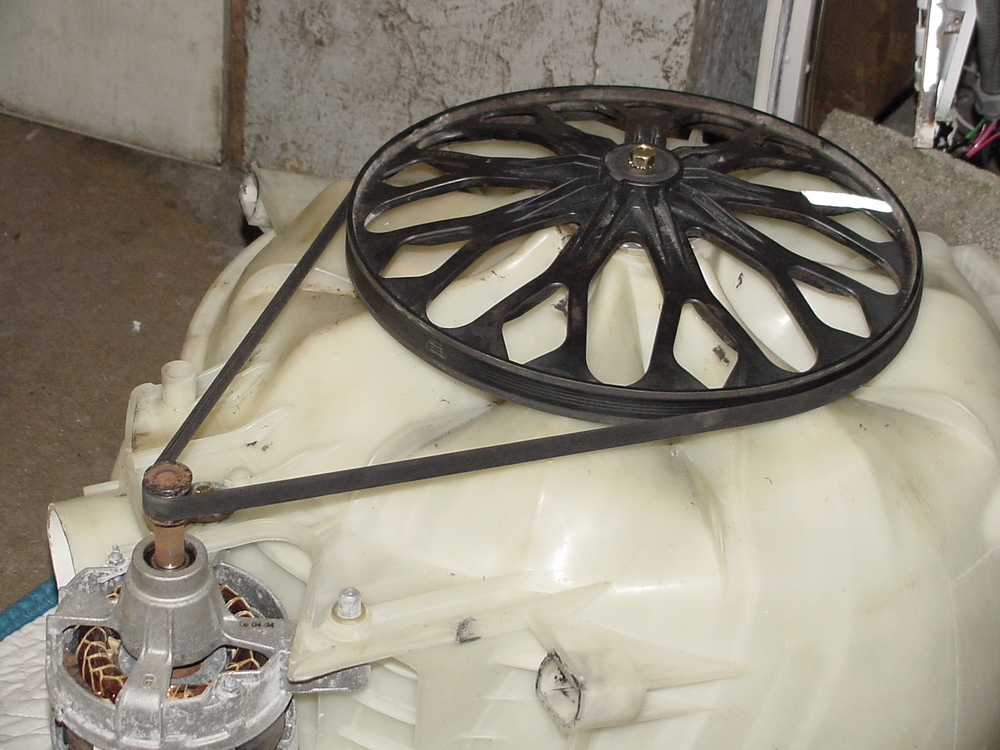
Post# 473096 , Reply# 56   11/2/2010 at 20:47 (4,917 days old) by supremewhirlpol ()        

plastic spacers

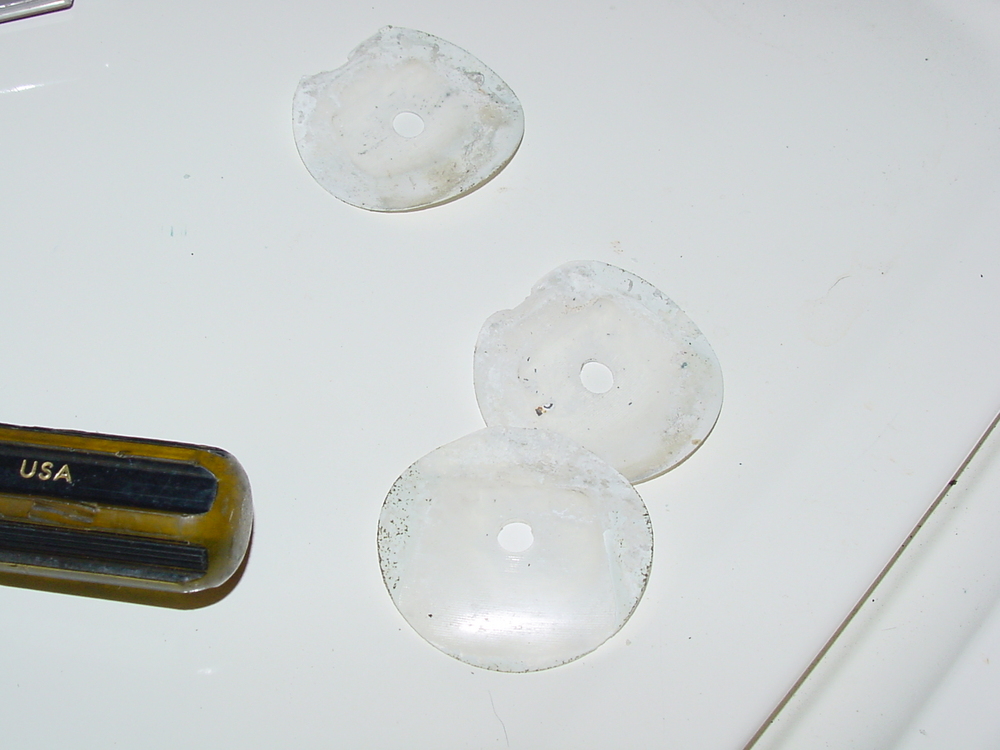
Post# 473097 , Reply# 57   11/2/2010 at 20:50 (4,917 days old) by supremewhirlpol ()        

Testing shows that the boot needs to be replaced.

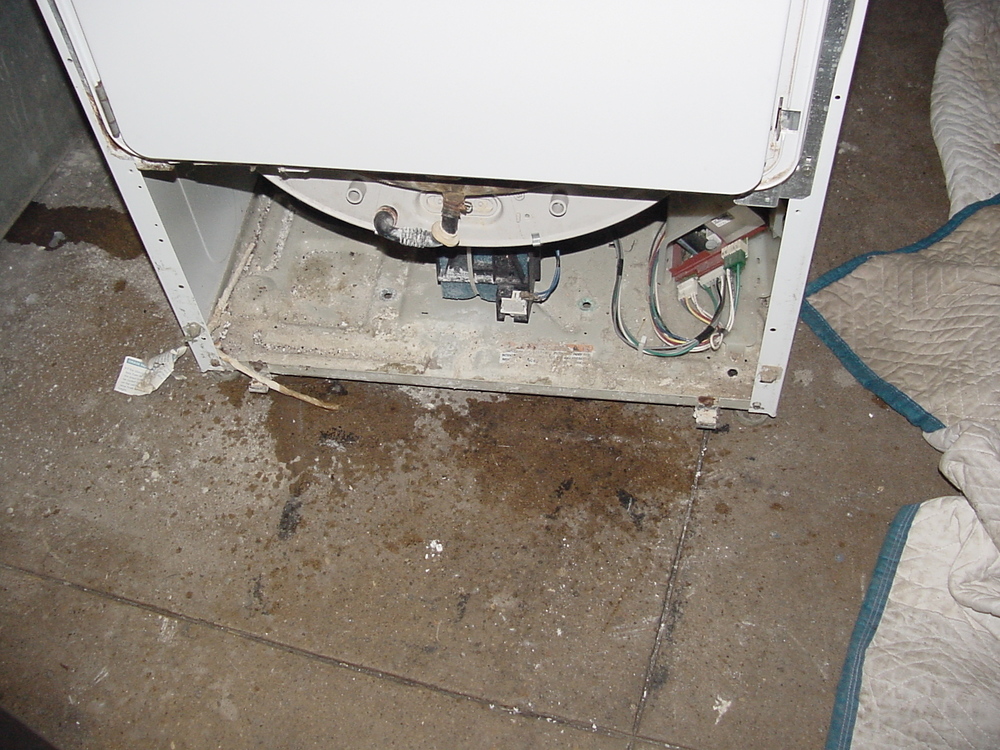
Post# 473098 , Reply# 58   11/2/2010 at 20:52 (4,917 days old) by supremewhirlpol ()        

Test wash with items that got very dirty with repair

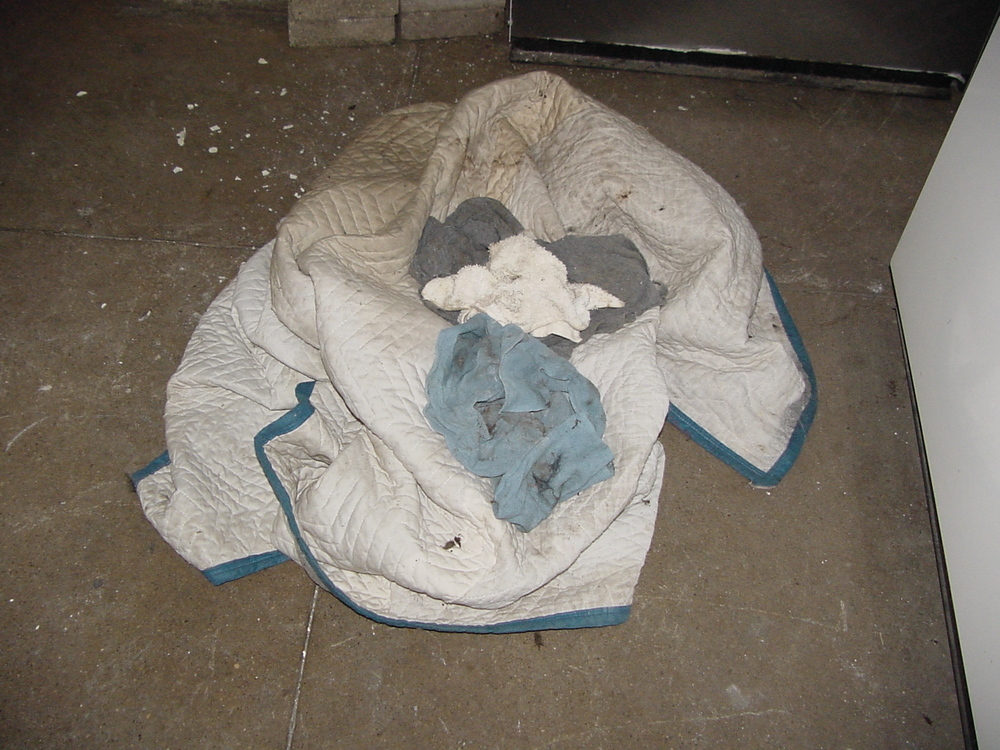
Post# 473099 , Reply# 59   11/2/2010 at 20:55 (4,917 days old) by supremewhirlpol ()        

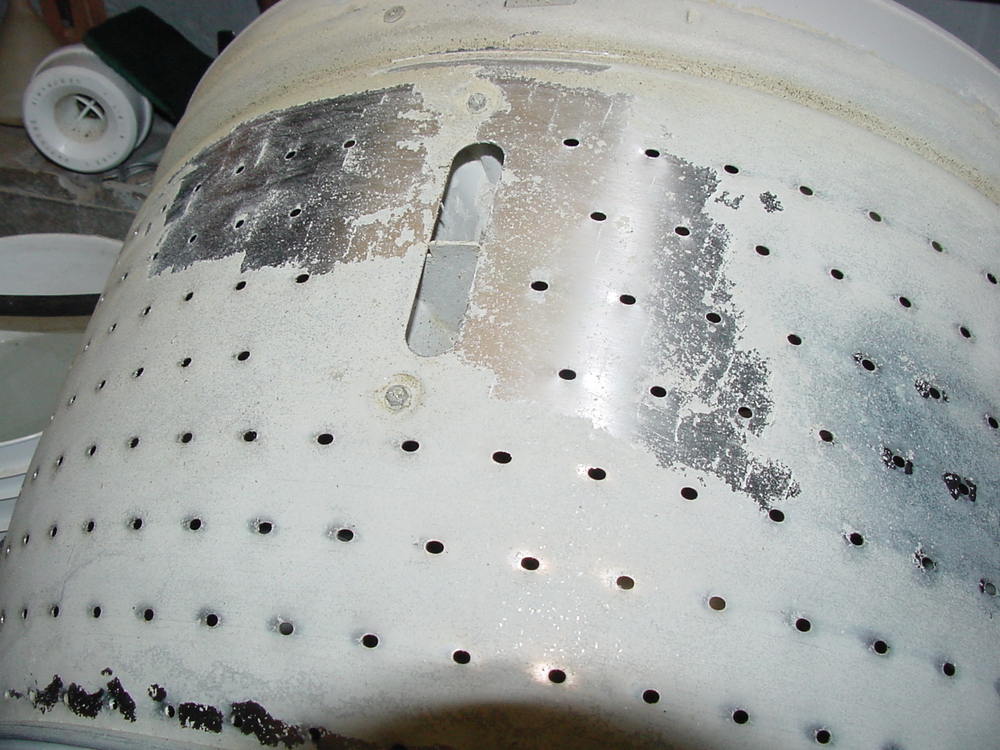
Cycle complete-> no leaks from bearing area. Machine is very quiet. The only thing I hate about this machine is no window. There are still repairs that need to be made-> boot, paint, refinish area around dispenser.

Post# 473101 , Reply# 60   11/2/2010 at 20:57 (4,917 days old) by supremewhirlpol ()        

Commercial Neptune IN-> Calypso OUT!!!

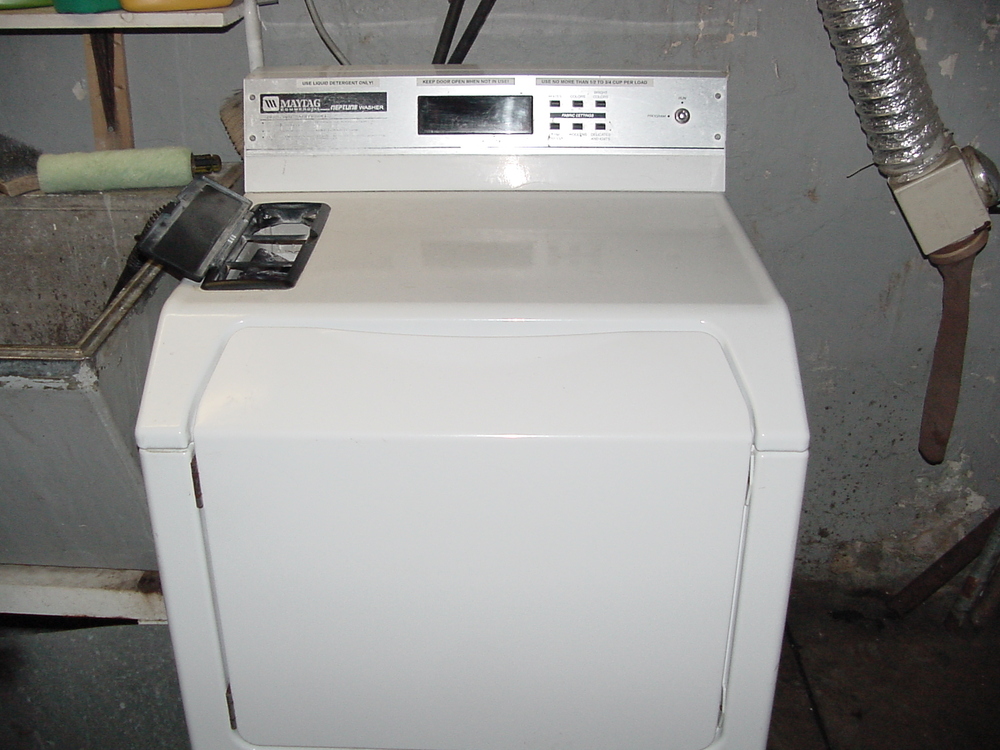
Post# 473115 , Reply# 61   11/2/2010 at 22:57 (4,917 days old) by cfz2882 (Belle Fourche,SD)        

thanks for all that!-i now know what i am in for if the
bearings go in my neptune...
I did do a bearing job on my '98 frigilux,was actually pretty
easy job on the frigilux.


Post# 473227 , Reply# 62   11/3/2010 at 13:39 (4,916 days old) by Volvoguy87 (Cincinnati, OH)        
Thanks.

volvoguy87's profile picture
Great record of an essential repair (assuming we want to keep the Neptunes running).

Dave


Post# 473243 , Reply# 63   11/3/2010 at 14:46 (4,916 days old) by vivalalavatrice ()        
CLAPS CLAPS!

to you!
It's really a challange each times you have to replace bearings, but I see a very great job!

BYE
Diomede


Post# 473283 , Reply# 64   11/3/2010 at 20:00 (4,916 days old) by supremewhirlpol ()        

While there is some support for these machines else where on the internet, I have not found a very detailed walk-through->thus I took the time to provide a some-what detailed walk through. This is a some-what involved, lengthy repair. If you are not mechanically inclined, you may want to move on-> have someone do the repair for you. PROCEED WITH CAUTION!!

Post# 473286 , Reply# 65   11/3/2010 at 20:09 (4,916 days old) by A440 ()        

Awesome Job!
You make it look so easy!


Post# 473581 , Reply# 66   11/5/2010 at 19:50 (4,914 days old) by Jetcone (Schenectady-Home of Calrods,Monitor Tops,Toroid Transformers)        
Great walk through Supreme

jetcone's profile picture
Its always easier when you get to see the whole procedure first. Thanks for the pics!

Jet


Post# 473693 , Reply# 67   11/6/2010 at 14:43 (4,913 days old) by yogitunes (New Jersey)        

yogitunes's profile picture
Excellent job!

I have 2 neptunes, changed bearrings on both, first time, really took me a while, wasn't sure what I was geting into, so it took longer, second one went faster............

you really stripped off a lot more from your machine than I did
I didn't take off the counter weights, or remove the inner tub from the spider, but yeah, getting those bearrings out was murder.....it went back together faster than I took it apart...
I had to place the outter tub over 2 chairs, slide the inner tub with spider into place, and step inside with my full weight just to get it to seat onto the seal, even with a little vaseline, it fits tight.....

so are you ready to do this again?


Post# 473740 , Reply# 68   11/6/2010 at 21:04 (4,913 days old) by supremewhirlpol ()        

Martin,
I didn't want to damage anything, so I remove as much as I can from the outer tub, for removing it from the machine, and the bearing replacement procedure. I removed the cylinder from the spider to reduce the weight for re-installation of the spider into the outer tub. On some machines, especially Ipso WE series, you can actually damage the seal when reinserting the cylinder assembly into the outer tub, if that happens, be looking to tear the machine down and do the procedure all over again A LOT SOONER. In this case Martin since it's just rubber and not some porcelain/ceramic collar that sits on top of rubber + counter rings + more rubber, My guess either way works->just me being more careful. Putting the machine back together is quicker.


It's not perfect, BUT it's documented so that should some one stumble upon this site, with a roaring Neptune, they may be able to fix it. If you let a Neptune roar for too long, you'll have a lot more damage, such as warped shaft, or damaged outer tub or outer tub cover.


Post# 477543 , Reply# 69   11/25/2010 at 20:38 (4,894 days old) by fordtech ()        

Great job and thanks very much for taking the time to walk us through it. I plan to run my Neptunes 15 more years with lots of parts procured from Ebay in storage.


Post# 477586 , Reply# 70   11/26/2010 at 01:18 (4,894 days old) by qsd-dan (West)        

qsd-dan's profile picture
Nice 7500's, fordtech!

Post# 477602 , Reply# 71   11/26/2010 at 05:23 (4,893 days old) by fordtech ()        

Thanks! I wouldn't trade them for anything on the market today.

Post# 477621 , Reply# 72   11/26/2010 at 06:45 (4,893 days old) by dj-gabriele ()        

I tried the commercial Neptunes here in Bologna and I must say that they wash and rinse very nicely compared to the other commercial machines that were around. If I were to come to the USA I'd be sure to get a used pair, as I've seen they're very serviceable!

Thanks a lot for sharing this great and informative repair!


Post# 477880 , Reply# 73   11/27/2010 at 14:11 (4,892 days old) by supremewhirlpol ()        

Now it tends to leak water into the inner tub while the machine is off. The water leaks in periodically. Usually this happens when the water pressure is very low from the Primus filling up. I think the commercial Neptune is a little jealous of Primus. Otherwise a very good machine->just no window->boring to watch.

Post# 478042 , Reply# 74   11/28/2010 at 10:55 (4,891 days old) by fordtech ()        

Im sorta glad my Neptune doesnt have a window. No panicking because I see suds, or complaining about water level, or thinking I know more than the manufacturer about what I should see during the wash. No sweating why this is this way or that way. All I know is the machine works great, and and the end of the cycle it the laundry is clean and spun out well. Out of balance loads leave you less terrified when you only can hear the result and cant see the poor tumbler struggling.. LOL

I also am glad that the door has the balancing mechanism inside and the ventilation ducts and vent grilles. The window is just a "cool" effect and often a reason for manufacturers to get way too many panick calls about nothing. IMHO


Post# 478120 , Reply# 75   11/28/2010 at 15:21 (4,891 days old) by PeterH770 (Marietta, GA)        

peterh770's profile picture
How do you put the machine into programming mode?

Post# 478122 , Reply# 76   11/28/2010 at 15:42 (4,891 days old) by cfz2882 (Belle Fourche,SD)        
water in tub

once i found a little water in the tub of my old '99 mah3000
neptune-never happened again,so not sure what happened there
i thought the check valve flapper in the pump may have got
some lint or something under it and allowed water in the
drain hose to slowly back into the tub,but not sure if there
is enough water in the hose to do that..probably was a seeping
inlet valve.
My mah3000,bought for $25 in non-working condition and fixed
has become a favorite"daily driver"machine and i love the
"UFO"sounds of the"switched reluctance"motor as it ramps up
the spin speed!


Post# 478280 , Reply# 77   11/29/2010 at 09:58 (4,890 days old) by supremewhirlpol ()        

cfz882:
Do you have a early neptune? Does it have that "special" motor in it? Got any pictures of the motor?

PeterH770:
I think you turn the switch to the left from "run" to "program".
I've never done it, as I have not taken the time to look for the manual on-line, Also I don't have the key. I would like to change some of the programs a bit but have not had the time. The machine works VERY well, and mom is happy. I still have Horsey to put back together/ridicule more and I have a 40LB Ipso to install before Christmas.


Post# 478315 , Reply# 78   11/29/2010 at 12:36 (4,890 days old) by fordtech ()        

supremewhirlpol I found this pic of an old switched reluctance motor from the early Neptunes on Ebay... this is the one that Whirs when it runs.

The new models are virtually silent.


Post# 478338 , Reply# 79   11/29/2010 at 13:49 (4,890 days old) by cfz2882 (Belle Fourche,SD)        
motor

the"switched reluctance"motor in the early neptunes is basicly
just a jumbo stepper motor-a bigger version of the motor that
drives the paper feed and print head in a printer.
gives the early neptunes the "rrrrr"during tumble and the"UFO"
sounds during the spin runup.
My neptune,mah3000aww,has ser#of25145795uk,shows late '98
date codes on components so was made late '98/early'99
When i got it,it had the classic wax motor short/blown triac
problem along with a plugged pressure switch hose;
after repairing the wax motor and the control board it has been
a great washer-not bad for$25 and a few dollars for parts!


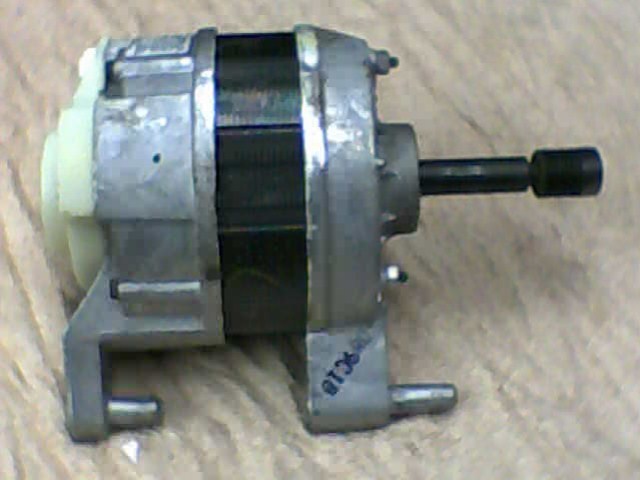
Post# 478484 , Reply# 80   11/30/2010 at 11:04 (4,889 days old) by PeterH770 (Marietta, GA)        

peterh770's profile picture
A local Maytag Commercial distributor should help you with getting a programming key. I can't imagine that the OPL programming is much different from the coin-op programming, so I can help you with that if/when you need.

Post# 478508 , Reply# 81   11/30/2010 at 13:18 (4,889 days old) by supremewhirlpol ()        

fordtech/cz882:
Thanks for the info, looks like a fun motor to play around with.

PeterH770:
I may be able to get a key from repairclinic, i'll look around. There has to be a programming manual for this machine. Thanks.


Forum Index:       Other Forums:                      


Comes to the Rescue!

The Discuss-o-Mat has stopped, buzzer is sounding!!!
If you would like to reply to this thread please log-in...

Discuss-O-MAT Log-In


New Members
Click Here To Sign Up.


automaticwasher.org home
Discuss-o-Mat Forums
Vintage Brochures, Service and Owners Manuals
Fun Vintage Washer Ephemera
See It Wash!
Video Downloads
Audio Downloads
Picture of the Day
Patent of the Day
Photos of our Collections
The Old Aberdeen Farm
Vintage Service Manuals
Vintage washer/dryer/dishwasher to sell?
Technical/service questions?
Looking for Parts?
Website related questions?
Digital Millennium Copyright Act Policy
Our Privacy Policy