|
Thread Number: 32586
/ Tag: Vintage Dryers
Tuning up the DE306 Dryer |
[Down to Last] |
Post# 491314 1/24/2011 at 21:48 (4,833 days old) by turquoisedude  (.) (.) |
||

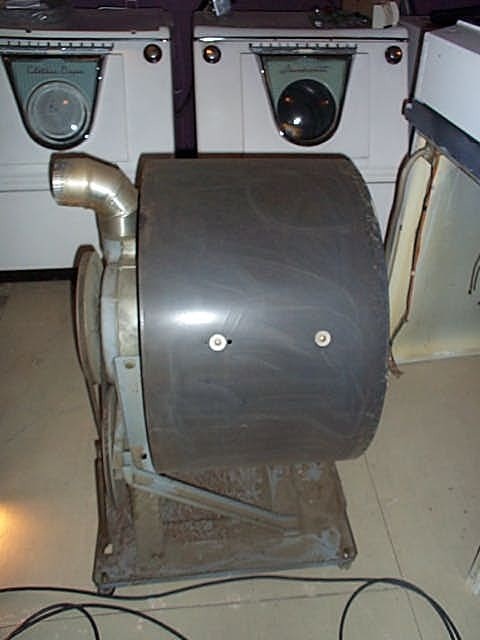
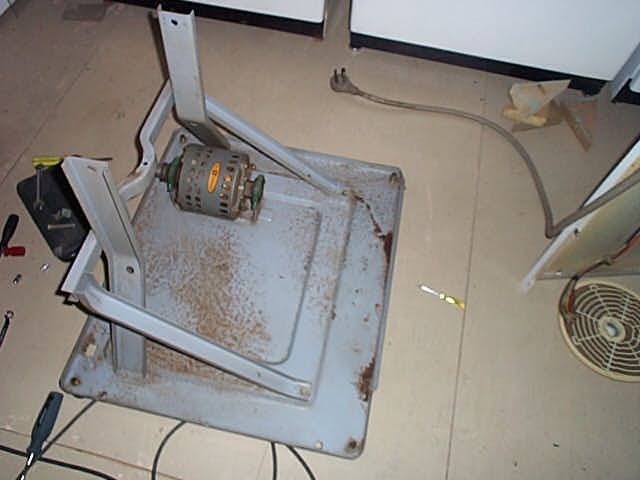
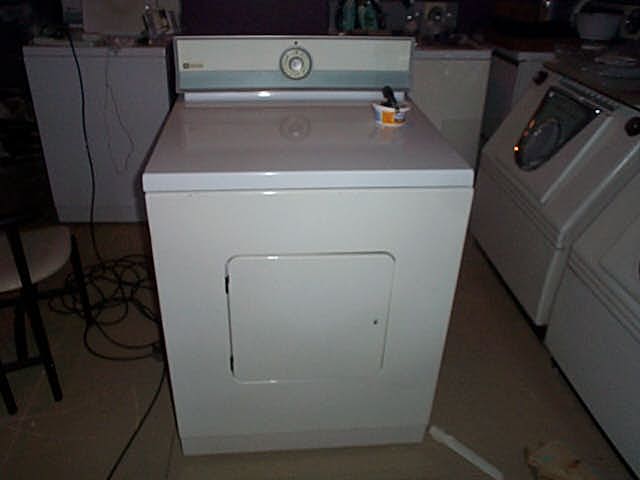
Funny, but when the weather is cold outside, I seem to be busy messing with high-voltage things inside... Item number 2 on my New Year's Resolutions list was to get the Maytag A206 - DE306 set into service as the 'daily drivers' in Ogden, so I figured I would start with the dryer. This dryer was found about 10 minutes from the apartment in Montreal last summer - it worked fine when tested, but I figured after 30+ years in service, a bit of tune-up was in order.
| ||

|
|
Post# 491316 , Reply# 1 1/24/2011 at 21:51 (4,833 days old) by turquoisedude (.) |
||
|
| ||
| Post# 491318 , Reply# 2 1/24/2011 at 21:52 (4,833 days old) by toploader55 (Massachusetts Sand Bar, Cape Cod) | ||
Uh Oh... | ||
|
Post# 491320 , Reply# 3 1/24/2011 at 21:56 (4,833 days old) by turquoisedude (.) |
||
|
| ||
|
Post# 491322 , Reply# 4 1/24/2011 at 21:58 (4,833 days old) by turquoisedude (.) |
||
|
| ||
|
Post# 491323 , Reply# 5 1/24/2011 at 21:59 (4,833 days old) by turquoisedude (.) |
||
|
| ||
|
Post# 491324 , Reply# 6 1/24/2011 at 22:01 (4,833 days old) by turquoisedude (.) |
||
|
| ||
|
Post# 491325 , Reply# 7 1/24/2011 at 22:02 (4,833 days old) by turquoisedude (.) |
||
|
| ||
| Post# 491326 , Reply# 8 1/24/2011 at 22:02 (4,833 days old) by cfz2882 (Belle Fourche,SD) | ||
|
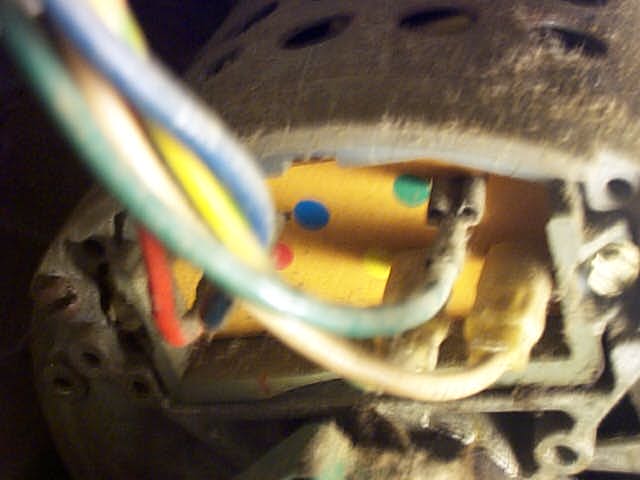
motor looks like a delco motor on that DE306-my DE306,1977,has a westinghouse. Only problem i found with mine is the idler pulley was running at an angle affecting the belt tracking a bit. | ||
|
Post# 491327 , Reply# 9 1/24/2011 at 22:03 (4,833 days old) by turquoisedude (.) |
||
|
| ||
|
Post# 491328 , Reply# 10 1/24/2011 at 22:05 (4,833 days old) by turquoisedude (.) |
||
|
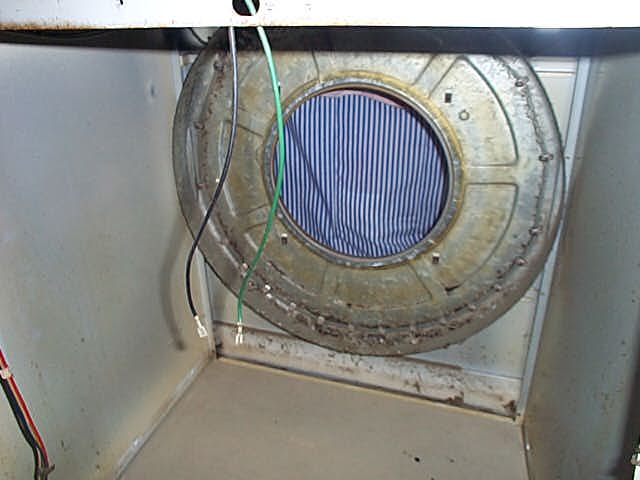
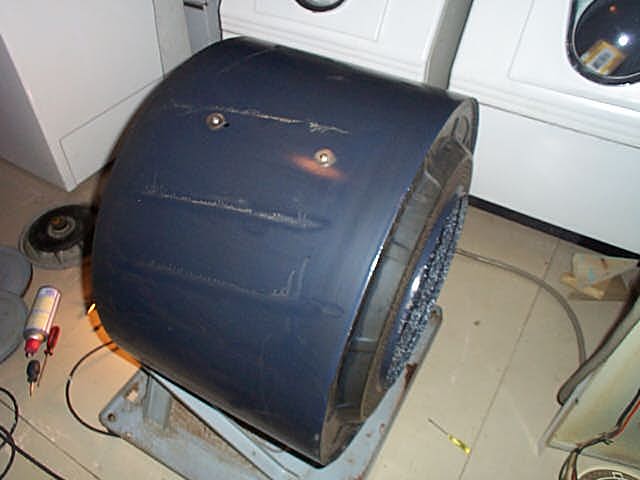
The last thing I got to do was install the new felt seal on the drum. Next weekend, it should be all back together. Of course I still have to find the other drive belt that I took off, put somewhere in the basement, and couldn't find anywhere... GRRRR! I am hoping it will turn up next weekend. Stay tuned...
| ||
|
Post# 491337 , Reply# 12 1/24/2011 at 23:07 (4,833 days old) by akronman (Akron/Cleveland Ohio) |
||
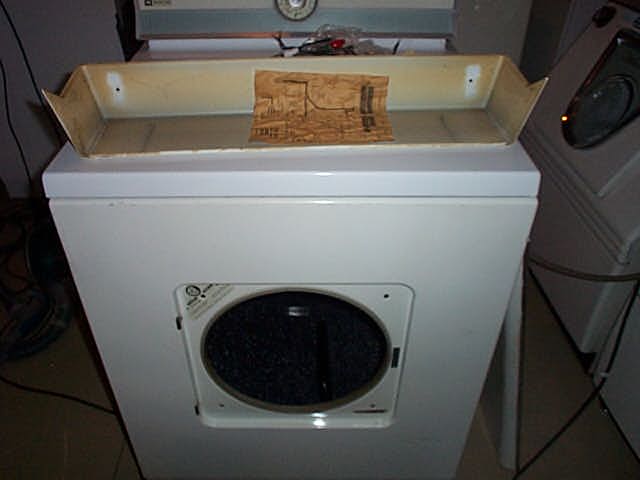
DE606 drum
Hey turquoise----I've been disassembling my DE606 all evening, FedEx is delivering a new door gasket tomorrow. I bought the dryer about a week and a half ago, removed the rear to clean a bit, then ran it for 5 or 6 loads to see what additional repairs may be needed, so this is my first ever Maytag dryer disassembly.
Umm, I suspended the top on ropes and cords from the basement beams, hovering about an inch above the machine, was afraid to remove every single wire, just cautious on the leads to the heat coil and door switch, every other wire has some slack. My drum doesn't have a felt seal, who knows when it was removed or lost. IS it a necessity, or should I just install the door gasket tomorrow and re-assemble? Where did you get your felt seal? This machine has run smoothly since I installed it, I don't think I'm yet going to dissasemble the entire drum/blower assembly for a lube job. I'm new to all of this fun, I think I will wait a while to learn gory details of total dis-assembly. I have de-linted it quite thouroughly, removed the Halo at the front and found 1 detached clip that snapped right back into the pan, reached way into the blower from inside the drum and wiped clean, also removed the aluminum vent at the top rear of the blower and wiped clean down in there. I never knew until I saw it live that the entire drum is supported on only the rear shaft through the blower, I had assumed it rode on an additional wheel or front assembly above the door, who knew? Can someone advise if the motor needs a few drops of oil somewhere, I haven't found little oil cup holes anywhere. also, without any dissasembly of the drum/blower/belts, any spots I need to lube? Thanks Mark | ||
| Post# 491340 , Reply# 13 1/24/2011 at 23:25 (4,833 days old) by qsd-dan (West) | ||
|
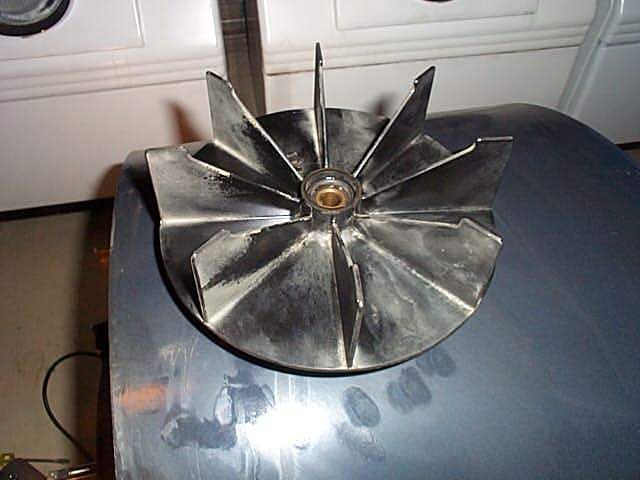
Did you turbine oil the drum bushings/wicking pad, fan bushings, and pulley bushings? Re-grease the slider?
You lucky dog, you even have a round style motor. It can be disassembled, blown out and cleaned (like any dryer motor, they internally accumulate lint overtime), turbine oiled (there are 2 bushings IIRC), and re-assembled. A tip: Give the motor shaft a couple of turn and get the "feel" of it before tearing the motor apart. If you have assembled it correctly (make sure the case screws are torqued as evenly as possible), it will turn as smooth, if not smoother after you're finished. | ||
|
Post# 491341 , Reply# 14 1/24/2011 at 23:26 (4,833 days old) by akronman (Akron/Cleveland Ohio) |
||
|
suspended dryer
here's pics to show you either how dumb I am, or how extremely resourceful!
Also, I took another good look at where the felt seal should be, seems to me it would help all incoming air pass over the coils and only enter the drum thru the perforated front ring. But without felt seal, a small amount would slip past and nevertheless only enter the drum, near the door, sort of an "Inner Halo?" 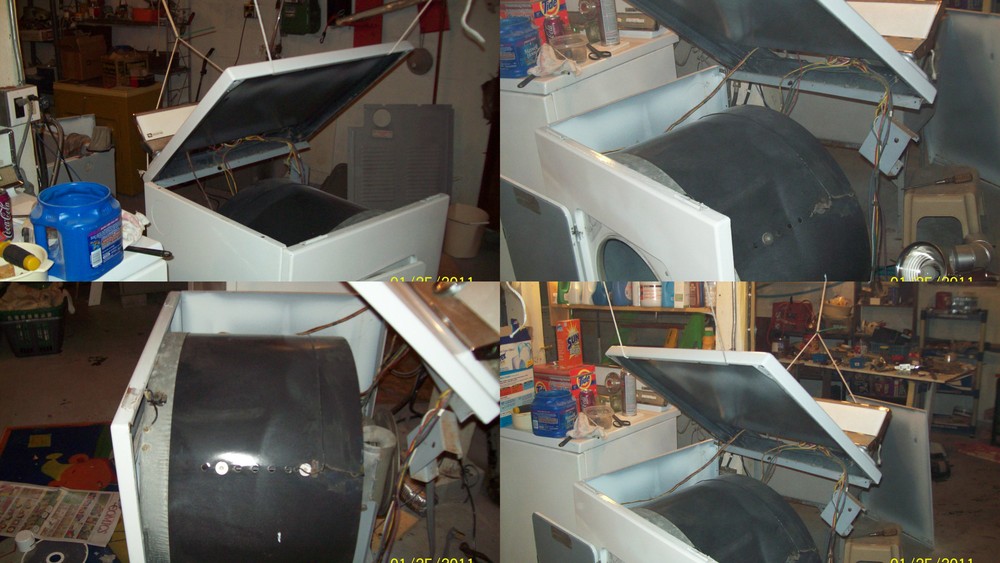
| ||
| Post# 491358 , Reply# 15 1/25/2011 at 02:56 (4,833 days old) by beekeyknee (Columbia, MO) | ||
Your Disassembly 
Mark,
You didn't need to take that cabinet all apart on your dryer. You remove the back, disconnect the wires that go to the motor and electronic dryness control (being careful not to let the brush and spring fly away), disconnect the wire that comes from the heating element from the switch inside the console, make a diagram where all the wires go, disconnect the terminal block where the pig-tail goes, grab the top of the console and tip forward and off the dryer. Dan's right. You should re-lube the drum bearing/blower shaft assembly with plenty of turbine oil. If that bearing seizes the dryer's junk. No more replacement bearings. The fan isn't replaceable either. Don't drop it. Remove the blower shroud, blower, and drum. Don't scuff the shaft when you pull the drum. The drum is held on by a big snap ring. Remove it horizontally down the shaft. Not vertically over the shaft. You'll break it. You'll need a snap ring tool. "But without the felt seal a small amount would slip past and nevertheless only inter the drum near the door." Yeah, something else might slip past too, like a penny or pin or anything else metal, sticking between your heating element and the chassis of the dryer and you'd have a shorted heating element and you'd be taking your dryer apart all over again. Find a felt seal. Clean the pulleys, especially down in the grooves where the belts ride. Your dryer should probably have new belts. Dan's right X2. When you put your motor back together you have to make sure the rotor shafts don't bind in their bearings. Sometimes you have to fiddle with it awhile until you get it to turn freely. My dryer motor has a centrifugal start switch. It wasn't working very smoothly when I restored my dryer. It's newer than yours, with the square motor. I placed paper towels under the switch so oil wouldn't go where I didn't want and oiled the moving parts with turbine oil until they worked freely. Then wiped off excess oil and checked the switch again. This helped it a lot. Your may or may not have a centrifugal switch. It could have a start capacitor. Be careful with these. It may or may not be holding a charge. They can be discharged with a rubber handled (insulated) screwdriver. Do an internet search on motor capacitors. When you get your dryer back together, check to see it it's turning properly by turning the drum by hand and watching all the parts turn. Make sure the pulleys are all in alignment, the drum's not sagging, and the fan doesn't rub the shroud. The belts should all run in a straight line. Checking all these things before you put the cover back on can save you a lot of trouble and grief. After its back together you can take the cover off the console and clean in there. All these things can be learned, if you're patient. Look up thread # 28312. Lots of good info there. | ||
|
Post# 491420 , Reply# 16 1/25/2011 at 12:59 (4,832 days old) by akronman (Akron/Cleveland Ohio) |
||
|
Mark's DE606 | ||
|
Post# 492736 , Reply# 17 1/30/2011 at 21:54 (4,827 days old) by turquoisedude (.) |
||
|
This weekend's progress....
Well, I was just itching to get back to work on this one! Saturday, I managed to get the cabinet back on. Now, I figured this would have been a two-person job, but I found a neat trick - I raised the levelling feet for the dryer base up as high as I could, then slipped the cabinet back on, with the base of the cabinet housing touching the floor. I then used blocks to hold up the cabinet, then re-attach the screws. Result? A nicely aligned cabinet!
| ||
|
Post# 492737 , Reply# 18 1/30/2011 at 22:03 (4,827 days old) by turquoisedude (.) |
||
|
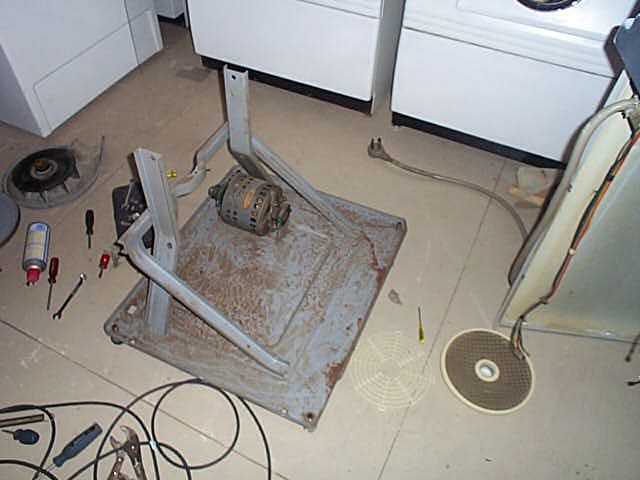
BUT....
I hit a snag somewhere... I reattached the belts (yes, I found the 'missing' one - it was tangled up with the cord of my work light...) and re-connected all the wires. When I hit the start switch, the dryer ran, but and I will quote hubby here - "It sounded like a moose in heat". The dryer made a rubbing, groaning kind of sound, so I cut the power but quick.
Not the result I expected, needless to say... So, what did I do wrong here? The belts seem to be back the way they were before I started messing with this. Could something else be binding?? When I tested the drum and fan after reassembly last week, they moved nice and smoothly... I did notice that the belt from the motor seemed to have a bit of play - could that be that be the problem and if so, how can I adjust the belt tension?? I am just glad I didn't mess with the DE700 - I need at least working dryer... OY! 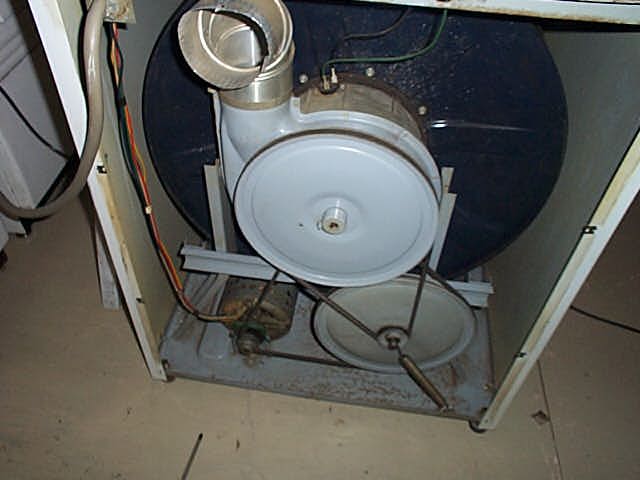
| ||
| Post# 492747 , Reply# 19 1/30/2011 at 23:14 (4,827 days old) by qsd-dan (West) | ||
|
The dryer made a rubbing, groaning kind of sound, so I cut the power but quick.
Was this with the rear panel on or off? If the rear panel was off and the unit isn't perfectly level, the cabinet distorts, causing the drum to rub against the heating element shroud. Manually rotate the drum and see if you can reproduce the sound. If the sound returns, have your partner rotate the drum while you shift and distort the cabinet side to side. If the sound gets worse/better, you found the culprit. Installing the rear panel and running the machine should give you an answer, but repeatedly removing and reinstalling the rear panel can sometimes be an annoying and daunting task. I did notice that the belt from the motor seemed to have a bit of play - could that be that be the problem and if so, how can I adjust the belt tension? I think you have the tensioning spring on incorrectly, but it's hard to tell in that pic. Can you take a pic of the spring and how it's connected to the base and pulley? | ||
|
Post# 492775 , Reply# 20 1/31/2011 at 06:39 (4,827 days old) by turquoisedude (.) |
||
|
| ||
|
Post# 492887 , Reply# 21 1/31/2011 at 19:08 (4,826 days old) by combo52 (50 Year Repair Tech Beltsville,Md) |
||
MT HOH DRYER
Hi Paul yes the back panel needs to be in place and the front shroud screwed in place. The motor belt is supposed to be very loose and it doesn't matter which way the tension spring is installed, but it looks like you still have the pot metal motor pulley these need to be changed on any HOH dryers if you want them to tumble a heavy wet load to the replacement steel pulley.
| ||
|
Post# 494740 , Reply# 22 2/7/2011 at 18:05 (4,819 days old) by turquoisedude (.) |
||
|
How to Moose-proof your Maytag....
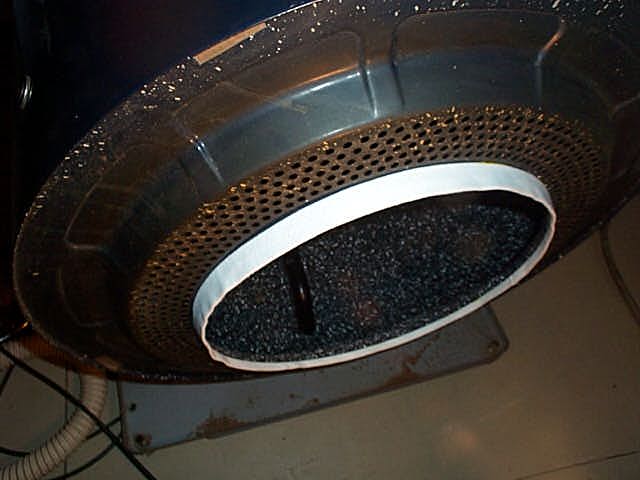
So this weekend's priority was to find out and remedy the 'lovesick moose' sound the DE306 was making. I checked and double checked the belts and pulleys - they looked fine... I finally decided to get brave and let the machine run for more than a few seconds to try and determine exactly where the noise was coming from. It was worth it - the noise seemed to be coming from the blower housing. I took it apart and realized that the fan drive belt pulley on the blower drive shaft was the source of the groaning. Silly me didn't lubricate this when I reassembled the dryer after the cleaning. Shame on me... Once done, it worked much quieter but there was still an occaisonal rubbing sound. The fan would actually travel backwards every so many revolutions and hit the blower housing. That was easily fixed by ensuring the drum drive pulley was moved closer and tightened.
And.... 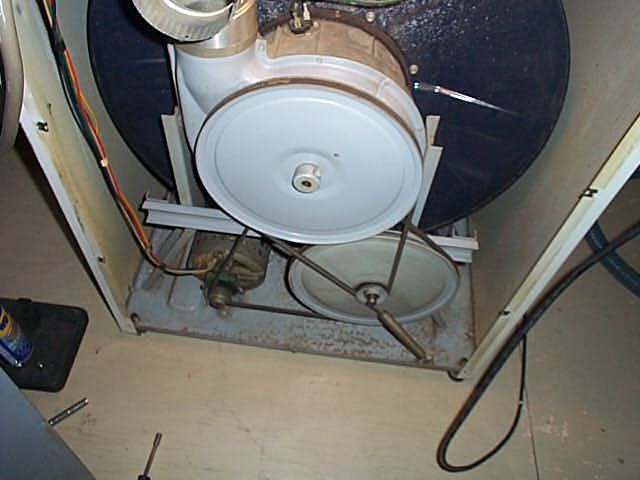
| ||
|
Post# 494743 , Reply# 23 2/7/2011 at 18:09 (4,819 days old) by turquoisedude (.) |
||
|
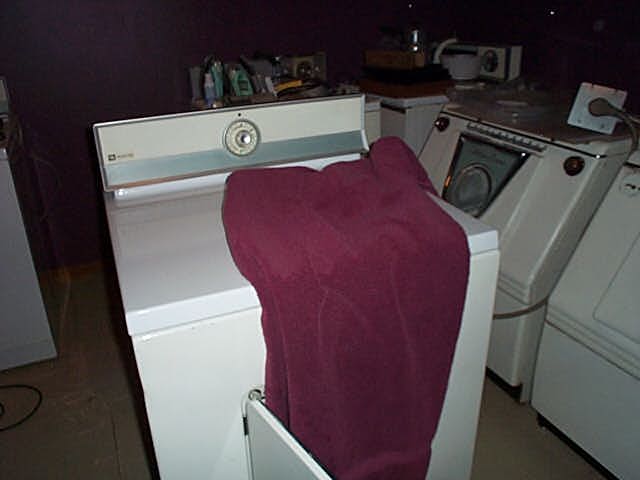
Success! I ran the dryer without heat for a good 10 minutes in smooth silence. I then tried a short run with heat and everything was just fine. No sparks, flames, blue flashes or dirty shorts this year... LOL
I did something that may enrage the Maytag fans, but I thought it looks cool. I added a red neon pilot light, wired so that when the timer is on it will glow. Forgive me! 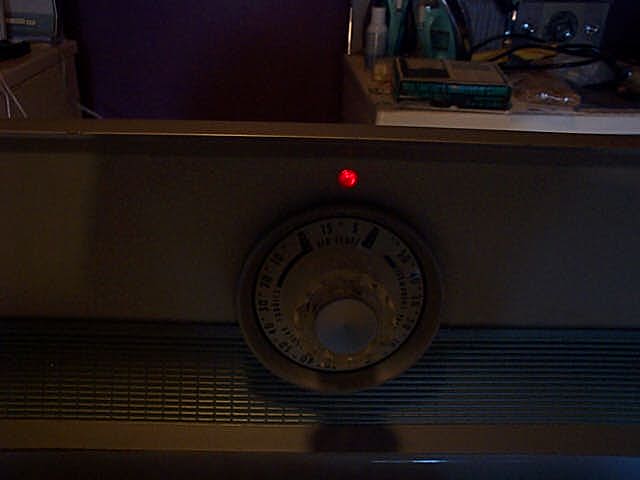
| ||
|
Post# 494744 , Reply# 24 2/7/2011 at 18:10 (4,819 days old) by turquoisedude (.) |
||
|
First dryer load | ||
|
Post# 494755 , Reply# 25 2/7/2011 at 19:17 (4,819 days old) by Volvoguy87 (Cincinnati, OH) |
||
Pilot light! | ||
|
Post# 494759 , Reply# 26 2/7/2011 at 19:44 (4,819 days old) by turquoisedude (.) |
||
|
Dave, I noticed there was a 'jewel' for a pilot light above the dial already, so I glued two 'L'-shaped brackets (they were actually old window blind parts on either side of the opening. The light itself is a red neon pilot light that I picked up at an electrical-supply store. I don't remember the exact specs, but I made sure it was rated for 110v. For the electrical connections, I tapped into the timer supply wires (a red and a white lead on this model) to connect the light. Dang, I wish I had taken a picture...
| ||
|
Post# 495099 , Reply# 27 2/9/2011 at 00:07 (4,818 days old) by pdub (Portland, Oregon) |
||
Thanks Paul | ||
| Forum Index: | 
| Other Forums: |

|

|

|

|

|

 Comes to the Rescue!