|
Thread Number: 44066
1945 GE Roaster Oven |
[Down to Last] |
Post# 647729 12/19/2012 at 18:03 (4,144 days old) by rp2813  (Sannazay) (Sannazay) |
||
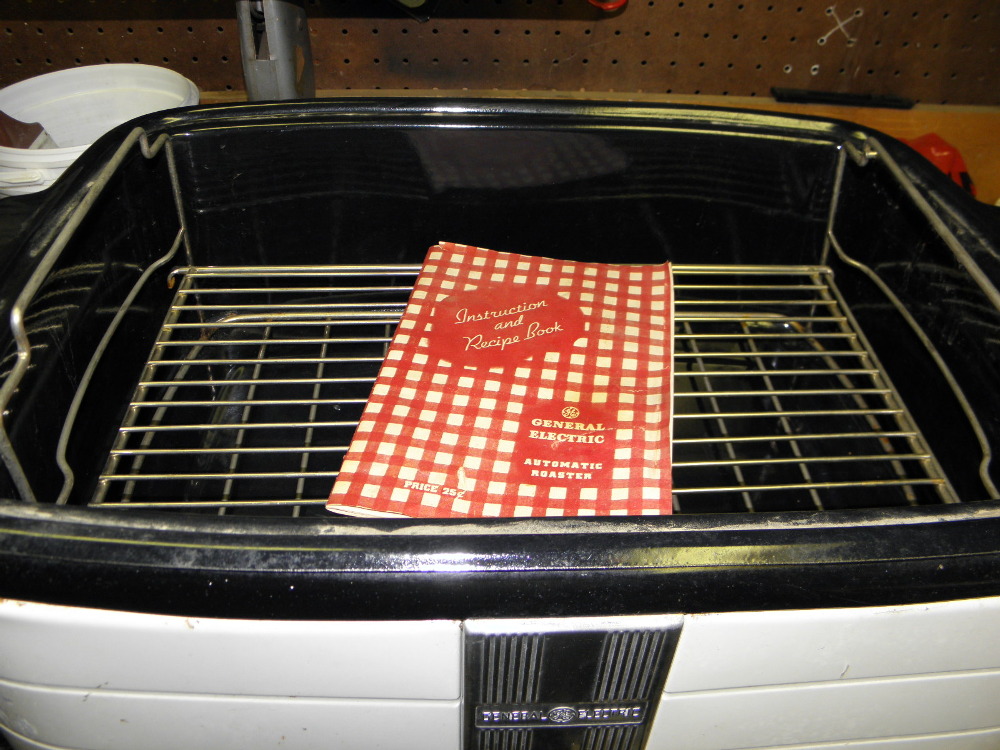
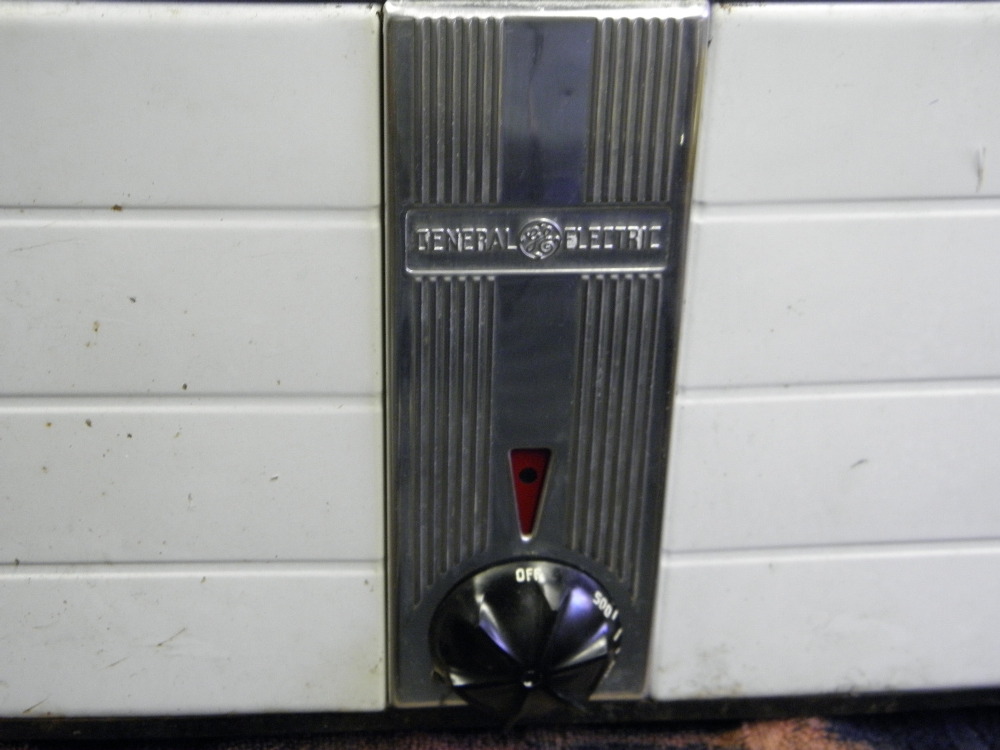
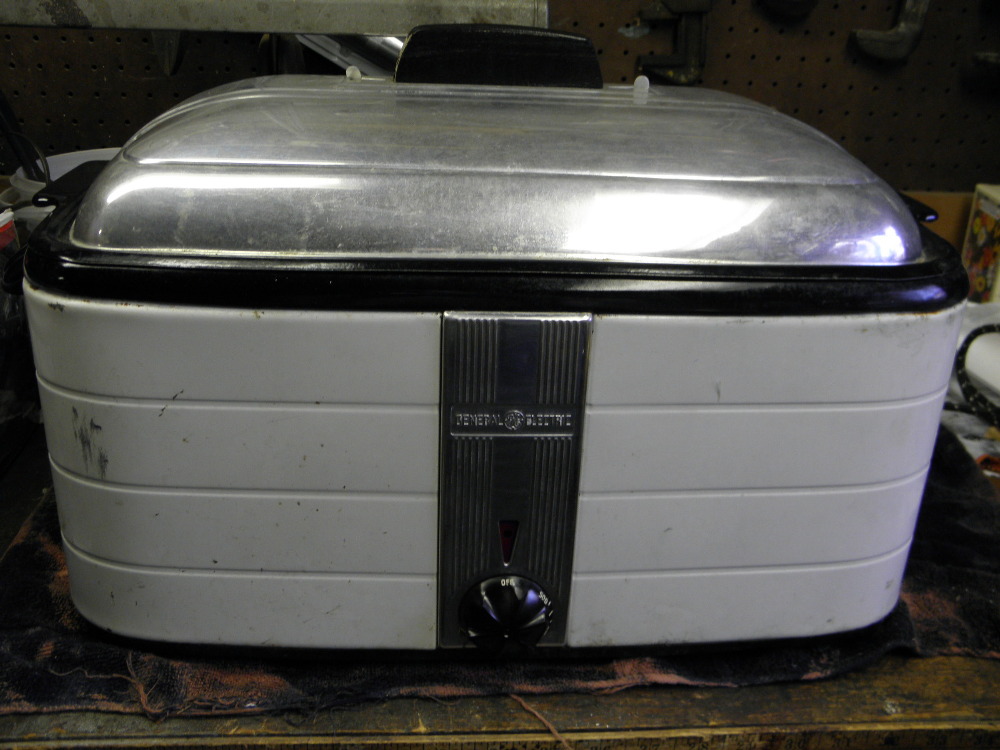
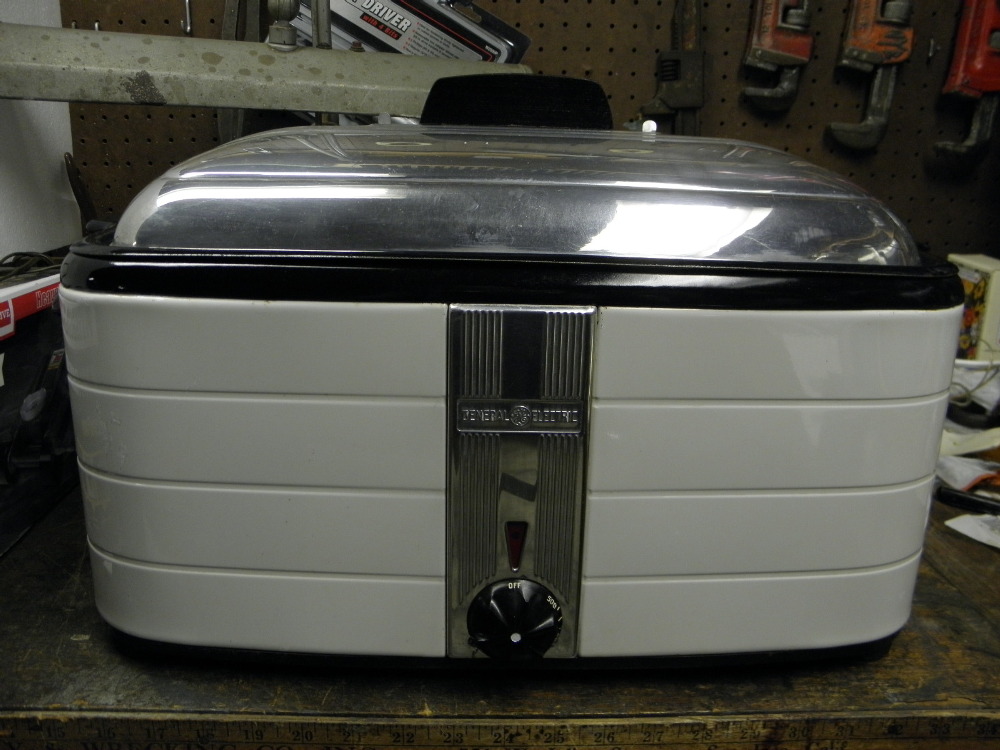
 I picked this up for $10 today. I've never seen a GE roaster before and liked the art deco look of the heat control trim panel.
Pictures show as-found condition. I think there was originally white paint behind the GE logo and perhaps on the grooved areas of the ribbing.
It will take some elbow grease, but I think the exterior will clean up fairly well.
| ||

|
|
Post# 647730 , Reply# 1 12/19/2012 at 18:06 (4,144 days old) by rp2813 (Sannazay) |
||
|
Interior | ||
|
Post# 647731 , Reply# 2 12/19/2012 at 18:11 (4,144 days old) by paulg (My sweet home... Chicago) |
||
Use it and love it.. | ||
|
Post# 647732 , Reply# 3 12/19/2012 at 18:12 (4,144 days old) by rp2813 (Sannazay) |
||
|
Close-Up | ||
|
Post# 647733 , Reply# 4 12/19/2012 at 18:18 (4,144 days old) by rp2813 (Sannazay) |
||
|
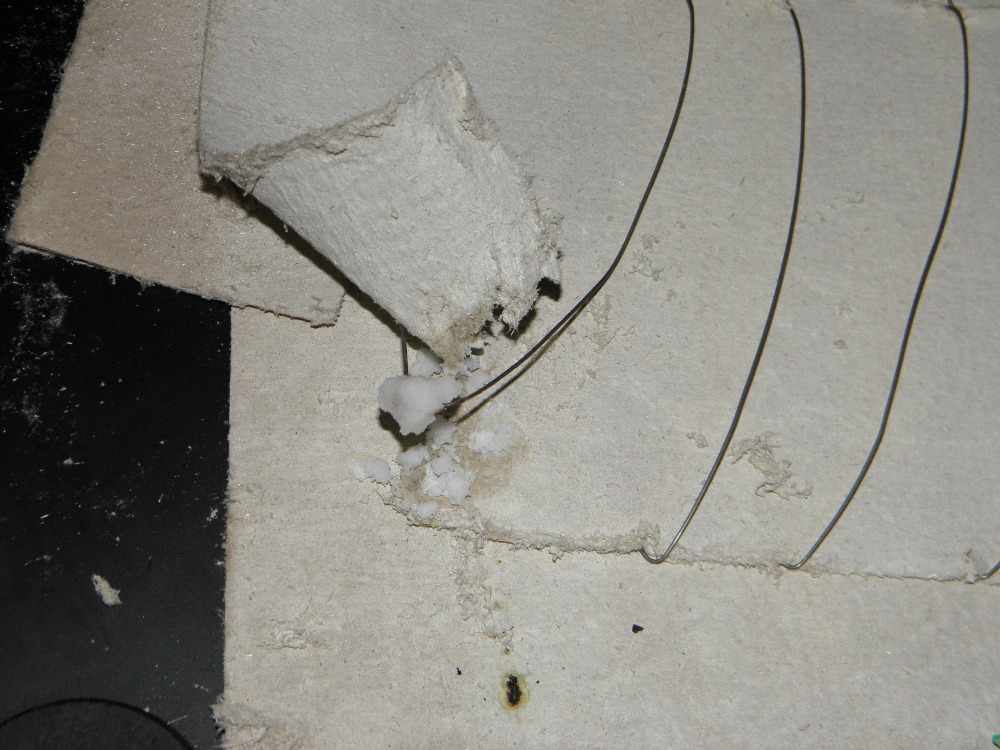
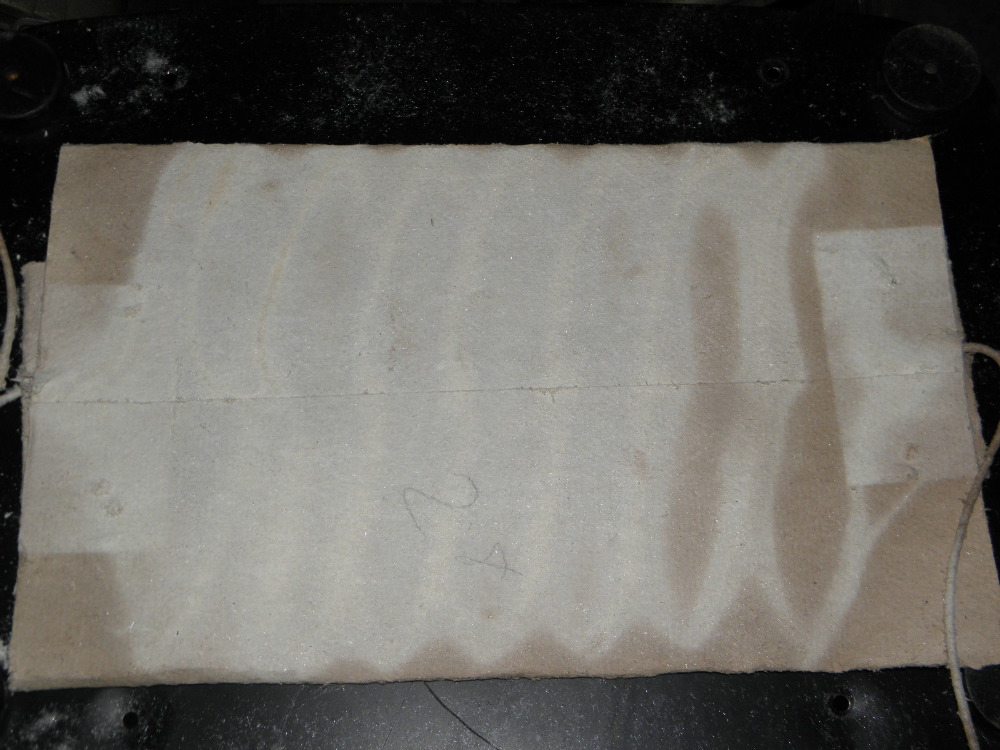
Now, a Question The receptacle for the cord is on the right side at the rear. When powered up, the heat seems to emanate from that corner of the cooking well. It's definitely the hot zone, and makes me think the heat would be very uneven for roasting or baking. I removed the bottom cover and encountered a mass of fiberglass stuck to an asbestos panel, so there was no way to examine the heating element(s).
Is this normal behavior or should the bottom of the well heat up more uniformly? Is there a safe way to open things up and examine the heating system? | ||
|
Post# 647851 , Reply# 5 12/20/2012 at 08:48 (4,143 days old) by gansky1 (Omaha, The Home of the TV Dinner!) |
||

That's very interesting, I've never seen a GE roaster before. Lots of Westinghouse, Nesco, etc. That's a great looking knob.
We used a Westinghouse at Robert & Fred's over Thanksgiving to do the Turkey and it worked beautifully. It had been years since I'd been around one in use and then it was only at church dinners for large amounts of spaghetti sauce, etc. Oddly, that was one kitchen gadget my grandmother didn't have. | ||
|
Post# 647861 , Reply# 6 12/20/2012 at 09:39 (4,143 days old) by polkanut (Wausau, WI ) |
||
Ralph, | ||
|
Post# 647866 , Reply# 7 12/20/2012 at 10:03 (4,143 days old) by rp2813 (Sannazay) |
||
|
Tim, I think I would have to remove the white surround, if that's possible. I didn't go very far with my investigating yesterday but will also check the connections behind the temperature control.
I like this GE because it seems more solid and heavier than the Westinghouse and Nesco roasters I've owned in the past, as well as being relatively unusual. However it doesn't have the pegs that allow the insert to be inverted and used as a lid for large items like the Westinghouses do. I can't imagine I'd use that option much. If I can get it working properly, this roaster will be used for additional oven space for things like casseroles and other side dishes when the main oven is occupied by a large item, or baking/roasting outside on hot days.
I have an old appliance repair book that may address roasters from this era, so will be looking into this further.
It's blurred, but here's a shot of the heating element indicator glowing. 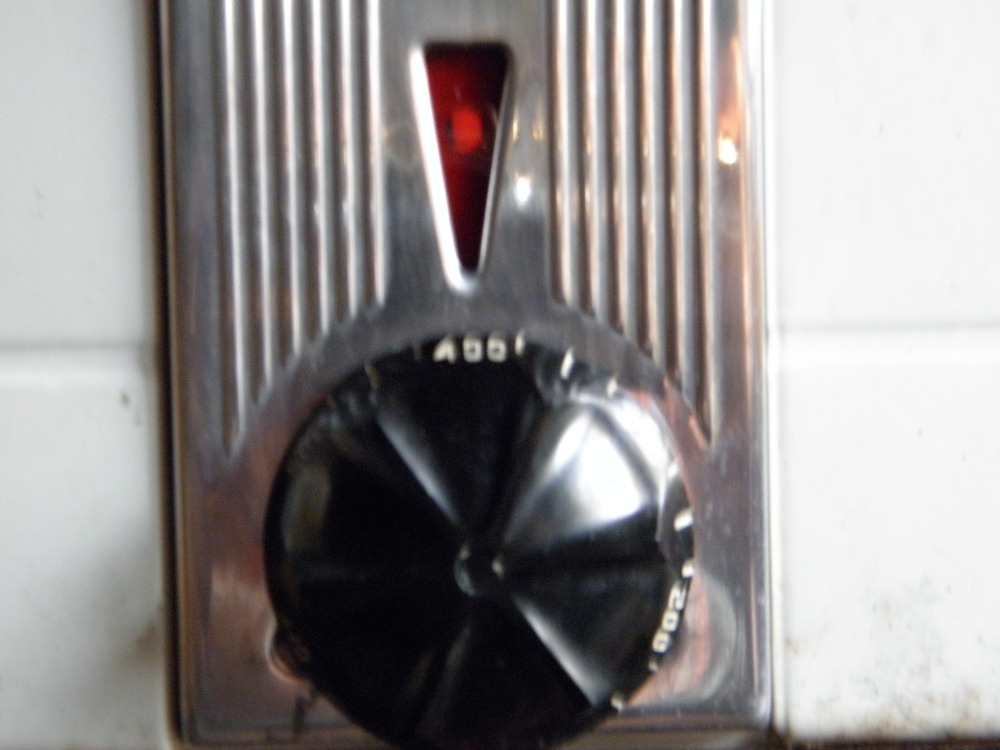
| ||
|
Post# 647868 , Reply# 8 12/20/2012 at 10:07 (4,143 days old) by Tomturbomatic (Beltsville, MD) |
||
|
I would be very wary about going into that. It is full of asbestos and there is no sense losing your life that way. It should not be doing the spot heating. The "on" indicator is probaby just a window to view the ribbon heating element. | ||
| Post# 647875 , Reply# 9 12/20/2012 at 10:37 (4,143 days old) by cadman (Cedar Falls, IA) | ||
 | ||
|
Post# 647877 , Reply# 10 12/20/2012 at 11:03 (4,143 days old) by rp2813 (Sannazay) |
||
|
Oh, trust me. I'm not going to be messing with asbestos over a $10 purchase. If I can't identify and fix the problem without disturbing the insulation material, it's not happening.
I'll look into measuring current draw.
The "ribbon" element behind the window is perhaps an inch long and attaches to a pair of screws that, on the back side of the assembly have wires running to the actual heating elements. | ||
|
Post# 647882 , Reply# 11 12/20/2012 at 11:38 (4,143 days old) by gredmondson (San Francisco, California 94117 USA) |
||
 | ||
|
Post# 647907 , Reply# 12 12/20/2012 at 12:38 (4,143 days old) by Ultramatic (New York City) |
||
Very nice find Ralph... | ||
| Post# 647917 , Reply# 13 12/20/2012 at 13:23 (4,143 days old) by whirlcool (Just North Of Houston, Texas) | ||
|
My Grandmother has a Westinghouse roaster back in the 50's. That thing could only be called "solid". Even the lid was heavy. It was darned heavy, not like the ones being sold today. | ||
|
Post# 647971 , Reply# 14 12/20/2012 at 17:34 (4,143 days old) by turquoisedude (.) |
||
 | ||
|
Post# 647976 , Reply# 15 12/20/2012 at 18:11 (4,143 days old) by rp2813 (Sannazay) |
||
|
It Appears To Be Fixed! My hands (even though I wore gloves) and forearms are a little itchy, but I found the problem.
I had to deal with some asbestos, but did so outside and wore a mask. The repair I had to make didn't require doing anything to the asbestos sheet that would create dust. There was a break in the heating wire. My trusty 1950 Electrical Appliance Repair text book advised that if an element has a break, the whole thing should be replaced. I suppose a replacement "heat sheet" for a modern HB or Nesco roaster could be retrofitted, but I decided to mend the break by twisting the wires together. It may not last very long, but I don't intend to put this roaster to daily use.
The result is that it heats more evenly now, although the hot spot is still there at right rear by the power supply, and the mended spot diagonal from it warms up the slowest, but now at least the entire bottom surface is heating. I'm thinking this is just the nature of the circuitry, but it's possible the mended area isn't as efficient as it should be. I'll have to try it out and see how it does. It may only be an issue during pre-heat and not once it hits the set temperature.
Geez, that fiberglass is really a mess to deal with. If I have to remove the surround again in the future, I think I'll use a length of foil tape to keep the fiberglass under control.
Now it's time to shine it up and bring it inside. Yay!
So Paul, is there supposed to be any white paint on the front control panel trim piece? | ||
| Post# 647984 , Reply# 16 12/20/2012 at 19:12 (4,143 days old) by whirlcool (Just North Of Houston, Texas) | ||
|
Could you have soldered or welded the two pieces of the heating wire together? | ||
|
Post# 648003 , Reply# 17 12/20/2012 at 20:04 (4,143 days old) by rp2813 (Sannazay) |
||
|
Allen, I think solder would just melt. Here is my experience:
On my mom's '49 Westinghouse stove, the deep well unit had an old school coiled element with ceramic insulation. One of the coils broke. I couldn't find anyone to repair it. Finally I got a hold of an old timer repair guy who said if it didn't get used much, I could twist the wires back together and that would fix it. Sure enough, it did the trick and without causing a more intense red glow at the mend.
If the elements on this roaster were the modern crock-pot ribbon type that resemble metallic tape, the repair I made today wouldn't have been possible. As stated above, we'll have to see how long it lasts. The wires are fairly thick, so I might get lucky. I tested it out again and the heat was fairly even, except for the warmer spot near the electrical connection. I think it's as good as it gets.
| ||
|
Post# 648024 , Reply# 18 12/20/2012 at 21:28 (4,143 days old) by rp2813 (Sannazay) |
||
|
I got out my aim & shoot thermometer gun, cranked up the thermostat, waited a couple of minutes and checked the temperatures in all four quadrants. Hottest bottom surface area at right rear was about 50 degrees warmer than the hottest at left front. The difference between left front, left rear and right front wasn't so pronounced. I don't think I can expect much more precision than that, even if the element hadn't needed mending. | ||
| Post# 648030 , Reply# 19 12/20/2012 at 22:25 (4,143 days old) by whirlcool (Just North Of Houston, Texas) | ||
|
Sounds like you got it. Are you going to use this for Christmas dinner? | ||
|
Post# 648032 , Reply# 20 12/20/2012 at 22:46 (4,143 days old) by rp2813 (Sannazay) |
||
|
Are you going to use this for Christmas dinner? Not likely this year. It's going to be low key, and we've been invited to a friend's house that day for prime rib. We've already told Dave's daughter and son-in-law that we'll just wing it to get together with them at some point on the 24th or 25th.
It's also going to require some time to make the roaster presentable, and I may not have much between now and Tuesday. We're throwing a New Year's Eve party so it could possibly come in handy then. If not, I'll just have to come up with a reason to use it sooner rather than later! | ||
|
Post# 648085 , Reply# 21 12/21/2012 at 05:03 (4,142 days old) by polkanut (Wausau, WI ) |
||
|
| ||
|
Post# 648097 , Reply# 22 12/21/2012 at 07:50 (4,142 days old) by Tomturbomatic (Beltsville, MD) |
||
|
Vinegar Wash skin exposed to fiberglass with vinegar and it will remove the itchiness. Don't rub vigorously as that will force the glass fibers deeper. Gently applying it to the skin dissolves them and the itching goes away. This might have to be repeated a time or two for best results. | ||
|
Post# 648148 , Reply# 23 12/21/2012 at 14:15 (4,142 days old) by rp2813 (Sannazay) |
||
|
| ||
|
Post# 648489 , Reply# 24 12/22/2012 at 23:10 (4,141 days old) by sudsmaster (SF Bay Area, California) |
||

Vinegar shouldn't be able to dissolve glass, however, it probably softens the skin so that it releases the tiny glass fibers more readily.
I'll have to remember that remedy the next time I have to install more fiberglass insulation under the house (which is about now). Ralph, I think the only long term solution would be to replace the heating element. I wonder if bulk heating element is available on-line somewhere. I used to "fix" broken electric toasters when I was a kid by hooking the broken ends of the heating element together. It would work for a while, then the element would break again. Probably from erosion/corrosion due to age and repeated use. | ||
|
Post# 648506 , Reply# 25 12/23/2012 at 00:45 (4,140 days old) by rp2813 (Sannazay) |
||
|
Rich, I think repeated use would for sure cause the mend to fail, but the wire is actually thick and sturdy and took some strong-arming to twist together, so it might hold up for a while. I rarely used my mom's old Westinghouse roaster so, as with so many other things, I let it go at the estate sale. It didn't have any of its original racks or pans, but it did have the handy window in the lid. This GE will probably be pressed into service only when the main oven is booked solid, and that rarely happens, or I can see it being used as a warmer in certain situations.
As I mentioned above, I wouldn't be surprised if an element for the modern versions of this type of roaster oven could be used as a replacement, presuming the general design hasn't changed and connections would be the same or could somehow be adapted. That would be the easiest fix, but I wouldn't be surprised even if such an element could be purchased, that it would be nearly as expensive as a whole new roaster. I think I've seen them for $40 or less at Target, etc.
As for the surround, upon closer examination I think it's going to require a whole new coat of heat-proof paint. It's too rusty and pitted in too many spots, and new paint would be an easier option. I've seen vintage Nesco roasters with tan/buff paint, so maybe I'll customize this GE with something other than stark white. | ||
|
Post# 648507 , Reply# 26 12/23/2012 at 01:07 (4,140 days old) by sudsmaster (SF Bay Area, California) |
||
|
Ralph,
You might also try this trick with Borax... (From: Dan Sternberg (steberg@erols.com).) Another old trick for nichrome repair is to make a paste of Borax, twist the two broken end together, and energize the circuit. A form of bond welding takes place. I've have used this on electric clothes dryer heater elements with good luck. (From: DaveC.) Here's a "quick fix" that sometimes works for a long time and sometimes fails quickly (depending, I think, on just how old and brittle the nichrome wire is). Mix some ordinary "Boraxo" powdered hand soap with a little water to make a thick paste -- and you don't need much. Take the broken ends of wire, bend a small loop into each, and interlock the loops so the wires stay together. Pack the Boraxo paste around the joint, and turn on the heater. Keep your eyes on that joint. As the coil heats up, the hook joint will be the worst connection, so it'll naturally get the hottest. When it gets hot enough, the nichrome wires will melt, and, being fluxed by the borate, will fuse together into a blob. The blob, now being *larger* than the rest of the wires, will immediately cool down, and will never again get as "red hot" as the rest of the heater. Allow the coils to cool down and, using pliers, carefully crush any glassy flux deposit that remains on the joint. If the joint doesn't behave as I describe, or if the wires are too brittle to be formed into hooks, the wires are likely too old to produce a long-lasting joint. If the joint behaves as I described, it may last for a good long time. CLICK HERE TO GO TO sudsmaster's LINK | ||
|
Post# 648509 , Reply# 27 12/23/2012 at 01:25 (4,140 days old) by rp2813 (Sannazay) |
||
|
| ||
|
Post# 648569 , Reply# 30 12/23/2012 at 12:12 (4,140 days old) by rp2813 (Sannazay) |
||
|
Well, if the mend should fail, I'll first look into a replacement heating assembly. I think the type used on a new roaster should be adaptable and would employ a safer form of insulation. If not, I'll either use a heat-proof crimp/solderless connector, give the borax a try or just get rid of the thing. I don't think using screws would work because due to the bulkiness of the mend it would eventually break through the asbestos envelope. The heating wire is very sturdy so I'm wondering how it broke in the first place. It looked slightly corroded on one of the broken ends, so it may have been a production defect. | ||
|
Post# 648627 , Reply# 31 12/23/2012 at 16:30 (4,140 days old) by sudsmaster (SF Bay Area, California) |
||
|
You're welcome, Ralph. The borax trick was new to me too.
The link I posted also discusses using high temperature crimp connections. Apparently standard crimp connectors won't last for a heating element application, but a high temp one will. Apparently even a strip of stainless steel from a nicad battery pack will also work, if one can crimp it adequately to the two segments of the heating element. Bulk heating element wire is available online but the trouble there could be figuring just what gauge to get. The older stuff like the GE roaster probably uses the most common type, which is nichrome wire. I wonder if Orchard Supply Hardware carries it...? | ||
|
Post# 648893 , Reply# 32 12/24/2012 at 22:22 (4,139 days old) by rp2813 (Sannazay) |
||
|
I don't have much faith in OSH anymore, but even if they did carry the correct wire, there's no way I could ever form it into the original configuration, which is about 20 oblong loops, ten down each side. If my mend goes bad, I'll cross that bridge when I come to it.
Considering the potentially tenuous nature of my repair, I decided it's not worth investing a lot of time in cosmetics. I got out the Meguiar's Car Cleaner & Wax and it removed everything that was just surface dirt. There's still some minor rust spotting on one side, but it cleaned up and buffed out well otherwise. I hit the nicks and scrapes with appliance touch-up. It may discolor from heat, but that remains to be seen. The biggest scrape on the left is still apparent, but the small nicks disappeared. I gave the lid a quick pass with Wenol and it shined up fairly well. I think it's presentable now, and with its substantial appearance it will have credibility as a viable appliance whether in the kitchen or out on the patio.
Here's a shot of it after today's treatment:
| ||
|
Post# 648931 , Reply# 33 12/25/2012 at 02:27 (4,138 days old) by sudsmaster (SF Bay Area, California) |
||
|
Looks very nice, Ralph.
If the mend fails, you could always try the boraxo/borax trick. It sounds relatively safe and does not involve thermite (which is an uncontrolled and dangerous reaction). I have some mystery wire in my workshop (came with the estate) and it MIGHT be heating wire; I'm a bit leery however to hook it up to line voltage to find out. And it's not ribbon, it's more like piano wire. | ||
| Post# 648951 , Reply# 34 12/25/2012 at 08:31 (4,138 days old) by westingman123 () | ||
|
So Handsome! She cleaned up right nice. With what did you polish the dial? The bakelite just shines! | ||
|
Post# 648958 , Reply# 35 12/25/2012 at 09:06 (4,138 days old) by polkanut (Wausau, WI ) |
||
|
| ||
|
Post# 648976 , Reply# 36 12/25/2012 at 11:18 (4,138 days old) by rp2813 (Sannazay) |
||
|
So Handsome -- I Agree! I prefer the design and more solid look of this GE over its gray & white Westinghouse contemporaries, even if the GE lacks the handy window in the lid that a Westinghouse offers.
I used the same bottle of Meguiars cleaner/wax for the temp control knob as well as the bakelite side handles (which can't be seen in the photos). I was careful to avoid the painted temperature markings. I also re-created the white dot in the center of the control knob since I had the bottle of appliance touch-up handy.
The current draw as stated on the bottom panel is 1350 watts. The giant receptacle end of the fabric-cased cord has the typical rattle to it, but it still grips the prongs firmly and doesn't get hot to the touch during use. The cord looks brand new.
Rich, that piano wire stuff sounds like what this roaster uses, although what I encountered was almost a spring steel sort of resistance to bending when I fixed the break. That's why I think it would be impossible to re-wire the thing myself. If the mend fails, I do intend give the borax(o) a try. | ||
|
Post# 649059 , Reply# 37 12/26/2012 at 01:32 (4,137 days old) by sudsmaster (SF Bay Area, California) |
||
|
Back in the mid-1960's, I recall our SF landlord giving us a roaster similar to that GE, although I don't remember the brand. I was interested in it but we never used it. Either it didn't work, or my mother refused to plug it in because she thought it would use too much electricity. Or she was angry at the landlord. Take your pick, lol.
I don't know what happened to it. Probably went into the trash. | ||
|
Post# 649260 , Reply# 38 12/26/2012 at 23:41 (4,137 days old) by rp2813 (Sannazay) |
||
|
Borax I bought some borax today. I'll use it for laundry, but have decided to perform the borax flux/fuse operation. If I don't, I know reliability will always be questionable. Since the wire looped and twisted together fine, that's a good indicator it's not brittle and compromised. I'll have more faith in the roaster if the mend can be fused into a relatively cool blob.
So all I need to do is connect the A/C cord's leads to the terminals at each end of the heating element, right? | ||
|
Post# 649269 , Reply# 39 12/27/2012 at 01:50 (4,136 days old) by sudsmaster (SF Bay Area, California) |
||
|
Never tried it before, myself, Ralph, but that sounds about right. I'd want to be able to observe the mend as it heats up with power applied, just in case.
PS-I wouldn't be too worried about the asbestos - if it's in a sheet form, and not abraded or machined, chances are the particles released will be minimal to nonexistent. I'd keep a damp towel or sponge handy to collect any stray fibers if they occur (with power off, of course). | ||
|
Post# 649383 , Reply# 40 12/27/2012 at 18:10 (4,136 days old) by rp2813 (Sannazay) |
||
|
The asbestos is indeed in sheet form and so far hasn't been a disintegration issue.
It's important to keep an eye on the borax patch after power is applied. From what I can gather, it should change from a pasty wad into a melted blob. There's no clear statement about when to cut power, but I presume it would be fairly soon after the blob forms.
I hope to get at this before the weekend is over so will report back here on how it all went. | ||
|
Post# 649395 , Reply# 41 12/27/2012 at 18:35 (4,136 days old) by sudsmaster (SF Bay Area, California) |
||
|
| ||
|
Post# 649413 , Reply# 42 12/27/2012 at 19:53 (4,136 days old) by rp2813 (Sannazay) |
||
|
I found Borax at my trusty ACE Hardware, so I bought a box since I knew I could use it for laundry.
I used to have an old school (literally) porcelain enameled Boraxo dispenser but it disappeared quite some time ago, otherwise I would have held out for Boraxo.
My interpretation is that either will work. I don't know what the difference is between the two, but am guessing whatever additional ingredients Boraxo may contain don't impact its potential to form a blob. I'll see if I can find any additional information. | ||
|
Post# 649466 , Reply# 43 12/28/2012 at 01:36 (4,135 days old) by sudsmaster (SF Bay Area, California) |
||
|
Well, the Boraxo would be mostly a natural type of soap with borax added.
Borax wouldn't have any soap in it. Personally I think the borax does the trick, that is, forms the flux that enables the weld to occur, so it might work the best as well. The person that mentioned Boraxo instead of Borax may have just had his names wrong. | ||
|
Post# 649467 , Reply# 44 12/28/2012 at 01:47 (4,135 days old) by sudsmaster (SF Bay Area, California) |
||
|
The plot thickens
Yes, I did some more googling and you want to use borax, not boraxo soap.
And here is another description of mending resistance wire with borax. An added dimension is that brass wire is used to strengthen the joint. Method: Repairing resistance wire Why Heating elements are found in many places - hair dryers, soldering irons, clothes irons, and many many more. They also have a limited lifetime and tend to break. Somehow, sometime during the operation a part of the wire gets locally weakened and its resistance raises. It may be because of a surface contamination that causes localized changes in the composition of the wire, mechanical damage lowering its cross-section, or locally diminished heat removal. The resistance of that spot raises in comparison with the rest of the wire, and more power gets released there due to the Ohm's law. More power means higher temperature, higher temperature means increase of the resistance, and increase of the resistance means higher locally released power; and soon we have a nice runaway. Then the device stops working, its heater staying cool like if it stars in a Coca Cola ad. Such device more often than not gets thrown out, even if there is a plenty of life still hidden in the rest of its construction. How The heating elements are usually made of a wire, coiled in a suitable shape on a refractory support (ceramics, mica, etc...), composed of a material with high electrical resistivity and decent resistance to heat. The most common such materials are nichrome (alloy of nickel, chromium, and sometimes iron) and kanthal (alloy of iron, chromium and aluminium). The wires are coated with a layer of oxide. This one serves as a passivation against further oxidation. This is the reason why such heating elements can not withstand well operation in reducing atmospheres. This oxide makes electrical contact difficult, hindering purely mechanical attempts to rejoin a broken wire. Such joint tends to be mechanically weak and electrically failure-prone. The repeated heating-cooling cycles also serve to loosen formerly tightly twisted wires. Welding of resistive wires is difficult. Spot welder did not help in making a satisfying joint with high mechanical integrity. Soldering is out of question due to the high temperatures the heaters operate at, vastly exceeding the melting point of the solder. The remaining easy way of metal joining is brazing, a method similar to soldering but operating with alloys with higher melting point. Borax was used as a flux, for its low cost, good availability, and ability to shield the surface from oxygen and to dissolve metal oxides, and thus promoting wetting with the molten metal. Silver was unsuccessfully tried as the brazing metal. While its melting point of above 900 �C could provide reasonable performance in lower-temperature applications, it turned out that it steadfastly refuses to wet the wires. No wonder, when iron and nickel are involved; silver does not wet these. A successful brazing material was brass, an alloy of copper and zinc. Copper has excellent wetting properties towards iron and nickel, therefore, when melted, it readily flows over the resistance wire. The melting point of about 900 �C is also favorable for resistance to decent temperatures encountered in lower-temperature heaters. Brass wire in a range of thicknesses can be obtained in art supplies shops catering to beadworking audience. Method The broken wire is somewhat straightened to ensure good access to both ends of the wire. The ends are twisted together. Then they are heated with a torch and dipped into powdered borax; some crystals adhere to the hot wires. Heat again, repeat until the joint is satisfactorily coated. Heat yet more; the crystals of borax will puff up as they lose crystal water, then they will melt into a glass-like substance, forming a bead-like droplet over the twisted wires. The brass is added to the joint in the form of a wire. Either it can be fed to the red-hot joint in the form of a wire, or the brass wire can be twisted around the joint before it is coated with borax. Each approach is good for different setting, try both, find what suits you better. The joint is thoroughly heated to orange-hot glow. The brass should melt readily, forming a shiny drop under the molten borax, then soaking between the twisted wires. This moment indicates a successful joint, well-wetted with brass. The brass should not form discrete droplets or beads, nor the wetting of the wires should be spotty and uneven. Good wetting makes a relatively thin layer of brass spreading out over the underlying metal. Then the joint is allowed to cool, solidified borax is carefully removed (it behaves like glass, it is hard and fragile; it can crack suddenly and the dissipated mechanical energy could break the wire again, ruining the effort), excessive length of the joint is cut off, and the wire is folded back to fit the heating element again. CLICK HERE TO GO TO sudsmaster's LINK | ||
|
Post# 649522 , Reply# 45 12/28/2012 at 11:46 (4,135 days old) by rp2813 (Sannazay) |
||
|
Well, this latest process is sounding like it's more trouble than it's worth. I don't have the option of dipping the broken ends into borax, which is something I've read a few times in my research. I need to do the repair with the twisted mend I've already made remaining in place. I have no brass wire that I'm aware of, so would need to hunt some down. I do like the idea of using a blow torch instead of electrical current. I think it provides more control and would be safer than heating up the entire element.
However, this most recent description makes me think the borax treatment may not be a sure bet for success.
As satisfying (and cheap) as it would be to fix the original, I might just poke around for replacement element assemblies applicable to modern roaster ovens found in stores today. More money but a lot less trouble, and I'd be buying the peace of mind that it won't likely fail me any time soon. As a bonus, I'll still have cleaner laundry as a result of adding borax. | ||
|
Post# 649593 , Reply# 46 12/28/2012 at 17:16 (4,135 days old) by rp2813 (Sannazay) |
||
|
OK, apparently there is no such thing as a replacement heating element assembly. Sears parts came close, but they only had the side element listed, and it was NLA. So why list it then? I found a Chinese company that had something that might have worked, but they only take orders for mass quantities.
Local parts houses were a bust as well. Apparently if you own a modern roaster oven and the heating element fails, you can go to the trouble of sending it away for repair by the manufacturer, or just buy a new one. Nobody offers parts to fix the thing yourself.
So it's back to the borax for me. I'll see if I can find some brass wire laying around here, and if not, I'll just go with plan A, which didn't mention brass wire. In my cruising of the web, I did read someone's account of simply twisting wires together and having that repair last for many years, so the borax treatment might provide some additional insurance, brass or no brass.
I hope to photo-document the process when the time comes. | ||
|
Post# 649614 , Reply# 47 12/28/2012 at 18:06 (4,135 days old) by kb0nes (Burnsville, MN) |
||
Crimp or Screw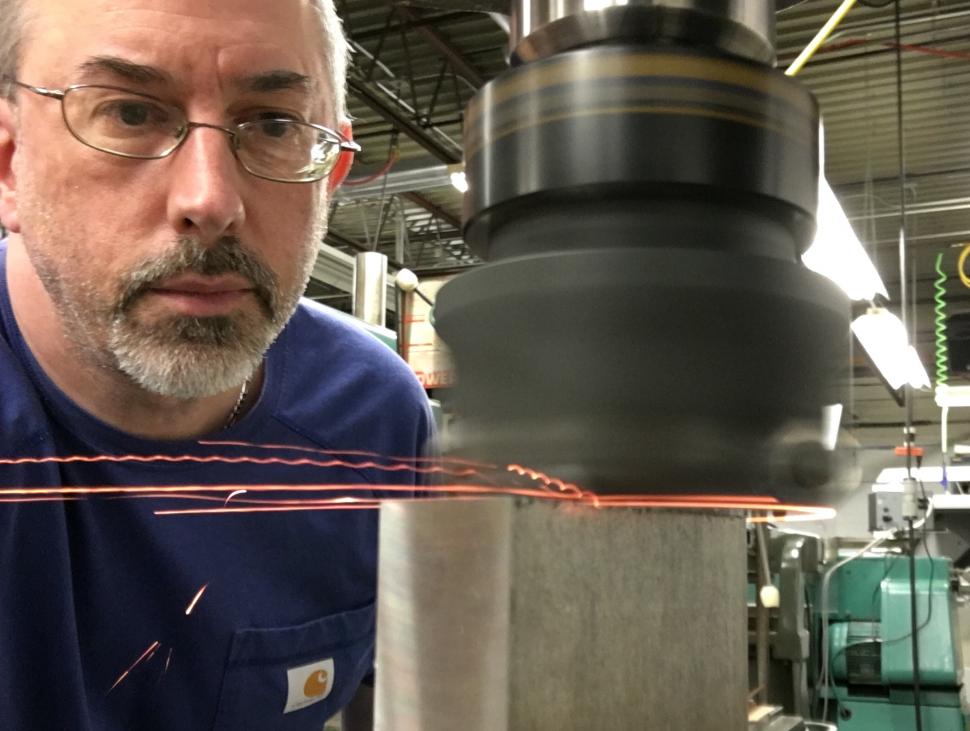
I've had good luck using either a nickle plated steel crimp ferrule or a small nut and bolt. Brazing may well work but the mechanical methods will work for many years too.
I found this site and they sell both resistance wire as well as ceramic grommets and crimp fittings. Perhaps something there will be of use. CLICK HERE TO GO TO kb0nes's LINK | ||
|
Post# 649663 , Reply# 48 12/28/2012 at 21:13 (4,135 days old) by rp2813 (Sannazay) |
||
|
A heat-proof crimp is probably the most reliable way to go. Due to the nature of the asbestos envelope, I don't think using a nut/screw and bolt will work, as it would create a bulge that could eventually poke through the asbestos sheeting.
I've sent an e-mail inquiry to MOR Electric Heating asking if they have anything that might work for a replacement element assembly. It's probably a long shot, but they might have some leads, so to speak. As stated previously, replacing only the nichrome wire would be next to impossible, as it would need to be threaded through the asbestos much like stitching work. I'm bad enough at that with perfectly flexible thread and non-toxic fabric.
Thanks for that link! | ||
|
Post# 649798 , Reply# 49 12/29/2012 at 16:11 (4,134 days old) by rp2813 (Sannazay) |
||
|
My trusty ACE Hardware had small multi-sectioned tray that included heat-proof crimp connectors, so I now have what I need. The specs on them say they'll handle up to 650 degrees. I think that's compatible with the nichrome element. I have a crimping tool that I bought a while back to use for attaching spades onto bell wire. It's capable of crimping the size of connector I have for the nichrome, so this should result in a proper repair. | ||
|
Post# 649840 , Reply# 51 12/29/2012 at 21:57 (4,134 days old) by rp2813 (Sannazay) |
||
|
Travis, from the research I've done it seems that repairing the existing nichrome wire is far easier than replacing it.
I'll take pictures when I have the roaster apart again.
The heating assembly consists of two sections of asbestos no more than 18" long, one of which has nichrome wrapped around it in long flat loops up one side and down the other, maybe 10 or 12 loops per side. IIRC that sheet is split down the middle to facilitate the wrapping. This piece is enclosed inside another sheet of asbestos that's three times as wide. This outer sheet is folded over so the ends overlap and make a double layer on one side, and serves as an envelope around the portion with the wiring. That's it.
This envelope slides in between a pair of front-to-rear cross members (with holes in them for the bottom cover screws) and the bottom of the cooking well, and is held in place simply by the fiberglass insulation being smashed against it once the bottom access cover is replaced.
Right now I'm having a hard time finding anything on line that provides information on how hot the nichrome gets in this application. I'm thinking it stays below 650 since the highest setting on the oven is 500, but maybe I'm being too simplistic. | ||
|
Post# 649848 , Reply# 52 12/29/2012 at 23:43 (4,134 days old) by sudsmaster (SF Bay Area, California) |
||
|
Ralph,
If the ACE crimp connectors are good up to 650C, that's about 1200F, and you'd probably be OK with the oven. If it's 650F, then it might fail over time, but it's worth a try. Brass wire is readily available - I got a few lengths of it at OSH a few years back. A craft store should have it as well. Personally I'd try a dab of borax paste, maybe over some fine brass wire, and then plug it in. What can you lose? The thing only cost $10!!! | ||
|
Post# 649851 , Reply# 53 12/30/2012 at 00:07 (4,134 days old) by sudsmaster (SF Bay Area, California) |
||
|
Here's a link to a interesting discussion of nichrome and it has a table of various amperages needed to achieve various wire temps.
CLICK HERE TO GO TO sudsmaster's LINK | ||
|
Post# 649959 , Reply# 54 12/30/2012 at 14:56 (4,133 days old) by rp2813 (Sannazay) |
||
|
I saw that table of nichrome amps vs temps, but since I have no background in electrical theory it didn't give me a clear answer on 1,350 watts applied to what I presume is no thicker than 18 gauge wire.
I'm going to double-check the crimp connector heat limit. It may have been 650-C but I'll have to make sure of it, as well as try to determine just how hot the nichrome will get in this particular application. It's hard for me to imagine that it would get red hot inside the asbestos envelope, but maybe it does. | ||
|
Post# 650619 , Reply# 55 1/2/2013 at 14:08 (4,130 days old) by rp2813 (Sannazay) |
||
|
Back To Borax? I've confirmed the heat limit of the crimp connector is 650 F. I went back to a table to try and calculate the high temperature of the nichrome at 1350 watts. The table advised that watts = volts x amps. For 18 gauge wire, 6.5 amps is required for the wire to reach 600 degrees F. I multiplied 6.5 by 110 for a product of 715 watts. If my logic is correct, this means that 1350 watts would heat the wire to nearly twice the temperature limit of the crimp connector. If the wire is thinner than 18 gauge, it only gets worse.
Now I'm back to thinking borax would offer a more lasting repair. If my calculations above are incorrect, I'd appreciate it if anyone familiar with electrical theory could offer the correct values. | ||
|
Post# 652089 , Reply# 56 1/9/2013 at 17:33 (4,123 days old) by rp2813 (Sannazay) |
||
|
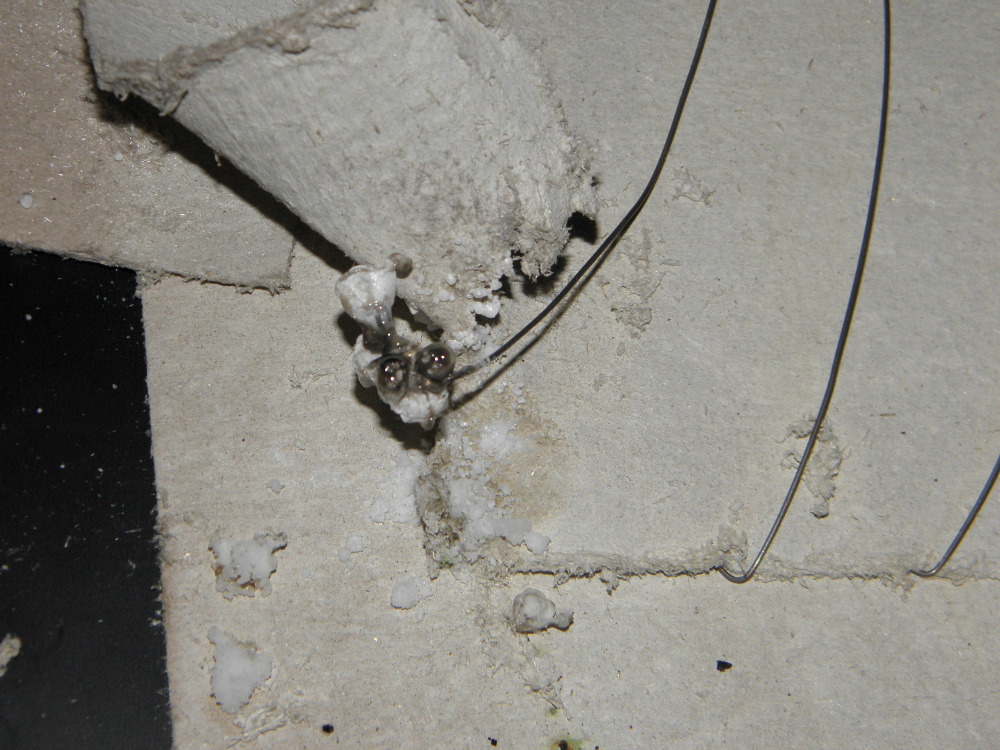
SUCCESS! The repair job has been completed!
I thought about starting a new thread, but it would have been out of context, so here we are again.
Since the crimp connectors were unsuitable, I went with the borax method. It was easy and entertaining. Highly recommended!
First, a shot of the mend wrapped with brass wire. Sorry that it's a little blurry. The brass was a slightly heavier gauge than the nichrome, so I couldn't get it wrapped as tightly as I wanted, but by this point I was invested. 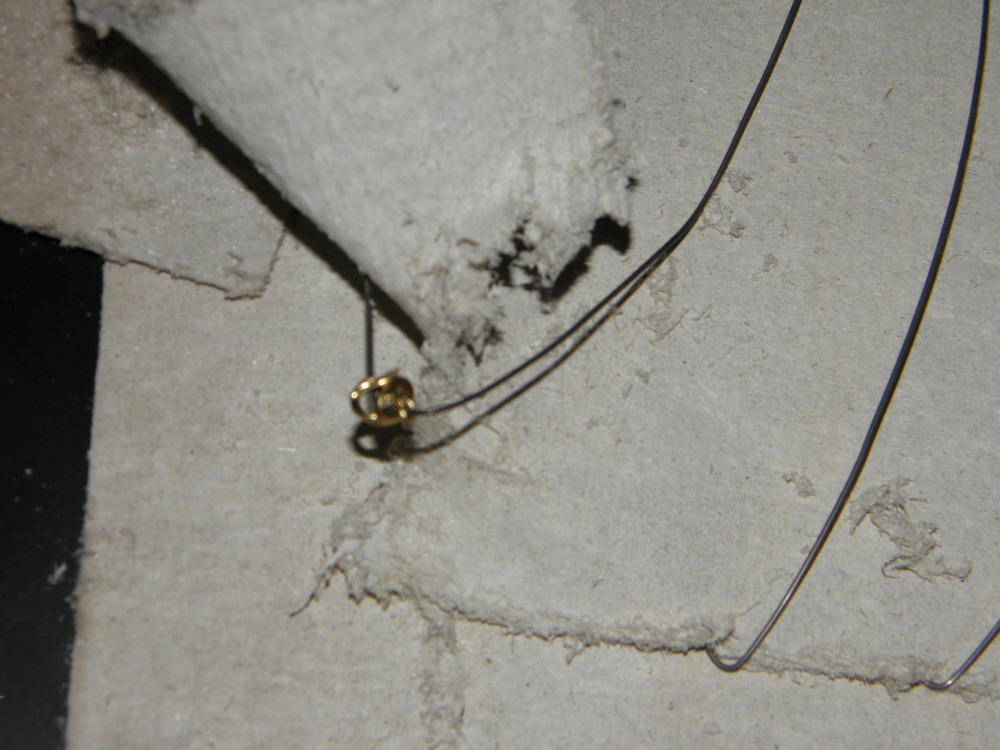
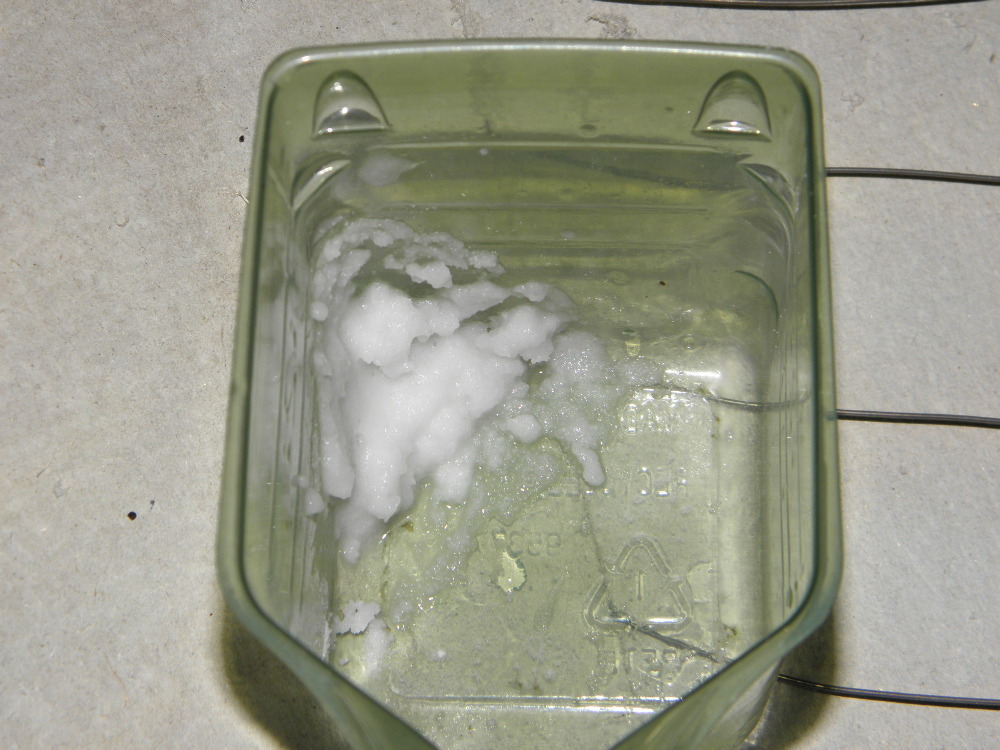
| ||
|
Post# 652090 , Reply# 57 1/9/2013 at 17:38 (4,123 days old) by rp2813 (Sannazay) |
||
|
The Flux | ||
|
Post# 652091 , Reply# 58 1/9/2013 at 17:40 (4,123 days old) by rp2813 (Sannazay) |
||
|
The Flux Applied | ||
|
Post# 652093 , Reply# 59 1/9/2013 at 17:42 (4,123 days old) by rp2813 (Sannazay) |
||
|
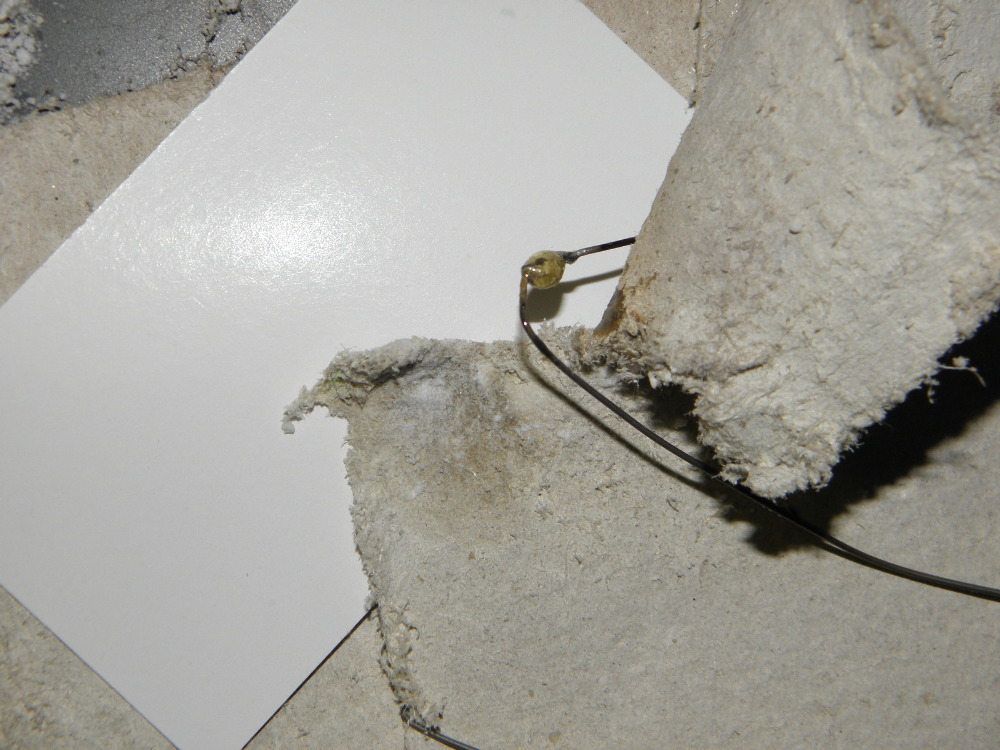
The First Attempt | ||
|
Post# 652094 , Reply# 60 1/9/2013 at 17:45 (4,123 days old) by rp2813 (Sannazay) |
||
|
Second Attempt | ||
|
Post# 652096 , Reply# 61 1/9/2013 at 17:48 (4,123 days old) by rp2813 (Sannazay) |
||
|
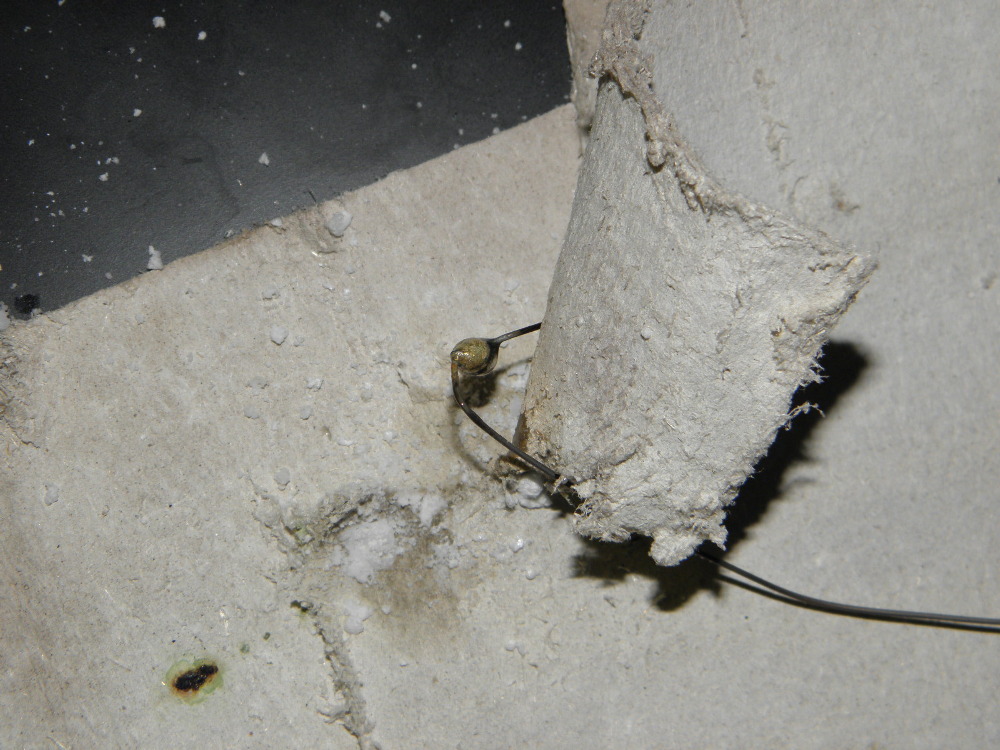
The Finished Product | ||
|
Post# 652097 , Reply# 62 1/9/2013 at 17:55 (4,123 days old) by rp2813 (Sannazay) |
||
|
The Heating Assembly Here's a shot of the entire nichrome element before closing up the asbestos envelope.
You'll notice that the wires aren't as close together on the right end as they are on the left. This is reflected in the heat distribution inside the well, as it's hotter at the end where the wires are closer together. I didn't mess with this because the nichrome is stapled into place at various points, so the positioning of the wire can't be changed. I'm OK with it. It's not like I'm going to be using this thing for souffles. 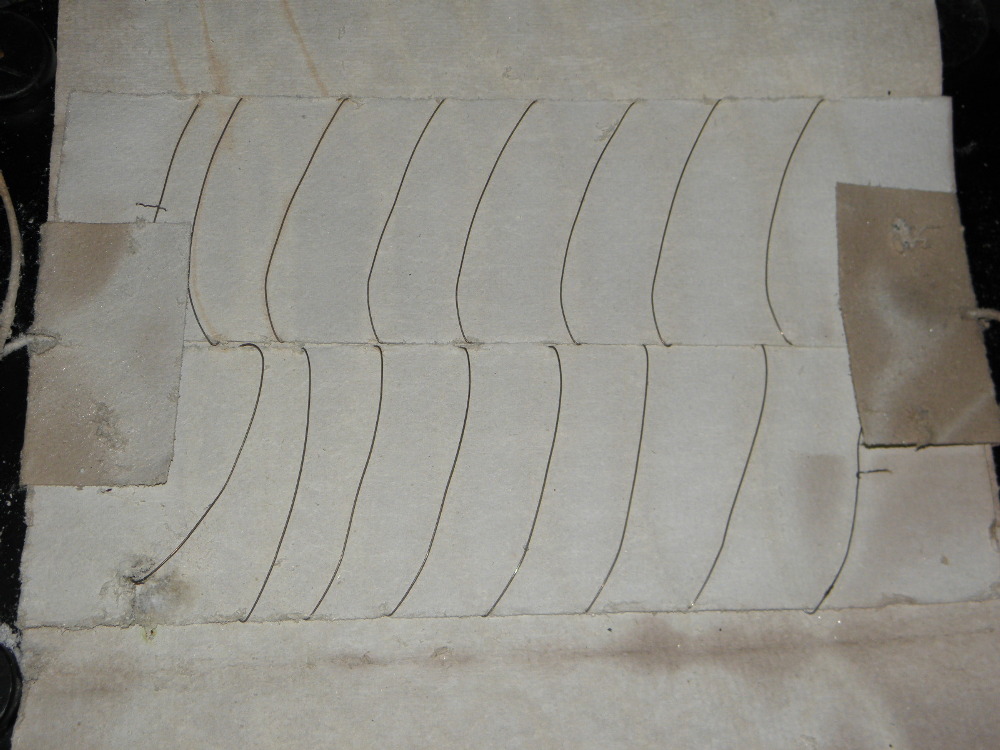
| ||
|
Post# 652098 , Reply# 63 1/9/2013 at 17:56 (4,123 days old) by rp2813 (Sannazay) |
||
|
The Envelope Please | ||
|
Post# 652101 , Reply# 64 1/9/2013 at 18:03 (4,123 days old) by rp2813 (Sannazay) |
||
|
Back In Place The heat sheet installed under the well. Two wires to hook up as can be seen here, and there are two more for the indicator "lamp" above the temperature control (not in view).
Completely re-assembled and tested, the roaster works as it should. It's ready for service, so now I need to think about what would be an appropriate inaugural dish to try in it. I'm confident this repair will last indefinitely. 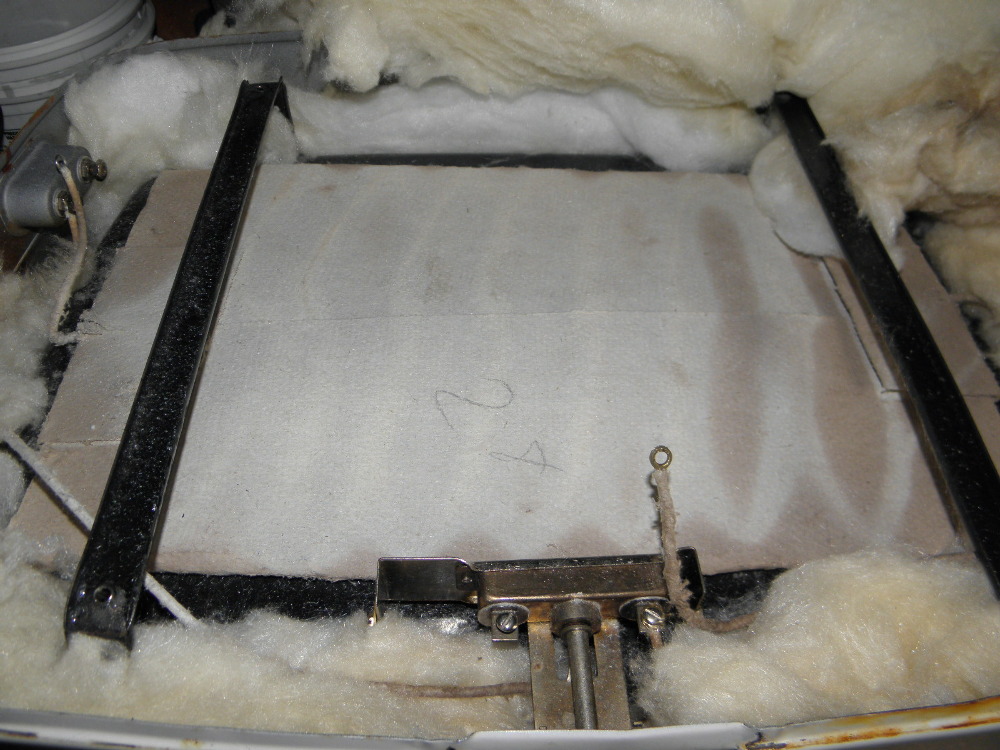
| ||
|
Post# 652179 , Reply# 65 1/10/2013 at 02:32 (4,122 days old) by sudsmaster (SF Bay Area, California) |
||
|
Good Work!
Too cool, Ralph!
Or, should I say, too hot, but not too hot? In any case, congratulations are in order. This opens up a whole new avenue for those of us with vintage (or not so vintage) appliances with broken nichrome heating wires. If only I knew about this technique about 45 years ago... I could have saved that old GE toaster... lol... | ||
|
Post# 652190 , Reply# 66 1/10/2013 at 05:39 (4,122 days old) by polkanut (Wausau, WI ) |
||
|
| ||
|
Post# 652249 , Reply# 67 1/10/2013 at 12:37 (4,122 days old) by rp2813 (Sannazay) |
||
|
Thanks Rich. I couldn't have accomplished this without the help of your investigative research.
Tim, I've been reading up on line for recipe ideas but it seems they are predominantly about turkey. I've learned that these roasters tend to steam more than roast, and that turkey will not brown so it was recommended more than once that the turkey be removed toward the end and placed into a regular oven to brown. Yeah, no. I'll stick with a conventional oven for that.
I noticed that on some makes the vents in the lid are controlled by a single knob with a dial marked "Pre Heat," "Bake" and "Roast" and I presume those translate into "closed," "partially open" and "fully open." That's good information to reduce or increase the steaming effects when desired. I also read that for the pre-heating period (usually 20 minutes or so), the temperature should be set for 25 degrees higher than the recipe calls for since as soon as the lid is removed to place the food in the well, a lot of heat will be lost that will have to be recovered. Another good rule of thumb.
I think this will be great for St. Patrick's Day dinner. I don't have a pot large enough to accommodate the potatoes and the cabbage, and I don't like cooking them separately from the beef. There might be something else to cook up before then, but the way time flies anymore, March 17 is right around the corner. | ||
|
Post# 652263 , Reply# 69 1/10/2013 at 13:53 (4,122 days old) by polkanut (Wausau, WI ) |
||
|
Corned beef, cabbage, and potatoes for a crowd would be a perfect way to christen this beauty! I hear you about time getting away from a person. My mom has a recipe for chili mac that makes a roaster full. I'll have to get it for you. I think she has a recipe for sloppy joes that makes a huge quantity also. | ||
|
Post# 652313 , Reply# 70 1/10/2013 at 18:31 (4,122 days old) by rp2813 (Sannazay) |
||
|
I may want to hit you guys up for some recipes down the road, or if you want, maybe a new thread can be started for roaster-specific recipes with ingredients in the appropriate quantities for an 18-quart model.
I found a couple of roaster corned beef recipes on line that I'll probably use as a guide. My GE owner's manual has very few recipes in it, and none for corned beef. I think there aren't (m)any cook books devoted to roasters because they'll do most things a conventional oven or slow cooker will do, and recipes for those appliances can be easily adapted. | ||
| Post# 652431 , Reply# 71 1/11/2013 at 09:19 (4,121 days old) by Westie2 () | ||
|
Recipes Here is link for the Hamilton Beach 18 Qt like we have so maybe a start Ours does good on a cake or bar cookies.
CLICK HERE TO GO TO Westie2's LINK | ||
|
Post# 652472 , Reply# 72 1/11/2013 at 14:31 (4,121 days old) by rp2813 (Sannazay) |
||
|
| ||
|
Post# 652526 , Reply# 74 1/11/2013 at 21:47 (4,121 days old) by rp2813 (Sannazay) |
||
|
| ||
| Post# 652528 , Reply# 75 1/11/2013 at 21:59 (4,121 days old) by Westie2 () | ||
|
Ralph here is recipes from Rival roasters. The smokeed brisket temps amd time could be used for the corned beef. Yes the cocks are good I see them all the time at Goodwill and also yard sales. If no lid can use foil or a close fit lid. CLICK HERE TO GO TO Westie2's LINK | ||
|
Post# 652562 , Reply# 76 1/12/2013 at 02:51 (4,120 days old) by rp2813 (Sannazay) |
||
|
I've done some more reading on line. There are a lot of people out there who have sworn off using a conventional oven for roasting a turkey after doing one in a roaster because 1) Turkeys consistently turn out moist and juicy when cooked in a roaster, and 2) The conventional oven is freed up for assorted side dishes. I think I'll give a turkey a try at some off-beat time of year and see how it goes.
It seems the issues with browning vary among the different brands perhaps as a result of lid designs, but I think the size of the bird would also be a factor. Brushing with butter, or a mixture of butter and a bit of Kitchen Bouquet helps to effect browning, if not crisping, but a moist bird is infinitely more preferable to a crispy one. | ||
|
Post# 812433 , Reply# 77 3/5/2015 at 14:19 (3,338 days old) by lotsosudz (Sacramento, CA) |
||
GE ROASTERS
I have one just like yours, as well as a Westy. I actually like the way the GE cooks, better than the Westy cooks. I find it more evenly heated, as well as more accurate on the thermostat settings, The only time I use the Westy, is in cooking huge turkeys, or when a larger batch of something is needed. Although the GE's capacity is smaller by a hair, it's my go to roaster for almost everything. you will find once you understand that they are really the original " set it and forget it" applance, you will find you will use it all the time! it's great for the Easter ham or leg of lamb.
Hugs, David | ||
| Forum Index: | 
| Other Forums: |

|

|

|

|

|

 Comes to the Rescue!