Thread Number: 49660
Hoover 155 (A3072) Dryer Overhaul Pt 1
[Down to Last]

automaticwasher.org's exclusive eBay Watch:
scroll >>> for more items --- [As an eBay Partner, eBay may compensate automaticwasher.org if you make a purchase using any link to eBay on this page]
Post# 717749   11/25/2013 at 22:16 (3,801 days old) by crouzet951 ()        

Hi again folks

I had intended just a quick vacuum and general tidy up for the 155, but it ended up being more like an overhaul. The dryer was last overhauled in 1991 when the machine first came into my possession, and it hasn't had a great deal of use since then. Perhaps once a month as an average. The main things replaced then were the motor windings, the timer, and the front drum bearings. This was mentioned in the attached link.

During this current overhaul, some parts were replaced where the existing ones would have been OK, but I really wanted a machine that would last another 20 years (or longer).

There were just a couple of minor disasters during the process, but it all worked out in the end.

Just a couple of requests – does anyone have any Australian service literature for any of the 3022, 3022A, 155, and 165 UK dryers sold here.

Secondly, would any UK members have service literature for similar UK market dryers to mine – the 3022, 3022A, D6008, D6E06, and D6042 , with the latter two probably being most similar. Just a wiring diagram would be wonderful.

I don’t really need any of this, but it would just be nice to add to my current service information. Thanks again to all.

Without further ado, here begins the journey.

Regards
John


The 155 safely brought up from the garage.


CLICK HERE TO GO TO crouzet951's LINK


Post# 717752 , Reply# 1   11/25/2013 at 22:18 (3,801 days old) by crouzet951 ()        

Dust and fluff everywhere - on everything inside the cabinet.

It is quite ingenious how the same basic cabinets were used for the washers and the dryers.


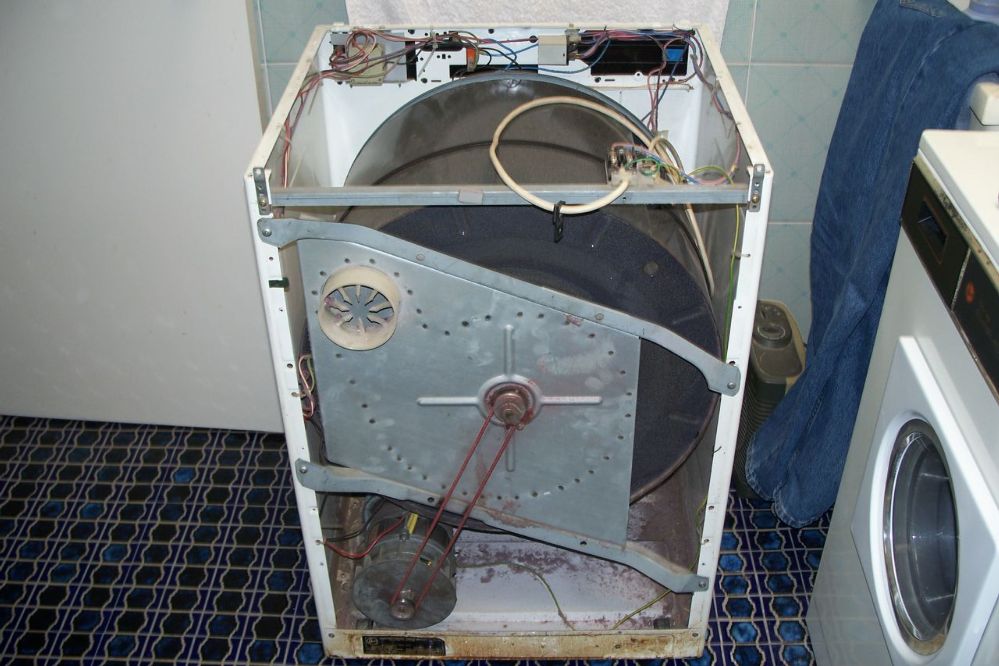
Post# 717754 , Reply# 2   11/25/2013 at 22:22 (3,801 days old) by crouzet951 ()        

I mainly used to dry my maroon sheets, hence the colour of the fluff.

The rust looking stuff on the lower back panel is more fish-oil based paint that I seemed to have used on everything. Hehe.


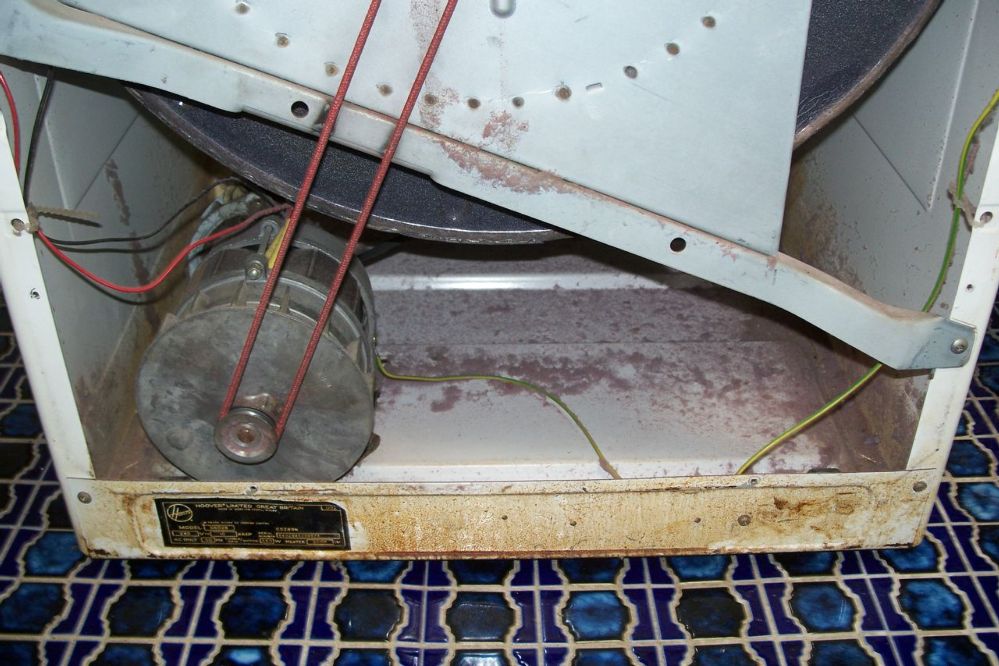
Post# 717755 , Reply# 3   11/25/2013 at 22:23 (3,801 days old) by crouzet951 ()        

More fluff.

Post# 717757 , Reply# 4   11/25/2013 at 22:30 (3,801 days old) by crouzet951 ()        

Before dismantling one of these machines, I recommend marking the location of the four fan housing brackets with a felt pen.

The fan housing, as well as supporting the rear of the drum, also braces the cabinet, keeping it square. It is best if the housing is replaced in the same locations.


Post# 717758 , Reply# 5   11/25/2013 at 22:37 (3,801 days old) by crouzet951 ()        

It is best to lay the machine of its front, suitably cushioned and protected of course, before lifting off the fan housing and removing the drum. The drum is a larger diameter than any of the openings in the cabinet, so the sides of the cabinet have to be spread slightly to allow it to be removed.

The first minor disaster occurred before laying the machine down, which will be described soon.


Post# 717760 , Reply# 6   11/25/2013 at 22:50 (3,801 days old) by crouzet951 ()        

The fan housing lifted off. The air seal around the diameter of the fan opening is quite thick felt. This is a suction fan, which draws air into the cabinet through vents on the back panel, sucks it through the heating elements, through the drum (and clothing), and expels it out the back vent.

The metal bridge across the fan has the rear drum support post in the middle.

Keep this housing away from children and animals as it is a nightmare of razor sharp edges. They must have worn riggers' glove when assembling these at Merthyr. Hehe.


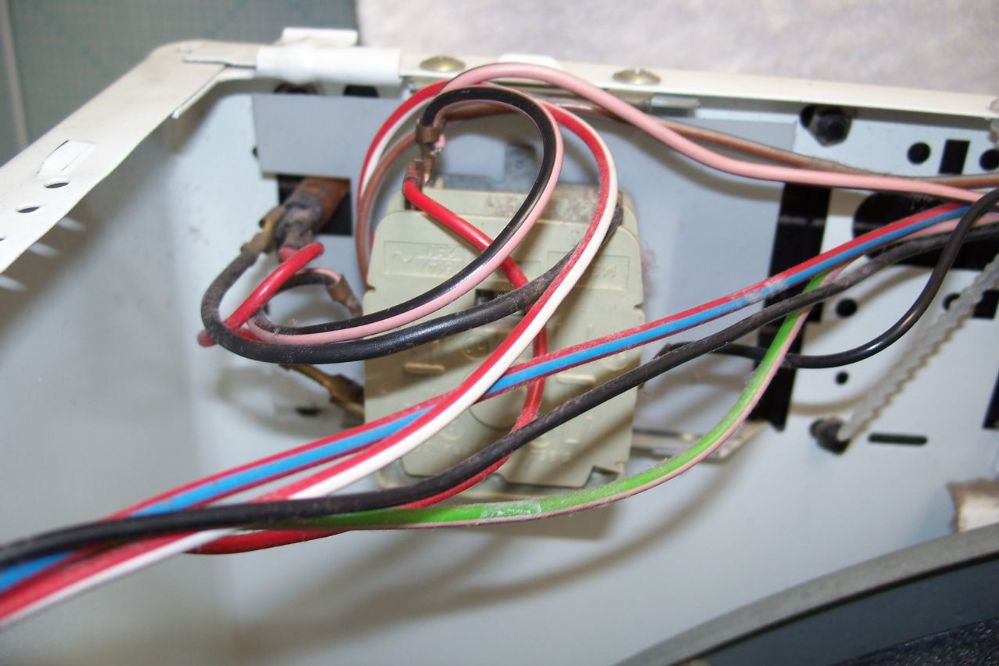
Post# 717765 , Reply# 7   11/25/2013 at 23:37 (3,801 days old) by crouzet951 ()        

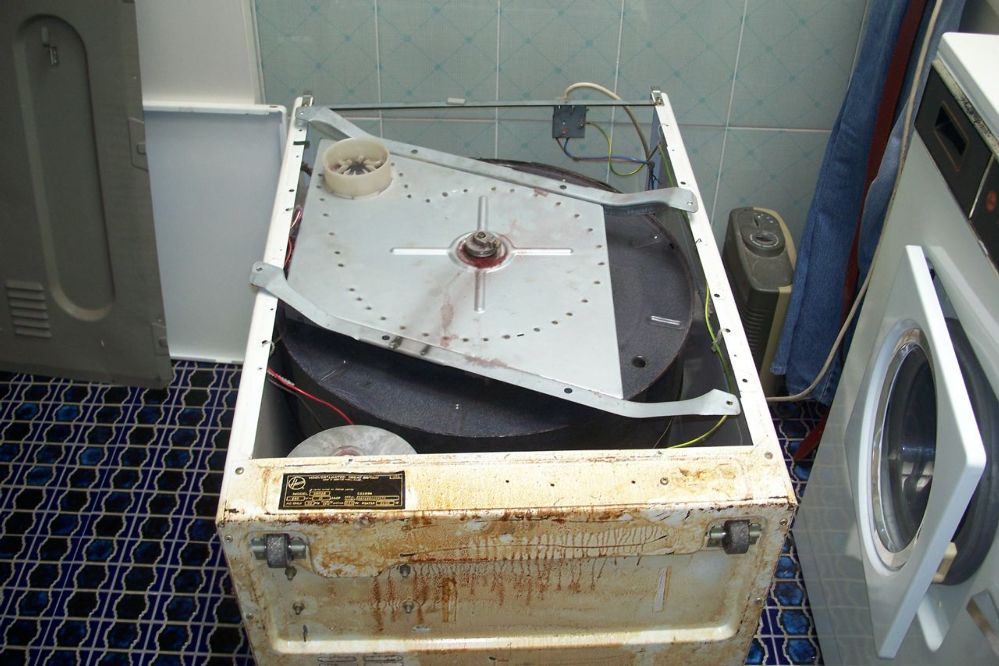
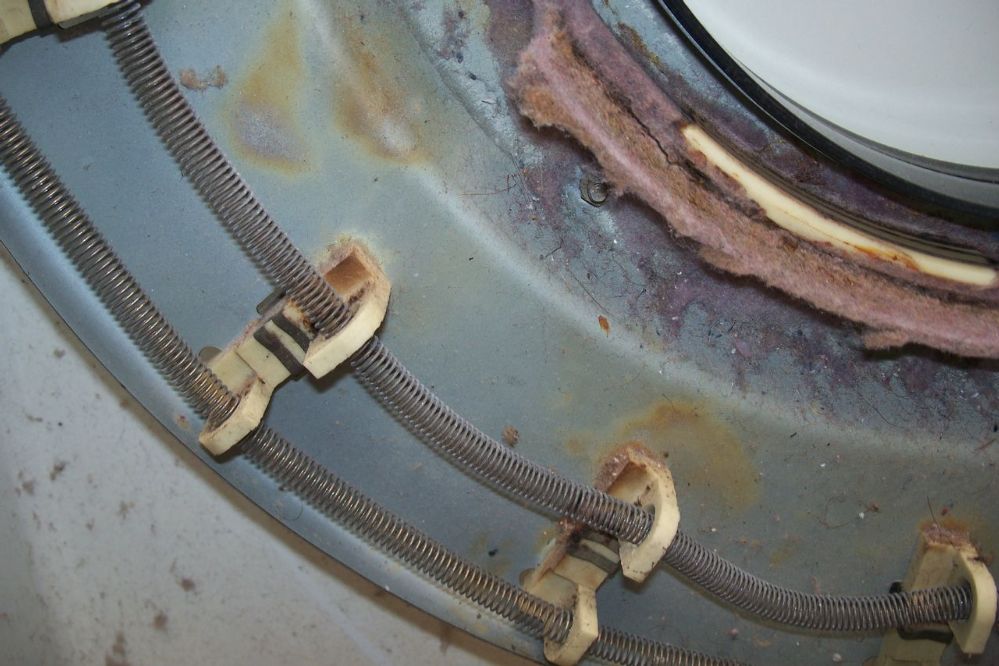
The rear of the drum. The rear support bearing is a bronze bush.

You can make out the lint filter through the holes.


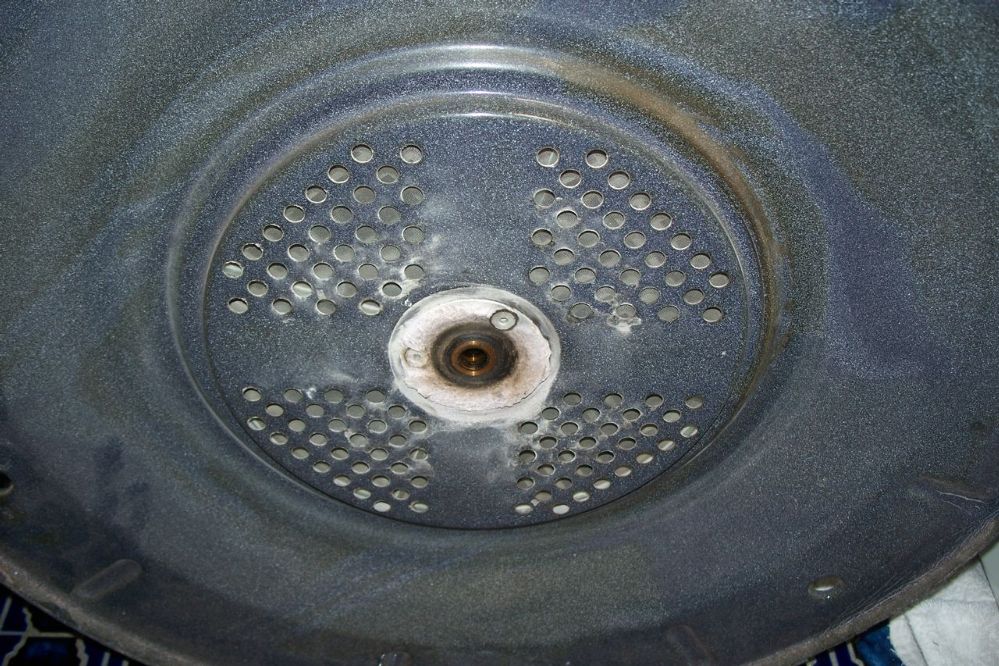
Post# 717766 , Reply# 8   11/25/2013 at 23:40 (3,801 days old) by crouzet951 ()        

This is the dual-temperature thermostat. It reacts to the temperature of the air exiting through the rear duct.

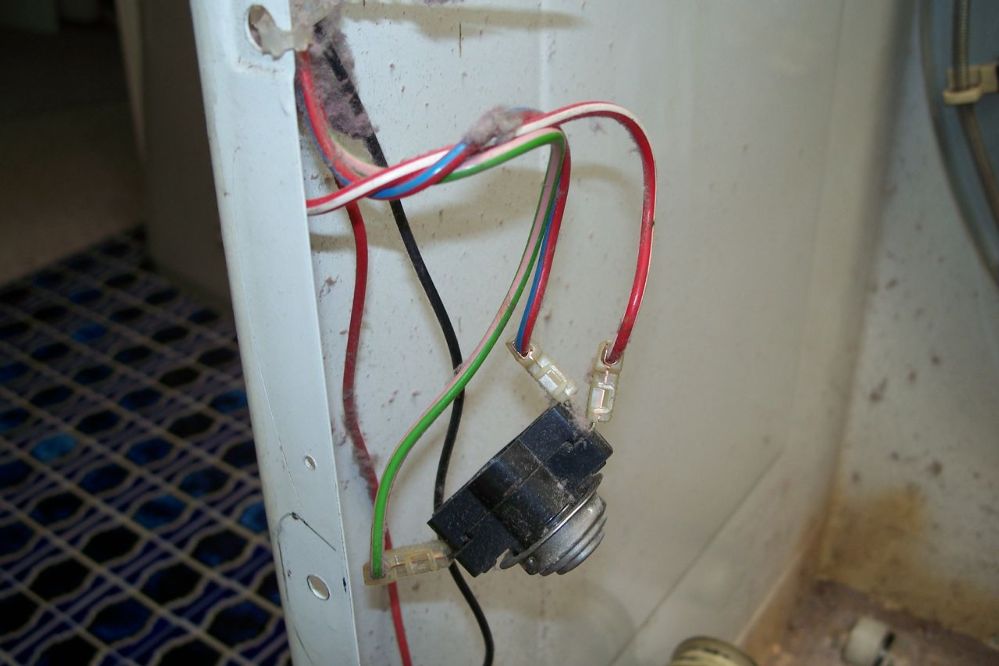
Post# 717768 , Reply# 9   11/25/2013 at 23:47 (3,801 days old) by crouzet951 ()        

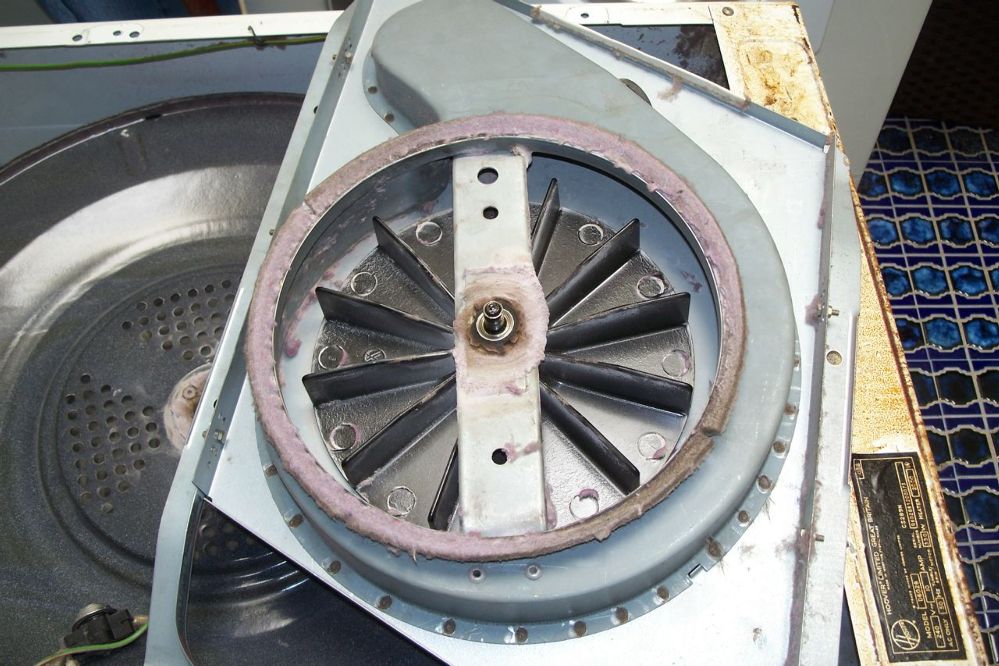
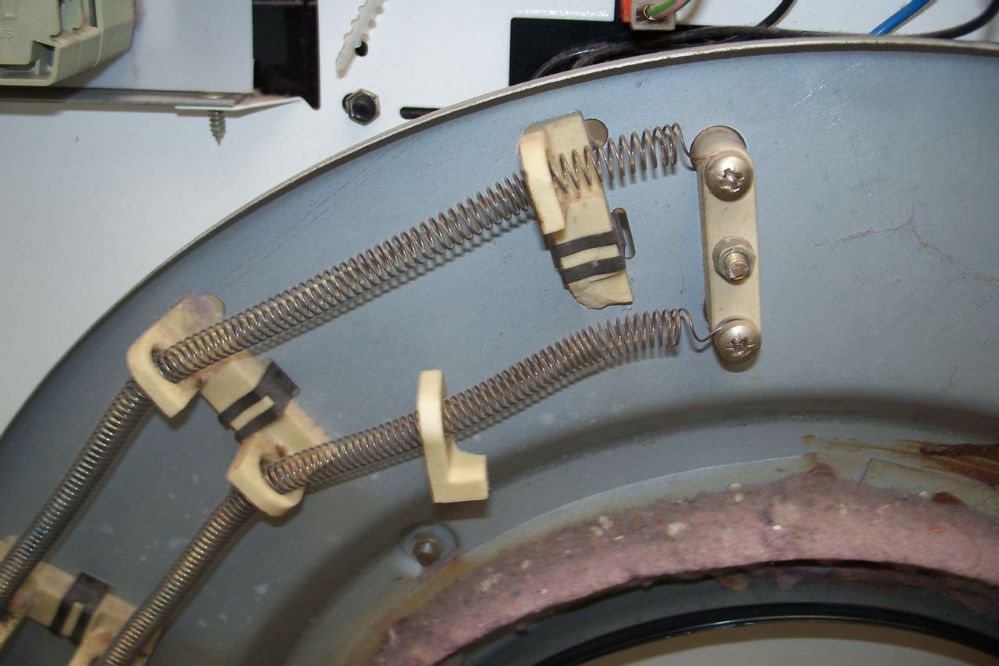
This is the heating element assembly. Air is drawn into the front of the drum, through the elements, for the whole circumference of the element assembly.

The small disaster can be seen at the 10.30 position.


Post# 717771 , Reply# 10   11/25/2013 at 23:56 (3,801 days old) by crouzet951 ()        

First small disaster.

It is imperative that, unless you have a helper, the dryer should be laid on its forward side before releasing the fan housing. Forgetting my past experience, I unscrewed the fan housing with the machine upright. The moment this was released, the front of the drum fell off its bearings and dropped down, breaking the element isolator. These appear to be ceramic and are very brittle.

'Twas my own stupid fault.


Post# 717772 , Reply# 11   11/26/2013 at 00:00 (3,801 days old) by crouzet951 ()        

The two white circular (nylon?) items are the front drum bearings. There is a flange at the front of the drum, and it simply rests on theses it rotates. I remember being quite shocked at the crudity of the setup, but it works beautifully.

These bearings were installed at the last overhaul and are hardly worn.


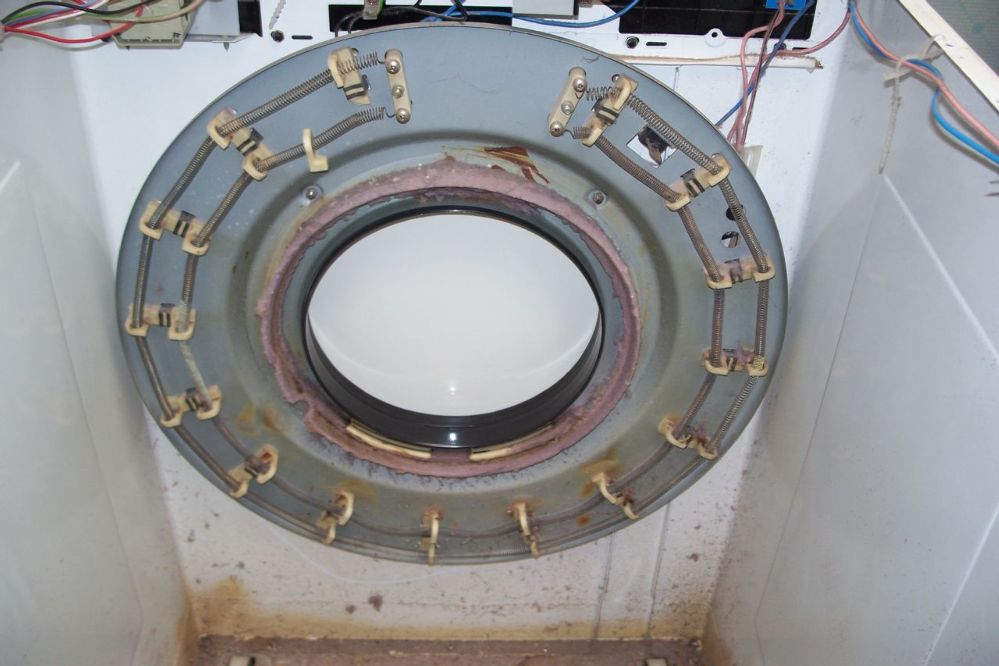
Post# 717773 , Reply# 12   11/26/2013 at 00:01 (3,801 days old) by crouzet951 ()        

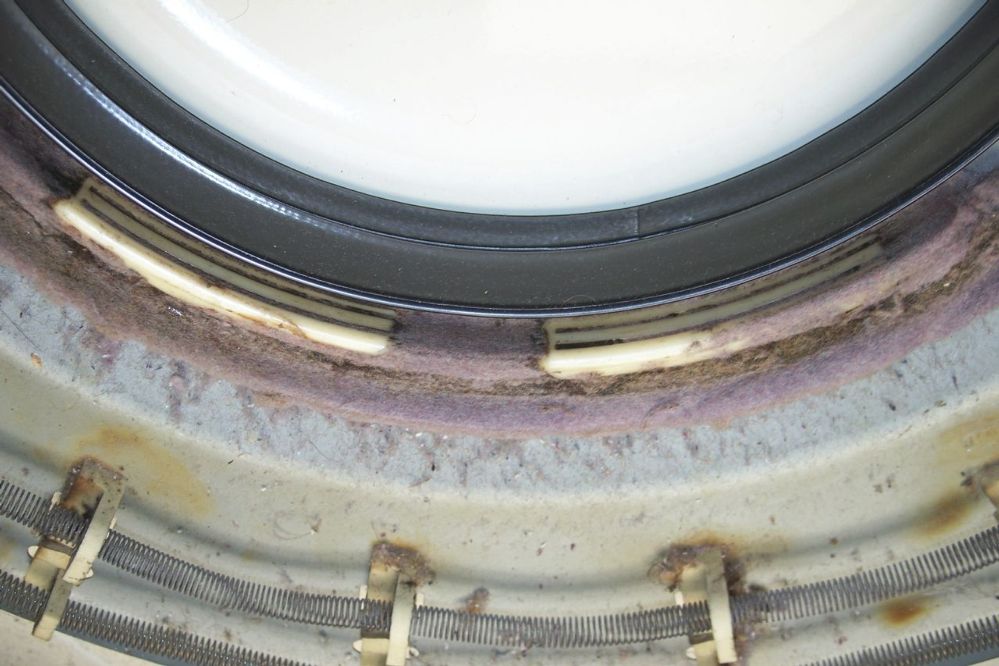
This is the flange at the front of the drum that rests on the bearings.

Post# 717774 , Reply# 13   11/26/2013 at 00:08 (3,801 days old) by crouzet951 ()        

Note the scorch marks, probably from when the initial motor windings burnt out and the fan stopped. This caused fluff buildup around the element isolators to smoulder when the elements went red hot, due to no air flow. The elements are original, so the thermal cutout must have saved them.

It's really quite frightening how there could easily have been a fire.


Post# 717776 , Reply# 14   11/26/2013 at 00:12 (3,801 days old) by crouzet951 ()        

Amazing

This is the end of the motor where cooling air is drawn in. It's very easy to see why previously the windings burnt out due to no air flow.

To the right is the hinged pressure roller that keeps the drum belt tight. The spring that normally pulls the roller to the left of this image has been removed.


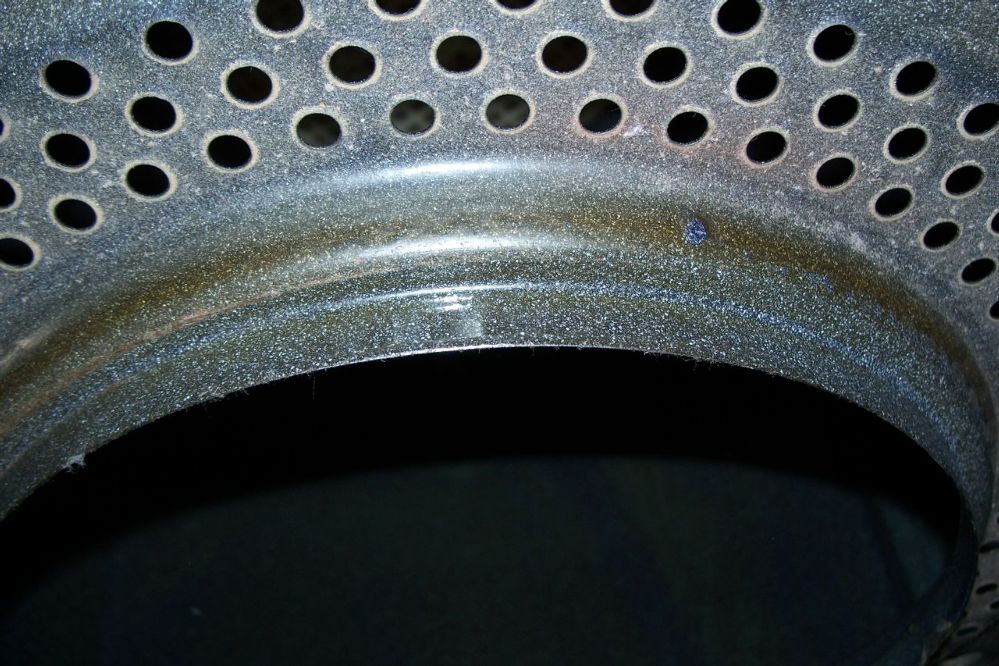
Post# 717777 , Reply# 15   11/26/2013 at 00:21 (3,801 days old) by crouzet951 ()        

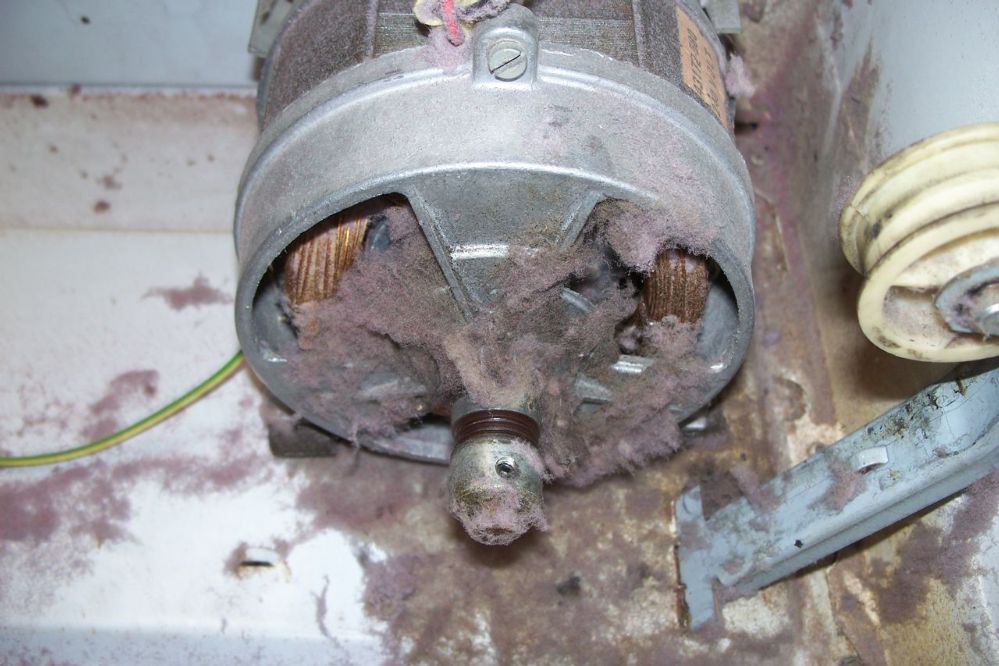
The motor is an induction type of very simple construction. Being an induction motor, it has no brushes.

The cooling fan for the motor can be seen, together with the small pulley that drives the drum fan.


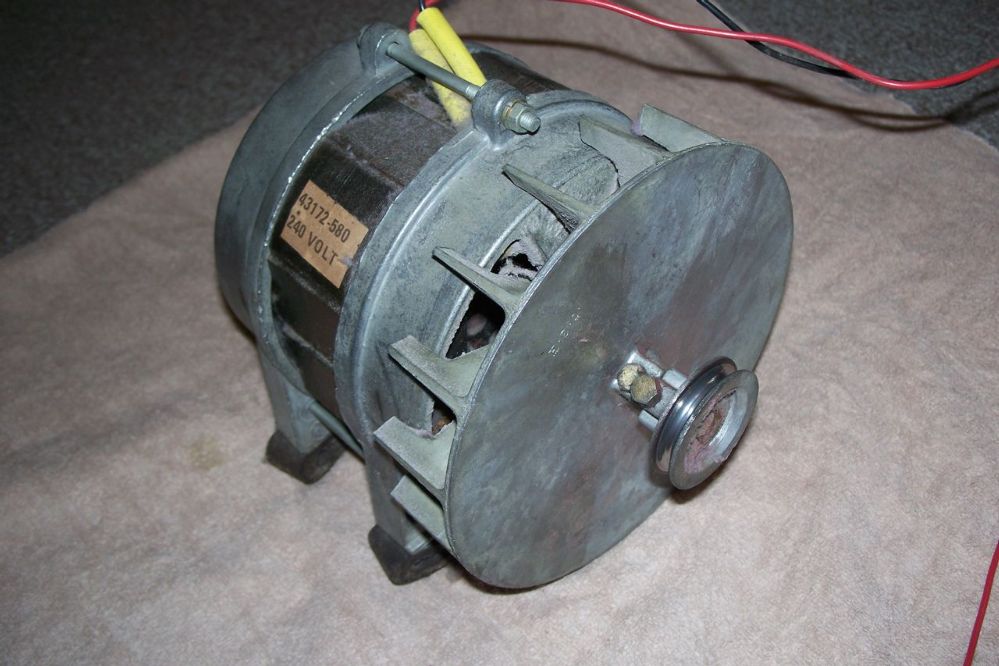
Post# 717778 , Reply# 16   11/26/2013 at 00:24 (3,801 days old) by crouzet951 ()        

This was the sight when one of the end plates was removed. Even the holes through the rotor were blocked.

The motor was well on its way to burning out the windings again.


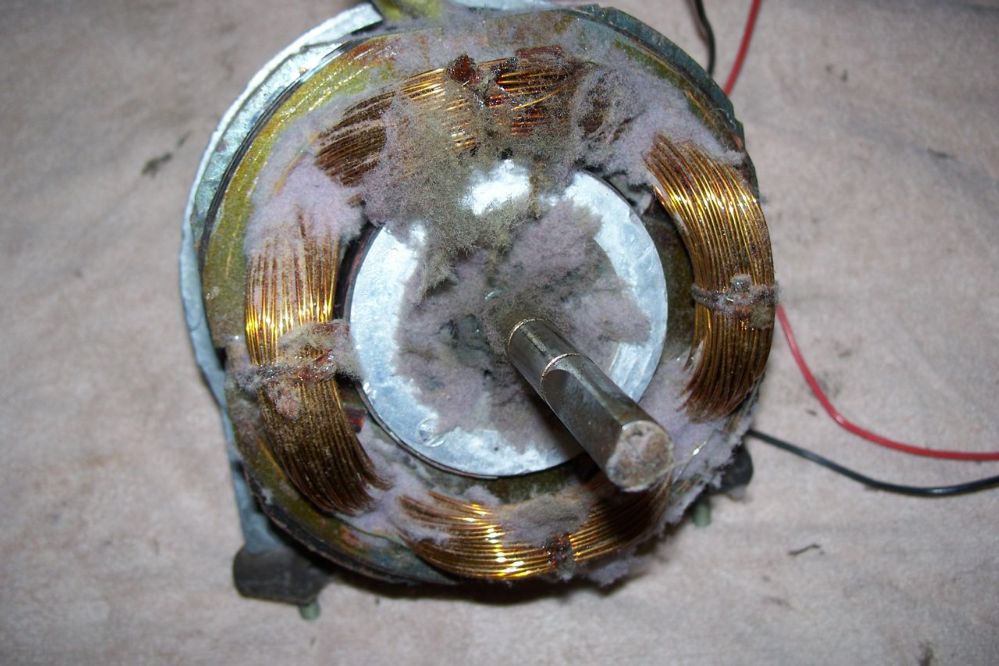
Post# 717779 , Reply# 17   11/26/2013 at 00:27 (3,801 days old) by crouzet951 ()        

As mentioned earlier, the motor is of very simple construction. Remove the pulleys, the fan, and a few screws, and it breaks down into four major sub-assemblies. They are the two end plates with bearings, the windings, and the rotor.

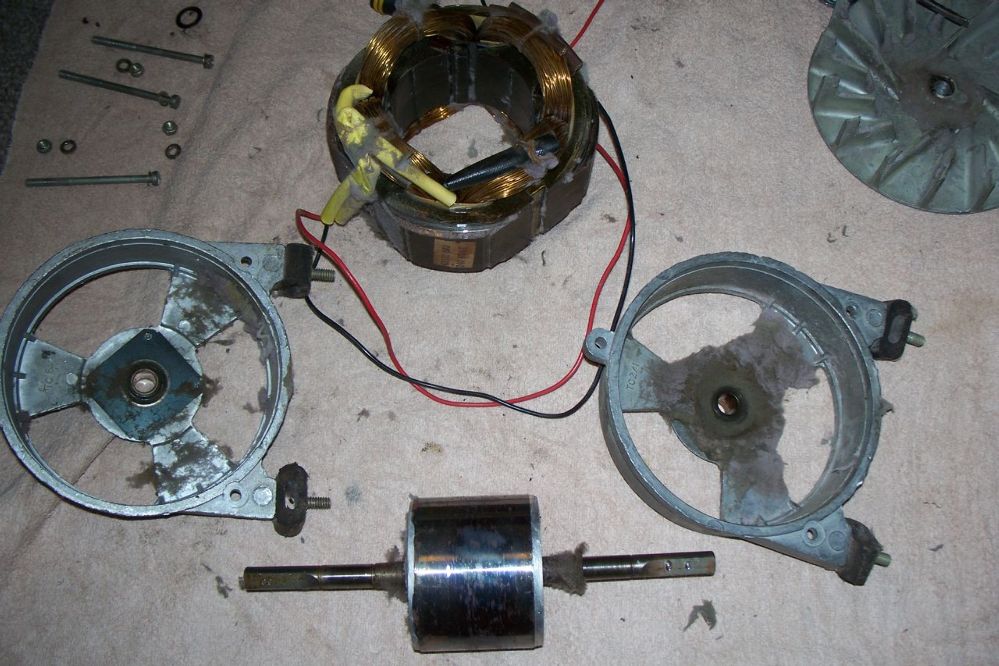
Post# 717780 , Reply# 18   11/26/2013 at 00:31 (3,801 days old) by crouzet951 ()        

The rotor bearings are self-aligning sintered bronze bushes. There is virtually no wear to either the bushes, or the rotor shaft surfaces.

These motors are very lightly loaded compared to washer motors.


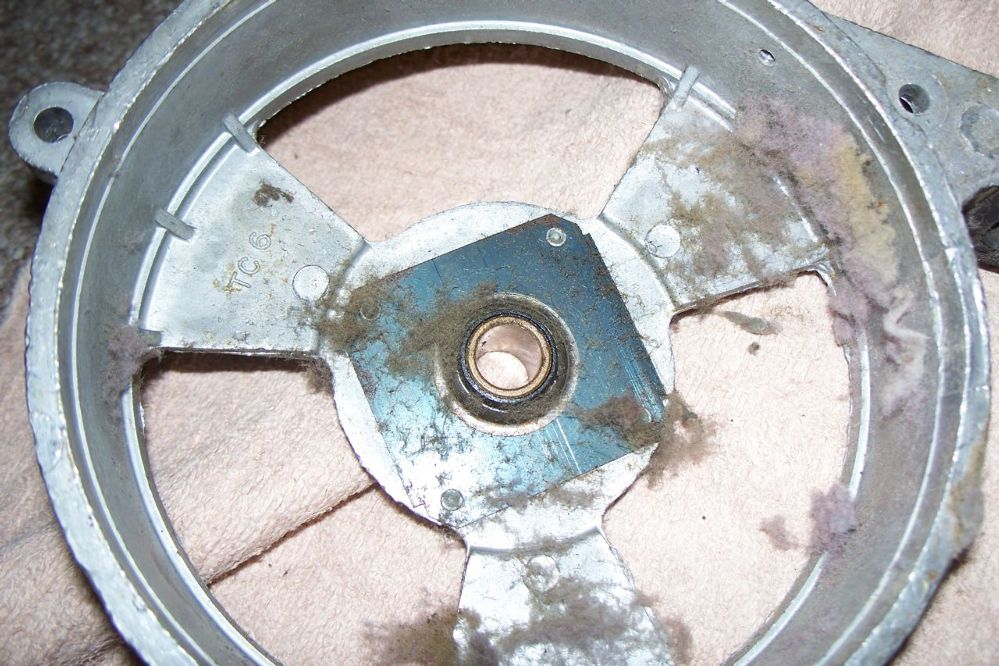
Post# 717781 , Reply# 19   11/26/2013 at 00:34 (3,801 days old) by crouzet951 ()        

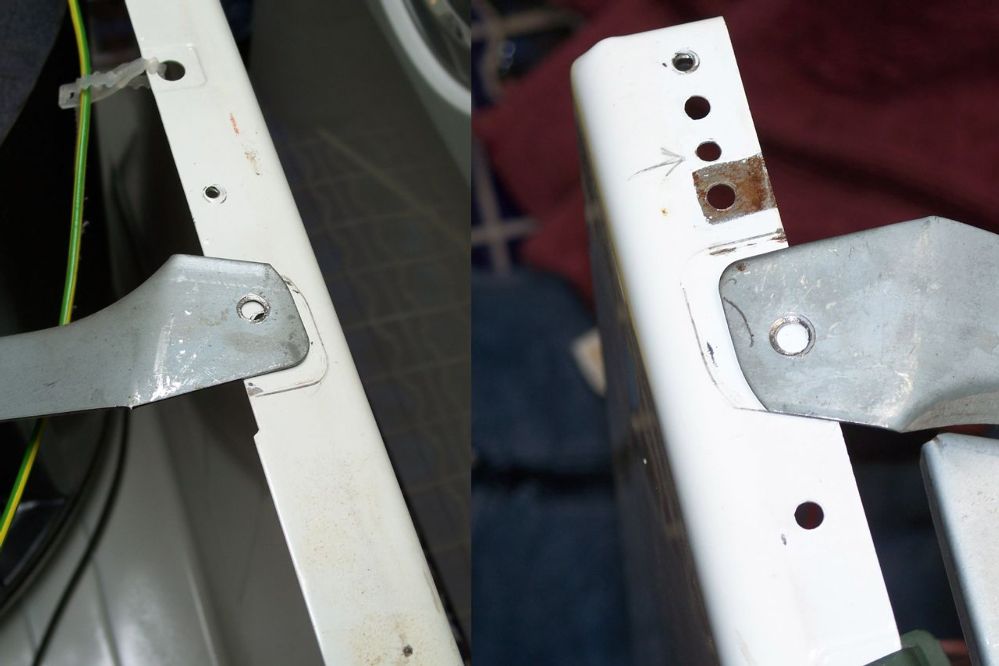
The bracket supporting the rear drum bearing post is retained by pop rivets. These were easily drilled out.

This bracket traps the fan in the housing, so it must be removed to get the fan out.


Post# 717783 , Reply# 20   11/26/2013 at 00:41 (3,801 days old) by crouzet951 ()        

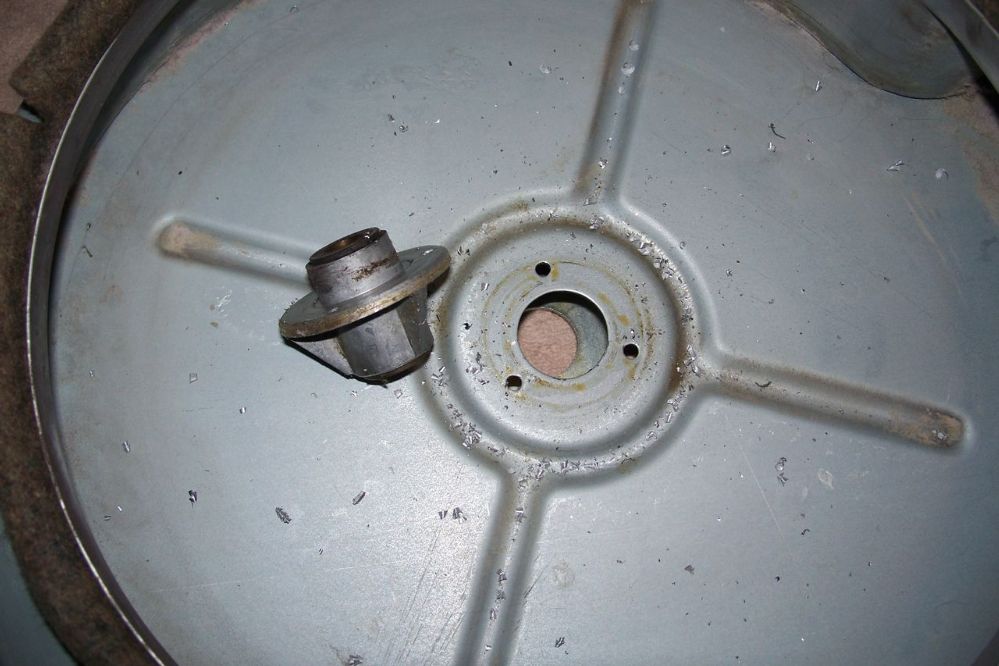
When the fan is removed, its bearing housing is visible. The bearing housing is made from alloy, and it's retained by three aluminium rivets.

More fluff everywhere of course.


Post# 717784 , Reply# 21   11/26/2013 at 00:47 (3,801 days old) by crouzet951 ()        

This is the rear of the drum fan, showing the plain shaft that runs in two bronze bushes in the bearing housing. The fan appears to be made from Bakelite, or something similar.

There was very little wear on the shaft - it can barely be felt running a fingernail across it.


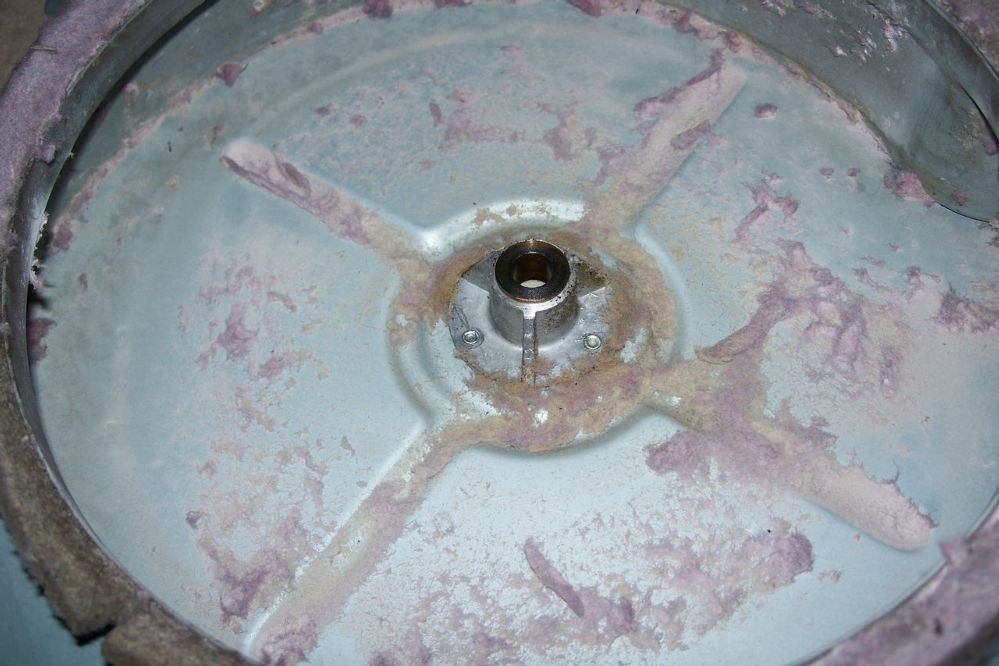
Post# 717785 , Reply# 22   11/26/2013 at 00:48 (3,801 days old) by CREEDY ()        

good work on the refurb! I have one of these i'm looking to sell its working and tidy does anyone want to make an offer on it? i'm on the gold coast :)

Post# 717787 , Reply# 23   11/26/2013 at 00:52 (3,801 days old) by crouzet951 ()        

The bronze bushes were slightly worn. The fan rocks very slightly when mounted in the bushes.

I would have been happy to refit the bearing housing and fan, but as I had a new housing and shaft, the three rivets were drilled out. There is a strengthener plate on the other side of the housing, which can be seen through the hole.


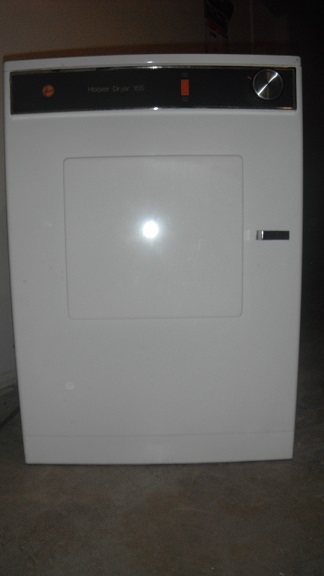
Post# 717788 , Reply# 24   11/26/2013 at 00:54 (3,801 days old) by crouzet951 ()        

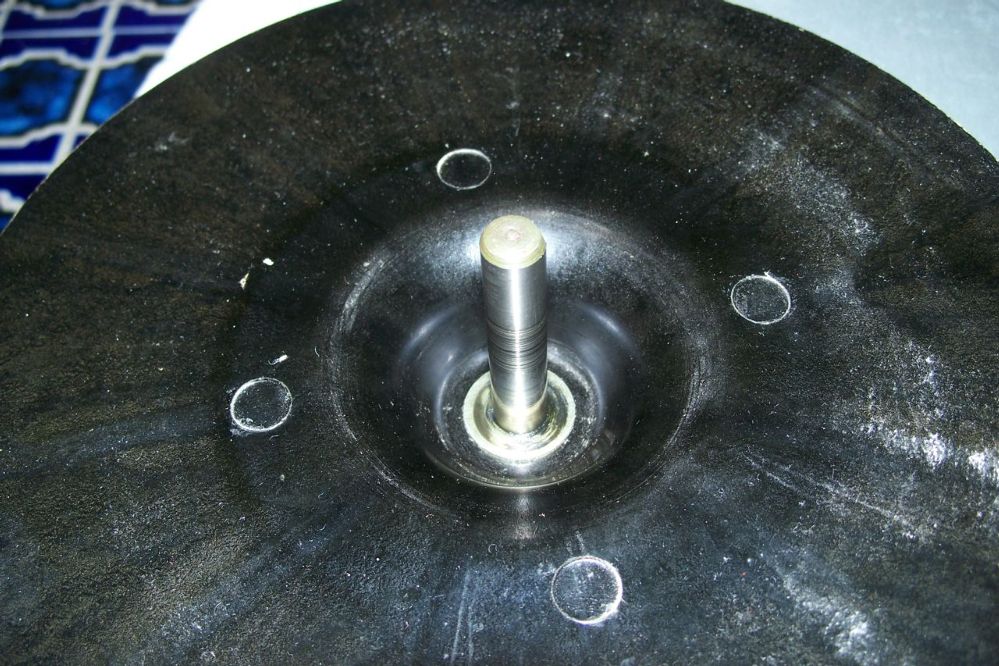
A close up of the rear drum bearing post. The drum turns quite slowly, so this bearing is lightly stressed. There's virtually no wear on the shaft.

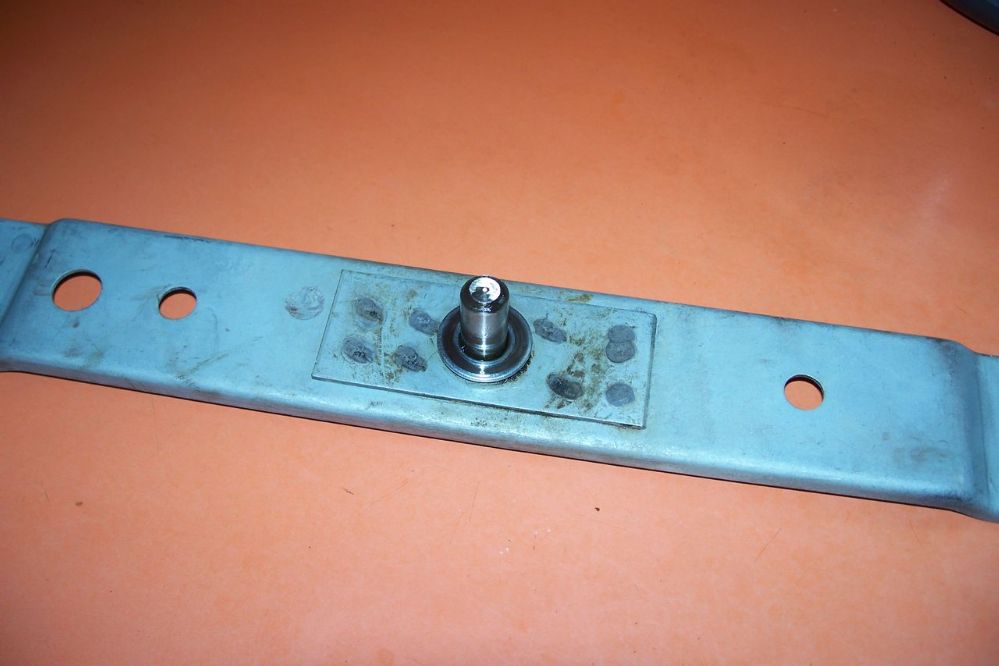
Post# 717789 , Reply# 25   11/26/2013 at 01:01 (3,801 days old) by crouzet951 ()        

These later dryers have the cabinet closed up at the bottom by a pressing which is pop riveted in place.

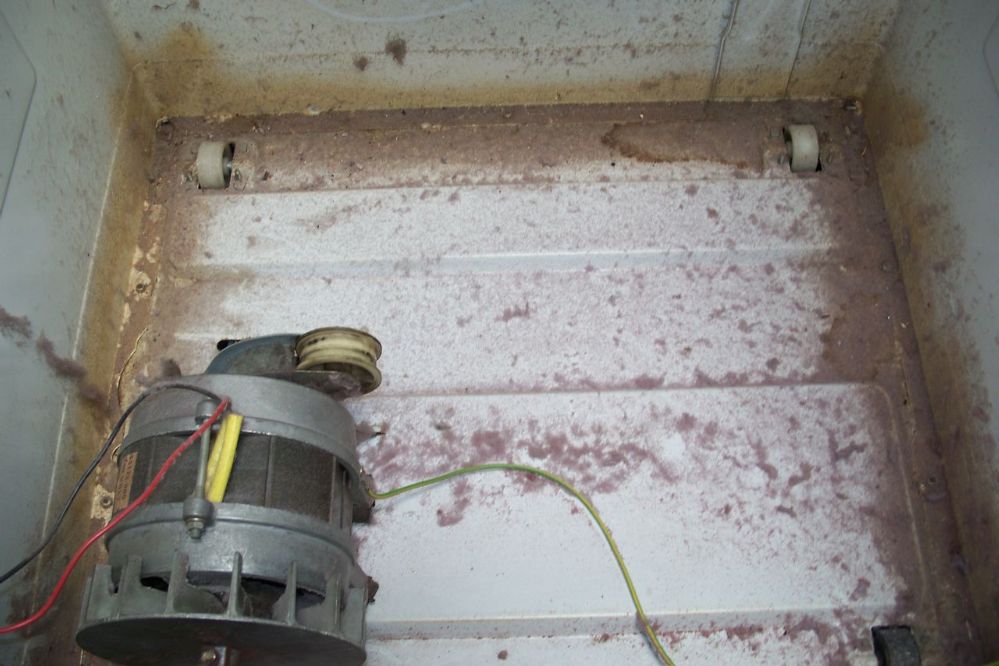
Post# 717790 , Reply# 26   11/26/2013 at 01:02 (3,801 days old) by crouzet951 ()        

This is the rear of the heating elements assembly.

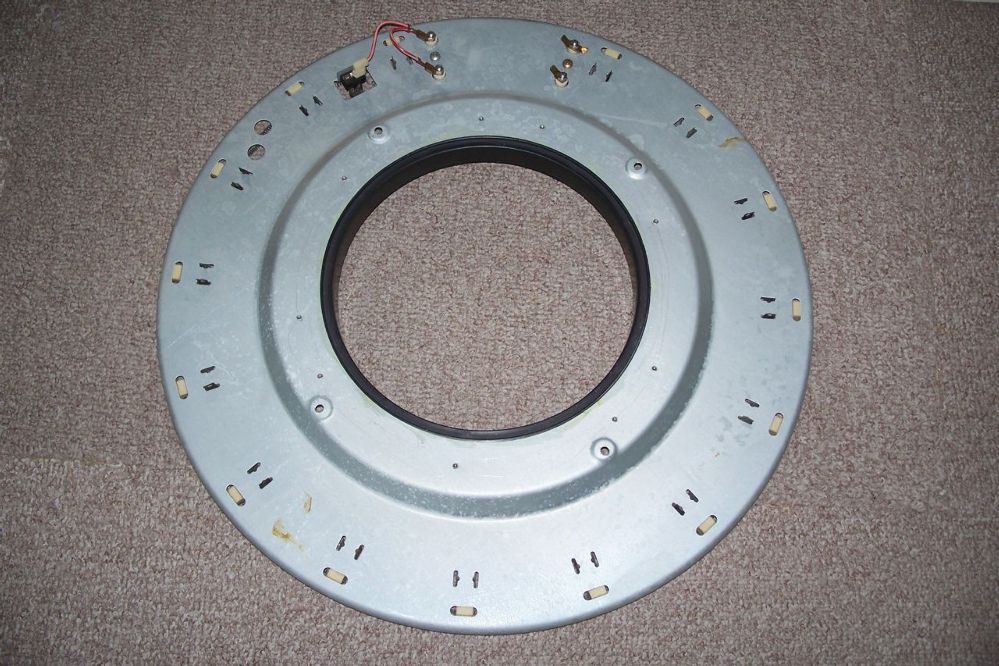
Post# 717791 , Reply# 27   11/26/2013 at 01:04 (3,801 days old) by crouzet951 ()        

This is the back of the thermal cutout that protects the elements.

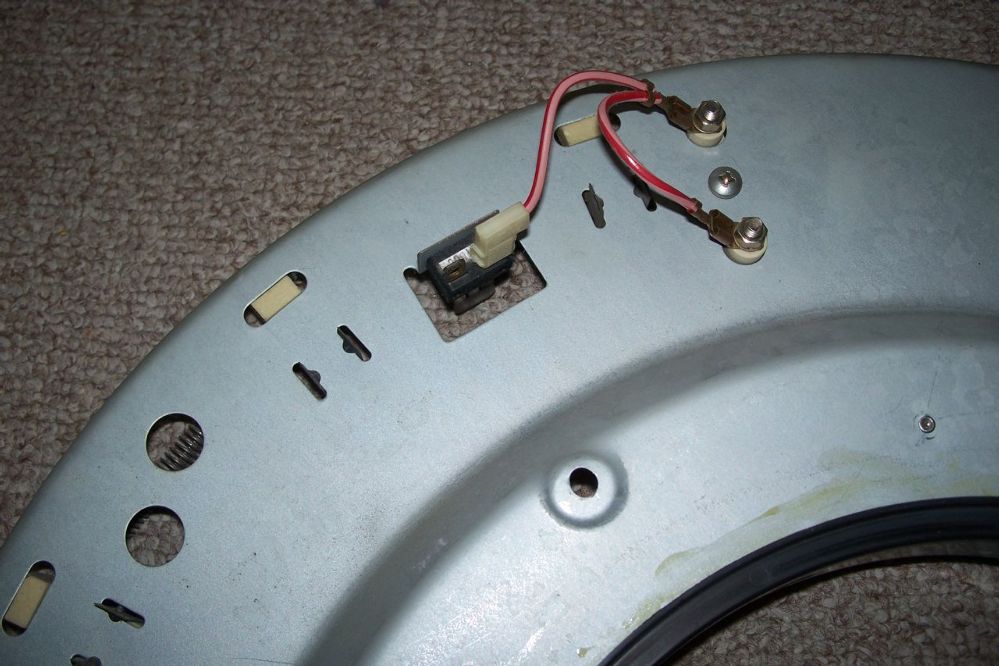
Post# 717793 , Reply# 28   11/26/2013 at 01:06 (3,801 days old) by crouzet951 ()        

An image of the rear of the door catch.

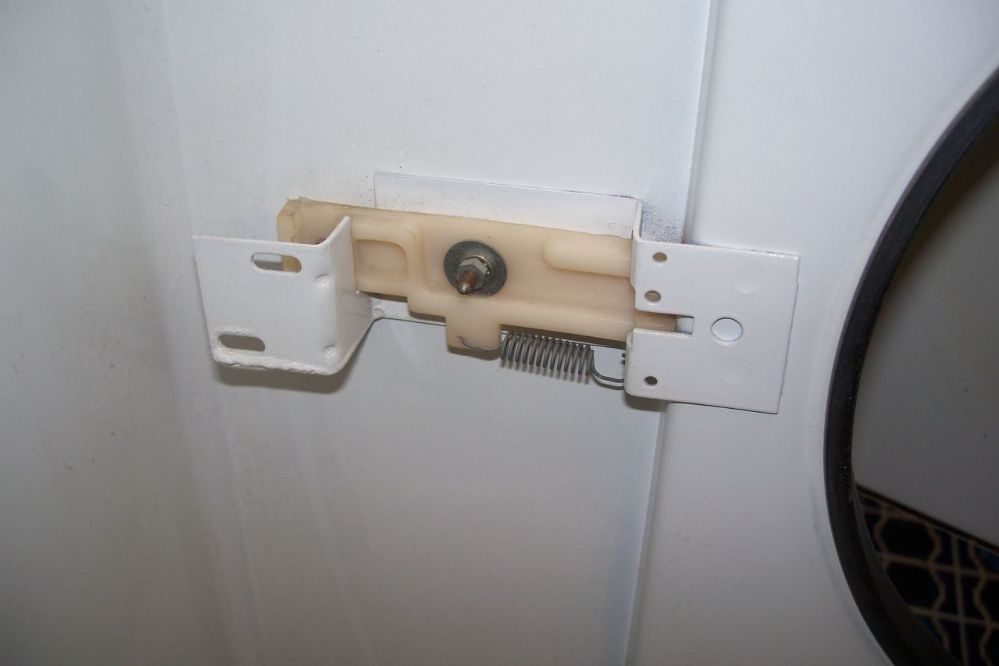
Post# 717794 , Reply# 29   11/26/2013 at 01:08 (3,801 days old) by crouzet951 ()        

This is the door switch at open position (power cut off to machine).

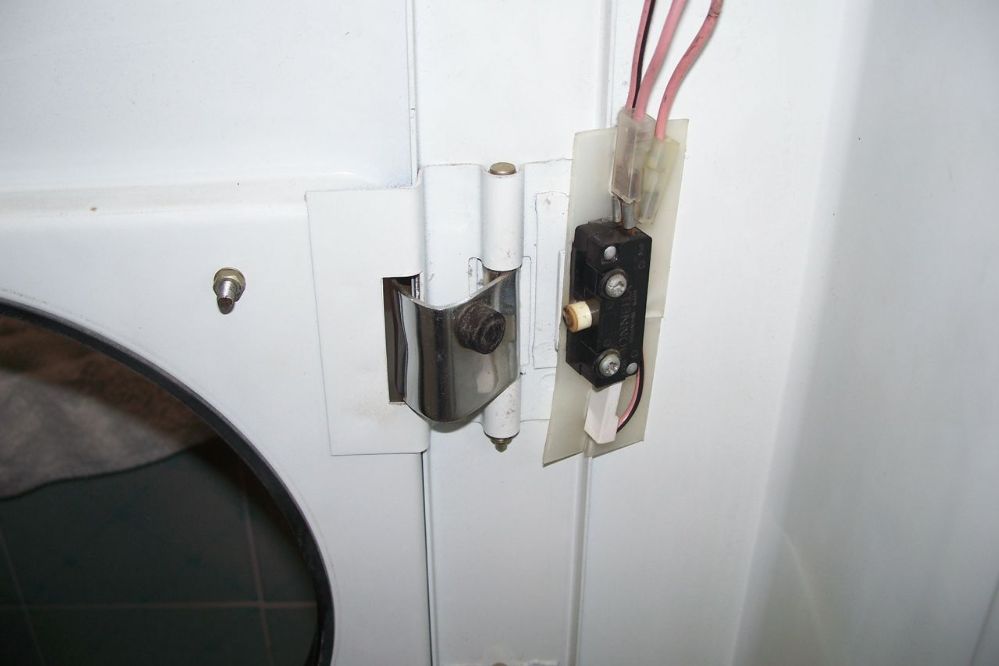
Post# 717795 , Reply# 30   11/26/2013 at 01:09 (3,801 days old) by crouzet951 ()        

This is the door switch at closed position (power supplied to machine).

Post# 717796 , Reply# 31   11/26/2013 at 01:10 (3,801 days old) by crouzet951 ()        

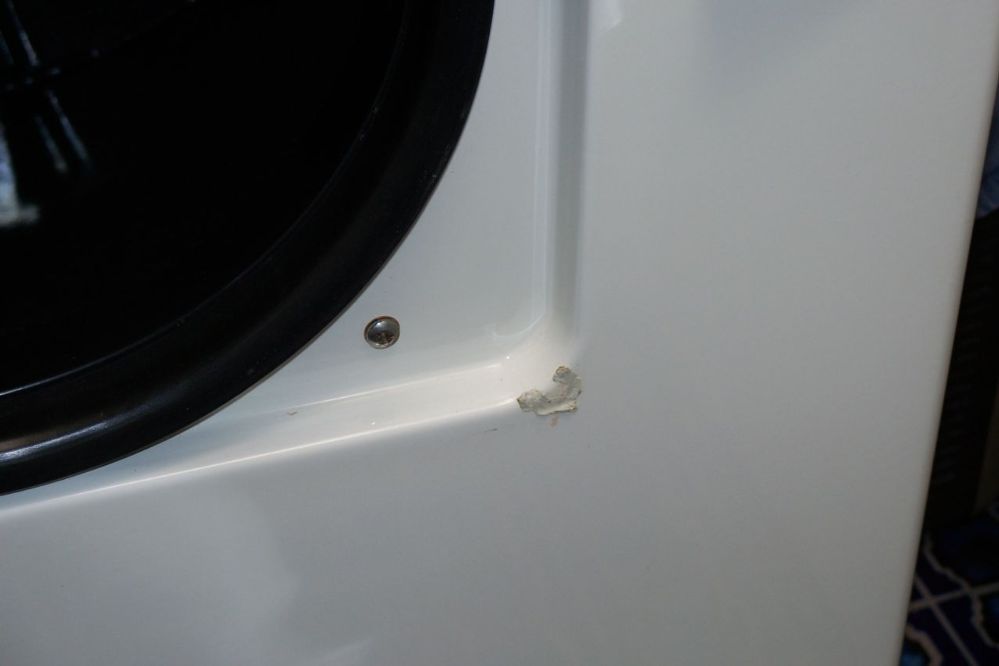
The small door buffers have perished, as is usual. I have new ones but they're black.
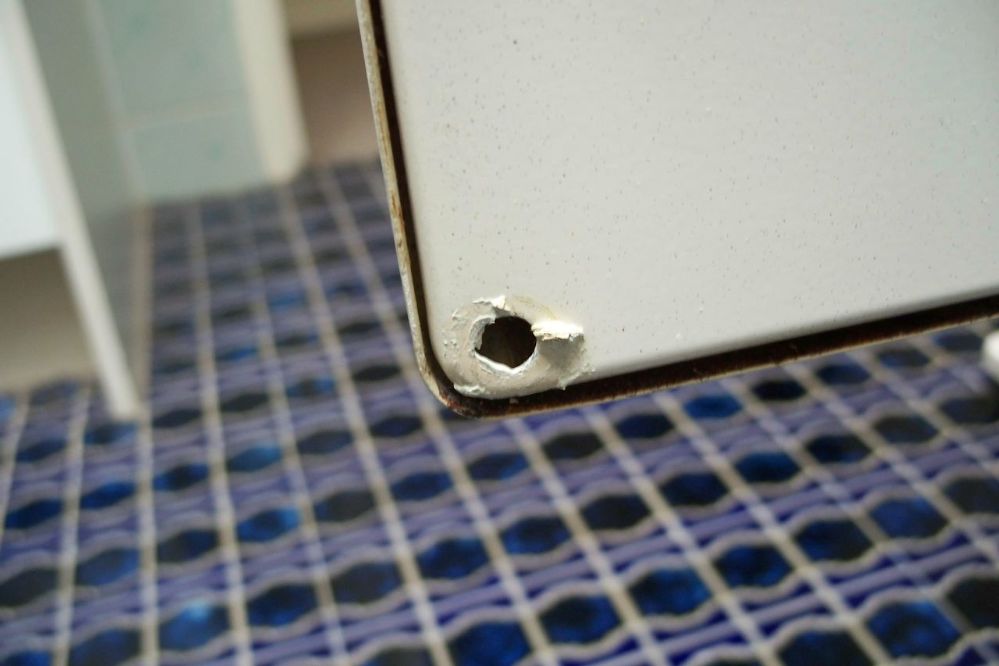
Post# 717797 , Reply# 32   11/26/2013 at 01:16 (3,801 days old) by crouzet951 ()        

Half the perished buffer has remained on the cabinet, which is also usual.

The screw is one of the four retainers of the heating elements assembly. So, if you've ever wondered what those four small holes with plastic plugs around the drum opening on your matchbox washer were - that's what they're for. Hehe.

That's it for now folks. I'll probably post the second part tomorrow.

Cheers
John


Post# 717799 , Reply# 33   11/26/2013 at 01:34 (3,801 days old) by crouzet951 ()        

Jaw drops!!!

Hi Creedy

This is the only other 155 I've ever seen, and it looks to be in great condition.

Could I ask around what sort of money you're after. I don't really want another, but hopefully someone local will want it.

If all else fails, please let me know as I'd not like to see it go to someone who won't appreciate it.

Thanks for posting.

Regards
John


Post# 717812 , Reply# 34   11/26/2013 at 06:19 (3,800 days old) by crouzet951 ()        

I've just realised that the model number is incorrect in the thread title.

It should be:

Hoover 155 (D6028) Dryer Overhaul.

Sorry guys.
John


Forum Index:       Other Forums:                      


Comes to the Rescue!

The Discuss-o-Mat has stopped, buzzer is sounding!!!
If you would like to reply to this thread please log-in...

Discuss-O-MAT Log-In


New Members
Click Here To Sign Up.


automaticwasher.org home
Discuss-o-Mat Forums
Vintage Brochures, Service and Owners Manuals
Fun Vintage Washer Ephemera
See It Wash!
Video Downloads
Audio Downloads
Picture of the Day
Patent of the Day
Photos of our Collections
The Old Aberdeen Farm
Vintage Service Manuals
Vintage washer/dryer/dishwasher to sell?
Technical/service questions?
Looking for Parts?
Website related questions?
Digital Millennium Copyright Act Policy
Our Privacy Policy