Thread Number: 55849
Kenmore Belt Drive Blower Dryer questions
[Down to Last]

automaticwasher.org's exclusive eBay Watch:
scroll >>> for more items --- [As an eBay Partner, eBay may compensate automaticwasher.org if you make a purchase using any link to eBay on this page]
Post# 782340   9/8/2014 at 12:33 (3,511 days old) by kenmore70 (New York)        

I'm restoring a 1962 Kenmore Belt Drive Blower Electric Dryer (MODEL 110.6218500) and have a few questions. I saw another post about this but didn't want to hog that post and there may be some differences between the two machines. In picture #1, how does the fan blade come off? Do you hold the pulley and turn the fan clockwise (like on the direct drive blower models)? In picture #2, I'd like to replace the rear drum seal but it looks like the clamping wire is riveted on, should I just pry it off and then try to rivet it back, what's the best way? In picture 3, the copper wire that you see goes from the service thermostat through the blower assembly housing, and it looks like it's held in place at both ends with a piece of epoxy or hard clay(not sure what it is). It broke off so I will need to replace that, is that what it is? THANKS

  Photos...       <              >      Photo 1 of 3         View Full Size


Post# 782371 , Reply# 1   9/8/2014 at 14:33 (3,511 days old) by RevvinKevin (Tinseltown - Shakey Town - La-La Land)        

revvinkevin's profile picture


Sorry I can't answer questions 1 or 2.   But as for question 3, that copper "wire" is a capillary tube that more than likely goes into the control panel to a thermostat or temperature control of some sort.   Others can tell you more about the actual function, but it IS a vital piece to the function of the dryer.


Where to get another?   Unless John Lefever (Combo52) has one in his parts stash (he very well may), you'll have to scavenge one from another dryer.


Kevin


Post# 782375 , Reply# 2   9/8/2014 at 14:42 (3,511 days old) by kenmore70 (New York)        

Thanks Kevin,

Actually, the copper wire is not broken, it's that 'CLAY' piece that came off which looks like it holds it attached to the housing. That is what I will need to use to re-attach it, I'm just not sure what that substance is and want to use the right stuff.


Post# 782380 , Reply# 3   9/8/2014 at 14:51 (3,511 days old) by RevvinKevin (Tinseltown - Shakey Town - La-La Land)        

revvinkevin's profile picture


Ooooh, OK.   I (obviously) understood it as the "wire" itself broke off, sorry for the confusion.


In that case, some sort if high-temp putty or epoxy (may be over kill) would do it.   Check with your local Ace hardware or place like that for something that would work.


Good luck!

Kevin


Post# 782475 , Reply# 4   9/8/2014 at 22:27 (3,510 days old) by dnastrau (Lords Valley, PA)        
Thermostat tube putty

Greetings:


I don't think I'd use epoxy on that.  If you attach it with epoxy you will never be able to get it off in the future if necessary.  I think the original substance is like (or is) plain old Plumber's putty or Mortite caulking cord - both available at any hardware store.  It should hold the tube against the housing and remain pliable for a long time.  Just be sure that the tube is directly touching the housing and the putty is just holding it down.


Andrew S.


Post# 783181 , Reply# 5   9/12/2014 at 07:23 (3,507 days old) by kenmore70 (New York)        

Hey Guys,

Thanks for your answers so far, anybody have any ideas for my other questions in the first post? Thanks !!


Post# 783380 , Reply# 6   9/12/2014 at 23:57 (3,506 days old) by kenmore70 (New York)        
Motor rebuild

I'm also debating whether or not to change the bearings in the 50+ year old motor on this Kenmore Dryer. They sound ok, but since I have everything apart I thought I'd just do it. Just wondering if any of you guys usually rebuild the motors (the serviceable ones) on the older machines when you rebuild the rest of the machine. Thanks

Post# 783419 , Reply# 7   9/13/2014 at 07:18 (3,506 days old) by akronman (Akron/Cleveland Ohio)        
Oh yeah

akronman's profile picture
I take apart a motor far enough to lube the bearings at both ends, and also get dust/lint/dirt out of the throw switch. Do it all while it's apart ONCE, saves trouble down the road.

As to replacing the bearings, instead of simply cleaning and oiling, I don't know.


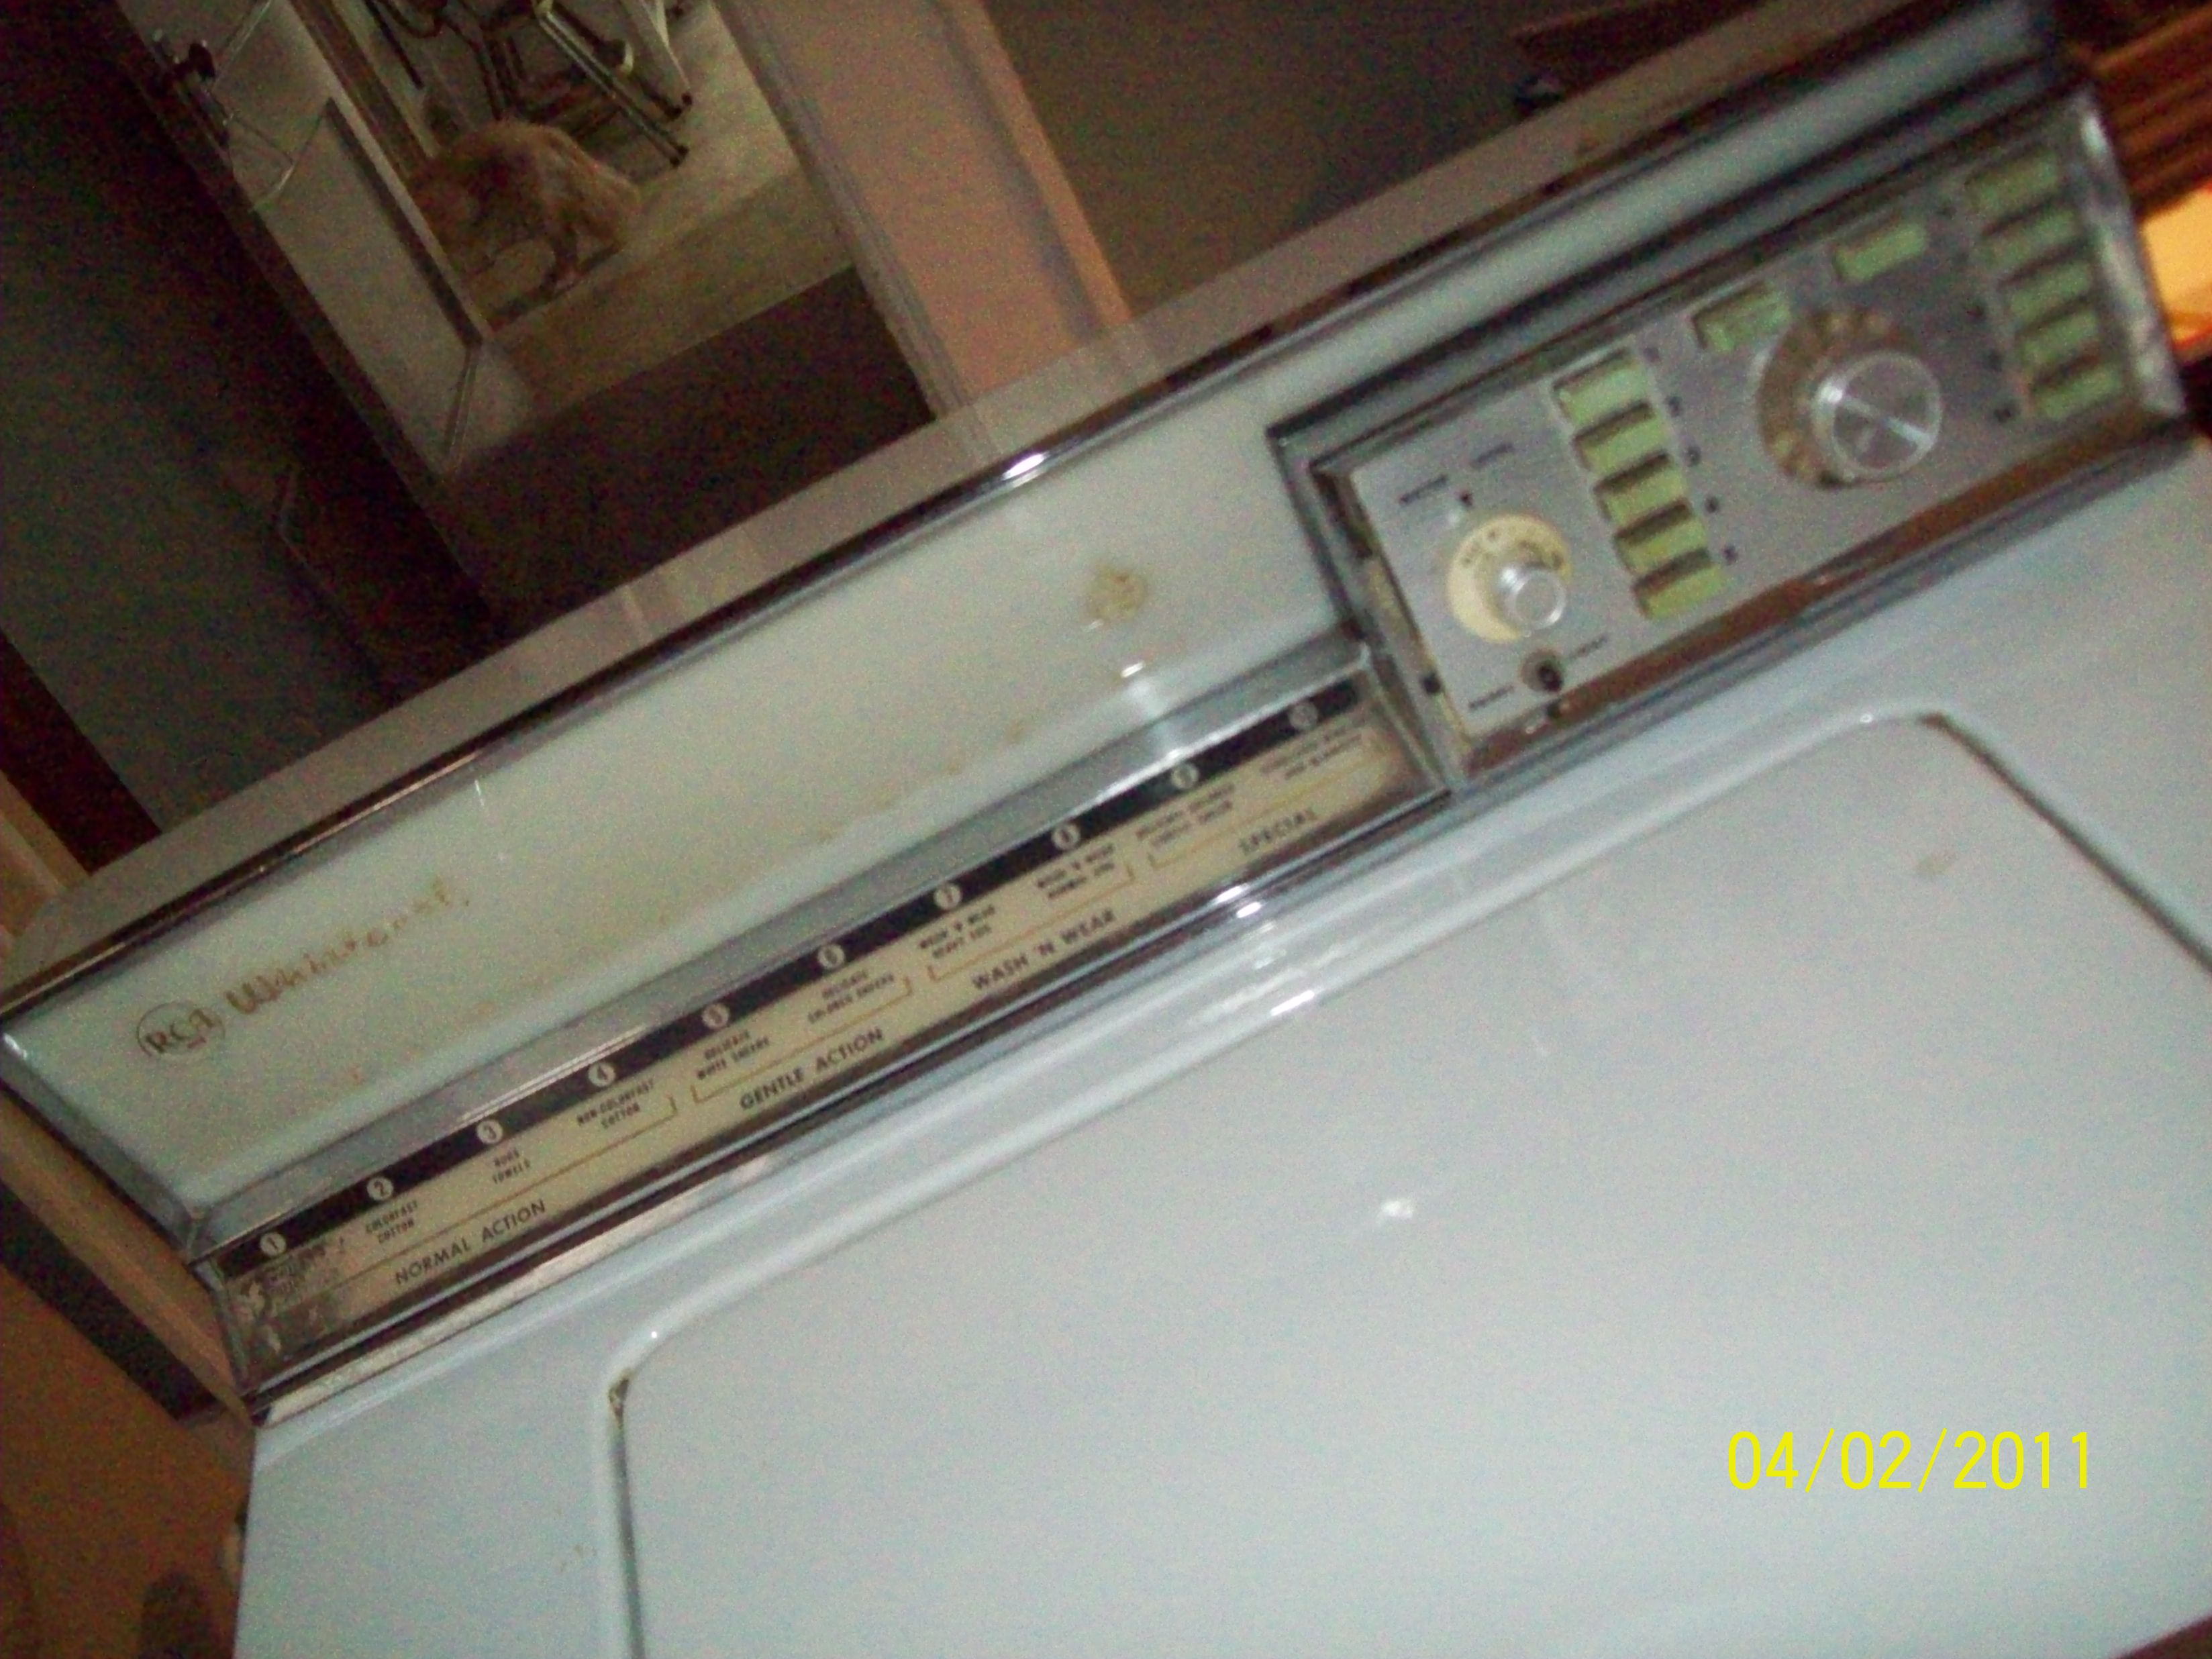
Post# 783627 , Reply# 8   9/14/2014 at 08:21 (3,505 days old) by combo52 (50 Year Repair Tech Beltsville,Md)        
Replacing Motor Bearings ?

combo52's profile picture
If they are not worn replacing them would do far more harm than good, As Mark suggested getting a little fresh oil in them is all that should be necessary.

Post# 783659 , Reply# 9   9/14/2014 at 11:42 (3,505 days old) by bendixmark (Winchester Mass)        
Fanblade

To remove the fan you remove the pulley and hold the shaft with a vise and unscrew the fan.I think it may be a lefthand thread.I used to do it all the time 40 years ago and it wasnt hard.I would not remove that seal I would add on to it if need be.

Post# 783837 , Reply# 10   9/15/2014 at 09:51 (3,504 days old) by kenmoreman ( Southern NH)        
Blower

You really don't need to take off the blower wheel. Remove the drive pulley and the backing plate can be pulled off exposing the bearing assembly. You can remove the clip on the oil wick and add turbine oit to saturate the wick. Let this penetrate overnight and the you can replace the wick clip and reassemble. As far as the rear seal goes if it is intact leave it alone. These were very durable. If the seal is not even then you should look at the rear bearing for wear or the front support felt that could be worn out tipping the dryer drum forward. That is easily replaced and the drum will realign. These were great dryers.

Post# 783857 , Reply# 11   9/15/2014 at 12:18 (3,504 days old) by kenmore70 (New York)        
Rear Drum Seal

Thanks kenmoreman and all you guys for your replies. The reason I want to take off the rear drum seal is because I may have the interior of the drum powder coated, it's in rough shape and I have a friend that can do this, but the felt seals (front and rear) need to come off. So if anyone has ever replaced the rear seal please let me know how you did it. The front seal looks more straight forward.

Also, for the rear drum bearing, would you use turbine oil to lubricate this or something else? How about the drive pulley, what's the best thing to use to lubricate that part? THANKS


Post# 784007 , Reply# 12   9/16/2014 at 08:34 (3,503 days old) by kenmoreman ( Southern NH)        

You should be able to leave it on and either cover it with tape or roll it over so it is only on the outside of the drum also secured with tape. The front seal stays on the front panel so that should not be a problem. You have to be careful with the front bearing removal so you don't break it but it is very doable.

Post# 785215 , Reply# 13   9/22/2014 at 21:44 (3,497 days old) by akronman (Akron/Cleveland Ohio)        
Hey Tom

akronman's profile picture
Throw some pics on here! We like to watch!


Forum Index:       Other Forums:                      


Comes to the Rescue!

The Discuss-o-Mat has stopped, buzzer is sounding!!!
If you would like to reply to this thread please log-in...

Discuss-O-MAT Log-In


New Members
Click Here To Sign Up.


automaticwasher.org home
Discuss-o-Mat Forums
Vintage Brochures, Service and Owners Manuals
Fun Vintage Washer Ephemera
See It Wash!
Video Downloads
Audio Downloads
Picture of the Day
Patent of the Day
Photos of our Collections
The Old Aberdeen Farm
Vintage Service Manuals
Vintage washer/dryer/dishwasher to sell?
Technical/service questions?
Looking for Parts?
Website related questions?
Digital Millennium Copyright Act Policy
Our Privacy Policy