|
Thread Number: 6091
Hobart Unhinged |
[Down to Last] |
Post# 125183 4/28/2006 at 19:13 (6,565 days old) by sudsmaster  (SF Bay Area, California) (SF Bay Area, California) |
||

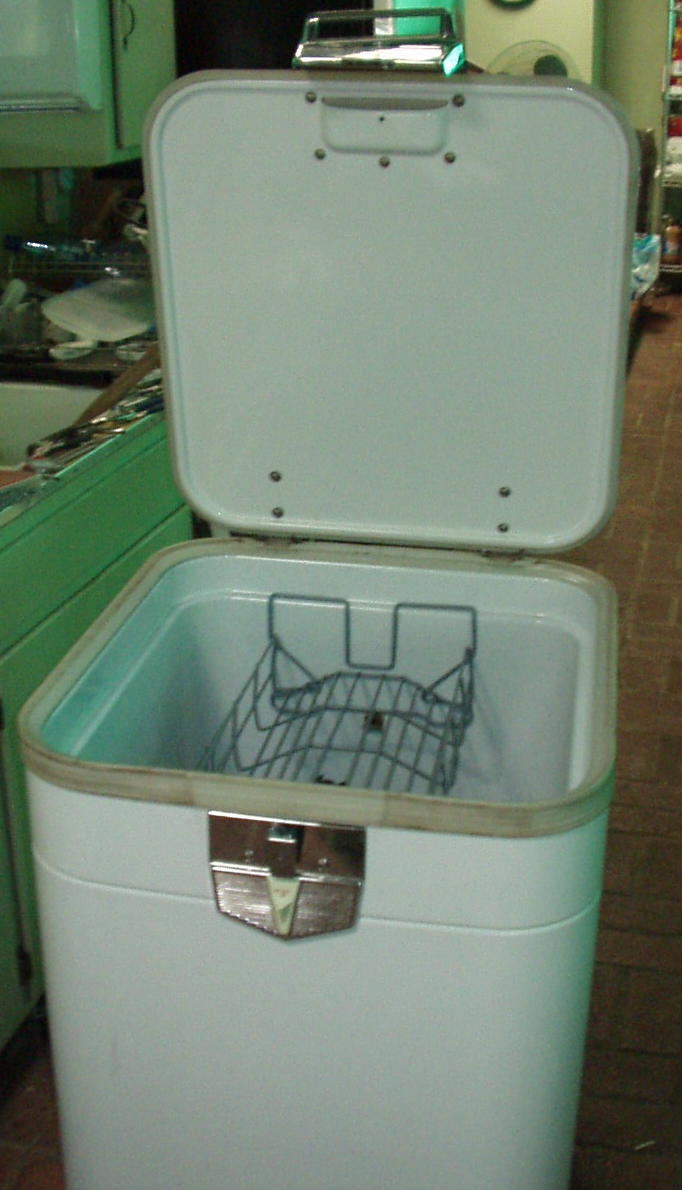
Just a quick update... This afternoon I finished making the replacement hinges for the Kitchenaid KD-2P portable dishwasher lid. I'll post photos of the old broken hinges and the new replacement hinges later tonight. The old hinges were cast pot metal. They had broken at the pivot, probably from someone laying the dishwasher over without having the lid secured - which will cause the lid to fly open and overload the hinge backstops. I milled the replacements out of solid 304 stainless bar stock. If they fit, they should last the lifetiime of the dishwasher - assuming the dishwasher lasts another 50 years! | ||

|
|
Post# 125301 , Reply# 1 4/29/2006 at 03:54 (6,565 days old) by panthera (Rocky Mountains) |
||
show me show me! | ||
|
Post# 125336 , Reply# 2 4/29/2006 at 08:35 (6,565 days old) by unimatic1140 (Minneapolis) |
||
 | ||
|
Post# 125378 , Reply# 3 4/29/2006 at 12:29 (6,564 days old) by sudsmaster (SF Bay Area, California) |
||
|
Yes, thanks guys. I did the milling myself. Right now the new hinges are installed on the dishwasher lid. I had to do that in order to make sure they fit. They do. Next step is to go to OSH and get some springs to hook up. I also need to fabricate some spacers for either side of the hinge at the pivot point, but that is a relatively minor task (I hope). Even stacked washers would suffice for the time being. Sorry I didn't get to snap some shots of the old and new hinges last night. I have to go out and do some shopping (springs and such) today as well as laundry (line drying, have to get the laundry done before noon) but I'll be posting the new hinges soon. Another consideration is whether or not to polish up the new hinges. Right now I kind of like the finish left by the milling cutters. I took a hand file and a deburring tool to remove any sharp edges. But the swirls and patterns of the milling process have always pleased me. I suppose I could install them for now as-is, they can always be removed later and polished up - and 304 stainless with take a very high polish. Back later! | ||
|
Post# 125448 , Reply# 4 4/29/2006 at 18:55 (6,564 days old) by sudsmaster (SF Bay Area, California) |
||
|
Old vs. New | ||
|
Post# 125451 , Reply# 5 4/29/2006 at 18:59 (6,564 days old) by sudsmaster (SF Bay Area, California) |
||
|
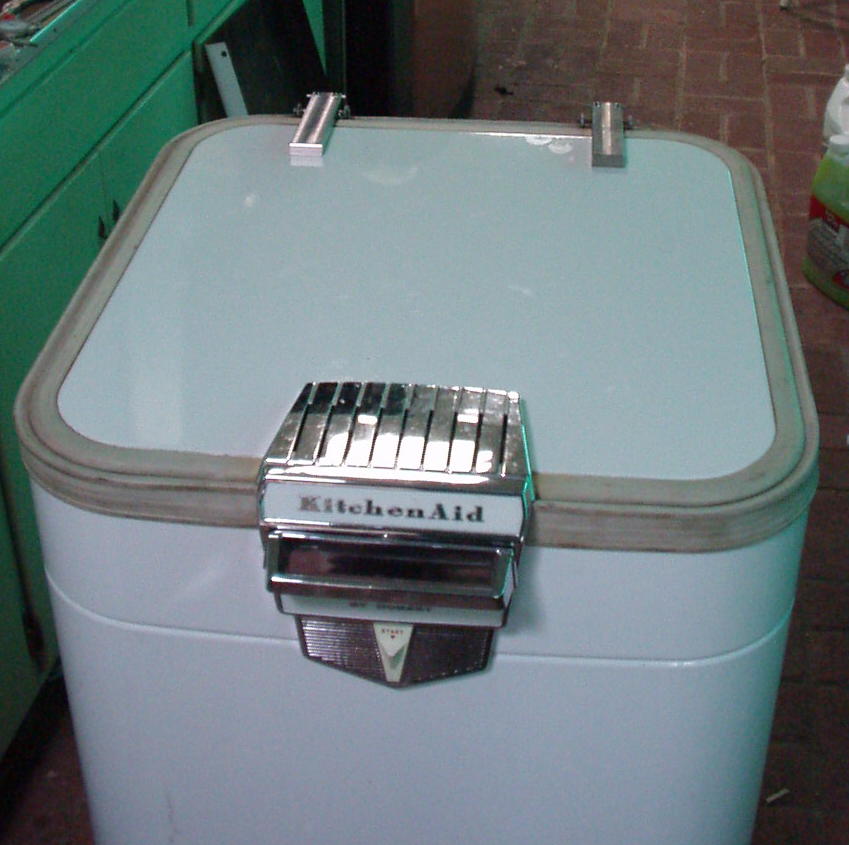
Here's a view of the underside of the old hinge. You can see that it's mostly hollow, and it's easy to understand why it broke under stress. The post metal casting did have a helpful feature. Although it's not visible in this shot, the engineers cast "10-32" beside each tapped hole. I had already measured the screws and determined their pitch and diameter, but it was nice to have that confirmed by the part itself. Of course, the corresponding tapped holes in the new hinge are sunk into solid metal. It's not going anywhere. It would probably bend before it broke. 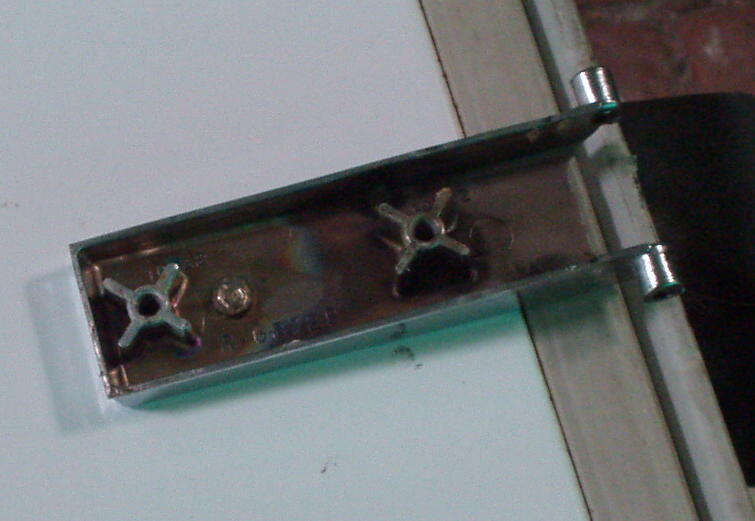
| ||
|
Post# 125456 , Reply# 6 4/29/2006 at 19:11 (6,564 days old) by sudsmaster (SF Bay Area, California) |
||
|
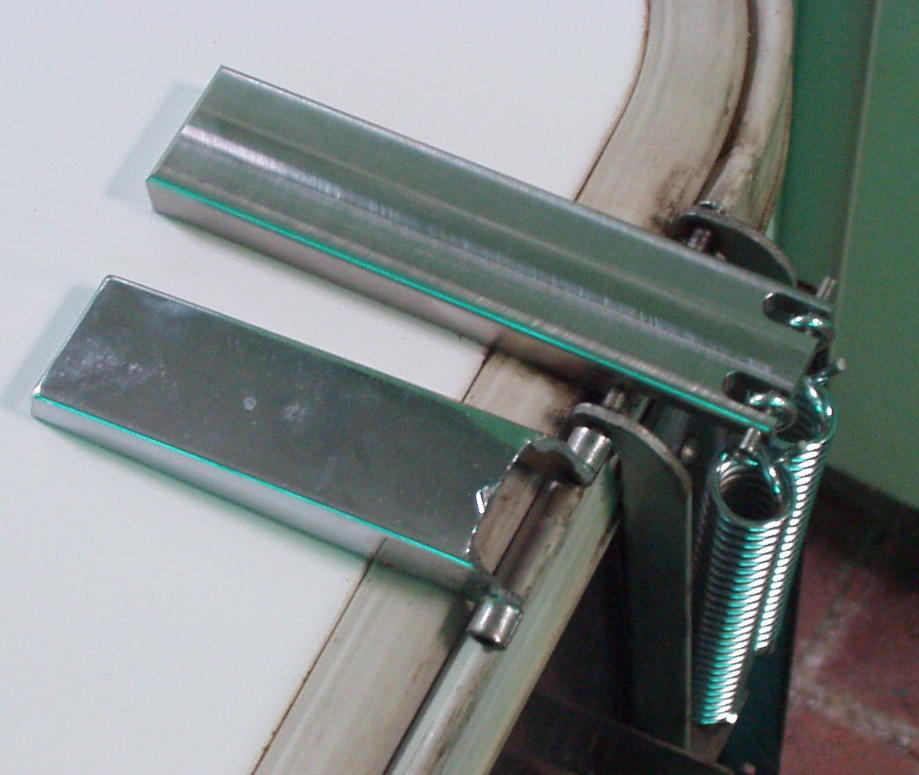
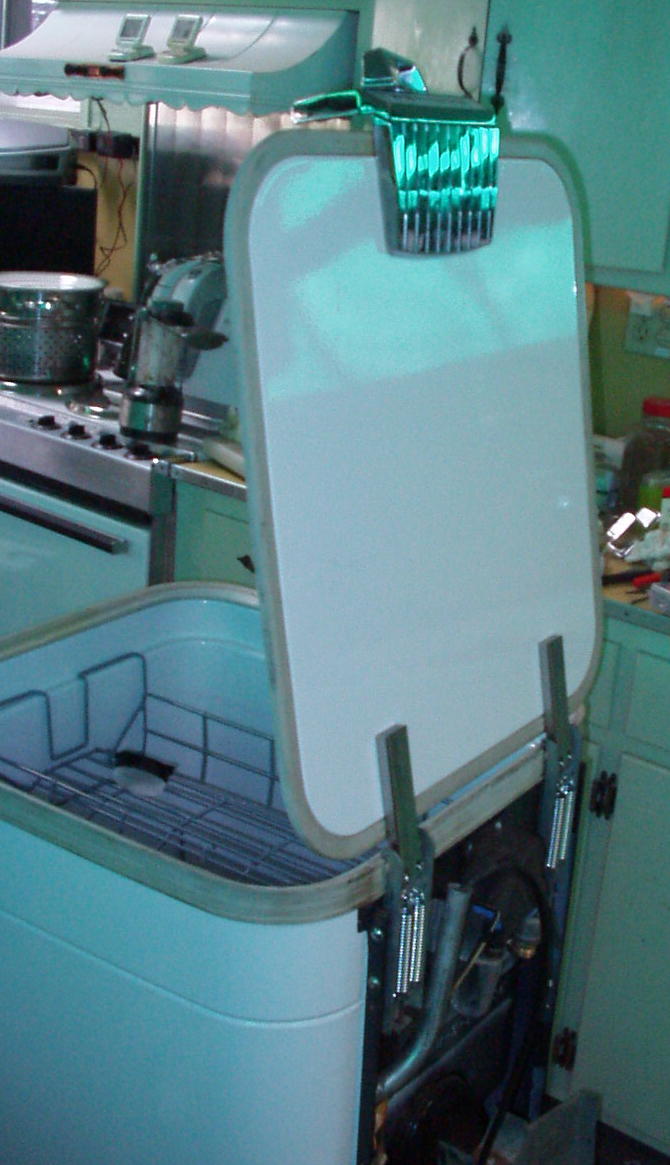
The lever's too long?
I wound up purchasing four different types of springs from OSH in order to find a set that actually kept the lid up. These are the ones that finally worked, although I had to use some S-hooks to extend their length and also allow the hinge to lay flatter against the backstop. The spring tension, when the lid is down, is enough to cause the lid to bulge slightly in the hinge attachment area. I don't think it's of any concern, but I imagine that it might help if I reworked the rear of the hinge to shorten it and move the spring attachment closer to the hinge pivot point. But I did the best I could by measuring the clearance to the rear cover and also by how long the rear of the hinge needed to be in order to contact the backstop. At least the lid now stays up so one can load and unload the racks without having to prop it open. As you can see, I decided to do the initial installation with the hinges in the unpolished condition, pretty much the same finish as they came out of the machining process. I can always go back and polish the hinges to a mirror like finish. But I kind of like them the way they are now. I will give them a coat of Kitchenaid Stainless Steel polish, just to spiff them up a bit. 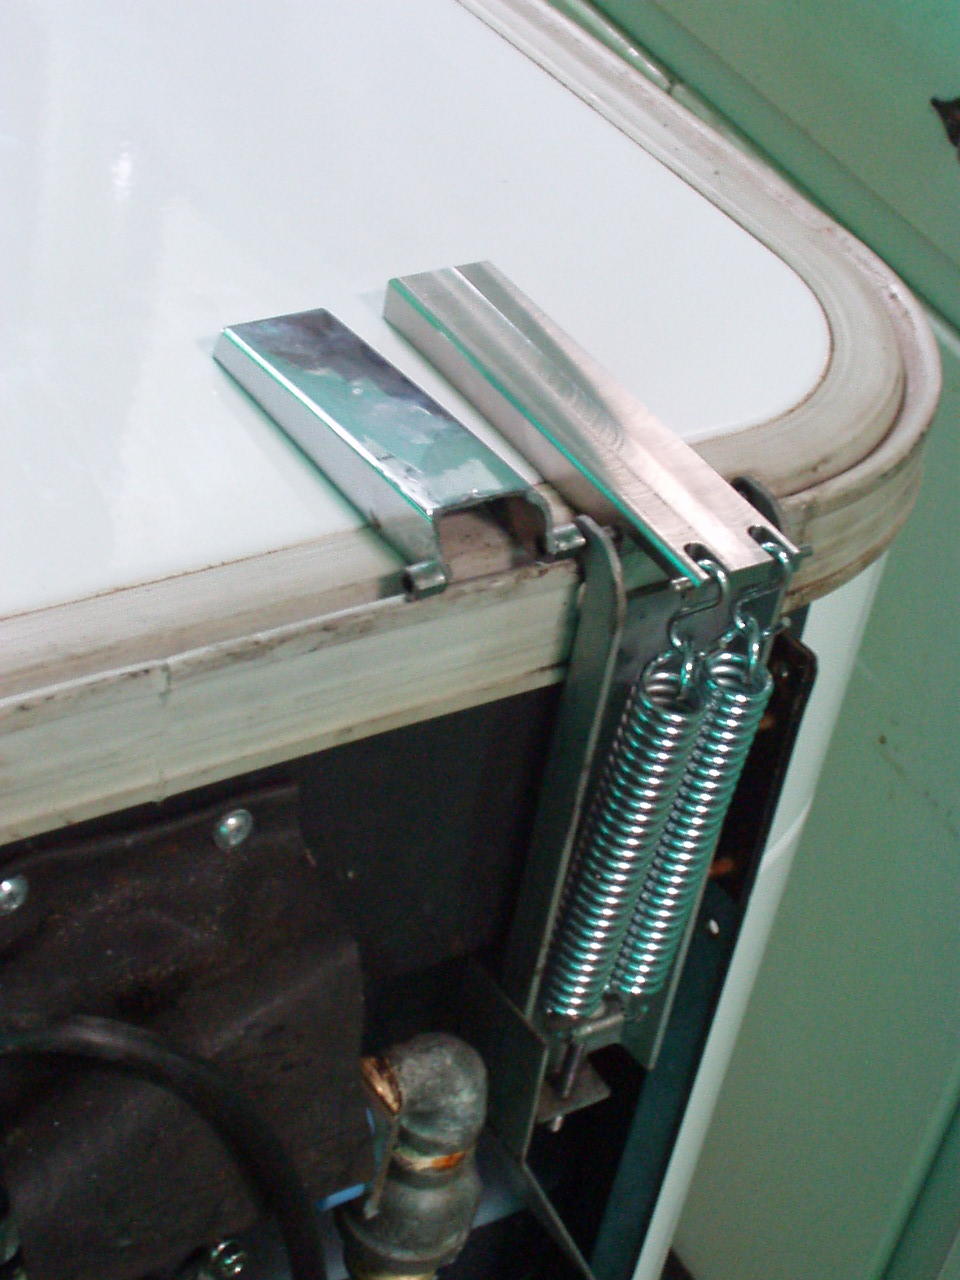
| ||
|
Post# 125462 , Reply# 7 4/29/2006 at 19:33 (6,564 days old) by sudsmaster (SF Bay Area, California) |
||
|
Look Ma, No Hands! | ||
|
Post# 125465 , Reply# 8 4/29/2006 at 19:38 (6,564 days old) by sudsmaster (SF Bay Area, California) |
||
|
Attenhut! | ||
|
Post# 125466 , Reply# 9 4/29/2006 at 19:42 (6,564 days old) by sudsmaster (SF Bay Area, California) |
||
|
Hinged Again | ||
| Post# 125473 , Reply# 10 4/29/2006 at 20:15 (6,564 days old) by frontaloadotmy (the cool gay realm) | ||
|
Very Nice machining suds, nice stainless panel behind the range too. | ||
| Post# 125474 , Reply# 11 4/29/2006 at 20:17 (6,564 days old) by mikepaquette () | ||
|
Excellent Great job. I am sure most here in the club will agree. Keep up the good work. Mike | ||
| Post# 125487 , Reply# 12 4/29/2006 at 21:12 (6,564 days old) by veg-o-matic (Baltimore, Hon!) | ||
 | ||
|
Post# 125503 , Reply# 13 4/29/2006 at 22:51 (6,564 days old) by appnut (TX) |
||
|
| ||
|
Post# 125505 , Reply# 14 4/29/2006 at 23:09 (6,564 days old) by swestoyz (Cedar Falls, IA) |
||
 | ||
| Post# 125554 , Reply# 15 4/30/2006 at 08:44 (6,564 days old) by varicyclevoice (Davenport, Iowa) | ||
What a beautiful machine! | ||
|
Post# 125573 , Reply# 16 4/30/2006 at 11:51 (6,563 days old) by sudsmaster (SF Bay Area, California) |
||
|
Thanks! For more photos of the washer and the restoration process, go here: CLICK HERE TO GO TO sudsmaster's LINK | ||
|
Post# 125580 , Reply# 17 4/30/2006 at 12:49 (6,563 days old) by sudsmaster (SF Bay Area, California) |
||
|
And here's a more permanent link to a photo collection of much of the same...
CLICK HERE TO GO TO sudsmaster's LINK | ||
|
Post# 125679 , Reply# 18 4/30/2006 at 20:23 (6,563 days old) by unimatic1140 (Minneapolis) |
||
|
| ||
|
Post# 125685 , Reply# 19 4/30/2006 at 20:42 (6,563 days old) by sudsmaster (SF Bay Area, California) |
||
|
Robert, Thanks. Today I defrosted the chest freezer and moved it and the fridge over, extended the hoses on the Hobart, put it all back together, and moved it over to its new niche at the end of the countertop. The hoses only needed to be about 7 feet long (stock is five feet) but I made them eight feet just in case (about 1.5 feet is used up inside the machine to loop around the "hose protector"). Sadly, the replacement hot water valve someone installed before I got this is backwards, so the hoses no longer nest inside the machine (although the power cord still will). But I'm content to just let the hoses slip behind the machine when it's not in use. I did a test run and everything seems fine again. I don't own a lathe. All this work was done after hours at work on a mill - what's called a VMC or vertical machining center. I squared up the blocks using a semi-manual method, and then wrote a program to drill and tap the holes, cut the notches for the springs etc., and put a radius along the upper edge. Actually, three programs ;-). Anyway, I have to thank my employer for letting me do this in their shop. I've been on the prowl to purchase and set up a small lathe and a small manual mill for my own workshop, but a combination of funding, time, and getting rid of clutter have put that on hold. None of this needed to be done on a CNC mill, it could all be done on a manual mill. The advantage for me was that I could write the program at night at home, and then run it at work and produce the parts quicker than I could if I did it manually. Plus once the first one is done and minor adjustments made as needed, the second one is pretty much unattended, aside from having to turn it in the vice for the various features/programs and manually add some special cutting oil for cutting the threads in the mounting holes on the underside of the hinges. But if I had a mill at home I would have done it there. I just didn't have all the time I would have liked to do it that way at work. | ||
|
Post# 125734 , Reply# 20 12/31/2069 at 18:00 (19,832 days old) by gansky1 (Omaha, The Home of the TV Dinner!) |
||
 | ||
|
Post# 125741 , Reply# 21 12/31/2069 at 18:00 (19,832 days old) by sudsmaster (SF Bay Area, California) |
||
|
Guestimation
Greg, Costing this would be tricky. Since I only had part of a hinge, I had to reverse-engineer the general design from what I could see on the rest of the washer hinge mount, spring mount, and upper rear cover. So I would have had to take the entire dishwasher to a shop to have them fit a new hinge. Had I done that, I figure it would have taken someone at least and hour or two to figure out that part. Then programming would have been another hour. Bringing the stock to outer dimensions, another hour. Doing the final machining, one and a half hours. Total of 4.5 to 5.5 hours. If you figure a basic shop rate of $60/hr, these could have cost... $300 for the pair. If I had an existing intact hinge to work off of, knock an hour off that, make it around $240 for the pair. Seems like a lot for a pair of hinges, but on the other hand I spent $60 on two hoses and I discovered I can only use part of one of them... And I doubt that new old stock hinges are out there... although who knows? Not sure I'd want them, anyway. I think mine are better ;-) | ||
|
Post# 125930 , Reply# 22 5/1/2006 at 20:11 (6,562 days old) by sudsmaster (SF Bay Area, California) |
||
|
Machining Primer
In a typical traditional machine shop there are two primary types of machine tools: the lathe and the mill. A metal cutting lathe is laid out similar to a wood cutting lathe, with a motor and spindle on the left, and a tailstock t the right. There, the similarity more or less ends. But the primary task of a lathe is to produce cylindrical parts that are symmetric around their axis of rotation. In a lathe, the workpiece rotates, and the cutting tool is held stationary and brought to bear against the workpiece in a controlled manner to remove material. The typical mill in a machine shop is a vertical knee mill. The knee part means that the X-Y table can move up and down. A vertical mill bears a superficial resemblance to a drill press, and some cheaper mills are really just drill presses with X-Y tables grafted on. In a mill, the cutting tool (usually an "end mill") rotates, while the workpiece is held stationary (usually in a vice) and is brought to bear in a controlled manner against the rotating cutting tool. If you want to machine a part that is largely flat, like these hinges, then what you want is a mill. Most of our vintage appliances were manufactured using a combination of techniques. There's the sheet metal of the cabinetry, which is bent in large hydraulic presses and brakes. Then there's various brackets, knobs, and decorations, which are usually made of cast metal because that's the cheapest way to produce parts for high production numbers. When a high degree of precision fitting is required, the casting may be further machined (in a lathe or mill) to produce a part with closer tolerances than the casting process can achieve. Pumps, motors, and valves may fit into this category. Naturally, a manufacturer will seek to use the least costly method to produce a product that still has acceptable appearance and performance. Machining tends to be among the higher cost methods of producing parts; however, for manufacture of "one-off" restoration or prototype parts, it can be the most efficient. The expense of machining also means that machined parts often have a certain cachet that stamped or cast parts lack. A classic example of this is the "machined" swirled finish on the instrument panels of expensive vintage luxury automobiles. Which makes me wonder if anyone has ever produced a "machined" panel for a classic washer or other appliance. Machining is perhaps the most versitile and flexible of various fabrication methods. While it's theorectically possible to machine all metal parts for an appliance or other product like an automobile, the cost would be tremendous and the performance would not be much better than a product assembled from a combination of stamped, cast, and machined parts. Additionally, many of the cast accoutrements of vintage appliance show the sculpter's touch, especially Art Deco styling. Some of these would be quite challenging to reproduce with a machine tool, even a CNC machine. But such forms and shapes are relatively easy to create using clay, wax, or wood from which molds are made for casting in metal. There are also methods for reproducing decorative parts by using an existing part as a template; in this way the "original" look of the product can be maintained. | ||
|
Post# 126124 , Reply# 23 5/3/2006 at 00:02 (6,561 days old) by sudsmaster (SF Bay Area, California) |
||
|
New parts - Water valve and Wheels
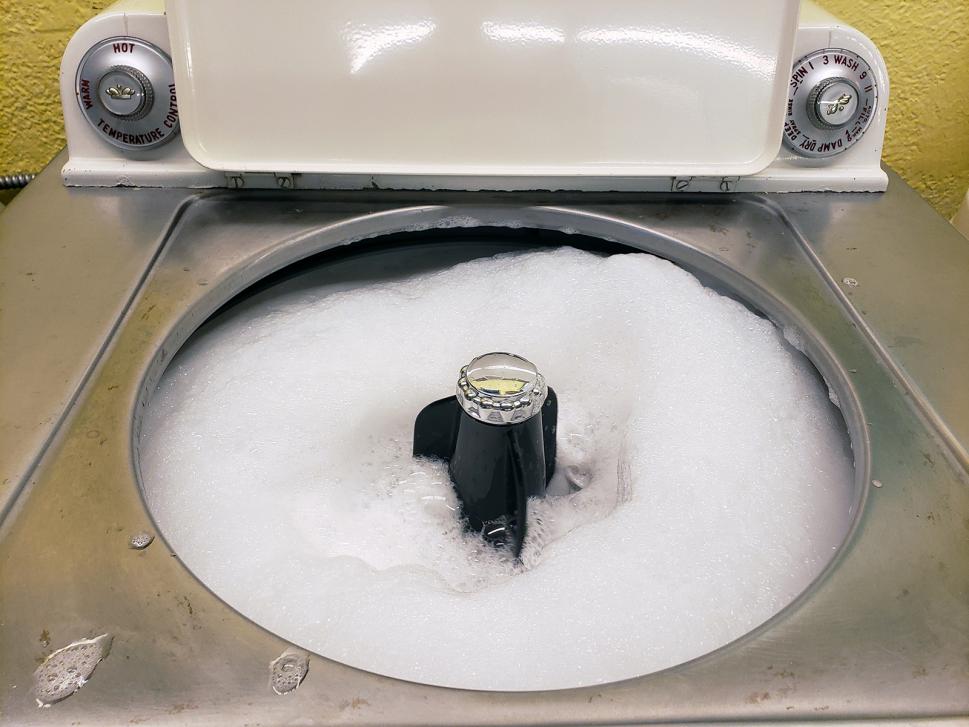
Today I got a new water intake valve for the KD-2P. I took a photograph of the (wrong) existing valve, as well as the Hobart service manual, to the local appliance parts store and the counterman brought out about five valves to choose from. I selected one with a male hose fitting, as it seemed to be the best fit. It's still not original, but with some judicious shimming and careful rotation of the valve assembly, I was able to orient the fill hose in the correct direction so that it can be stowed along with the drain hose inside the machine when not in use. Theoretically, that is. Since I extended the existing hoses by about three feet, using a double ended barb type of fitting, the entire hose assembly won't quite fit in the back of the machine. So it's on my todo list to replace the hoses entirely, so that there is no longer a discontinuity to hang up on things, and also shorten them a bit so that there is no more length than is needed to reach the sink from the dishwasher's more or less permanant location at the end of the counter. I've been putting off that task because it means removing the original plated hose ferrules at the faucet fitting (the "unicouple") and replacing them with prosaic worm-drive hose clamps. But sometimes one must sacrifice for practicality, no? I also installed the 2-1/2" casters that I picked up on Monday. I shimmed the front ones with about five fender washers, so that the machine is level when in place on the slanted patio brick pavement. The front casters have brakes so there is no chance of it rolling away, and it's now a lot easier to manuver around the patio as needed (the old wheels were only about 1-1/4" diameter). Of course I ran another empty load in the Hobart just to make sure all the changes didn't break anything. I am still highly entertained by the sound, sight, and vibration of this appliance. When it has no dishes to deflect the water stream, the washer is quite a bit louder, and even emits a low pitched rumble that one can sense at a distance. The whole thing also shakes a little bit, like an energetic clothes washer. What with the plume of steam rising out of the handle vents, it's quite a show. Sorry, no photos today, but I noticed something interesting as I was disassembling the heater thermostat to write down the part number. On the side of the heater is a little decal, that says "Kitchenaire" in big script, with smaller text stating it's a dish dryer and plate warmer. Kind of amazing this decal survived all these years on the side of a hot heater. Next time I have the machine on its side with the bottom panel off, I'll see if I can snap a photo. | ||
| Forum Index: | 
| Other Forums: |

|

|

|

|

|

 Comes to the Rescue!