|
Thread Number: 22143
Some maintenance on a Halo of Heat Dryer. |
[Down to Last] |
Post# 347038 5/6/2009 at 13:52 (5,466 days old) by volvoguy87  (Cincinnati, OH) (Cincinnati, OH) |
||

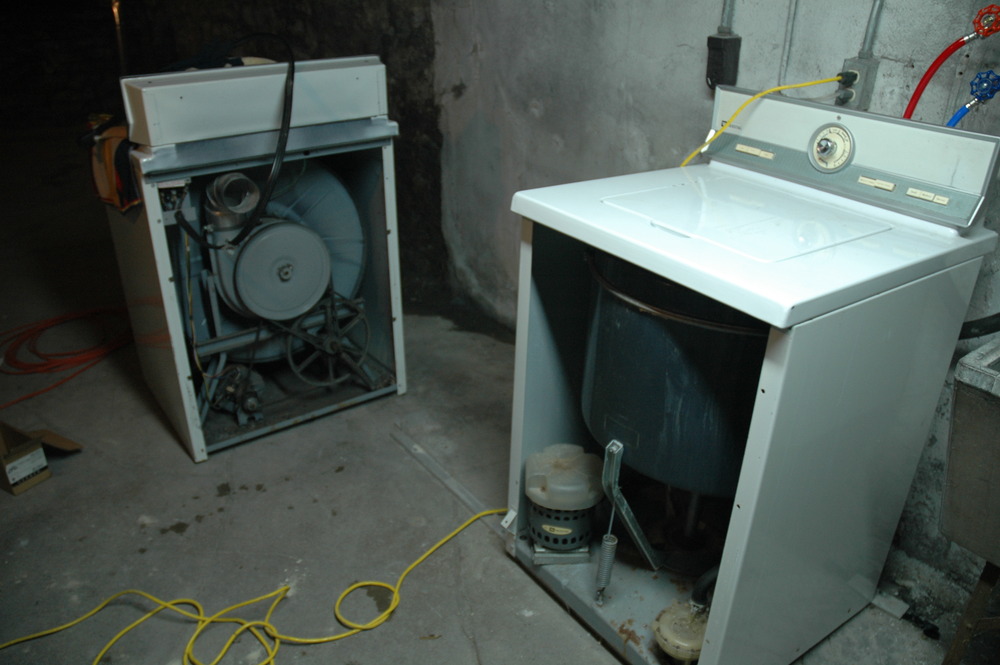
There are going to be pictures, lots of them! I took these a while ago and wanted to make sure that it all came back together and worked fine before posting. The dryer is a DE306. This is the BOL full size Halo of Heat electric dryer. It has 3 cycles, regular timed for up to 1 hour, a Permanent Press timed cycle of less than an hour, and about a 15 minute air fluff cycle. There is no end of cycle signal. This one was manufactured around April of 1970. In this post, I will show how I opened the back of the dryer, disassembled a few things, and gave it a general cleaning and lubricating. Enjoy, Dave | ||

|
|
Post# 347041 , Reply# 1 5/6/2009 at 13:55 (5,466 days old) by volvoguy87 (Cincinnati, OH) |
||
|
The laundry area. | ||
|
Post# 347045 , Reply# 2 5/6/2009 at 14:06 (5,466 days old) by volvoguy87 (Cincinnati, OH) |
||
|
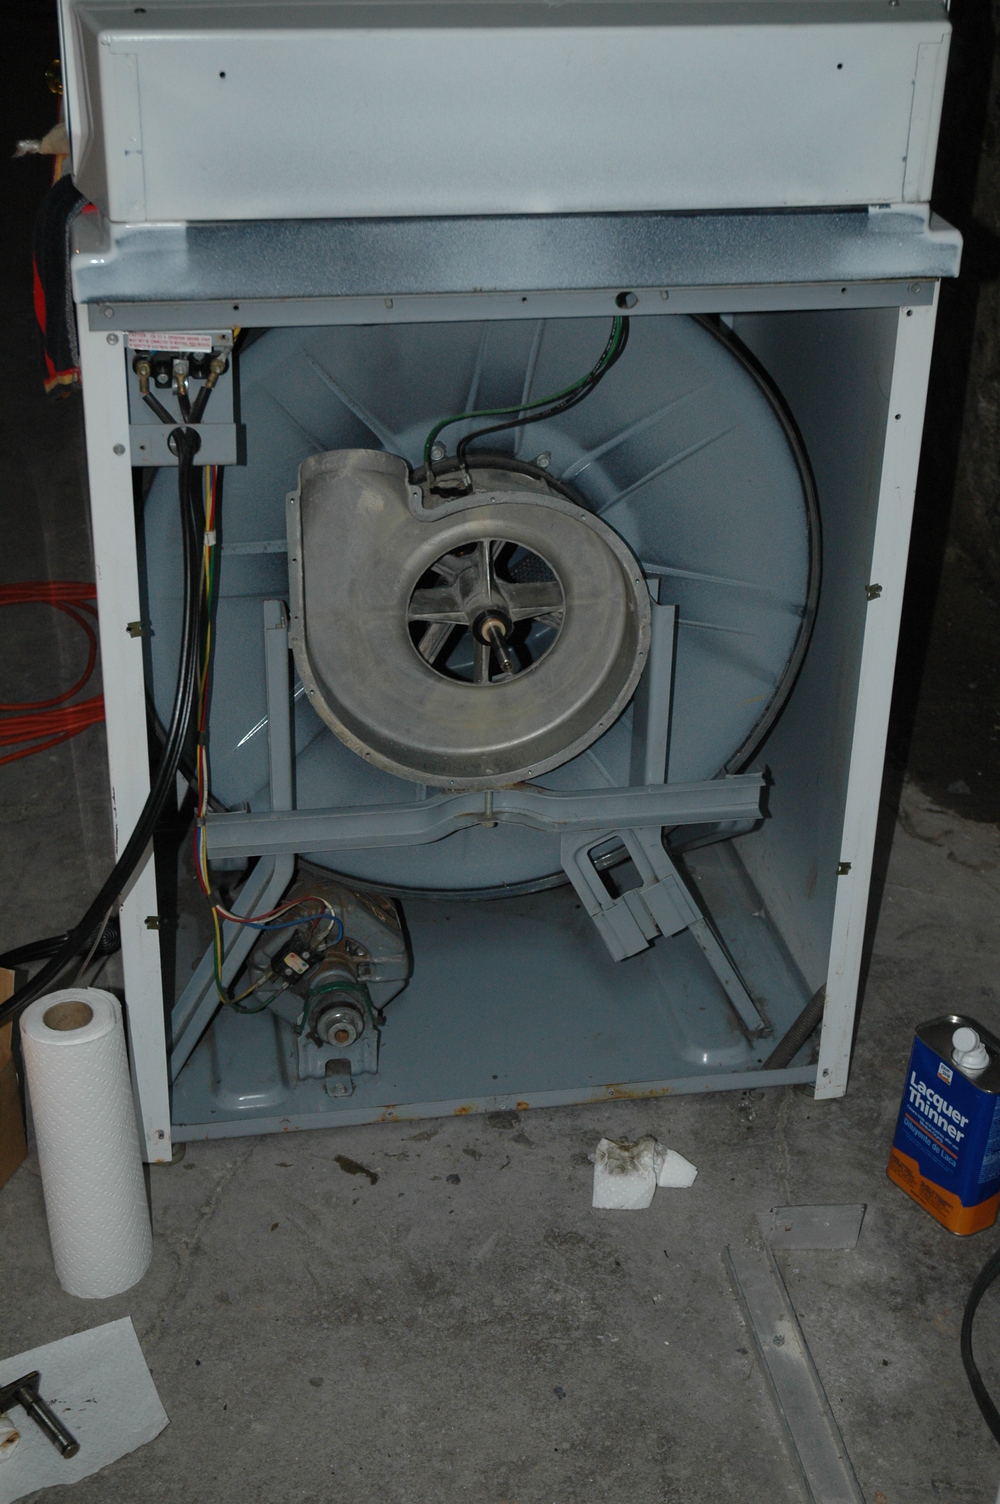
The meat and potatos of a HoH.
This is still before cleaning! The motor at the lower left is firmly bolted into place. The large double pulley (1 big, 1 small) at the bottom right is on a sliding mount. The spring keeps proper tension on both belts. I cleaned the old grease and lint off the tensioner and applied new grease. The belts work as follows: The big belt, directly driven by the motor, goes over the big tensioner pulley and runs the blower (hidden behind the large upper pulley) at high speed. The smaller belt is driven by the small tensioner pulley and turns the large upper pulley at slow speed. This is what rotates the drum. The blower rotates around the slowly moving drum shaft, but it is driven at high speed by the aforementioned belt, not the shaft. Even though the blower is supported by the slow shaft, it runs fast! This is where Zoom Spout oil became my best friend. 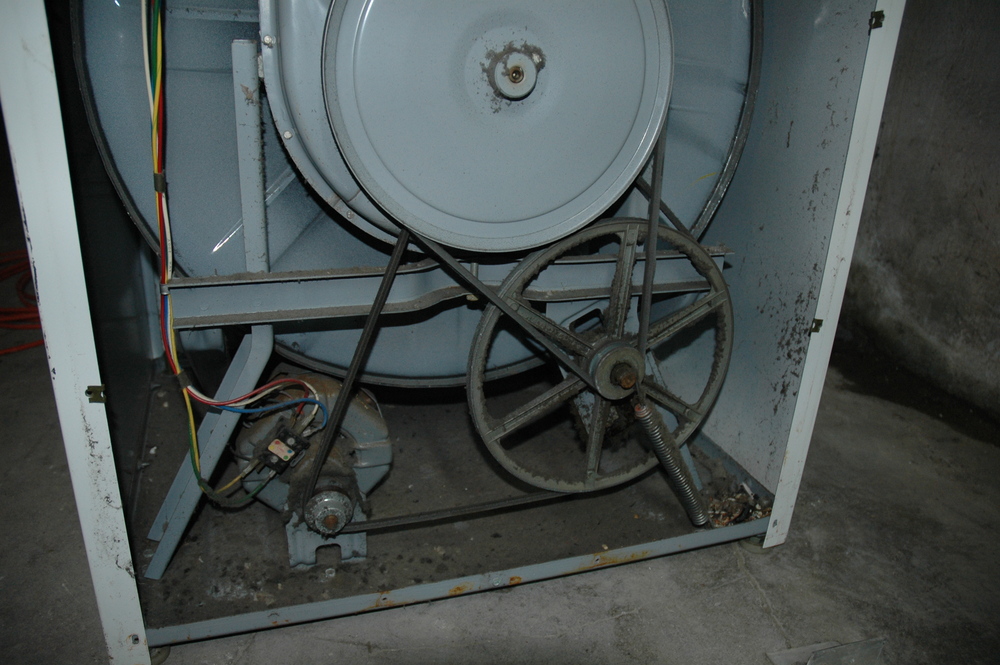
| ||
|
Post# 347046 , Reply# 3 5/6/2009 at 14:10 (5,466 days old) by volvoguy87 (Cincinnati, OH) |
||
|
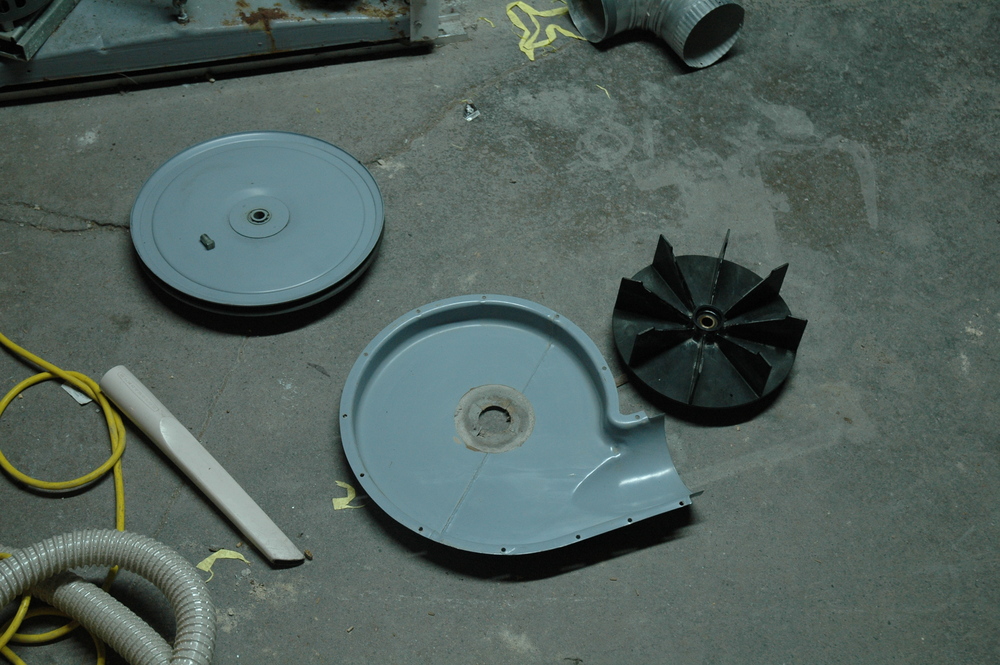
The HoH blower before cleaning.
This is the blower sitting as it would in the dryer. The metal piece behind it is the rear of the blower housing. It really wasn't very dirty. I think the blower itself is made of Bakelite or some other rigid plastic. The blower is a solid disk on the rear wit blades sticking out of it. Different from a squirrel cage blower but VERY effective. It would be very difficult for lint to accumulate on this type of blower.

| ||
|
Post# 347047 , Reply# 4 5/6/2009 at 14:14 (5,466 days old) by volvoguy87 (Cincinnati, OH) |
||
|
Next!
Belts removed, blower dismantled, now the cleaning can begin. By the way, there is a square-head bolt on the large upper drum pulley that must be removed so you can remove the drum pulley. Use a wrench with good leverage! When reassembling, make sure the bolt is aligned with the flat spot on the shaft. 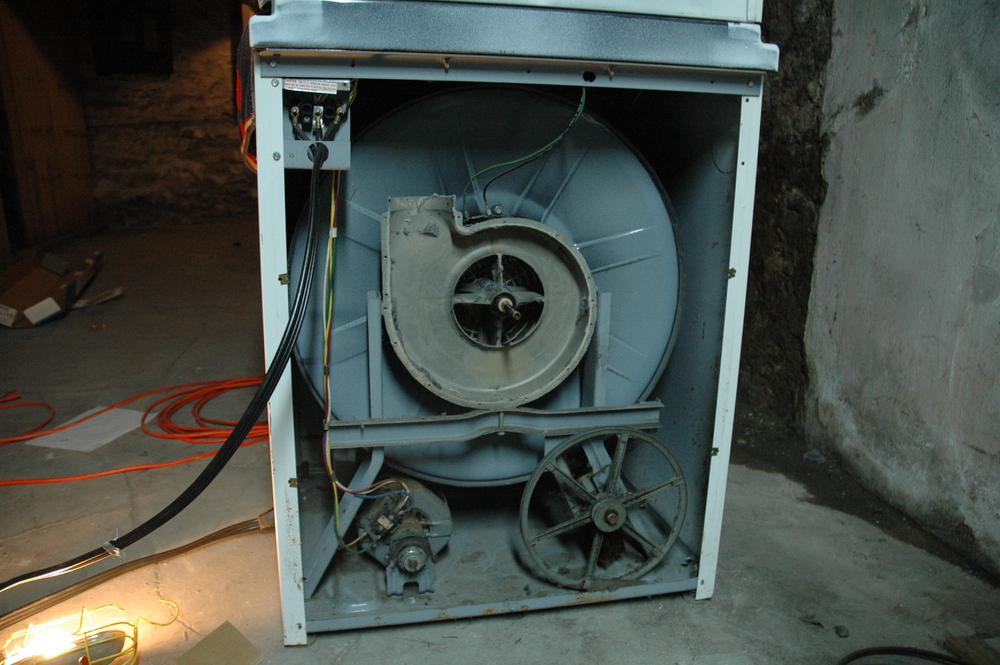
| ||
|
Post# 347048 , Reply# 5 5/6/2009 at 14:18 (5,466 days old) by volvoguy87 (Cincinnati, OH) |
||
|
Clean blower! | ||
|
Post# 347051 , Reply# 6 5/6/2009 at 14:20 (5,466 days old) by volvoguy87 (Cincinnati, OH) |
||
|
Happier dryer. | ||
|
Post# 347053 , Reply# 7 5/6/2009 at 14:24 (5,466 days old) by volvoguy87 (Cincinnati, OH) |
||
|
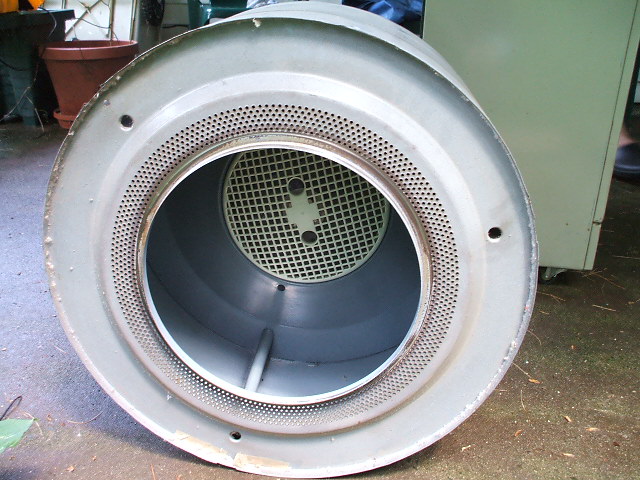
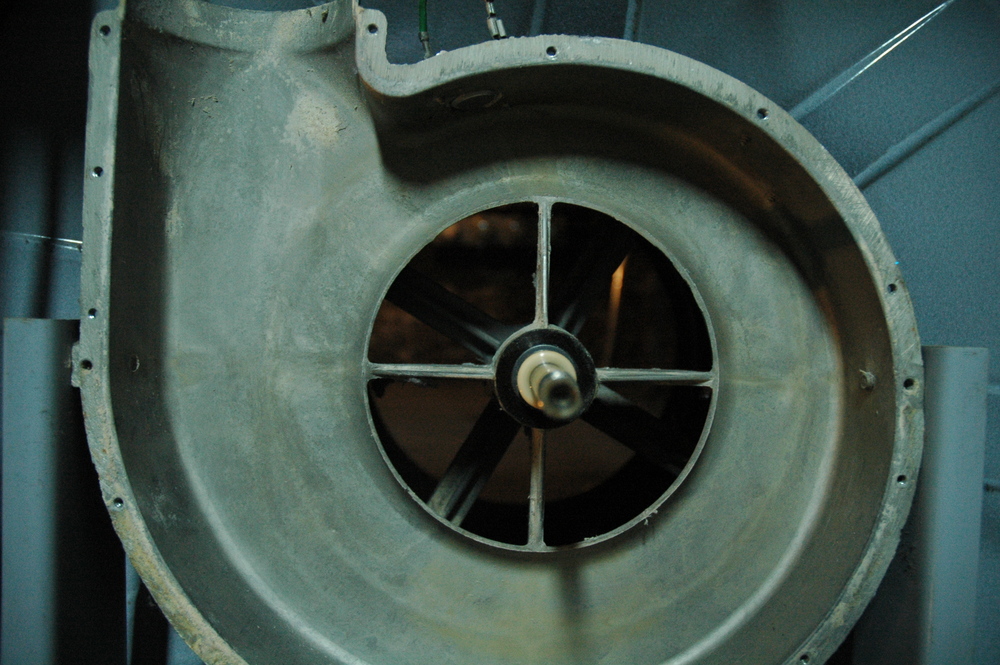
Blower housing.
Looking through the blower housing. I removed the lint filter and left the door open so you can look right through the dryer to the other end of the basement. The shaft in the center of the picture is the slowly-rotating shaft which drives the drum. The blower is installed on this shaft, but it freewheels on it, being driven at high speed by its own belt.
| ||
|
Post# 347054 , Reply# 8 5/6/2009 at 14:30 (5,466 days old) by volvoguy87 (Cincinnati, OH) |
||
|
I hope you enjoyed this thread.
I didn't get any good shots of reassembly but it was not difficult. Just remember not to miss any of the thousand or so bolts that hold the blower halves together. I replaced the belts and the fiber washer on the blower shaft. I greased the sliding tensioner pulley mount. I used Zoom Spout Turbine Oil and oiled the tensioner pulley shaft and the blower shaft. 2 weeks or so after doing all this work, the motor seized up without warning. We ended up prying the ends off the motor and soaking the bearings with lots and lots of Zoom Spout Turbine Oil. The motor has been working perfectly ever since. I fear my Lady Kenmore Electronic set will not be this easy to work on. Happy Drying, Dave | ||
| Post# 347075 , Reply# 9 5/6/2009 at 16:18 (5,466 days old) by autowasherfreak () | ||
|
Dave: Will this be basically the same for the gas dryers? Is there anything special that I will need to do with the gas dryer, or areas of concern that I need to look at? James | ||
|
Post# 347083 , Reply# 10 5/6/2009 at 16:46 (5,466 days old) by volvoguy87 (Cincinnati, OH) |
||
|
Sort of.
I didn't do anything with the heating system. Everything I did was mechanical. Just check to make sure there isn't significant corrosion due to high moisture from the pilot light, otherwise my cleaning and lubrication ought to work on a gas model too. I know the HoH electric heating elements are at the front of the drum, but I have no idea where the gas burner is located. Also, make sure to get Zoom Spout turbine oil. It is the proper viscosity and lacks gumming detergents. The long flexible spout is also very convenient for getting into tight spots. As a side note, the reason why the HoH dryers are so wide is because the drum is quite shallow in order to fit the blower and belts behind the drum. The later Big Load dryers are narrower, but have a much deeper drum. Since the HoH drums are so shallow, having the lint filter in the middle of the back of the drum is not a hassle. Happy HoH, Dave | ||
| Post# 347100 , Reply# 11 5/6/2009 at 18:28 (5,466 days old) by lebron (Minnesota) | ||
 | ||
| Post# 347104 , Reply# 12 5/6/2009 at 18:40 (5,466 days old) by qsd-dan (West) | ||
|
"2 weeks or so after doing all this work, the motor seized up without warning. We ended up prying the ends off the motor and soaking the bearings with lots and lots of Zoom Spout Turbine Oil. The motor has been working perfectly ever since." Whoa! This topic deserves its own thread! How did you pull this off (pun somewhat intended). I thought the case halves are welded together. How did you get both ends back on securely? I have a spare working HOH square motor, but don't really want to damage it for pure experimentation. "I fear my Lady Kenmore Electronic set will not be this easy to work on." Nope, not even close. Have fun the exhaust ducting, lol. After working on 3 Halos, I still don't understand why some here call them Halo of Hell. Simple and easy design to work on in my opinion. | ||
| Post# 347109 , Reply# 13 5/6/2009 at 18:49 (5,466 days old) by saltysam () | ||
|
What would classify a Maytag dryer as a "Halo of Heat&q Dave, my dryer is Model TA702 which is a '65 model and looks almost identical in the back as yours. Would this one be considered a Halo of Heat dryer? Mark 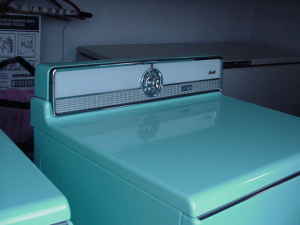
| ||
| Post# 347110 , Reply# 14 5/6/2009 at 18:53 (5,466 days old) by qsd-dan (West) | ||
|
What would classify a Maytag dryer as a "Halo of Heat&q | ||
|
Post# 347121 , Reply# 15 5/6/2009 at 20:24 (5,466 days old) by volvoguy87 (Cincinnati, OH) |
||
|
Maytags.
I thought there were a few early pre HoH dryers, possibly sourced from another company, maybe not. I think HoH dryers got their unfortunate nickname because the pre 06 series were put together differently, necessitating the removal of the entire cabinet to work on them. FWIW, always make sure that HoH dryers with moisture sensors are properly grounded or else they will not shut off. The 306 has no moisture sensor (boy I wish it did!). The HoH moisture sensors are located on the drum baffles I think and are susceptible to getting gunked up from dryer sheets. The pictured dryer is a daily driver, nearly 40 years after it was born. As for the motor... We did not open up the entire motor. We merely pried off the end caps. Imagine the motor as a long-neck beer bottle with a long neck at both ends. The motor is attached to the motor mount on the necks with green straps (visible in the picture above). The straps are a pain to remove, but we did it with a hefty flat screwdriver after removing the motor mount with the motor attached. The ends of the long necks were pressed on and it is possible to pry them loose and soak the seized bearings within with oil. We pressed the end caps on again when the shaft was able to be turned easily by hand. We attempted this repair because we do not have another working dryer at the moment and thought the motor was toast and that we had nothing to loose. Someone here at AW sent us an extra motor for which I am very thankful. My housemate handled it, otherwise I would thank you myself, so thank you mystery Maytag motor provider! I am uncertain how long our motor repair will last, so we might need the spare motor anyway. Clear as mud? Dave | ||
|
Post# 347126 , Reply# 16 5/6/2009 at 21:14 (5,466 days old) by swestoyz (Cedar Falls, IA) |
||

A bit of Maytag Dryer history..... The first Maytag dryer came out in 1953 and was completely designed in-house in Newton. Unlike Frigidaire and others, Maytag did not outsource a dryer to sell along side the AMP or Conventionals. The first dryer, the 60W, was a water film dryer. Shortly thereafter they did come out with an airflow electric as well as gas. A revised water dryer was developed using the condensing method vs. the original water film. In late 1957 the Halo of Heat dryers were introduced, but they did keep the condensing dryers around until 1965. The first electronic control dryers came out in 1960, and were used on both the HOH and Condenser/Water dryers. The cabinet of all HOH dryers needs to be removed to access the front element, and in some cases the door switch. Otherwise they really aren't bad dryers - I personally really like them. Ben 
| ||
| Post# 347168 , Reply# 17 5/7/2009 at 05:14 (5,466 days old) by moonvalleycacti () | ||
|
Whats a water film dryer??? Never heard of that before | ||
| Post# 348160 , Reply# 19 5/11/2009 at 18:44 (5,461 days old) by qsd-dan (West) | ||
|
Whats a water film dryer??? Never heard of that before | ||
| Post# 348163 , Reply# 20 5/11/2009 at 18:47 (5,461 days old) by qsd-dan (West) | ||
|
Whoops, | ||
|
Post# 348208 , Reply# 22 5/11/2009 at 20:57 (5,461 days old) by gadgetgary (Bristol,CT) |
||
And here it is | ||
| Forum Index: | 
| Other Forums: |

|

|

|

|

|

 Comes to the Rescue!