|
Thread Number: 26402
Westy CD6 dryer repair made easy - NOT! |
[Down to Last] |
Post# 405328 1/11/2010 at 10:31 (5,215 days old) by turquoisedude  (.) (.) |
||

There is probably a reason why I shy away from messing around with dryers - probably because when I play with 220 volt current bad things happen... So on Friday, I picked up the motor for the dryer at this repair shop in Magog, Quebec (BTW these people seem to be able to repair ANYTHING!). After de-Christmasing the house on Friday and most of Saturday, I got a chance to hook the motor back up and roughly put it with the fan blower back in place in the Westy dryer. I bravely hooked the dryer up to my non-standard-and-not-recommended new 220v line and dryer plug, pulled the start button and.... 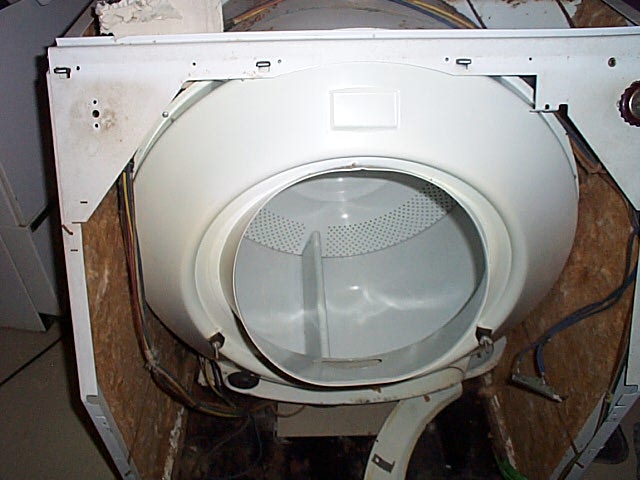
| ||

|
|
Post# 405329 , Reply# 1 1/11/2010 at 10:42 (5,215 days old) by turquoisedude (.) |
||
|
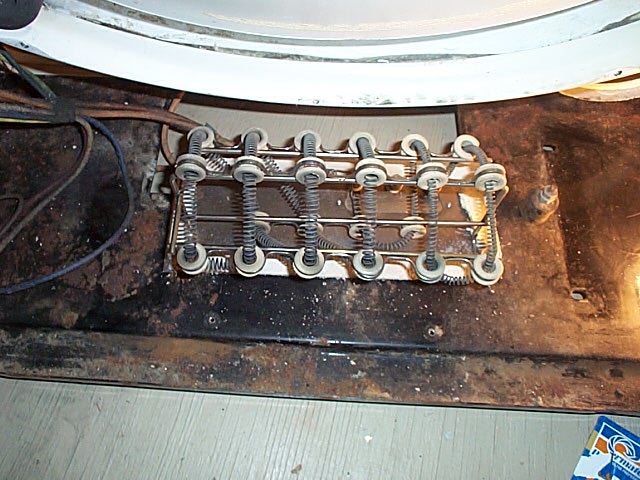
The motor started! It ran fine, but I noticed a scraping or rubbing sound. That's when I heard that tell-tale loud PHUT sound, accompanied by that bright blue flash of light that should tell you very clearly "Dude, you have a short circuit here". Needless to say, I managed to get to the main breaker panel and shut off the dryer feed before I had a chance to blink.... After a change of underwear and a glass of a soothing herbal beverage (the kind they make in the Scottish Highlands and age for 12 to 15 years), I tried to figure out what the smeg I had just done and had I ruined this 1953 dryer! I did plenty wrong... 1) the dryer was not level - I had to jack it up on one side to extract the motor and had not put it back down when I got the motor back 2) I did not completely re-install the fan assembly, I just kind of pushed into the air intake chamber and I did not put the inlet air guard into place and 3) I did not double-check the heater assembly had been re-installed correctly after I removed it for inspection. So, after removing the fan assembly, I noticed that there was a piece of the asbestos board gasket that should have been on the bottom of the heater assembly had slipped and was touching the heater elements! Now to me, that should not have caused a short. I looked a little closer and I noticed a sliver of almost hair-like thread on the heater assembly(it doesn't show up on the photo - sorry!). Conclusion - I figure that the rubbing I heard was the fan rubbing against the chamber housing and a piece of metal was filed off, blown into the heating elements and KAPOW! 
| ||
|
Post# 405330 , Reply# 2 1/11/2010 at 10:44 (5,215 days old) by turquoisedude (.) |
||
|
| ||
|
Post# 405332 , Reply# 3 1/11/2010 at 10:50 (5,215 days old) by turquoisedude (.) |
||
|
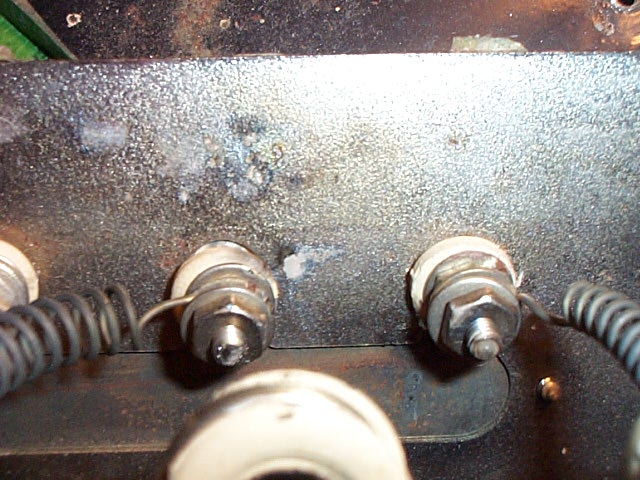
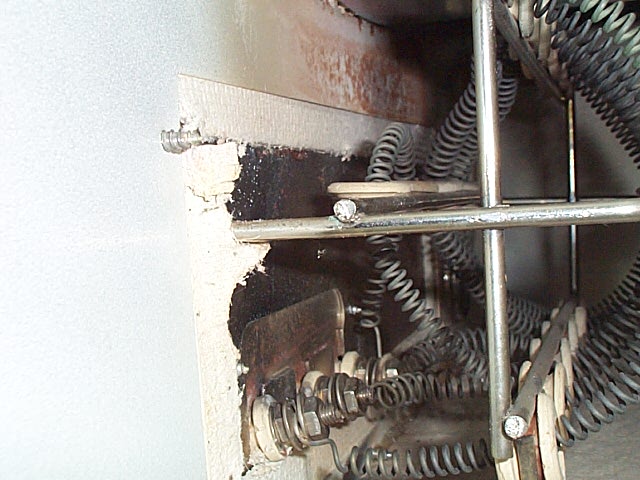
So, a couple of questions...
When I do reinstall the heater unit, what can I use as a gasket around the edge of the metal?? The original gasket is asbestos board and I think I'd get looked at real funny if I asked my local repair parts guy if he stocks it! I will also need something to use as a shield in front of the heater unit to protect the music box (which shows signs of high heat exposure). And finally, in the picture below, do those coils look a wee bit too close for comfort? Should I try and adjust them to leave more of a gap or am I just being too paranoid? I am already anxious for the weekend to get here so that I can try again and hopefully not put on a fireworks display!! 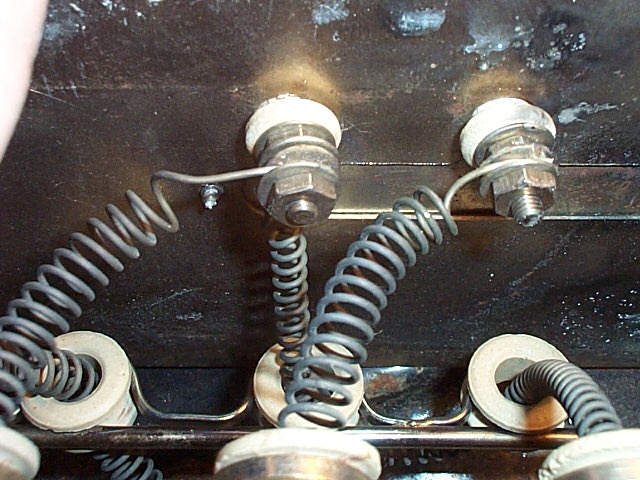
| ||
| Post# 405337 , Reply# 5 1/11/2010 at 11:09 (5,215 days old) by austinado16 () | ||
|
BTW... I patched my heating elements umpteen times over the past 13 years until finally the element wire was just so cooked and brittle that I couldn't keep up with the failures. I modified an element out of a modern machine and the dryer lives on. | ||
|
Post# 405793 , Reply# 6 1/13/2010 at 11:02 (5,213 days old) by turquoisedude (.) |
||
|
Got the timer today!
I bought that Westinghouse timer that I had spotted on eBay (in Wisconsin) and it arrived today. The motor looks as if it will fit, but I will only know for sure this weekend. Hope I don't have any further electrical issues!!! BTW the timer unit and knob are not something I need,so if anyone may be interested in what looks like a late 60's or early 70's Westinghouse dryer timer and/or clear selector dial, just let me know. | ||
| Post# 405803 , Reply# 7 1/13/2010 at 11:48 (5,213 days old) by aldspinboy (Philadelphia, Pa) | ||
 | ||
|
Post# 407112 , Reply# 8 1/18/2010 at 11:53 (5,208 days old) by turquoisedude (.) |
||
|
Okay, so I messed up on the timer....
Dang! I should've researched the part numbers a little more but the timer from Wisconsin was definitely NOT the right one... I thought maybe I could somehow take the drive gear from the original timer and make it fit on the new one, so I opened both timers. Even I could see that the escapement mechanisms were too different and my heart sank. I tried, just for the heck of it, to manually turn the original timer; I turned it on it's side and a piece of something fell out (it looked like glue or gasket). I turned the gears and they were now moving again! I figured I had nothing to lose, so I hooked it up to AC power and... It worked! I tested it out of the timer mechanism and all seemed fine, so I popped it back in and let it run. It ran fine (and kept reasonably accurate time too!). Here's the re-assembled timer while I was testing it! 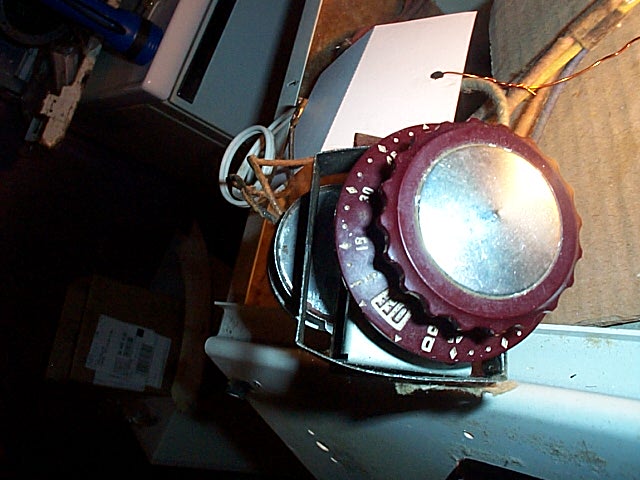
| ||
|
Post# 407113 , Reply# 9 1/18/2010 at 11:55 (5,208 days old) by turquoisedude (.) |
||
|
| ||
|
Post# 407116 , Reply# 10 1/18/2010 at 12:00 (5,208 days old) by turquoisedude (.) |
||
|
I figured that I wasn't likely to have such clear access to the base plate again, so I gave it a fast coat of POR-15. I would not recommend doing this inside, but it was mild enough in Ogden on Saturday (around 37 degrees F) that I could throw open the basement windows. Hubby wasn't there either, so I had no one to yell at me about the reek in the house... LOL I took a walk around the property while the paint dried. It was definitely worth doing! 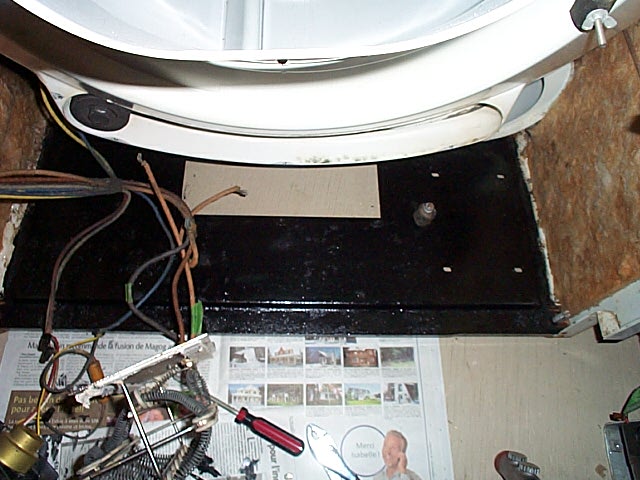
| ||
|
Post# 407119 , Reply# 11 1/18/2010 at 12:04 (5,208 days old) by turquoisedude (.) |
||
|
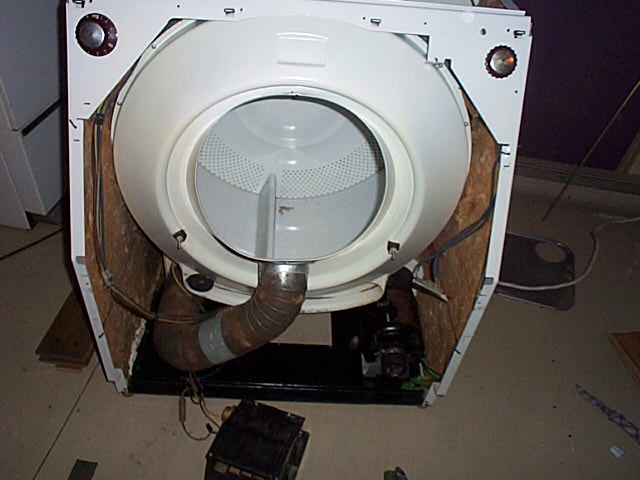
I only got the heater unit and motor re-installed on Sunday afternoon. This time, I set myself a couple of checkpoints... I made VERY sure there was no potential contact between the heating elements and the cabinet and I followed the specs in the manual to get the correct distance between the motor and the blower cage. This was a big mistake I made in the first test - with the correct distance, the blower turned nice and smoothly with no rubbing or scraping.
| ||
|
Post# 407122 , Reply# 12 1/18/2010 at 12:05 (5,208 days old) by turquoisedude (.) |
||
|
| ||
|
Post# 407124 , Reply# 13 1/18/2010 at 12:08 (5,208 days old) by turquoisedude (.) |
||
|
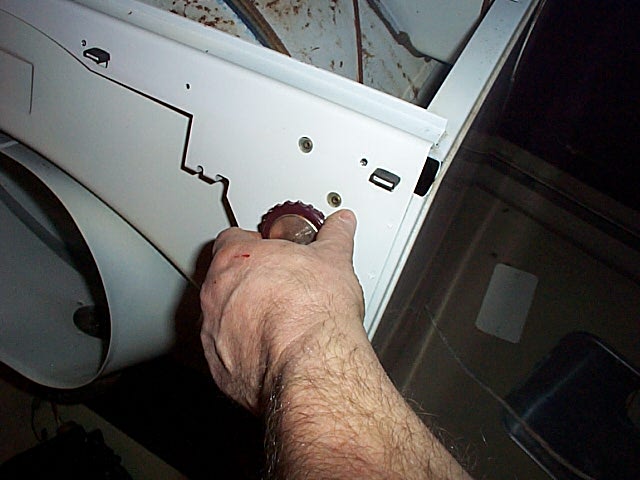
The moment of truth.... | ||
|
Post# 407126 , Reply# 14 1/18/2010 at 12:12 (5,208 days old) by turquoisedude (.) |
||
|
It worked!
The motor started, the blower silently moved air over the heater unit and into the drum! I smelled a slight cooking smell, but it dispersed quickly - I figure that was just dust burning off the heating coils. The air coming into the drum was good and HOT! I was dizzy with excitement! I was actually on the phone with Darren (aldspinboy) for a test and to quote him he could "fell that hot air all the way in Philly". AND he got to hear the end of cycle musical signal play "How Dry I Am". WOW! I did it - my first dryer restore!! | ||
|
Post# 407132 , Reply# 15 1/18/2010 at 12:17 (5,208 days old) by turquoisedude (.) |
||
|
Another couple of questions...
I was curious to know if the heating elements (it looks like there are two distinct coils) cycle or alternate to provide low or high heat somehow. There is no selection on the control panel and I am assuming the timer just sets the elements "on". Does one of the thermostats mounted in the heating chamber take care of this?? Also, the dryer as is does not have an external vent (still has the pop-up lint filter on the rear exhaust panel). Should I modify the original venting/filter arrangement to add an external vent?? Oh, and if anyone needs a timer, with dial, for a more modern Westinghouse dryer, let me know! I doubt that I will ever find a use for the one I bought... | ||
|
Post# 407163 , Reply# 17 1/18/2010 at 14:07 (5,208 days old) by turquoisedude (.) |
||
|
Noted!
That POR15 stuff is pretty evil alright... I was lucky this time, I guess! Midwest has also helped me out with timer motors for the L5 and the GE washer/dryer combo, but I have heard from other people that they are less willing to get involved with vintage timers any more... Thanks for the info about venting and insulation! Oh, and I have just tried sending scans of the Westinghouse dryer manual to you (I used my MSN Live account, not the email listed in board profile). Please let me know if they get through or not!! | ||
| Post# 407165 , Reply# 18 1/18/2010 at 14:16 (5,208 days old) by austinado16 () | ||
|
Got the dryer manual! Thanks for the dryer manual. All 21 pages showed up. Fantastic stuff! Hope someone here is willing to share the LB-6 washer book, and maybe even the D-6 Dryer book. | ||
|
Post# 407167 , Reply# 19 1/18/2010 at 14:32 (5,208 days old) by turquoisedude (.) |
||
|
Please stand by...
I am going to scan the manual for the CL-5 and CL-9 Laundromats for you! And I have an L8 Manual (about 40 pages) that I will scan after that. That L8 manual is a gold mine! Oh, I forgot about this until I got back to town, but I do have the complete wiring diagram for the CD-6 dryer - I could photograph that for you if you might need it. Lord knows, I have suffered without wiring diagrams, so if I can share one that someone else needs, I am more than happy to do so! | ||
| Post# 407172 , Reply# 20 1/18/2010 at 14:52 (5,208 days old) by austinado16 () | ||
|
Amazing! I'll take anything you can send. No hurry, just whenever you have time. Thanks so much! | ||
| Post# 407216 , Reply# 21 1/18/2010 at 18:29 (5,208 days old) by jeb (Mansfield Ohiio) | ||
|
Westinghouse LB-6 do you have this specification page 
| ||
|
Post# 407218 , Reply# 22 1/18/2010 at 18:36 (5,208 days old) by turquoisedude (.) |
||
|
Got a parts list... | ||
| Post# 407221 , Reply# 23 1/18/2010 at 18:42 (5,208 days old) by jeb (Mansfield Ohiio) | ||
|
LB-6 back side 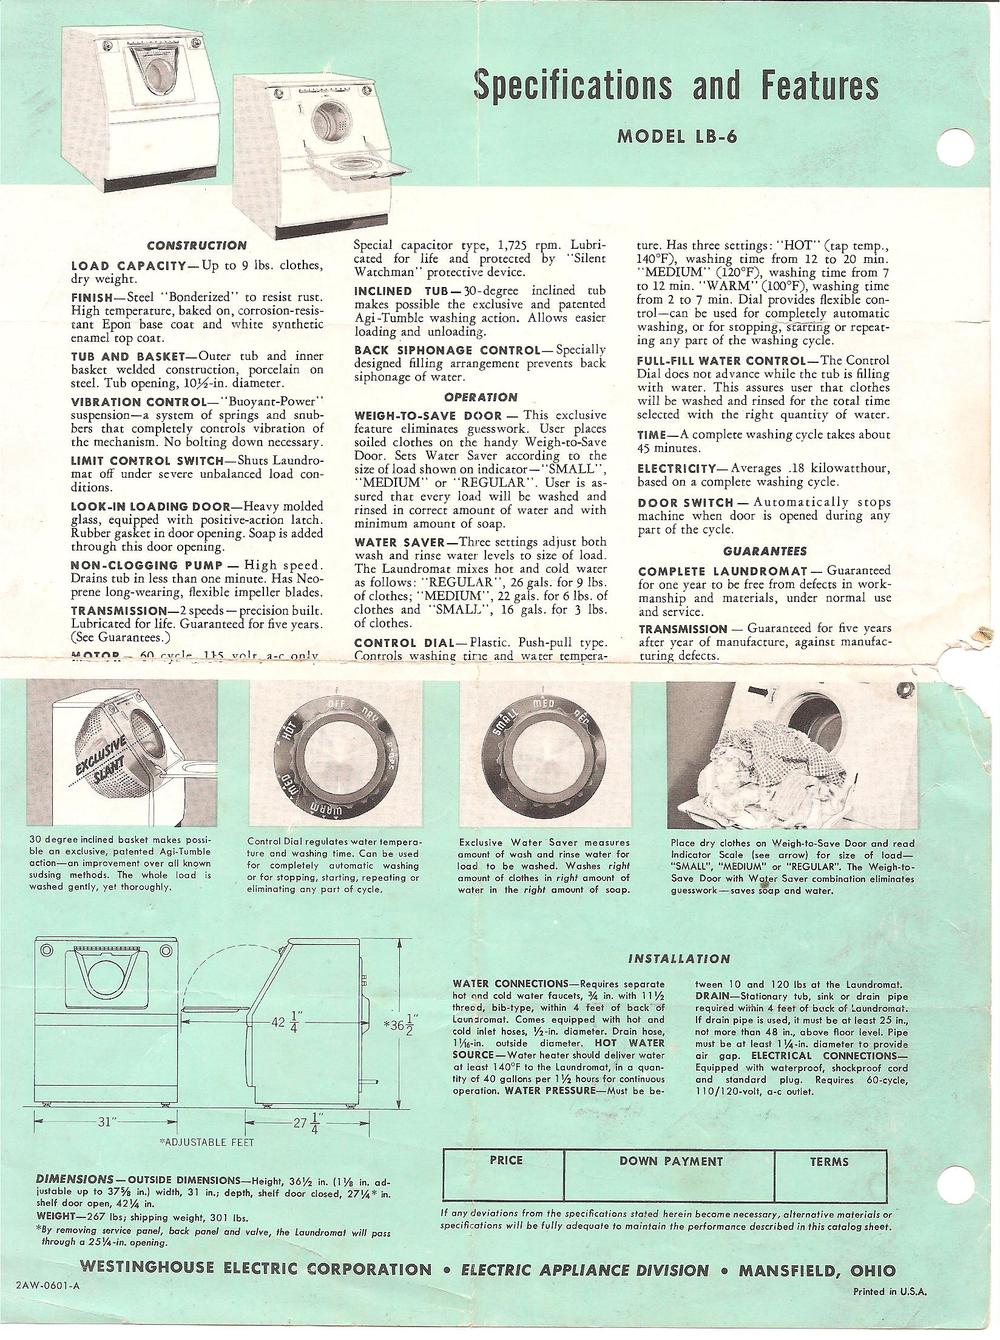
| ||
| Post# 407243 , Reply# 24 1/18/2010 at 20:38 (5,208 days old) by austinado16 () | ||
|
Fantastic Brochure! Thanks for scanning and posting those! No, I haven't seen them before (and don't have them). Geez...$299 for the washer! That must have been like a grand in today's money. | ||
| Post# 407264 , Reply# 25 1/18/2010 at 22:54 (5,208 days old) by jeb (Mansfield Ohiio) | ||
|
LB-6 I am quessing the $74.99 is some kind of trade-in allowance | ||
| Post# 407266 , Reply# 26 1/18/2010 at 22:59 (5,208 days old) by a440 () | ||
|
Congrats on the final outcome. Glad you did not get a shock out of it all! Your dryer looks fantastic! Brent | ||
| Post# 407397 , Reply# 27 1/19/2010 at 12:13 (5,207 days old) by austinado16 () | ||
|
Downloading your latest manuals right now. Fantastic!! Thank you so much for taking the time to scan and send. | ||
|
Post# 407423 , Reply# 28 1/19/2010 at 13:42 (5,207 days old) by turquoisedude (.) |
||
|
Glad they got through! | ||
|
Post# 409296 , Reply# 29 1/25/2010 at 12:10 (5,201 days old) by turquoisedude (.) |
||
|
Just had to add some video!
Got the drive wheel installed and tested on the weekend. It's looking good and should be ready for a 'maiden dry' soon. In the video, listen carefully towards the end... Just curious about the noise made by the friction drive - is that normal for this model?? I was thinking I may need to tighten up the motor mounting some more, too. Comments? CLICK HERE TO GO TO turquoisedude's LINK | ||
| Post# 409339 , Reply# 30 1/25/2010 at 14:41 (5,201 days old) by westingman123 () | ||
|
Beautiful! Beautiful! Hats off to you, I can only hope mine turns out as well. | ||
| Forum Index: | 
| Other Forums: |

|

|

|

|

|

 Comes to the Rescue!