|
Thread Number: 34425
Kenmore Dryer Wiring |
[Down to Last] |
Post# 516474 5/9/2011 at 05:23 (4,727 days old) by DADoES  (TX,�U.S. of A.) (TX,�U.S. of A.) |
||
|
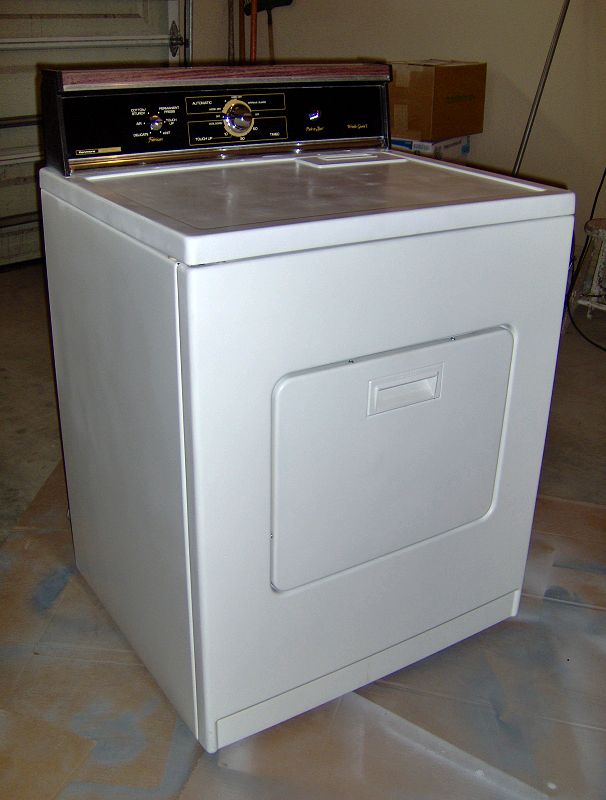
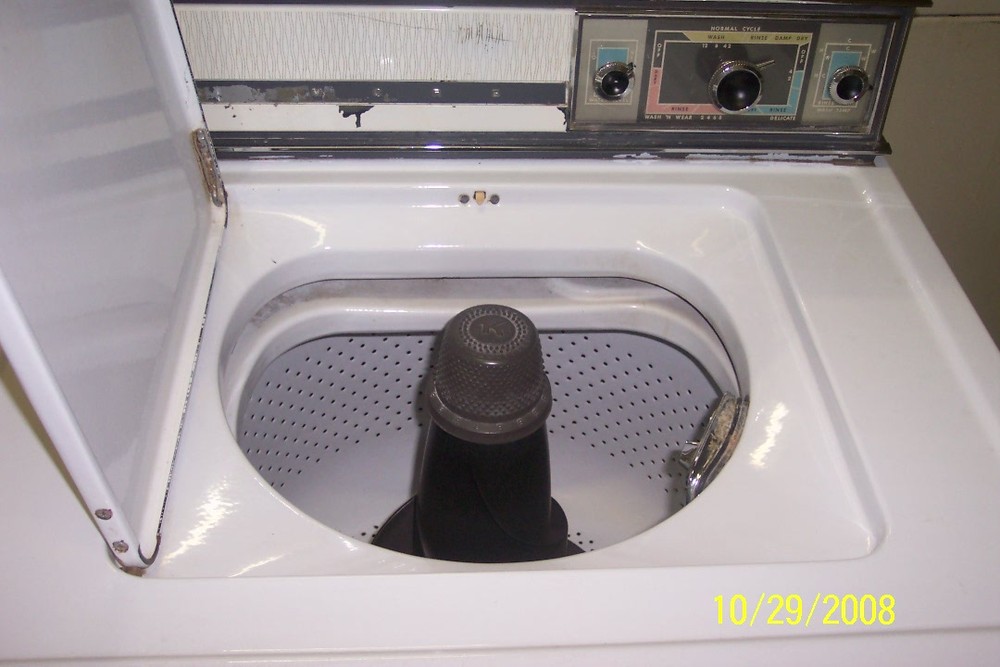
Refurbishing a Kenmore dryer, model 110.76974100 (S/N M83101408 ... can anyone clarify if this is a 1978 or 1988 build?).
Problem now being that there is no wiring diagram on it, and I didn't make note of all the connections before starting. Yeah, I know, the camera is (or should be) my friend. Also may be that some wiring "repairs" were done on it at some point.
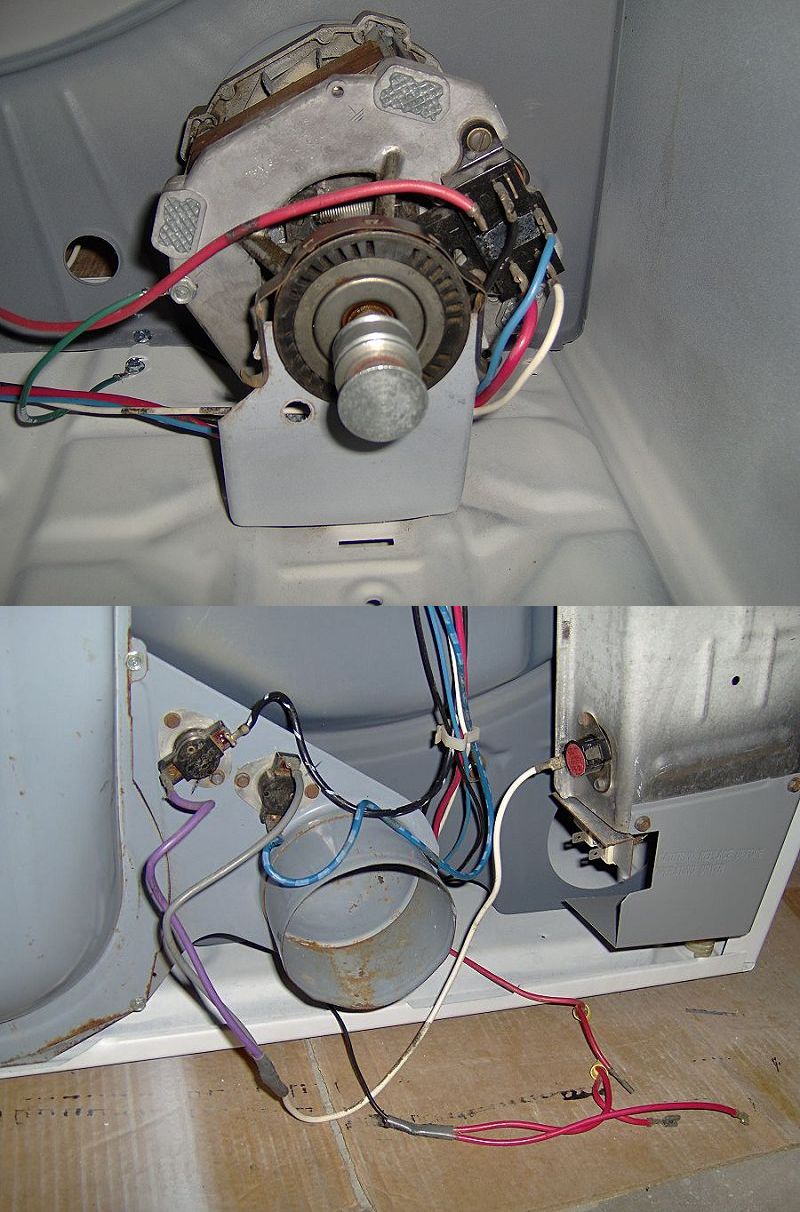
Anyway, the motor connections are correct color & position per my note, but I didn't detail which red wire goes at which position. The lower red wire on the motor switch comes from the cord terminal block. The upper red wire is the single red that comes out at the element. Correct?
The operating thermostats are also correct color & position per note (blue & black come down from the temp switch) ... but I didn't make note of the element connections.
The two red element wires that tie to the smaller black wire going to the motor switch ... seems to me the black wire is rather small gauge to carry element current.
Please advise. Do I have any of this correct? Does the violet+gray --> white connect to the high-limit 'stat or to the element? Where go the three reds?
| ||

|
|
Post# 516479 , Reply# 1 5/9/2011 at 05:46 (4,727 days old) by kenmoreguy64 (Charlotte, NC) |
||
Glen -
That is a 1979 model, so it is a 1978 build. VERY common model, and a great dryer. I have one myself in the garage in line for my time. You can tell the decade by the first 7 in the model number. It's been a while since I worked on a dryer electrically, but a 1982 similar (but not exact) machine I worked on extensively had the lower red wire leading to the element. I only know this because I had to make a repair to that wire. I know my machine has some literature on the back that I would be glad to photograph for you. It is model 110.76974100 also, build code F829, so it's two weeks older than yours. If I can be of help, just let me know. I need to get ready for work, but could snap some pics this evening. Gordon | ||
|
Post# 516484 , Reply# 2 5/9/2011 at 06:25 (4,727 days old) by combo52 (50 Year Repair Tech Beltsville,Md) |
||
DRYER WiRING Hi you have the motor connected correctly, YEY. On the heater element connect the two red wires to the two element terminals that have the yellow wire nuts on them. You will notice that these two terminals are a little larger than all the others on this dryer [ it doesn't matter witch wire goes on which terminal ] and then connect the remaining red wire with the smaller terminal to the other terminal on the heater box safety thermostat [ again it doesn't matter witch terminal each wire is on ]. Usually when an electrical component only two identical terminals it doesn't matter which terminal each wire goes on. The two control thermostats on the blower housing are wired so they will work although you could have the wiring connected in such a way that hi and low heat would be reversed. The upper thermostat is the higher temp one { unless they have been removed and reversed ] and the lower one is for the lower temp, to check look at the letters that are printed near each terminal, one set will have Ls for low and the other will have Hs for hi. The small black wire that you were worried about not being large enough to carry the heater current only sends current to the timer motor for the auto dry cycle, the heater loops through the heavy red wires. | ||
|
Post# 516676 , Reply# 3 5/9/2011 at 20:13 (4,727 days old) by DADoES (TX,�U.S. of A.) |
||
|
Thanks, John. The thermostats are in correct positions, I marked them before starting, and made a note of the wires and the motor ... just not the element, which I expected to remember but apparently not so much, LOL. The dryer was given to me as a throwaway, but I found it to be in good mechanical condition other than a broken filter handle and door latch (also replaced the rear drum seal), and the intake grill half clogged with lint ... which accounts for the slow-drying complaint that accompanied the gimmee. Originally white, had been painted almond. Some rusting/pitting on the top.
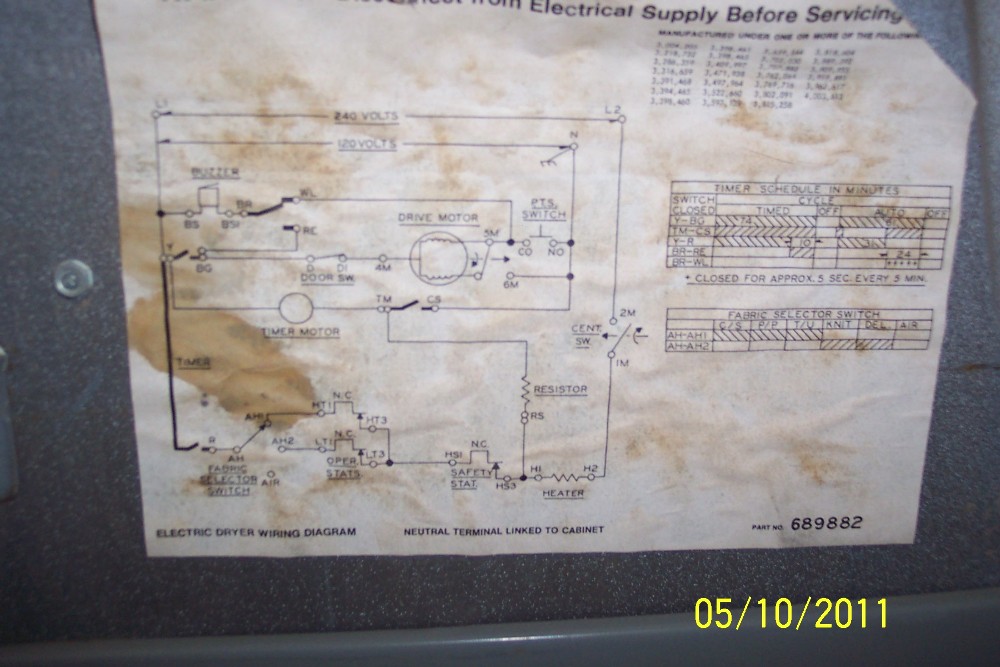
Gordon, a pic of your wiring diagram would be great. There's a resistor mounted on side of the timer, looks to be part of the timer motor circuit ... perhaps to slow down the timer during Wrinkle Guard? 1978/1979 ... it's 10 years older than I expected.
It's closed up and a test run attempted ... D-E-A-D. Leastwise it doesn't trip the circuit breaker and there's no explosion. Another dryer works on the outlet, so power is active. I didn't try running it before starting the refurb, apparently that was another mistake. :-| Next to troubleshooting. 
| ||
|
Post# 516679 , Reply# 4 5/9/2011 at 20:17 (4,727 days old) by DADoES (TX,�U.S. of A.) |
||
|
| ||
|
Post# 516698 , Reply# 5 5/9/2011 at 21:18 (4,727 days old) by DADoES (TX,�U.S. of A.) |
||
|
| ||
|
Post# 516699 , Reply# 6 5/9/2011 at 21:42 (4,727 days old) by kenmoreguy64 (Charlotte, NC) |
||
|
| ||
|
Post# 516701 , Reply# 7 5/9/2011 at 21:44 (4,727 days old) by kenmoreguy64 (Charlotte, NC) |
||
|
The ditto twin | ||
|
Post# 516764 , Reply# 8 5/10/2011 at 07:35 (4,726 days old) by combo52 (50 Year Repair Tech Beltsville,Md) |
||
|
DRYER WiRING Hi the resister near the timer powers the timer motor during the auto dry heated portion of the cycle, when the heat is off by any one of the three thermostats being open. It steps the 240 volts down to 120 which is what the timer motor runs on. This is why that small black wire is connected to the heavy red heater wring, when any thrermostat opens during auto dry heat cycle the black wire completes a circuit through the turned off heating element through the resister to the timer motor and back to neutral. This wring design eliminated the need to make all three thromostats three wire thromostats, it also allows the timer to advance and shut off the dryer if the vent is totally clogged and the dryer is cycling the heater on the heater box safety thermostat only.
When MT came out with thier first auto dry time-temperature system on the HOH DE407 dryer they had no such safety system designed in. As a result when the vent was clogged or just to long the heat would keep cycling on the heater safety and the dryer would literally run all night with only the safety thermostat keeping the whole thing from going up in flames. | ||
|
Post# 517148 , Reply# 9 5/12/2011 at 00:20 (4,725 days old) by DADoES (TX,�U.S. of A.) |
||
|
Ran a load. Cotton casual shorts, underwear, t-shirts, a few small towels. Low temp, normal dry on auto cycle. Perfect results.
Instead of a specific cool-down, the auto-dry cycle segues into the continuous-tumble Wrinkle Guard I period. The EOC buzzer triggers ~10 mins in.
Washed in a Neptune TL of Dec 2005, dried in a Whirlmore of Aug 1978. | ||
| Forum Index: | 
| Other Forums: |

|

|

|

|

|

 Comes to the Rescue!