|
Thread Number: 35506
1-18 Clutch |
[Down to Last] |
Post# 530001 7/11/2011 at 13:24 (4,670 days old) by yogitunes  (New Jersey) (New Jersey) |
||
 | ||

|
|
Post# 530148 , Reply# 1 7/12/2011 at 07:43 (4,669 days old) by combo52 (50 Year Repair Tech Beltsville,Md) |
||
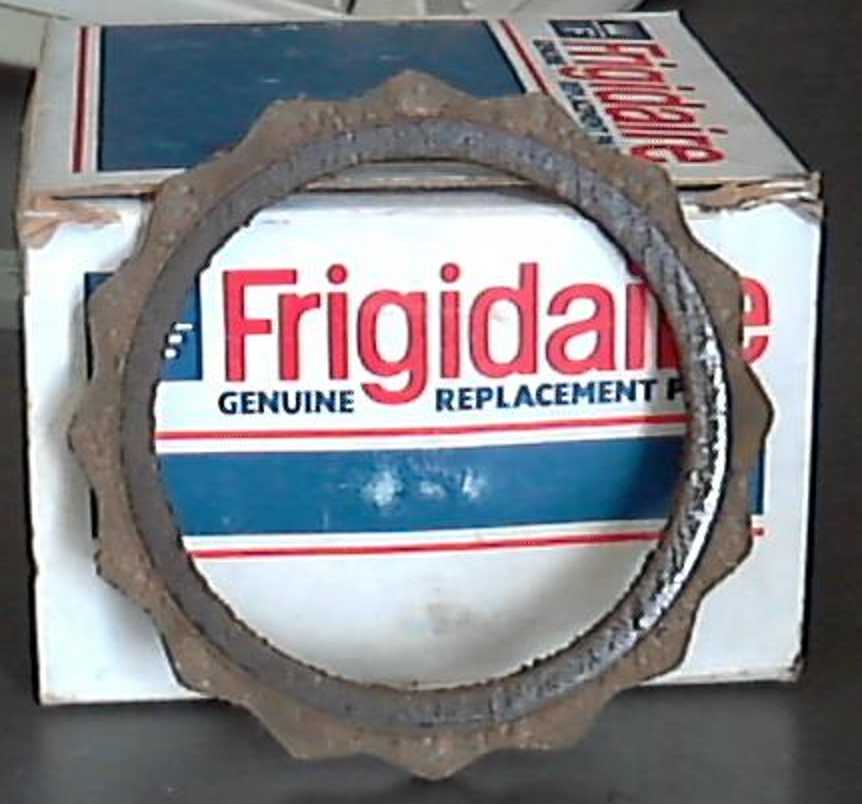
1-18 CLUTCH Yes there are clutch linings some small springs etc inside the spin wheel and they can either lock up and not slip properly which can cause the motor to cut out on its overload or it can slip too much and the machine won't spin properly. The 1-18s clutch is a larger beefed up version of the one that the solid tub roller-matices used 1964-1969. The clutch can be removed and disassembled, sometimes if the machine sat for a period of time in a very damp area the linings will rust to the steel plates or there may be a slight water leak from the main seal. Keep us posted on your progress. | ||
| Post# 530309 , Reply# 3 7/12/2011 at 22:48 (4,669 days old) by fltcoils (South Bend, Indiana) | ||
|
Clutch viewed on brake end pic 1 of 12 See the brake shoe 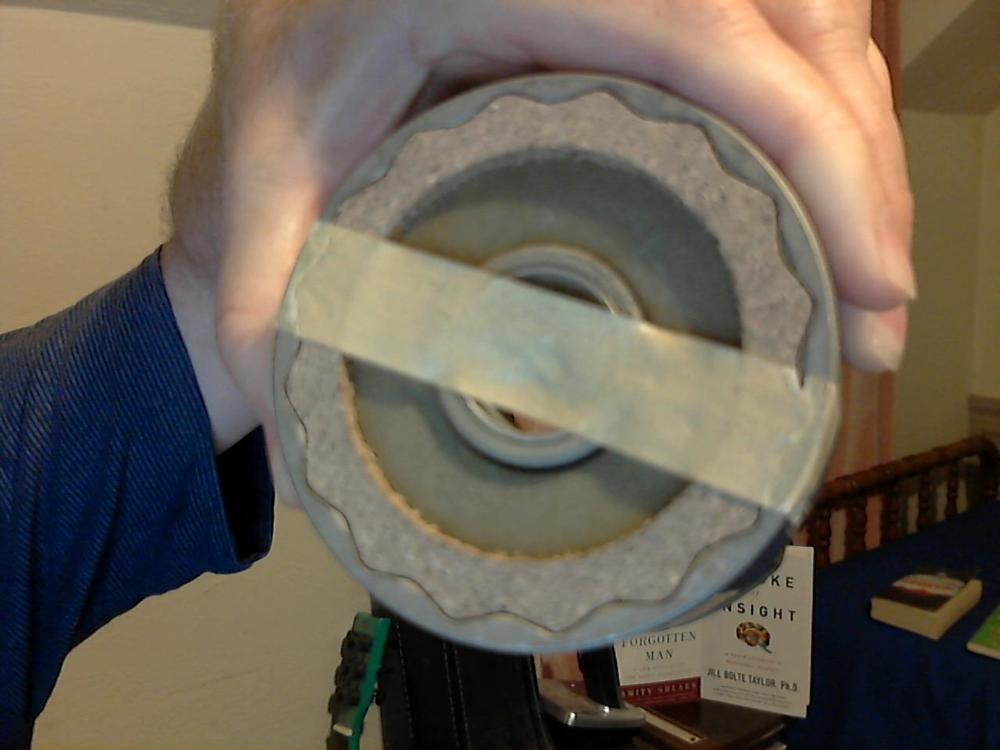
| ||
| Post# 530310 , Reply# 4 7/12/2011 at 22:49 (4,669 days old) by fltcoils (South Bend, Indiana) | ||
|
Clutch screws removed to allow disassembly pic 2 Cams set to side 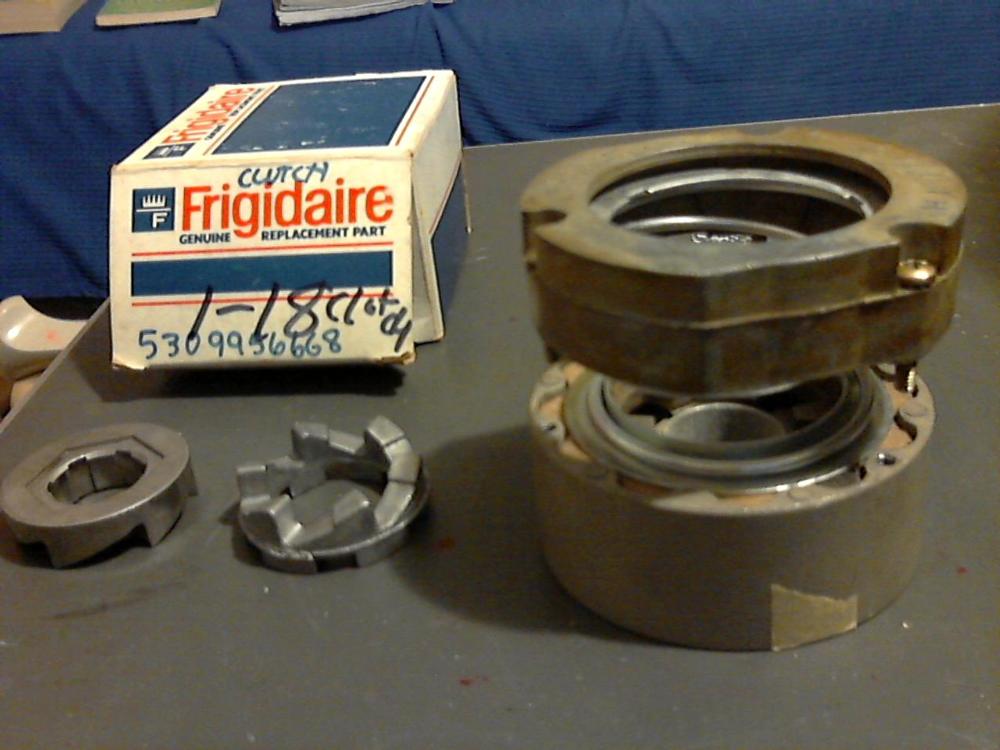
| ||
| Post# 530311 , Reply# 5 7/12/2011 at 22:51 (4,669 days old) by fltcoils (South Bend, Indiana) | ||
|
Clutch components layed out Pic 3 Note spring free ht is 1.787" including metal end washers 
| ||
| Post# 530312 , Reply# 6 7/12/2011 at 22:52 (4,669 days old) by fltcoils (South Bend, Indiana) | ||
|
Inner shoe inserted Pic 4 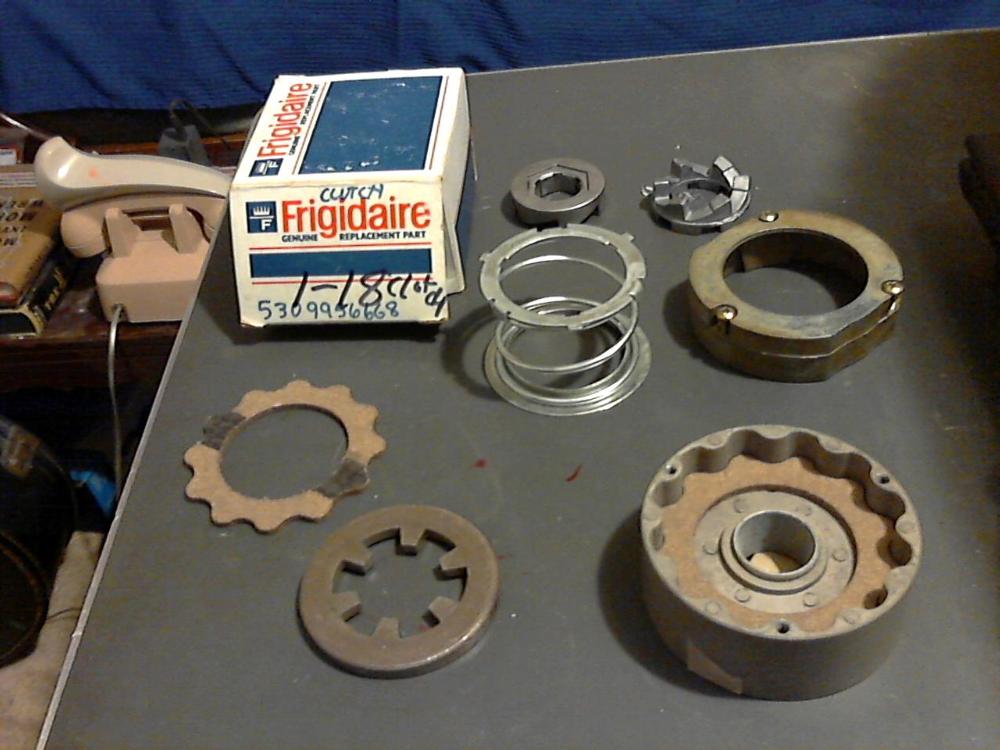
| ||
| Post# 530313 , Reply# 7 7/12/2011 at 22:53 (4,669 days old) by fltcoils (South Bend, Indiana) | ||
|
Pressure plate inserted Pic 5 Besure to make flat side up on pressure plate, stepped side goes down. 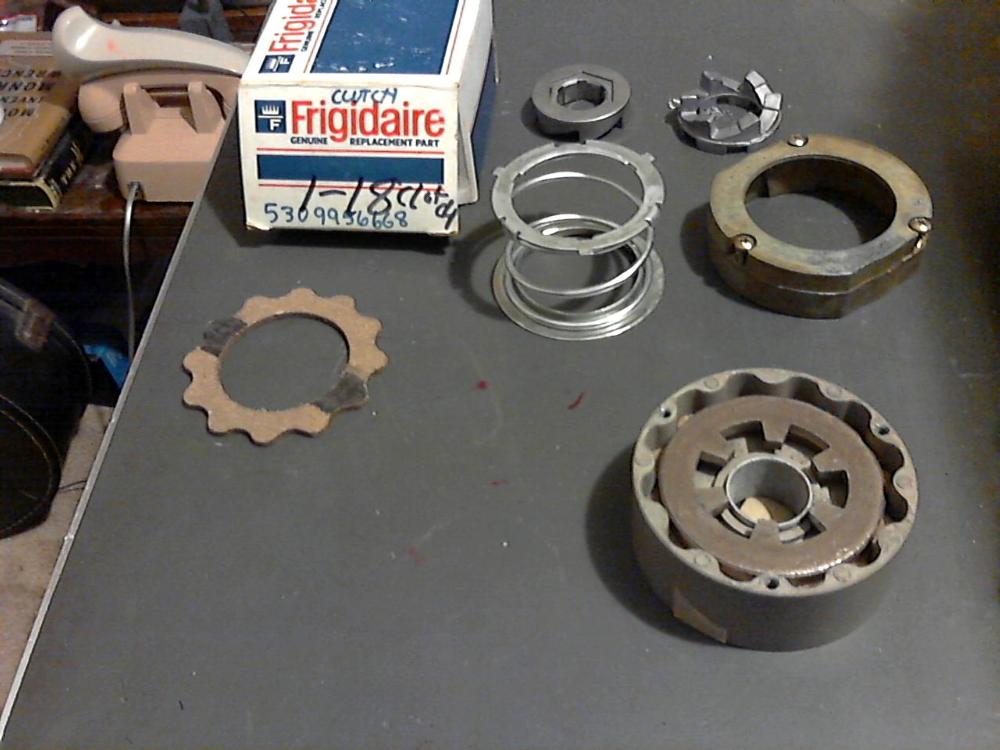
| ||
| Post# 530314 , Reply# 8 7/12/2011 at 22:53 (4,669 days old) by fltcoils (South Bend, Indiana) | ||
|
Outer shoe inserted Pic 6 
| ||
| Post# 530315 , Reply# 9 7/12/2011 at 22:54 (4,669 days old) by fltcoils (South Bend, Indiana) | ||
|
Inner cam put in place Pic 7 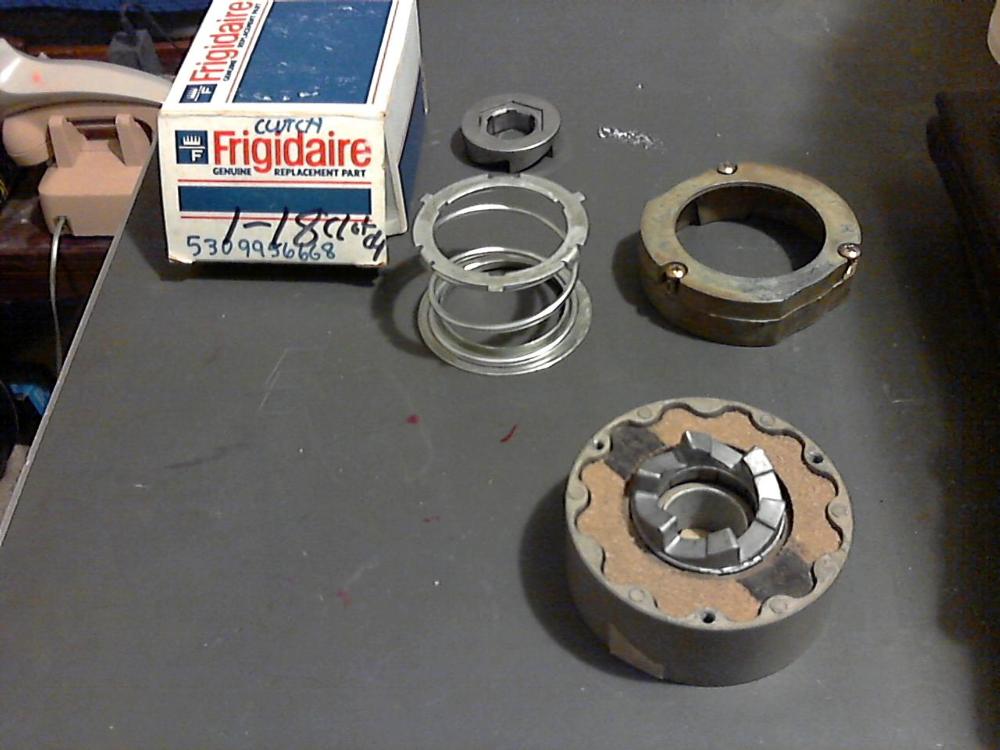
| ||
| Post# 530316 , Reply# 10 7/12/2011 at 22:55 (4,669 days old) by fltcoils (South Bend, Indiana) | ||
|
Outer cam put in place Pic 8 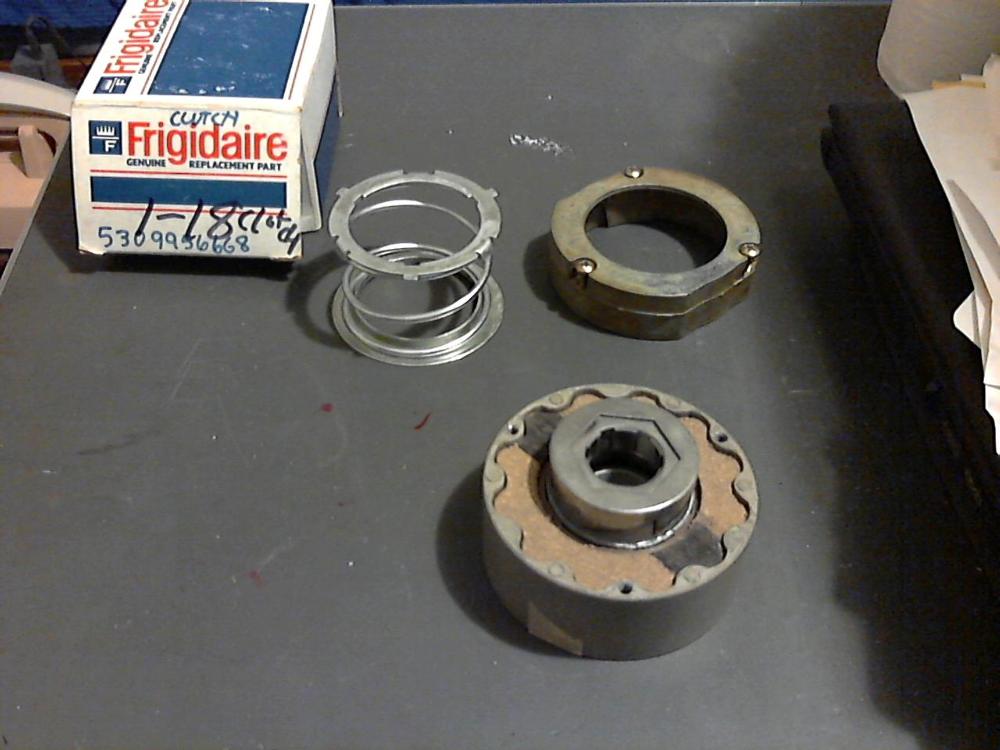
| ||
| Post# 530317 , Reply# 11 7/12/2011 at 22:55 (4,669 days old) by fltcoils (South Bend, Indiana) | ||
|
Tension spring put in place Pic 9 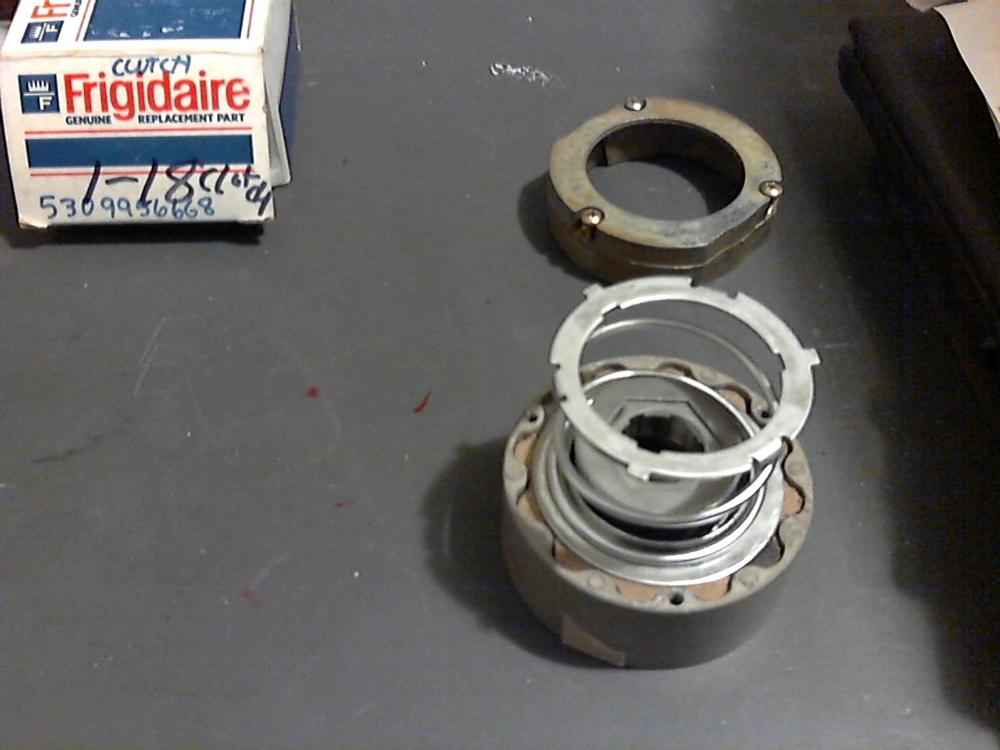
| ||
| Post# 530318 , Reply# 12 7/12/2011 at 22:57 (4,669 days old) by fltcoils (South Bend, Indiana) | ||
|
Tension adjustment notches Pic 10 5 Notches allow depth of spring shoulder to be changed from 0.870 max depth, 0.258 min depth 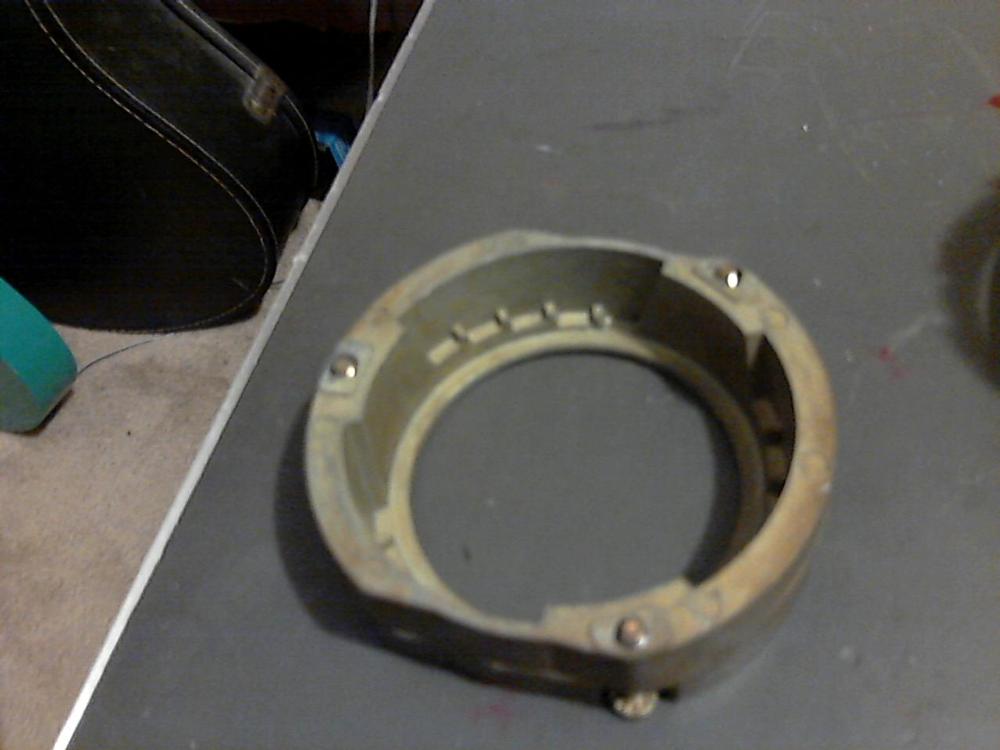
| ||
| Post# 530319 , Reply# 13 7/12/2011 at 22:57 (4,669 days old) by fltcoils (South Bend, Indiana) | ||
|
Stock adjustment is middle slot Pic 11 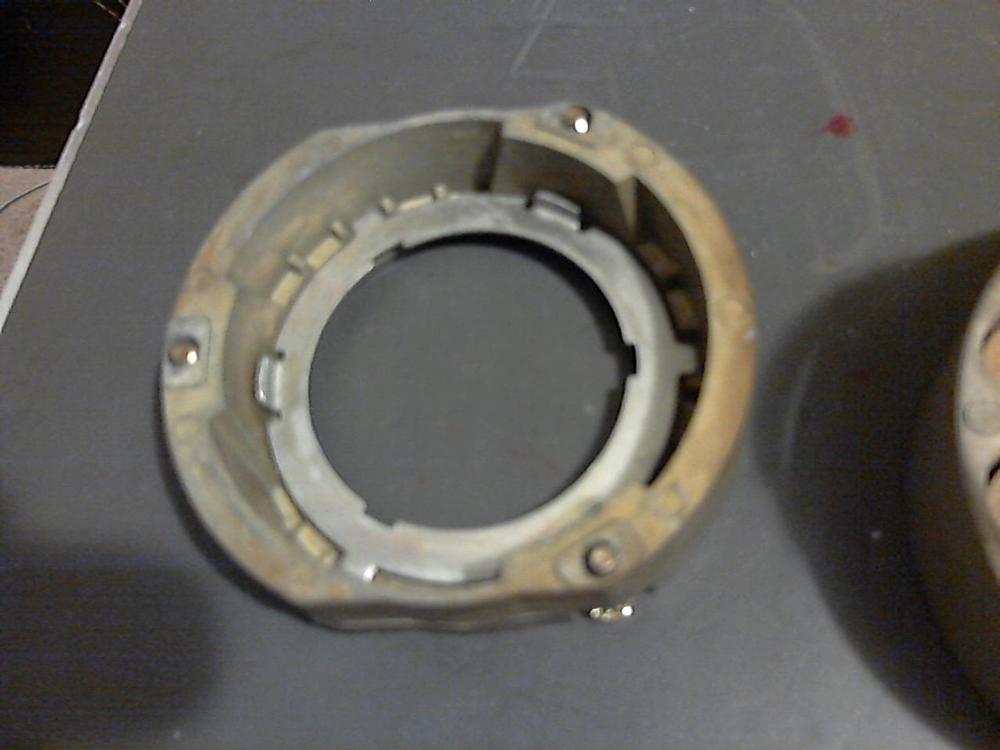
| ||
| Post# 530320 , Reply# 14 7/12/2011 at 22:58 (4,669 days old) by fltcoils (South Bend, Indiana) | ||
|
Assembled clutch Pic 12 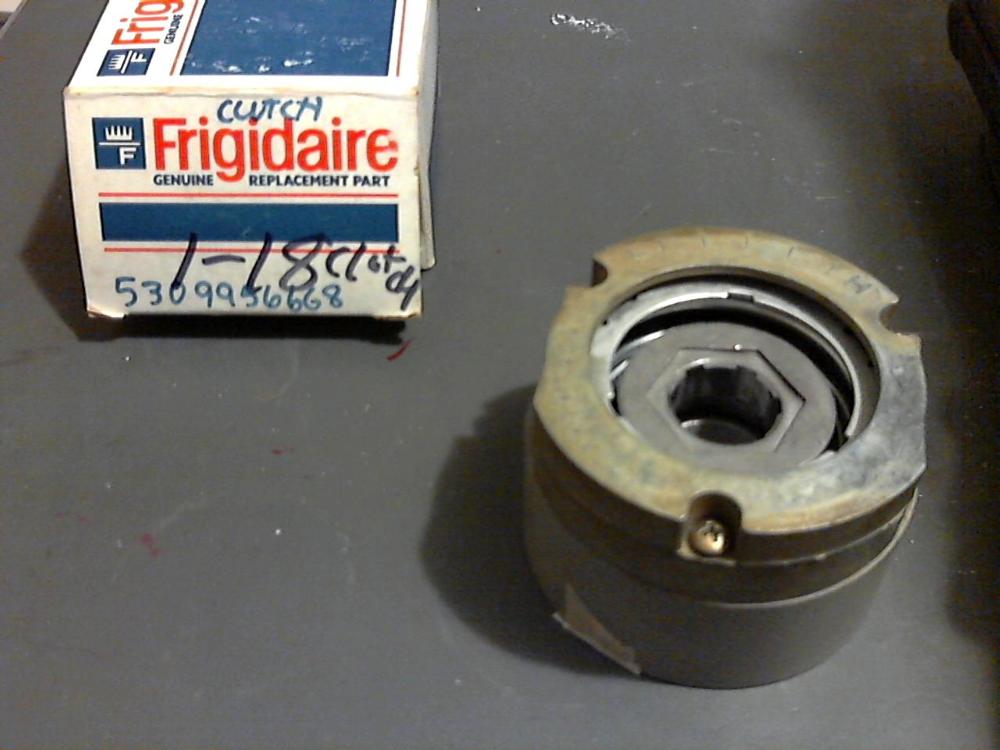
| ||
| Post# 530321 , Reply# 15 7/12/2011 at 23:01 (4,669 days old) by fltcoils (South Bend, Indiana) | ||
|
I didn't include the brake side There are 3 small springs inserted from the clutch side, held in place by the inner clutch shoe On the brake side there are 2 cupped washer/springs then the shoe The inner cupped washer inserts OD contacting down, then the outer cupper washer OD contacting up, then the brake shoe. | ||
|
Post# 530322 , Reply# 16 7/12/2011 at 23:11 (4,669 days old) by pdub (Portland, Oregon) |
||
Great Pictorial | ||
| Post# 530323 , Reply# 17 7/12/2011 at 23:12 (4,669 days old) by fltcoils (South Bend, Indiana) | ||
|
Tension Spring Depth Adjustment Correction 0.820 max depth, 0.586 min depth pic showing 3 small springs next to holes on clutch side 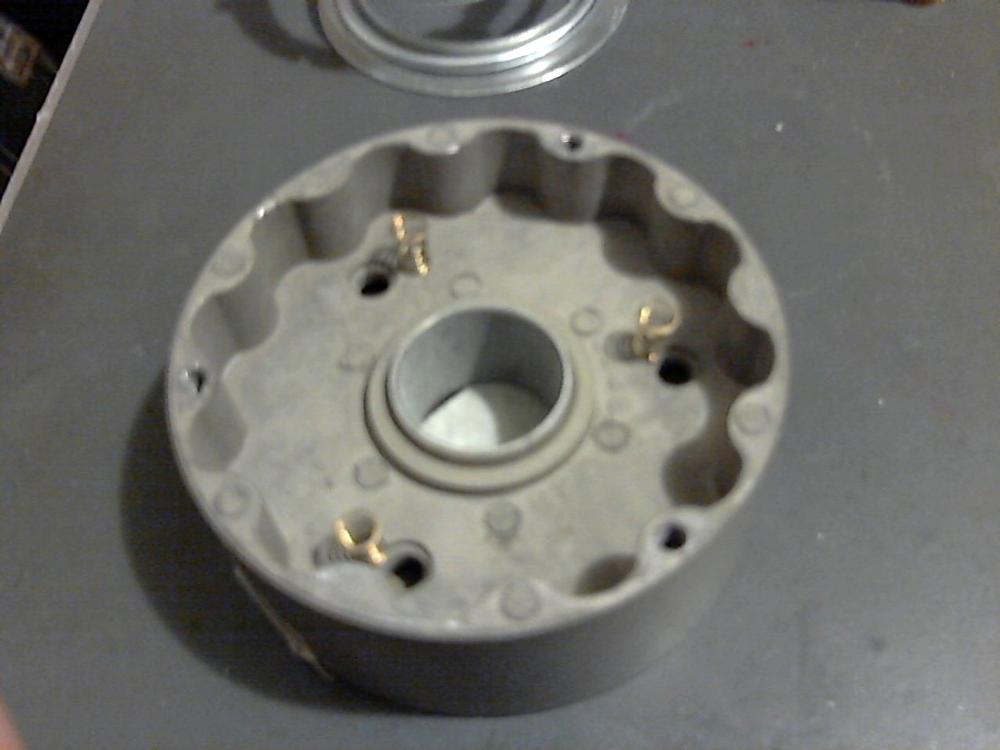
| ||
| Post# 530324 , Reply# 18 7/12/2011 at 23:13 (4,669 days old) by fltcoils (South Bend, Indiana) | ||
|
Brake Parts layed out Bic2 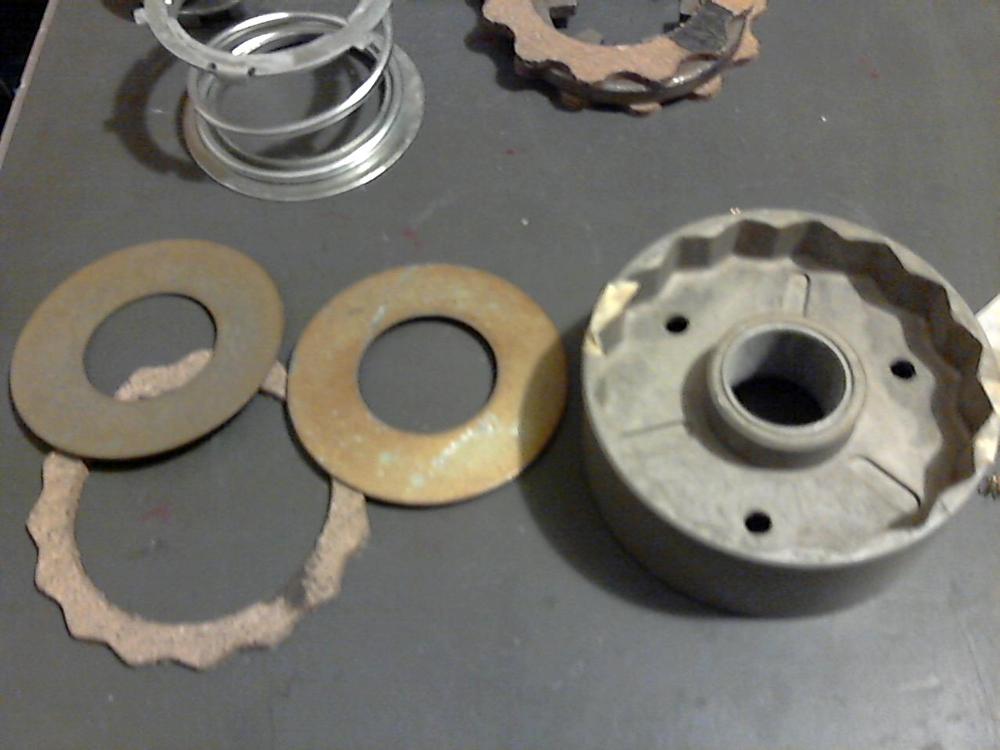
| ||
| Post# 530325 , Reply# 19 7/12/2011 at 23:14 (4,669 days old) by fltcoils (South Bend, Indiana) | ||
|
Inner washer Pic 3 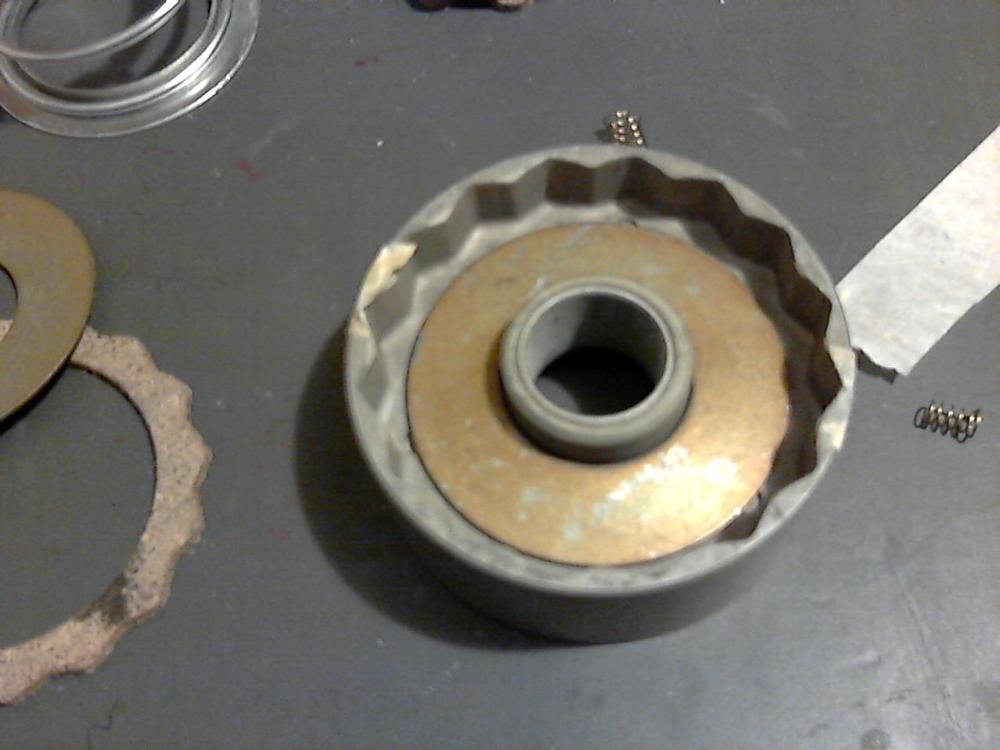
| ||
| Post# 530326 , Reply# 20 7/12/2011 at 23:15 (4,669 days old) by fltcoils (South Bend, Indiana) | ||
|
Outer washer Pic 4 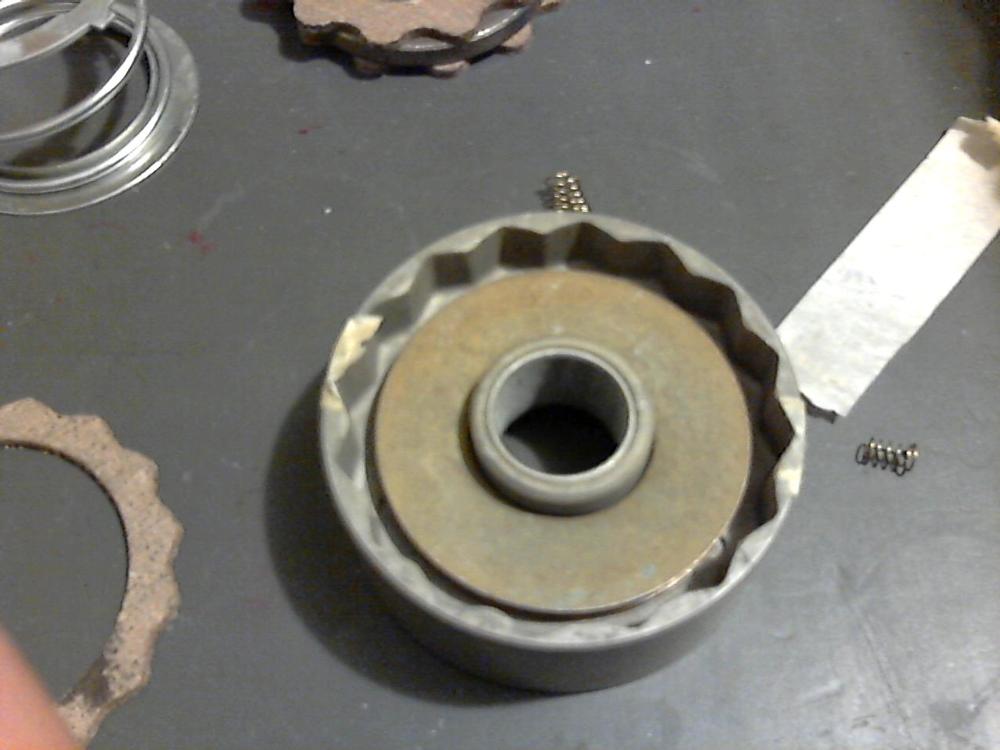
| ||
| Post# 530327 , Reply# 21 7/12/2011 at 23:16 (4,669 days old) by fltcoils (South Bend, Indiana) | ||
|
Brake shoe inserted Pic 5 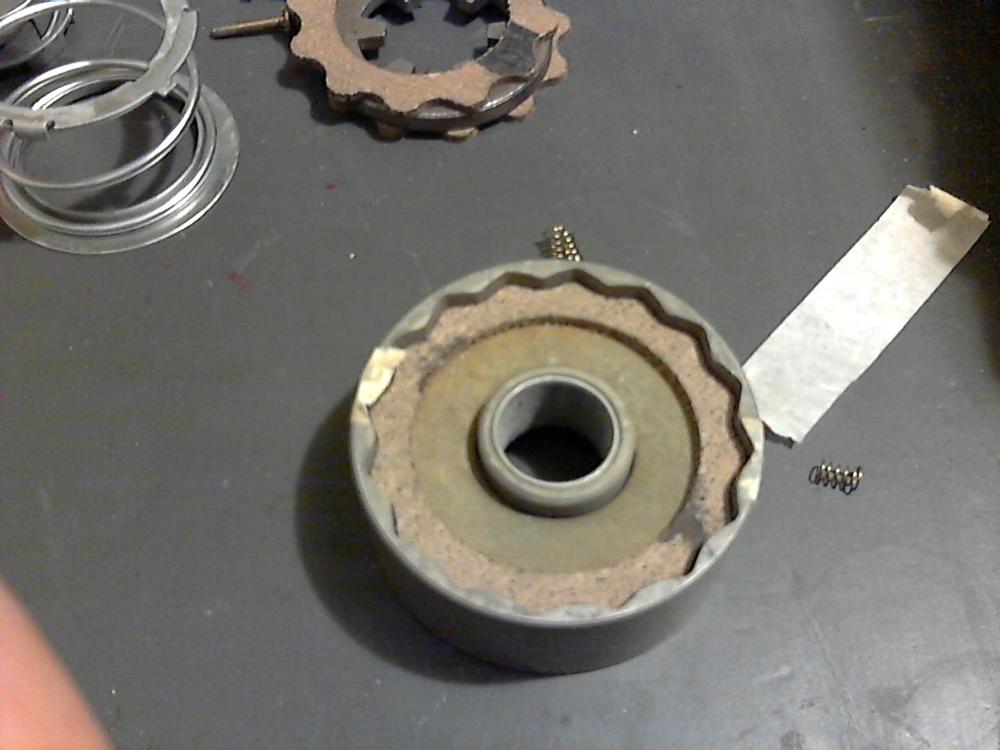
| ||
| Post# 530330 , Reply# 22 7/12/2011 at 23:22 (4,669 days old) by fltcoils (South Bend, Indiana) | ||
|
Remember, it all goes back in the box CLICK HERE TO GO TO fltcoils's LINK 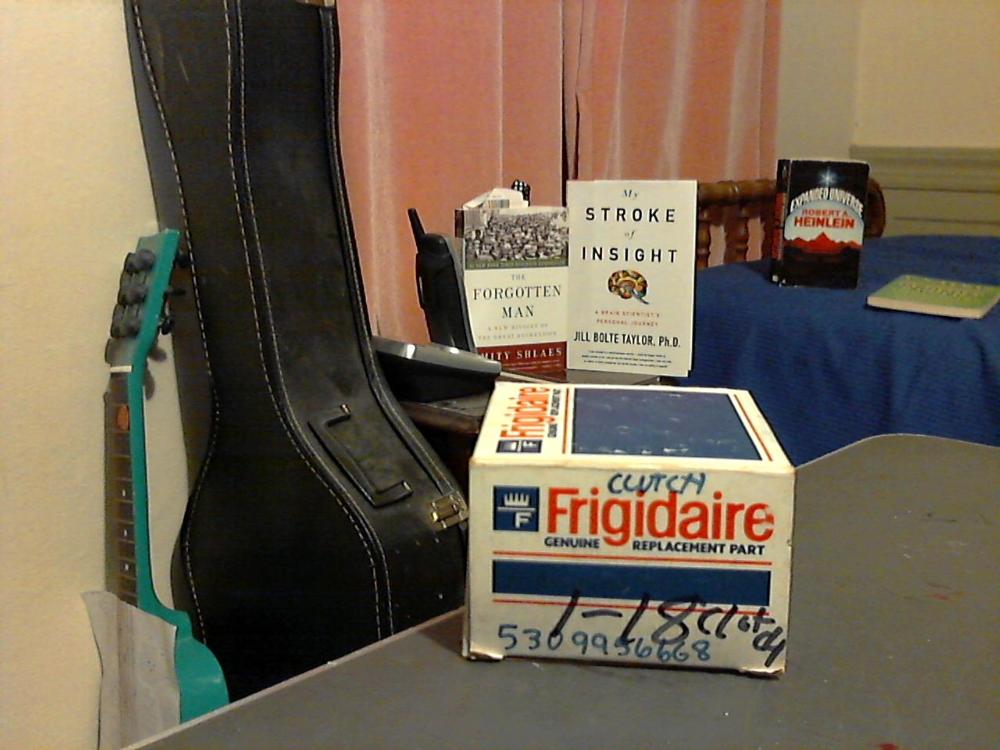
| ||
|
Post# 530848 , Reply# 25 7/15/2011 at 15:23 (4,666 days old) by yogitunes (New Jersey) |
||
|
Many thanks for all the pics and input........the machine I have is from Darren with the main seal leak.....worked OK until the leak got worse.....in any case this will be a parts machine for me......and I didn't want to write off the idea that the motor was burnt out because of it cutting out everytime it went into spin....but runs fine in agitation mode.....I figured it may have been a clutch getting stuck, but was not sure.....so I am gonna take your advise, as a learning experience to dis-assemble and see what I can do.......
this is new territory for me, also with advice from Petes input from another thread on replacing the main seal, I just want to take my time and go piece by piece getting it apart in case I need additional parts...... Either way, this is a great learning experience.......I have a 1-18 comming from Mike in August, which is working order, just missing a few parts, so in any choice, its win win! its one thing to watch a video of these machines......and a whole world of difference in person.....fascinating doesn't describe it! Thanks again everyone | ||
|
Post# 530875 , Reply# 27 7/15/2011 at 19:23 (4,666 days old) by yogitunes (New Jersey) |
||
|
Bill
I know where your comming from.....it was just funny and yet frustrating to keep sealing the small leaks only for the bigger one to occur....... but its how we learn.......and the old addage, nothing is as simple as it seems auto brake cleaner works great for a number of applications, especially the rollers of these machines...... Nothing new to these guys of AW....but I am a kid in candy store watching the simplicity of rollers that make this thing work....pure genious I don't understand yet all the hoses comming in and out of the pump.....most are obvious, and a few of whats that for? | ||
| Forum Index: | 
| Other Forums: |

|

|

|

|

|

 Comes to the Rescue!