|
Thread Number: 41426
DG906 Work Finally Begins |
[Down to Last] |
Post# 611915 7/23/2012 at 23:19 (4,291 days old) by d-jones  (Western Pennsylvania (Pittsburgh Area)) (Western Pennsylvania (Pittsburgh Area)) |
||

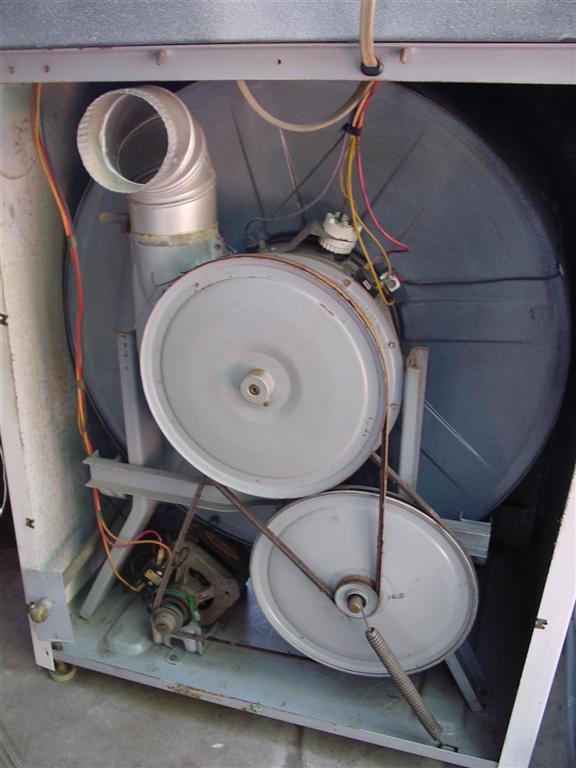
Some of you may recall that earlier this year, Christina(cmlrobison)found a DG906 for sale on Craigslist here in the Los Angeles area, and posted it on the blog. (Thank you Christina!) Well, to make a short story even shorter, I bought it and took it to my folks house knowing I couldn't work on it until later. Now that their washer is up and running, later is finally here.
Here's a picture of it to refresh your memories 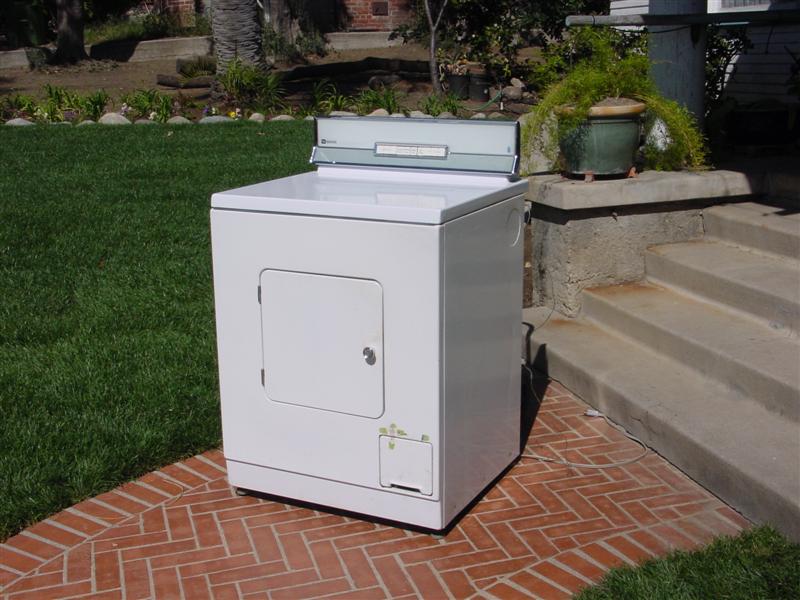
| ||

|
|
Post# 611919 , Reply# 1 7/23/2012 at 23:31 (4,291 days old) by d-jones (Western Pennsylvania (Pittsburgh Area)) |
||
|
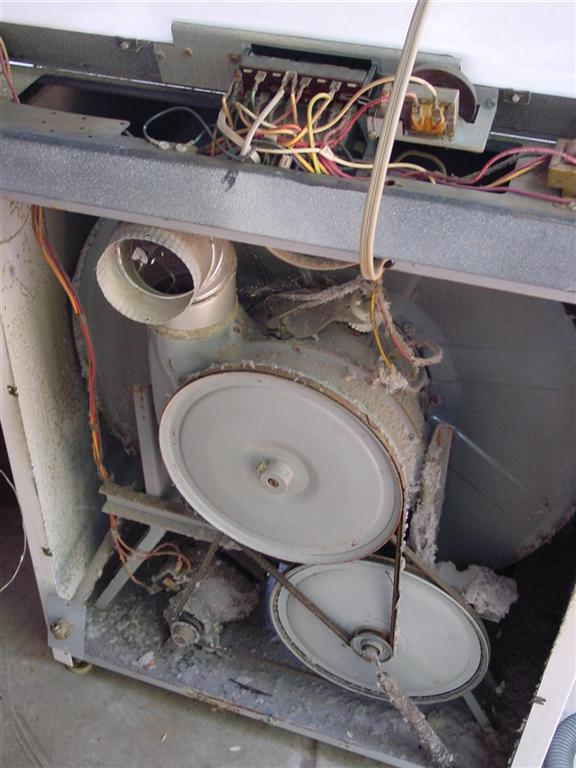
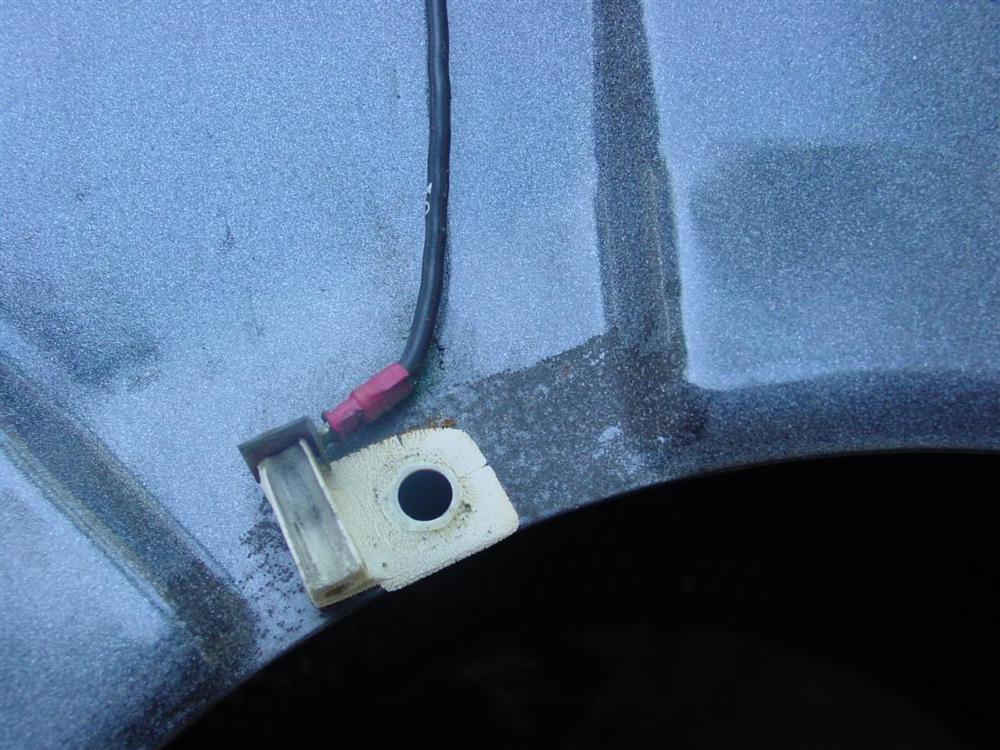
I started by pulling the back panel off to have a look inside. Yikes! There's so much lint and miscellaneous fluff in here it looks like it's been flocked! It kind of makes me want to drape it in Christmas lights and sing a carol or two. "Oh 906, oh 906, how linty are thy switches." Sorry, I couldn't resist.
| ||
|
Post# 611924 , Reply# 2 7/23/2012 at 23:36 (4,291 days old) by d-jones (Western Pennsylvania (Pittsburgh Area)) |
||
|
| ||
|
Post# 611931 , Reply# 3 7/23/2012 at 23:46 (4,291 days old) by d-jones (Western Pennsylvania (Pittsburgh Area)) |
||
|
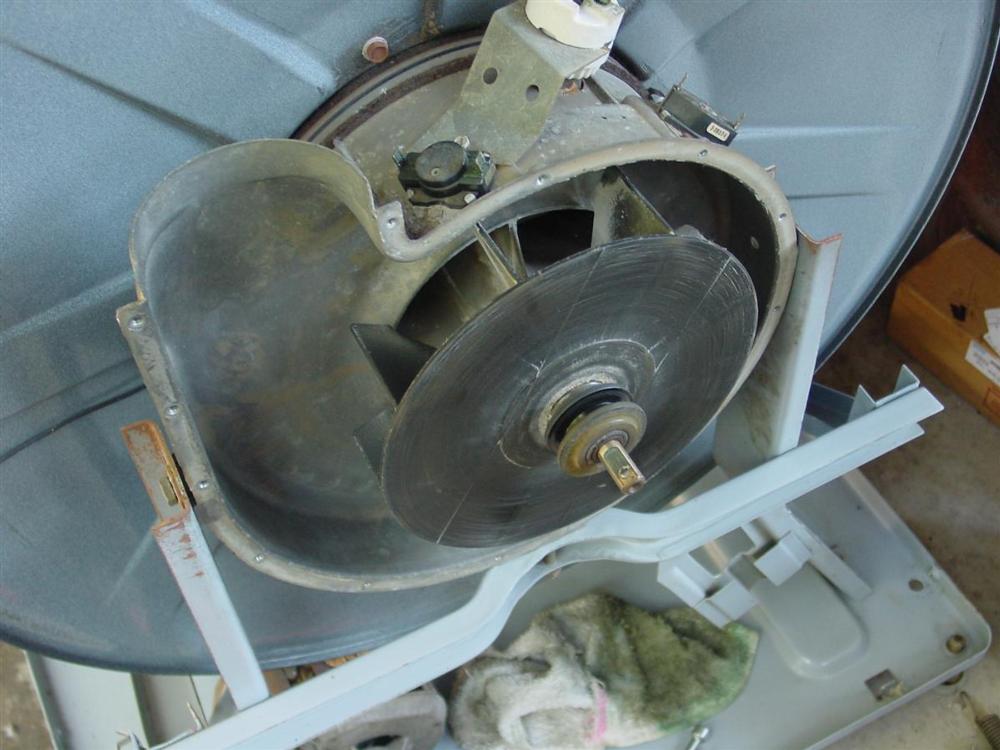
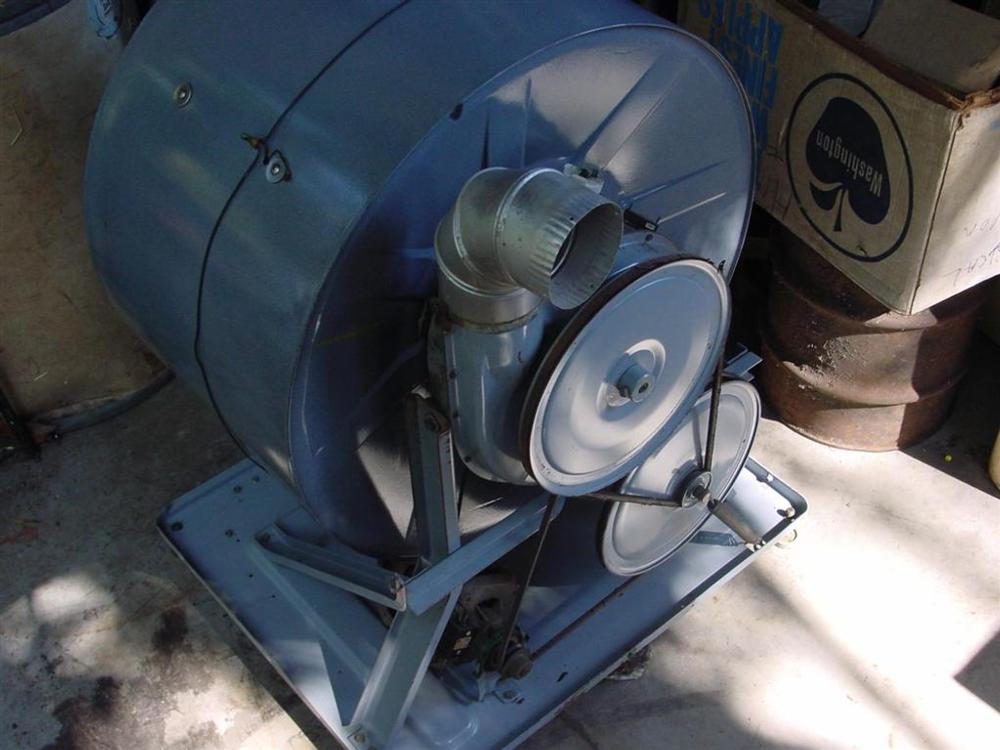
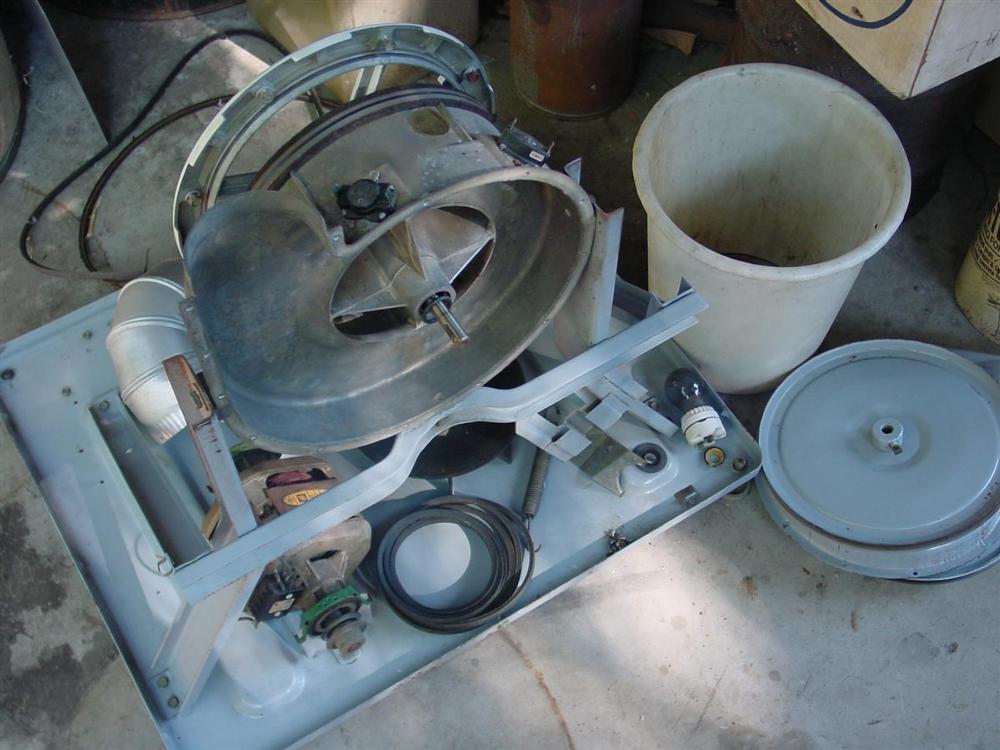
Well now I'm really impressed. Hardly any corrosion to speak of, the original painted finish is in excellent condition throughout with only a couple of minor exceptions, and again, no obvious major problems to deal with at all. Both of the belts are shot, but I've already got new ones on order. The little carbon brush holder appears to be damaged, but not in any way that'll effect it's performance, so I may decide to just leave it alone.
| ||
|
Post# 611940 , Reply# 4 7/24/2012 at 00:02 (4,291 days old) by d-jones (Western Pennsylvania (Pittsburgh Area)) |
||
|
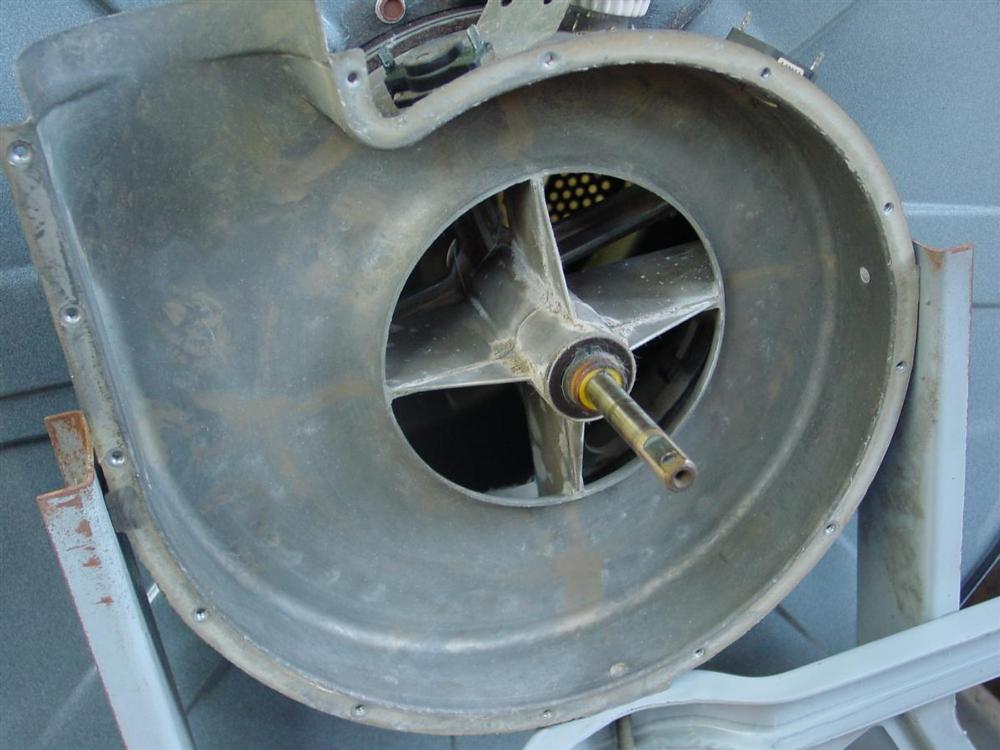
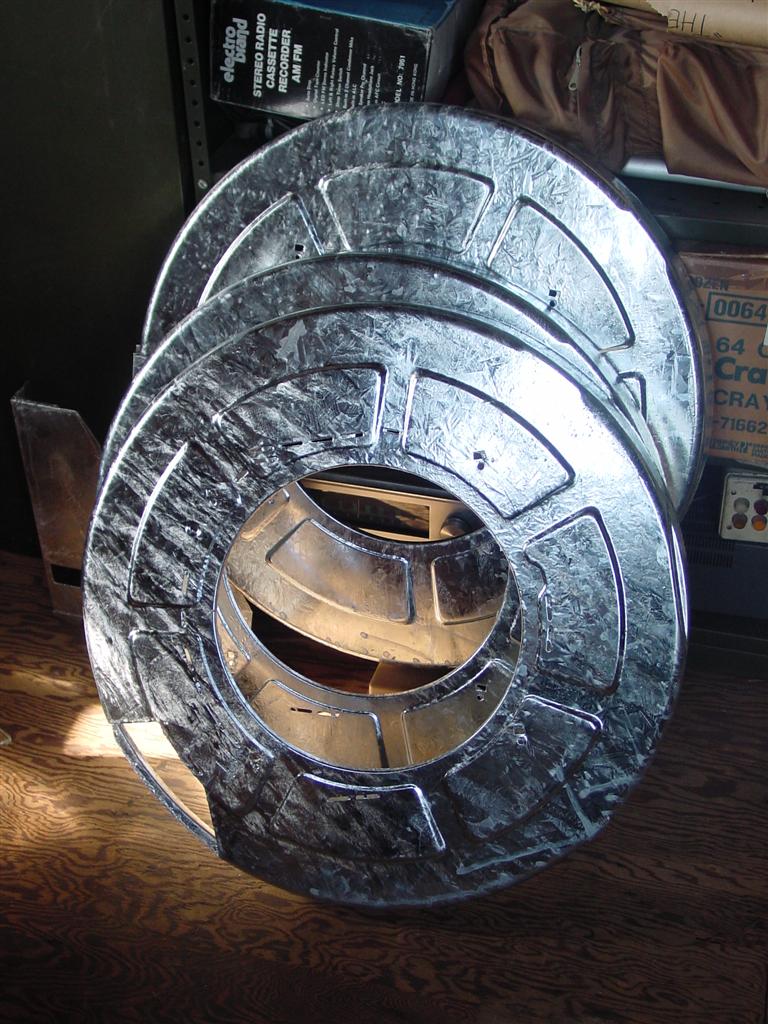
Here's a different view of this well preserved machine that leads me to a question. Mark(Kenmore71)was working on his DG806 last year around this time, and he posted some photos of this area showing a felt seal in place that this machine doesn't seem to have. To make matters even more confusing, the parts manual doesn't show this area well at all. Is there supposed to be a strip of felt around the drum opening you see here?
| ||
|
Post# 611946 , Reply# 5 7/24/2012 at 00:19 (4,291 days old) by d-jones (Western Pennsylvania (Pittsburgh Area)) |
||
|
As they so often are on older dryers, this seal is shot and will need to be replaced, but I already have the new seal sitting here ready to go so it's not a problem. But again, one of Marks photos seems to show a white felt seal secured to the inner drum opening that's missing here. I know a number of members here have rebuilt Maytag HoH dryers in the past, so would it be too much trouble to ask one of you to post a photo or two of the seals in this area so that I can see what I'm missing and how it should be installed? It would be very helpful if you could.
Thanks David 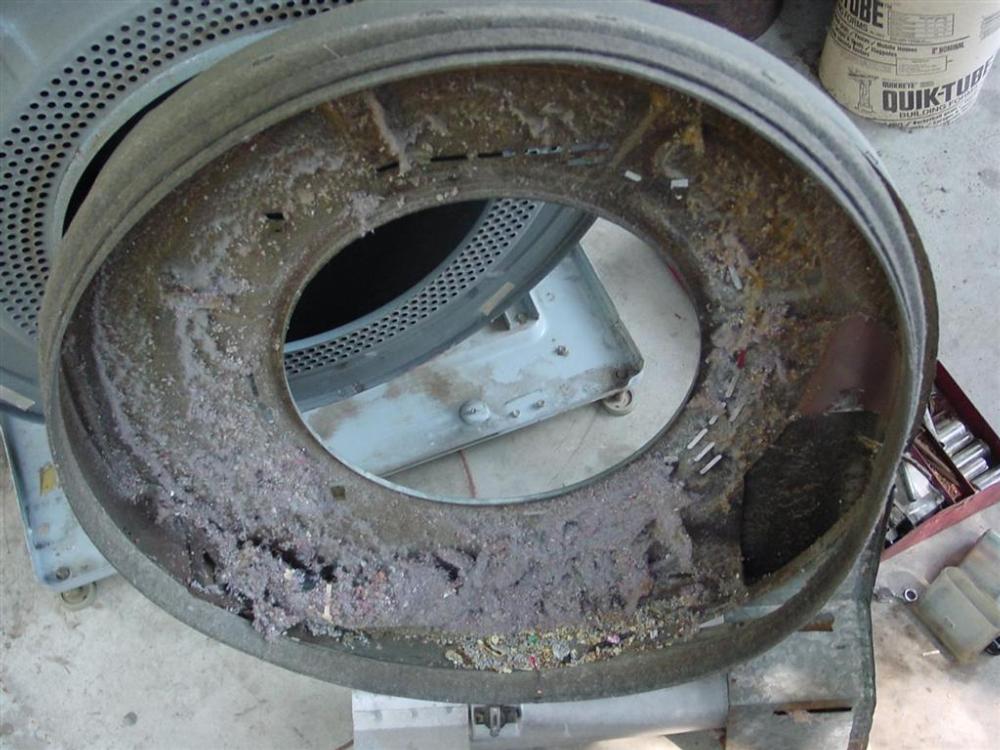
| ||
| Post# 611953 , Reply# 6 7/24/2012 at 02:08 (4,291 days old) by redcarpetdrew (Fairfield, CA) | ||
Ask and yee shall receive...
That is one smart looking 906! Speaking of the white seal, here's a link to my CDE906 that I rescued and reworked. Included are the part number of the seal and the info on mounting it. Hope it helps!
By the way, I'm STILL lusting after the matching CA906 washer... RCD CLICK HERE TO GO TO redcarpetdrew's LINK | ||
|
Post# 611972 , Reply# 7 7/24/2012 at 07:37 (4,290 days old) by combo52 (50 Year Repair Tech Beltsville,Md) |
||
Seals for Gas HOH Dryers
The seal that is glued to the front drum lip of HOH dryers was to keep coins and bobby pins from escaping the drum and shorting on the heating element on the electric models. And while it was usually on gas models as well it is not important to the performance of the dryer at all as this was its only function, and I am not certain that all gas models even used them. The larger shroud seals you mentioned diffidently need replacing. You should also get a new motor pulley as yours is still the aluminum pulley and on a dryer that has a lot of use on it this pulley is usually worn enough that the machine will not tumble properly with a full load.
Overall it looks like you got very restore-able dryer, keep us posted as to your progress. | ||
|
Post# 612047 , Reply# 8 7/24/2012 at 14:15 (4,290 days old) by d-jones (Western Pennsylvania (Pittsburgh Area)) |
||
|
Thanks for your comment John
There's no indication that the seals in question were ever installed on this machine, no glue remnants around the opening, no dried out strips of old felt laying about in the cabinet. So unless I've misunderstood your comment, based on what you've said I guess I could just replace that outer felt seal and leave it at that.
I'm still a little puzzled by something though. In the link posted above by redcarpetdrew(thanks for that link), the dryer he's working on is an electric model. So going by John's information the additional seals it has make sense. But if you check out the link below to Marks thread about his DG806 rework, in the posted photos it's plain to see that his gas dryer has the same seals installed. My first thought was that perhaps his machine is a little older, and that by the time my dryer was built these additional seals were no longer being used on gas dryers. But it turns out that both my dryer, and Marks, were built in 1967, so what gives? As old as this dryer is, I suppose someone could've already been in there and removed all the bits and pieces of evidence, but who knows. Perhaps they really were never installed in the first place. So at this point should I go ahead and install them, or would that just be a waste of time? If they aren't really needed as John suggests, I'm inclined to leave them out. CLICK HERE TO GO TO d-jones's LINK | ||
|
Post# 612057 , Reply# 9 7/24/2012 at 14:46 (4,290 days old) by Kenmore71 (Minneapolis, MN) |
||

I would not bother with that front seal. As John points out on a gas dryer the only thing it would do would be to prevent coins, etc. from dropping into the front air housing. One of the bigger challenges will be finding a NOS large front seal or creating something yourself that would serve the same purpose. It is my understanding that those large seals are rare as hen's teeth. I bought the last one that Larry in Parma had last summer. I'm sure there are some more of them out there. Best of luck! 906 dryers are rare enough and I think think the gas ones are even more rare. It'll be a purty machine when you get it all spiffed up.
| ||
|
Post# 612062 , Reply# 10 7/24/2012 at 15:22 (4,290 days old) by d-jones (Western Pennsylvania (Pittsburgh Area)) |
||
|
Thanks Mark
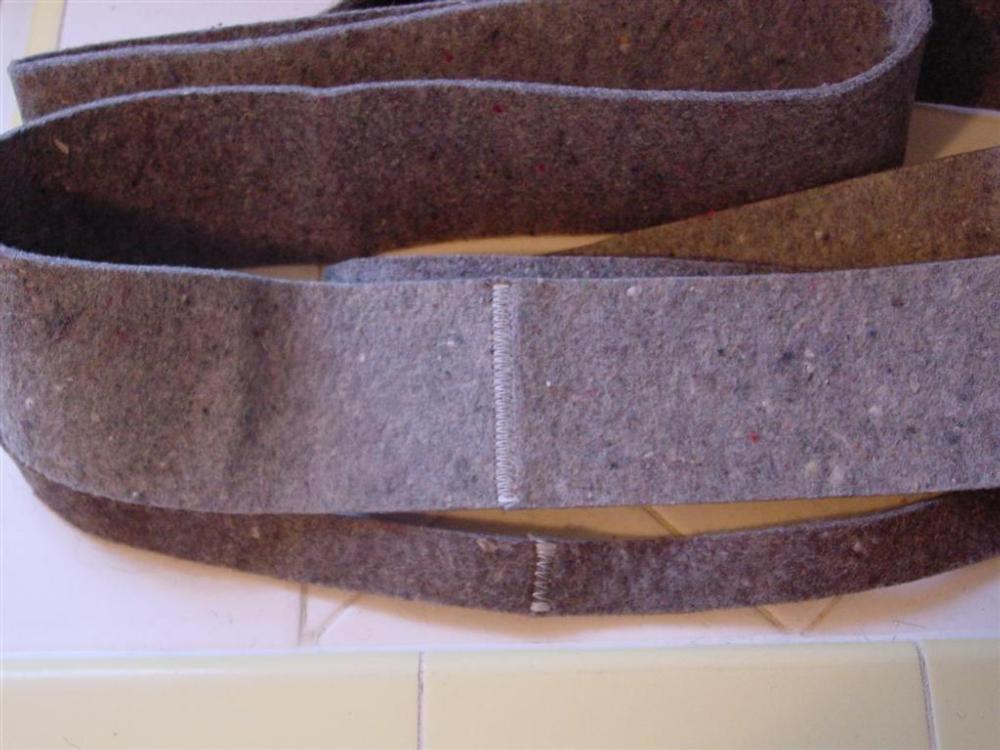
That makes two of the more knowledgeable techs here saying skip the extra seals, so I'll skip them. As far as the larger outer seals go, I already have two sets standing by, so no worries there. But you know, in looking over these new seals, they're nothing more than cheap industrial grade pressed wool felt, and the stitch used to form the butt splice is one that nearly every sewing machine in existence is capable of producing. I'm seriously thinking about having a go at making a set or two, if for no other reason than to prove to myself how easy it is. After all, the supply of new old stock seal sets IS drying up, and it would be a shame to have a vintage dryer rendered useless by something as simple as this.
| ||
|
Post# 612065 , Reply# 11 7/24/2012 at 15:59 (4,290 days old) by Kenmore71 (Minneapolis, MN) |
||
|
| ||
| Post# 612080 , Reply# 12 7/24/2012 at 17:18 (4,290 days old) by beekeyknee (Columbia, MO) | ||
David,
John (combo52) and I were just discussing this a few weeks ago on Mark's (Kenmore71) thread #40918 and after seeing the seal up close I think I, or anyone with some basic sewing skills, could make these. I'd be willing to give it a try. But where does one obtain that felt? Great idea about the furnace tape, Mark. Brian | ||
| Post# 612085 , Reply# 13 7/24/2012 at 17:29 (4,290 days old) by cmlrobison (Ontario, NY) | ||
|
Felt Here's site I shared with David. CLICK HERE TO GO TO cmlrobison's LINK | ||
|
Post# 612087 , Reply# 14 7/24/2012 at 17:47 (4,290 days old) by d-jones (Western Pennsylvania (Pittsburgh Area)) |
||
|
In addition to Christina's link, here's another I found. They're a domestic manufacturer right here in Michigan. They sell pressed wool felt in rolls or pre-cut into strips of whatever width and thickness you require. The only question is will they process small orders for the general public, or do they only deal with large orders for the manufacturing world. I haven't called to find out yet.
CLICK HERE TO GO TO d-jones's LINK | ||
|
Post# 612304 , Reply# 15 7/25/2012 at 16:37 (4,289 days old) by d-jones (Western Pennsylvania (Pittsburgh Area)) |
||
|
Felt Seals
I just spoke to Phil at the Sutherland Felt Company regarding the material to make dryer seals, and he was very helpful. I'll be sending him samples of what I need, cut from good sections of the old seals from this dryer. At this point he sounds very confident that he'll have what I'm looking for, so cross your fingers. The only drawback is that the rolls of felt are sixty inches wide, and to form a loop with the correct diameter the strip of felt will need to be about eighty two inches long. As you can imagine, they won't cut two or three strips out of the roll. I would need to take twenty of the three inch wide strips so that the entire sixty inch width is used. Of course the narrower strip is only one inch wide, so I'll end up with sixty of those. However, if they have the material I need in a partial roll, that changes everything, as they would be willing to cut just what is needed from a partial roll.
With any luck this will actually work. | ||
|
Post# 612331 , Reply# 16 7/25/2012 at 19:28 (4,289 days old) by combo52 (50 Year Repair Tech Beltsville,Md) |
||
|
Felt Seals For MT HOH Gas Dryers The wider seal is larger in diameter than the narrow seal as the narrower one is designed to pull the wider one in against the rotating drum. I am glad you found a source of the felt material if someone wants to repair this or any number of other dryer brands or models. The larger problem in keeping these HOH dryers running is going to be controls, blowers, rubber door seals, and main bearings.
But keep us posted and thanks for sharing your rebuilding with us , John. | ||
|
Post# 612872 , Reply# 17 7/27/2012 at 20:09 (4,287 days old) by d-jones (Western Pennsylvania (Pittsburgh Area)) |
||
|
More disassembly | ||
|
Post# 612873 , Reply# 18 7/27/2012 at 20:15 (4,287 days old) by d-jones (Western Pennsylvania (Pittsburgh Area)) |
||
|
| ||
|
Post# 612875 , Reply# 19 7/27/2012 at 20:18 (4,287 days old) by d-jones (Western Pennsylvania (Pittsburgh Area)) |
||
|
| ||
|
Post# 612876 , Reply# 20 7/27/2012 at 20:23 (4,287 days old) by d-jones (Western Pennsylvania (Pittsburgh Area)) |
||
|
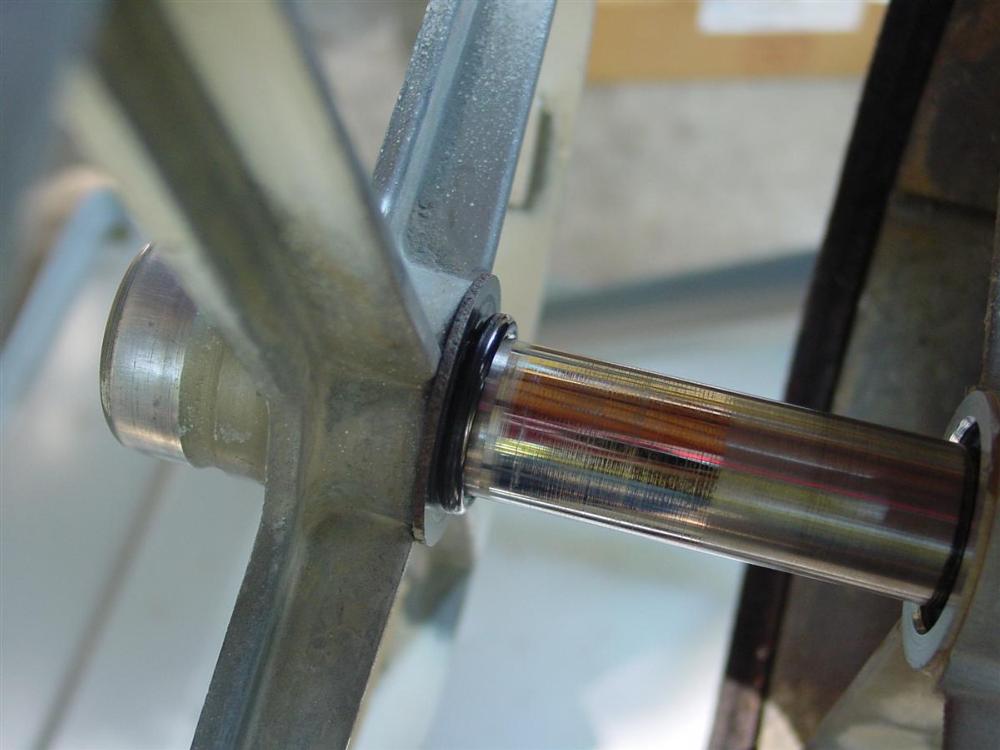
Here's the O ring at the other end of the shaft, also hardened and needing replacement. This picture was taken after everything had been cleaned up. I didn't look like this when I pulled the drum. Fortunately, the bearing surface is still in good condition and will just need fresh lube prior to reassembly.
| ||
|
Post# 612877 , Reply# 21 7/27/2012 at 20:30 (4,287 days old) by d-jones (Western Pennsylvania (Pittsburgh Area)) |
||
|
Unfortunately, the carbon brush holder was more delicate than it looked. When I tried to lift the brush to clear the felt during the drum removal, it came apart. In hindsight I should have just removed it prior to pulling the drum, but the way it looks here in this photo, it might not have survived that either. Thankfully the appliance shop down the street has new ones in stock, so I'm not that worried about this little setback.
| ||
|
Post# 612878 , Reply# 22 7/27/2012 at 20:40 (4,287 days old) by d-jones (Western Pennsylvania (Pittsburgh Area)) |
||
|
Ballast bulb?
This is how it sits now, waiting for a few more parts to arrive before I can begin reassembly. I do have a question though. The light bulb seen sitting at the right hand edge of the base plate is labeled "ballast" on the top. What is the point of this beyond lighting the drum? Is there something special about this bulb that will make it difficult to find?
| ||
|
Post# 612904 , Reply# 23 7/28/2012 at 00:45 (4,287 days old) by tolivac (greenville nc) |
||
|
Ballast bulbs were used in conjunction with the UV-ozone lamps.Is there a UV-ozone bulb in the dryer?The ballast bulb was a low cost alternative to the iron core or transformer type ballast. | ||
|
Post# 612908 , Reply# 24 7/28/2012 at 01:22 (4,287 days old) by d-jones (Western Pennsylvania (Pittsburgh Area)) |
||
|
Hi Rex | ||
| Post# 612917 , Reply# 25 7/28/2012 at 03:30 (4,286 days old) by qsd-dan (West) | ||
|
The parts manual calls for an ordinary 40 watt appliance bul | ||
|
Post# 612924 , Reply# 26 7/28/2012 at 06:18 (4,286 days old) by tolivac (greenville nc) |
||
|
Yes,someone did put in the wrong bulb if the machine doesn't have a UV bulb. | ||
|
Post# 612925 , Reply# 27 7/28/2012 at 06:18 (4,286 days old) by tolivac (greenville nc) |
||
|
Bulbs aside-beautiful restore job!! | ||
| Post# 612949 , Reply# 28 7/28/2012 at 08:35 (4,286 days old) by mrb627 (Buford, GA) | ||
Agreed! | ||
|
Post# 612957 , Reply# 29 7/28/2012 at 09:10 (4,286 days old) by combo52 (50 Year Repair Tech Beltsville,Md) |
||
|
Ballast Drum light Bulb That bulb was probably original to the dryer, as already mentioned a 40 watt appliance bulb is the same thing and at one time almost all 40 watt appliance bulbs were labeled as ballast bulbs. Some earlier MT dryers did have an ozone lamp that this drum light would have been wired in series with. The pink 1958 gas HOH dryer that we restored about two years ago had both lamps, this was the one I converted to electric ignition like Ricker did with one of his rebuilds. | ||
|
Post# 612958 , Reply# 30 7/28/2012 at 09:15 (4,286 days old) by combo52 (50 Year Repair Tech Beltsville,Md) |
||
|
Ballast Drum light Bulb That bulb was probably original to the dryer, as already mentioned a 40 watt appliance bulb is the same thing and at one time almost all 40 watt appliance bulbs were labeled as ballast bulbs. Some earlier MT dryers did have an ozone lamp that this drum light would have been wired in series with. The pink 1958 gas HOH dryer that we restored about two years ago had both lamps, this was the one I converted to electric ignition like Ricker did with one of his rebuilds. | ||
|
Post# 672339 , Reply# 31 4/12/2013 at 21:23 (4,028 days old) by d-jones (Western Pennsylvania (Pittsburgh Area)) |
||
|
Finally a little progress.
Corrosion on the dryer's drum cover and mixing chamber brought things to a screeching halt as the perfectionist in me couldn't simply let it go. The parts are finally back from the galvanizer and just need a little dressing up to be used. I went ahead and had the same parts done for my DG701 as well. Now work can finally resume.
This post was last edited 04/13/2013 at 01:05 | ||
| Post# 672389 , Reply# 32 4/13/2013 at 06:24 (4,027 days old) by beekeyknee (Columbia, MO) | ||
|
David,
That looks really nice. I've never had anything re-galvanized. Where do you get it done? I was considering doing what John (combo52) did last summer. See link below. What would be best, guys? I think the paint idea John did might be best for electrics and probably cheaper. Brian CLICK HERE TO GO TO beekeyknee's LINK | ||
|
Post# 672409 , Reply# 33 4/13/2013 at 08:45 (4,027 days old) by bajaespuma (Connecticut) |
||
You people are amazing.  | ||
|
Post# 672453 , Reply# 34 4/13/2013 at 12:56 (4,027 days old) by d-jones (Western Pennsylvania (Pittsburgh Area)) |
||
|
Hi Brian - There's an outfit here in Los Angeles called Apex Galvanizing that did the work for me. Back in the old days(thirty years ago) there were quite a few places here that did this sort of thing, but with all the outsourcing of manufacturing that's gone on since then, Apex is just about the last one still operating. There are still a lot of places that will do zinc electroplating, but electroplating lays down a much thinner layer of material. Too thin in fact for this sort of application.
As far as painting the drum cover on the electric version goes, I think you're absolutely right. John's method of painting is likely the best bet. But on the gas versions, the end cover and mixing chamber exist in what can only be described as a hostile environment. Especially if the felt drum seal or the rubber door gasket should begin to deteriorate, which seriously reduces the volume of airflow through the combustion cone, the mixing chamber and the drum cover, while simultaneously raising the temperatures they're subjected to. So I figured to do it correctly, I had to go with hot dip galvanizing. 
This post was last edited 04/13/2013 at 14:26 | ||
|
Post# 672456 , Reply# 35 4/13/2013 at 13:09 (4,027 days old) by RevvinKevin (Tinseltown - Shakey Town - La-La Land) |
||
|
| ||
|
Post# 675696 , Reply# 36 4/26/2013 at 19:35 (4,014 days old) by d-jones (Western Pennsylvania (Pittsburgh Area)) |
||
|
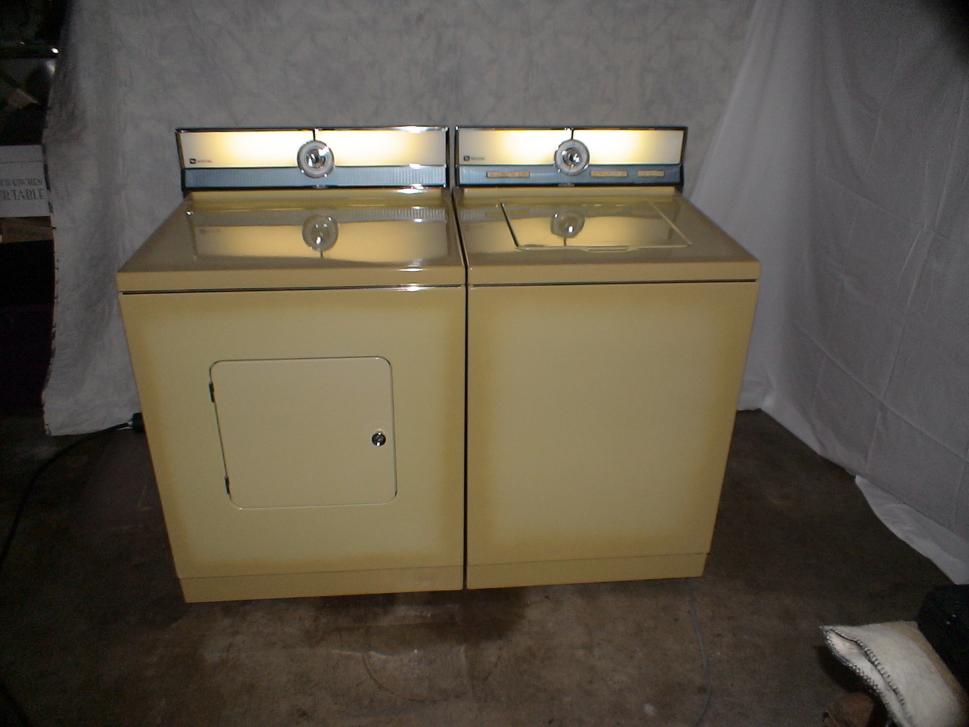
I spent another few hours at my folks house this afternoon working on the dryer, so there's a little more progress to report. Some of you may recall that the washer this dryer is being paired with is Harvest Gold, so I'll give you just one guess what's about to happen here. 
This post was last edited 04/26/2013 at 19:59 | ||
|
Post# 675698 , Reply# 37 4/26/2013 at 19:45 (4,014 days old) by revvinkevin (Tinseltown - Shakey Town - La-La Land) |
||
|
Waiting and waiting... | ||
|
Post# 675699 , Reply# 38 4/26/2013 at 19:46 (4,014 days old) by d-jones (Western Pennsylvania (Pittsburgh Area)) |
||
|
It was pretty easy to figure out, so I'm sure you all guessed correctly. The transfer was very easy. Maytag made it simple by making the two top panels identical with the exception of one small hole that isn't used for anything. Both top panels are in excellent shape overall, but I have to admit that I like the look of the white one better, so it'll be placed in storage for the inevitable day when things get switched back. In the mean time my mom will have the use of a Harvest Gold DG906 that matches her washer. I know this will upset some of the purists out there, but bear in mind that with the preservation of the original cabinet, no permanent harm has been done.
By the way, can anyone tell me if this model was actually made in Harvest Gold? It may sound like a dumb question, but I honestly don't have a clue. 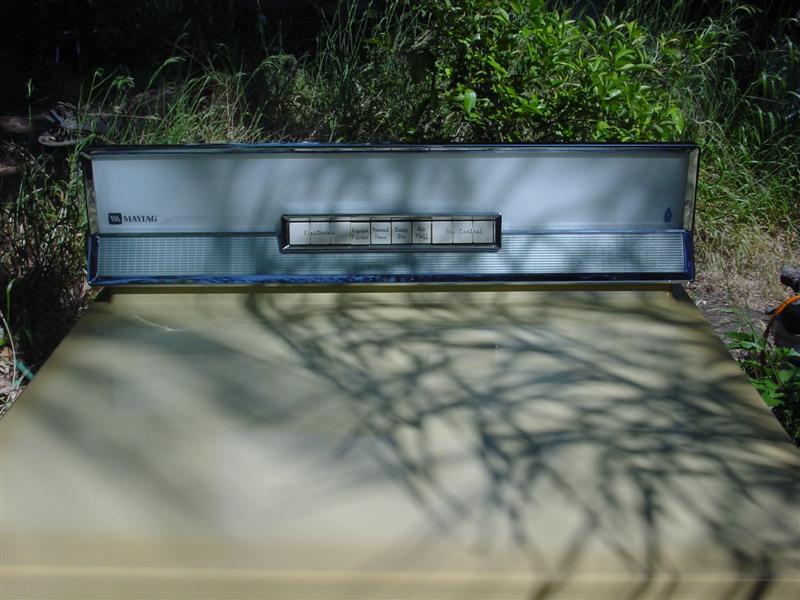
This post was last edited 04/26/2013 at 20:02 | ||
| Post# 1167501 , Reply# 39 12/25/2022 at 08:33 (484 days old) by Maytag85 (Sean A806) | ||
Old thread but..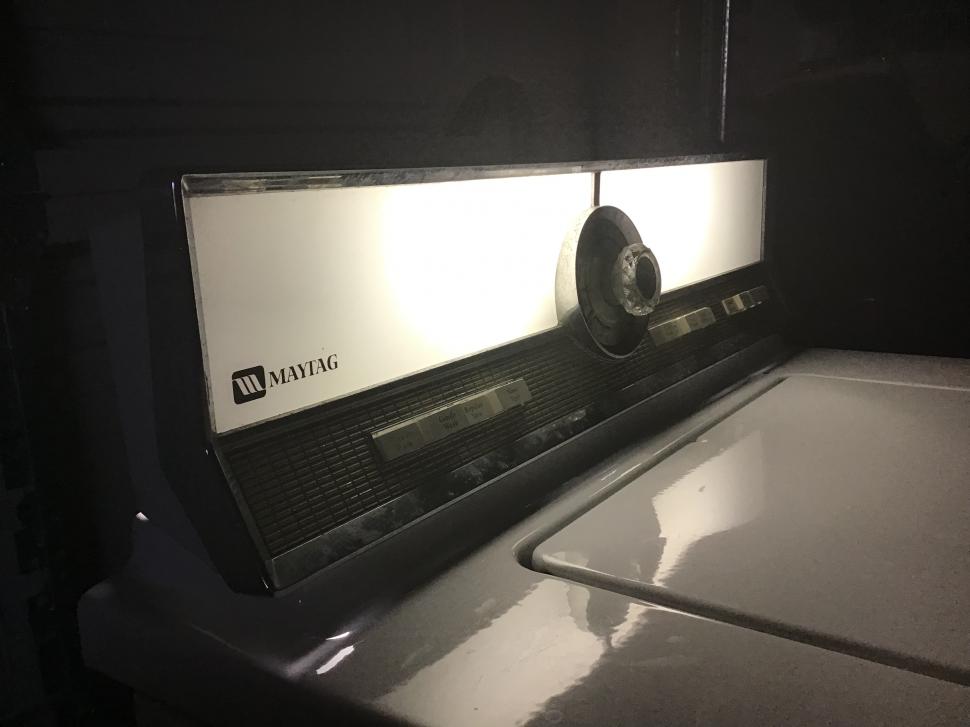 | ||
|
Post# 1167518 , Reply# 41 12/25/2022 at 16:23 (484 days old) by DADoES (TX,�U.S. of A.) |
||
|
| ||
| Post# 1167520 , Reply# 42 12/25/2022 at 17:00 (484 days old) by Maytag85 (Sean A806) | ||
|
I think the one of the reasons that made the Maytag Gas HOH dryers even slower is when the felt seals were compromised or after years of constant burning pilot light would weaken the high limit thermostat which would cycle it off below the operating temperature. Another contributing factor is if the belts weren�t tensioned properly, it wouldn�t allow to things to run at full speed causing the high limit thermostat to kick the heat off since there isn�t good airflow. Pot metal pulley that allowed for lots of slippage could cause longer dry times as well. The Maytag DE306 I picked up back in 2018 took awhile to dry a load of towels and thought the high limit thermostat was weak after many years of service, turns out someone replaced it with one that was rated for 140F rather than a thermostat rated in the 150F to 160F rating.
The high limit thermostat on my Maytag DG306 kept on cycling the burner off below the operating temperature back in 2020 since the cycling thermostat wasn�t really working and would just cycling off the high limit thermostat instead. Ended up replacing the cycling thermostat with a L120-10 low heat thermostat, now you think it outs take longer to dry with a lower temperature, nope, seems to be a bit quicker since I observed carefully since the front of the cabinet is quite warm in the first 40 minutes or so when drying towels and heavy cottons then gradually begins to get cooler and cooler right before the cool down and definitely seems to have a better cool down. Now the Maytag DE806 I am putting together (not a true DE806 since it will have a 408 auto dry timer but otherwise will have similar features to a true Maytag DE806) will be interesting to see how it operates once I get it everything all hooked up and working on it. My original plan was to find a Maytag 808 console since it has the opening for low and regular temperature options, have a 306 timer for timed drying only, and have a adjustable cycling thermostat set to 175F and the other a low heat 120F thermostat. I am willing to bet it will be FAST with a 175F high heat but will just settle on having a single low he temperature until I am locate an 808 console for it. Would even be a first dual cycling thermostat HOH dryer made after 1966 in the group and possibly the fastest one in the group as well. | ||
| Forum Index: | 
| Other Forums: |

|

|

|

|

|

 Comes to the Rescue!