|
Thread Number: 46218
/ Tag: Ranges, Stoves, Ovens
An Unusual Find...Vintage Kenmore Range Hood |
[Down to Last] |
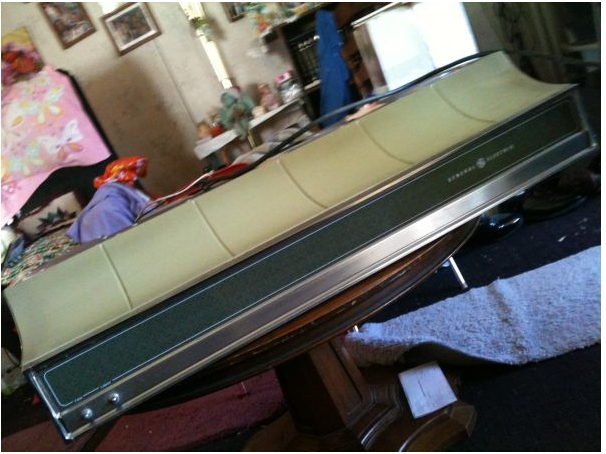
Post# 675223 4/24/2013 at 15:53 (4,011 days old) by ultramatic  (New York City) (New York City) |
||
 | ||

|
|
Post# 675225 , Reply# 1 4/24/2013 at 15:56 (4,011 days old) by ultramatic (New York City) |
||
|
The "Beast" is surprisingly heavy... | ||
|
Post# 675226 , Reply# 2 4/24/2013 at 15:57 (4,011 days old) by ultramatic (New York City) |
||
|
Yep, that decorative strip lights up... | ||
|
Post# 675228 , Reply# 3 4/24/2013 at 15:58 (4,011 days old) by ultramatic (New York City) |
||
|
3 cheers for faux wood! | ||
|
Post# 675232 , Reply# 4 4/24/2013 at 16:02 (4,011 days old) by ultramatic (New York City) |
||
|
Yikes, this has NOT been cleaned in many years! | ||
|
Post# 675234 , Reply# 5 4/24/2013 at 16:04 (4,011 days old) by ultramatic (New York City) |
||
|
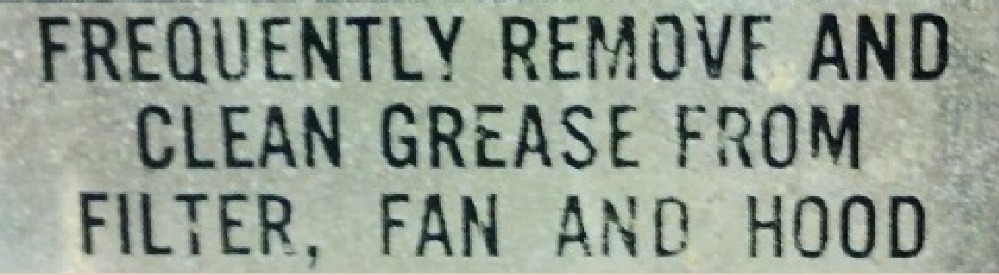
One of the FOUR filters... | ||
| Post# 675236 , Reply# 6 4/24/2013 at 16:08 (4,011 days old) by Kenmoreguy89 (Valenza Piemonte, Italy- Soon to be US immigrant.) | ||
 | ||
| Post# 675237 , Reply# 7 4/24/2013 at 16:11 (4,011 days old) by Kenmoreguy89 (Valenza Piemonte, Italy- Soon to be US immigrant.) | ||
|
For the grease dirt things, are they stainless??? If they're and are not alluminum, I'd go out buy a box of washing soda, let it soak overnight in very hot water, soda and a good degeaser solution or ammonia, then give a run in the dishwasher heavy soil cycle... That's what I would try to do.... most of today's degreasers usually fail, at least for me.... | ||
| Post# 675239 , Reply# 8 4/24/2013 at 16:15 (4,011 days old) by alr2903 (TN) | ||
|
Ultramatic try boiling them in a tall pot like a turkey fryer. arthur | ||
|
Post# 675240 , Reply# 9 4/24/2013 at 16:20 (4,011 days old) by ultramatic (New York City) |
||
|
Although ideal, no exterior venting is possible for my kitch | ||
|
Post# 675242 , Reply# 10 4/24/2013 at 16:23 (4,011 days old) by ultramatic (New York City) |
||
|
...try boiling them in a tall pot... | ||
| Post# 675248 , Reply# 11 4/24/2013 at 16:40 (4,011 days old) by Kenmoreguy89 (Valenza Piemonte, Italy- Soon to be US immigrant.) | ||
|
Good for you! It's a nice hood, surely better of one's of today ventless ones, of course!!!! I hope my suggestion would help you, not sure if you confused or you understand baking soda but I said washing soda, baking soda would not do much as washing soda would in this case, even though many people do that with baking soda also, but being yours a particular thick aged and guess built up in several years layer ...washing soda/sal soda indeed really would be the only solution as it is a way more powerful degreaser than baking soda! Just DO NOT use washing soda in Alluminum ones only in stainless ones.... washing soda will damage allunminum as it will oxidate it! 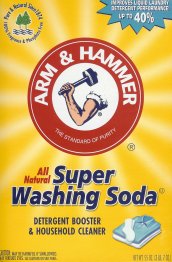
This post was last edited 04/24/2013 at 16:58 | ||
|
Post# 675266 , Reply# 13 4/24/2013 at 17:39 (4,011 days old) by cuffs054 (MONTICELLO, GA) |
||
|
I'm betting on charcoal also. If you shake them you may be able to hear it. | ||
|
Post# 675274 , Reply# 14 4/24/2013 at 18:06 (4,011 days old) by DADoES (TX,�U.S. of A.) |
||
|
�
My parents have one very similar.� Vented, variable speed, dual squirrel-cage blowers, filter is a u-shaped wrap-around affair.� The front panel is backlit when the fluorescent light is on except around the controls where your unit is woodgrain.� I cannot place exactly when it was bought but likely was within a couple years of 1975 ... to match the KDI-17a which had a stainless steel panel.� It was moved along when we bought a different house in the early 1980s (per this picture, which was taken in Sept 2001). 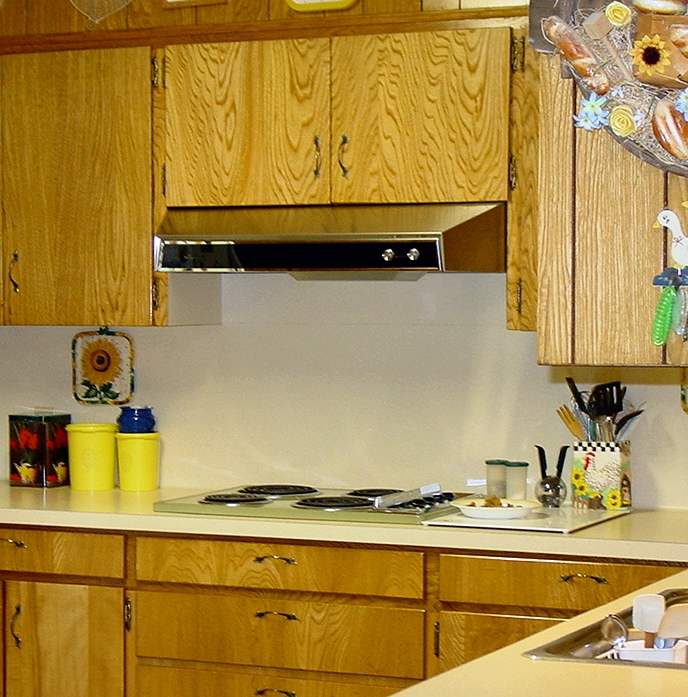
| ||
|
Post# 675275 , Reply# 15 4/24/2013 at 18:07 (4,011 days old) by ultramatic (New York City) |
||
|
| ||
|
Post# 675277 , Reply# 16 4/24/2013 at 18:11 (4,011 days old) by ultramatic (New York City) |
||
|
| ||
| Post# 675280 , Reply# 17 4/24/2013 at 18:32 (4,011 days old) by danemodsandy (The Bramford, Apt. 7-E) | ||
|
That's Wayyyy Older....
....Than 1987. My copy of the Fall/Winter, 1975 Big Book shows basically the same hood, already updated with black glass-look plastic replacing your white panel, and the Ye Olde Fayke Woode Graine accent omitted. It's just like the one DADoES shows in his pic.
Never mind what the rep said - you can still get filters for this unit. Filters Fast is a company specializing in HTF filters for range hoods, and they even have trim-to-fit charcoal filters that should work with this unit. BTW, the purpose of the charcoal filter is to help eliminate cooking odors, so replacing them will make your cooking much more pleasant. It also serves as a fine filter for grease, trapping particles that can get through the mesh filters. Here's a link: CLICK HERE TO GO TO danemodsandy's LINK | ||
|
Post# 675315 , Reply# 18 4/24/2013 at 20:42 (4,011 days old) by ultramatic (New York City) |
||
|
Thanks for the link Sandy! | ||
|
Post# 675337 , Reply# 19 4/24/2013 at 23:09 (4,011 days old) by combo52 (50 Year Repair Tech Beltsville,Md) |
||
KM Range Hood | ||
|
Post# 675465 , Reply# 21 4/25/2013 at 16:09 (4,010 days old) by ultramatic (New York City) |
||
|
Boy that Sears rep sure got EVERYTHING wrong on this hood. So I'm going back to my original assessment that the hood is really from the late '60's, early '70's.
@washer111 I opened the hood up even further today, grease build up is even WORSE than I thought. Will post pictures. Also, I'm going to try and power it up. The blower fans move freely, so I'm inclined to believe the motor is fine. | ||
|
Post# 675513 , Reply# 22 4/25/2013 at 18:50 (4,010 days old) by ultramatic (New York City) |
||
|
Some more pictures... | ||
| Post# 675515 , Reply# 23 4/25/2013 at 18:51 (4,010 days old) by danemodsandy (The Bramford, Apt. 7-E) | ||
|
Louie: | ||
|
Post# 675516 , Reply# 24 4/25/2013 at 18:52 (4,010 days old) by ultramatic (New York City) |
||
|
I'm gonna' need more ammonia... | ||
|
Post# 675517 , Reply# 25 4/25/2013 at 18:54 (4,010 days old) by ultramatic (New York City) |
||
|
a LOT more... | ||
|
Post# 675518 , Reply# 26 4/25/2013 at 18:55 (4,010 days old) by ultramatic (New York City) |
||
|
Even the fans are caked... | ||
|
Post# 675520 , Reply# 27 4/25/2013 at 18:56 (4,010 days old) by ultramatic (New York City) |
||
|
Will it light? Tonight is the test. | ||
|
Post# 675521 , Reply# 28 4/25/2013 at 18:59 (4,010 days old) by ultramatic (New York City) |
||
|
That's what I'm planning to do Sandy... | ||
|
Post# 675528 , Reply# 29 4/25/2013 at 19:59 (4,010 days old) by ultramatic (New York City) |
||
|
And it works! | ||
| Post# 675533 , Reply# 30 4/25/2013 at 20:42 (4,010 days old) by danemodsandy (The Bramford, Apt. 7-E) | ||
|
Hopefully: | ||
|
Post# 675537 , Reply# 31 4/25/2013 at 21:06 (4,010 days old) by combo52 (50 Year Repair Tech Beltsville,Md) |
||
|
KM Range Hood | ||
|
Post# 675546 , Reply# 32 4/25/2013 at 22:51 (4,010 days old) by ultramatic (New York City) |
||
|
| ||
| Post# 675558 , Reply# 33 4/26/2013 at 01:08 (4,010 days old) by westingman123 () | ||
|
Oooooh! Jealous much. | ||
|
Post# 675642 , Reply# 34 4/26/2013 at 13:55 (4,009 days old) by CircleW (NE Cincinnati OH area) |
||
|
850. prefix indicates a Whirlpool (Chambers) sourced product. Sounds like Sears got it through Whirlpool, but it was made by Chambers. | ||
|
Post# 675658 , Reply# 35 4/26/2013 at 15:40 (4,009 days old) by ultramatic (New York City) |
||
|
Thanks Tom! | ||
|
Post# 675692 , Reply# 36 4/26/2013 at 19:32 (4,009 days old) by combo52 (50 Year Repair Tech Beltsville,Md) |
||
|
850 Prefix | ||
|
Post# 675703 , Reply# 37 4/26/2013 at 19:58 (4,009 days old) by Yogitunes (New Jersey) |
||
 | ||
|
Post# 675713 , Reply# 38 4/26/2013 at 21:00 (4,009 days old) by jamiel (Detroit, Michigan and Palm Springs, CA) |
||
|
| ||
|
Post# 675738 , Reply# 39 4/27/2013 at 02:28 (4,009 days old) by ultramatic (New York City) |
||
|
Interesting development...
I used an even stronger degreaser today and found that it actually started to strip the paint on the inside of the hood. Under the paint it's nice and shiny stainless steel. Soooooo, I thought why not buy a paint stripper and leave it all in stainless. Would this be a good idea? Or should I just repaint it?
@ yogi, I've heard of Purple, if this new stuff conks out, I'll give it a try.
@ Jamie, Thanks for the info!
| ||
|
Post# 675772 , Reply# 40 4/27/2013 at 09:56 (4,008 days old) by combo52 (50 Year Repair Tech Beltsville,Md) |
||
|
Interesting Development These Range Hood s were available in a SS finish, but unless someone bought a SS one and painted it what you are seeing is not SS [ if if was a SS hood that was painted the outside finish would have a grained appearance ] That said bare steel is shinny like SS and I have seen people strip things like old steel radiator covers polish and add light grain to them and then you must clear-coat them immediately to keep them from rusting. How successful this all depends on how good the bare steel looks when you get it all stripped, many times the bare steel looks blotchy and uneven in color and no amount of cleaning and adding grain makes it look great. | ||
|
Post# 675795 , Reply# 41 4/27/2013 at 11:28 (4,008 days old) by ultramatic (New York City) |
||
|
| ||
| Post# 675796 , Reply# 42 4/27/2013 at 11:35 (4,008 days old) by coldspot () | ||
|
Ok the filter I had this same problem. Tru vaule had or might still have a make your own. You use the frame and cut it to fit. Also this site looks to do the same. Mine is a Miami-Carey darn hard to find parts. CLICK HERE TO GO TO coldspot's LINK | ||
|
Post# 682194 , Reply# 43 6/2/2013 at 22:21 (3,972 days old) by ultramatic (New York City) |
||
|
A small update:
I finally went back to the range hood today (yes, yes, the Kenmore washer is waiting...I got all the parts in already, and the Toastmaster fan is waiting too). I started to dismantle it for cleaning. To my dismay, some of the painted parts are peeling/chipping when I scrub. Sooo, long story short, I'm just going to strip the parts and repaint them. What paint should I use? It must be durable to withstand heat and cleaning. Rust-Oleum or perhaps something else? | ||
|
Post# 747202 , Reply# 45 4/2/2014 at 22:23 (3,668 days old) by ultramatic (New York City) |
||
|
So I decided to finish the Kenmore hood first before I do the Slattery/Caloric switch. I've finally completely disassembled it and started to clean the layer upon layer of grease and grime. I'm using DEP oven cleaner, with some success. But it is taking multiple applications and as I mentioned earlier, it is lifting off the factory paint. I've decided to leave it on bare metal. It actually looks better than the paint anyway. So it won't rust, I want to apply something clear, but is also resistant to high heat and repeated cleanings. Any ideas?
Removing the motor
Under the hood. YUK!
After 3 applications of cleaner, STILL greasy.
The exterior after 3 cleanings and some Bar Keepers Friend | ||
|
Post# 747239 , Reply# 46 4/3/2014 at 02:31 (3,668 days old) by ultramatic (New York City) |
||
|
| ||
| Post# 747258 , Reply# 48 4/3/2014 at 06:38 (3,667 days old) by danemodsandy (The Bramford, Apt. 7-E) | ||
|
Louie:
These Sears hoods in stainless had the painted finish underneath to cut down on glare and weird reflections from the hood light. Sears being Sears, it was probably cheaper to do it this way than it was to put a brushed finish on the underside.
It was something like a silver hammertone finish, without the "hammered" effect. So, the painted area underneath is the way it came originally. | ||
|
Post# 747376 , Reply# 49 4/3/2014 at 18:52 (3,667 days old) by ultramatic (New York City) |
||
|
| ||
|
Post# 747378 , Reply# 50 4/3/2014 at 18:57 (3,667 days old) by ultramatic (New York City) |
||
|
| ||
|
Post# 747431 , Reply# 51 4/3/2014 at 22:10 (3,667 days old) by ultramatic (New York City) |
||
|
| ||
|
Post# 747452 , Reply# 52 4/4/2014 at 00:31 (3,667 days old) by ultramatic (New York City) |
||
|
| ||
|
Post# 747495 , Reply# 53 4/4/2014 at 07:00 (3,666 days old) by combo52 (50 Year Repair Tech Beltsville,Md) |
||
|
Range Hood Fan Motor | ||
| Post# 747501 , Reply# 54 4/4/2014 at 07:24 (3,666 days old) by danemodsandy (The Bramford, Apt. 7-E) | ||
|
I'll Second John! | ||
|
Post# 747590 , Reply# 55 4/4/2014 at 14:01 (3,666 days old) by ultramatic (New York City) |
||
|
| ||
| Post# 747618 , Reply# 56 4/4/2014 at 15:49 (3,666 days old) by danemodsandy (The Bramford, Apt. 7-E) | ||
|
Here's a Clue:
Those motors were made by Leece-Neville in Gainesville, GA. Leece-Neville is now a division of Prestolite. The Gainesville operation, according to Wikipedia, was shuttered and moved to Arcade, NY.
Here is a link to the Prestolite Leece-Neville page. You might try contacting them for a distributor, who in turn can be contacted for a retail source, or for info on who might be able to advise you on an equivalent motor. Don't try asking Prestolite to sell you a motor direct, because they probably won't. Just FYI, those were quality motors. Too bad they were run un-oiled and dirty for so long. www.prestolite.com/pgs_contact/co... | ||
|
Post# 747622 , Reply# 57 4/4/2014 at 16:32 (3,666 days old) by ultramatic (New York City) |
||
|
| ||
| Post# 747649 , Reply# 58 4/4/2014 at 18:08 (3,666 days old) by danemodsandy (The Bramford, Apt. 7-E) | ||
|
Louie: | ||
|
Post# 747664 , Reply# 59 4/4/2014 at 19:28 (3,666 days old) by ultramatic (New York City) |
||
|
| ||
| Post# 747665 , Reply# 60 4/4/2014 at 19:42 (3,666 days old) by danemodsandy (The Bramford, Apt. 7-E) | ||
|
Try This:
Give Seaboard Marine Electric Co. a call and see what they say. They're in Brooklyn, on 14th near 3rd Ave.
Here's a link: www.sbmarine.com/... This was a Google lookup; I don't know anything about them. But the page makes it look like they can either handle this, or tell you who can. | ||
|
Post# 747668 , Reply# 61 4/4/2014 at 19:46 (3,666 days old) by ultramatic (New York City) |
||
|
| ||
|
Post# 747714 , Reply# 62 4/5/2014 at 01:17 (3,666 days old) by ultramatic (New York City) |
||
|
While I get the motor sorted out, I decided to continue cleaning the rest of the hood. I was very reluctant to clean the faux wood with the Sears Kenmore logo. So I used dish washing liquid and warm water with a sponge thinking it would be mild enough. It got rid of the grease and grime, along with the paint on the raised letters and it began to lighten the faux wood. See post #3 to see how it originally looked.
Ok, here is my attack plan, contact paper over the faux wood, and a paint pen to repaint the lettering. I have very steady hands, so I have been told, so I think it can come out pretty decent. Unless anyone has a better idea?
| ||
|
Post# 747722 , Reply# 63 4/5/2014 at 05:38 (3,665 days old) by retro-man (- boston,ma) |
||
|
Check out the Broan website. The motor and blower assembly look identical to the one that you have. I replaced mine a few years ago and might have to do it again soon. Jon | ||
|
Post# 747754 , Reply# 64 4/5/2014 at 09:45 (3,665 days old) by eronie (Flushing Michigan) |
||
|
motor grainger.com will have that motor. | ||
|
Post# 747818 , Reply# 65 4/5/2014 at 13:54 (3,665 days old) by ovrphil (N.Atlanta / Georgia ) |
||
 | ||
|
Post# 747900 , Reply# 66 4/5/2014 at 18:54 (3,665 days old) by combo52 (50 Year Repair Tech Beltsville,Md) |
||
|
GE 36" Range Hood | ||
|
Post# 747962 , Reply# 67 4/5/2014 at 22:46 (3,665 days old) by ultramatic (New York City) |
||
|
| ||
|
Post# 747963 , Reply# 68 4/5/2014 at 22:48 (3,665 days old) by ultramatic (New York City) |
||
|
| ||
|
Post# 747999 , Reply# 69 4/6/2014 at 02:03 (3,665 days old) by DaveAMKrayoGuy (Oak Park, MI) |
||
"Vintage Hoods Tossed": | ||
|
Post# 748002 , Reply# 70 4/6/2014 at 02:09 (3,665 days old) by ultramatic (New York City) |
||
|
| ||
|
Post# 748260 , Reply# 71 4/6/2014 at 23:04 (3,664 days old) by ultramatic (New York City) |
||
|
Cue in Pycho shower scene soundtrack | ||
|
Post# 748396 , Reply# 72 4/7/2014 at 10:23 (3,663 days old) by ovrphil (N.Atlanta / Georgia ) |
||
|
You know the previous owners could read | ||
|
Post# 748423 , Reply# 73 4/7/2014 at 12:17 (3,663 days old) by ultramatic (New York City) |
||
|
| ||
|
Post# 748793 , Reply# 74 4/9/2014 at 01:25 (3,662 days old) by ultramatic (New York City) |
||
|
| ||
|
Post# 748794 , Reply# 75 4/9/2014 at 01:59 (3,662 days old) by ultramatic (New York City) |
||
|
| ||
|
Post# 749615 , Reply# 76 4/12/2014 at 21:21 (3,658 days old) by ultramatic (New York City) |
||
|
| ||
|
Post# 749634 , Reply# 77 4/12/2014 at 23:03 (3,658 days old) by ovrphil (N.Atlanta / Georgia ) |
||
|
| ||
|
Post# 749637 , Reply# 78 4/12/2014 at 23:15 (3,658 days old) by ultramatic (New York City) |
||
|
| ||
|
Post# 749639 , Reply# 79 4/12/2014 at 23:22 (3,658 days old) by MattL (Flushing, MI) |
||
|
A scrap piece of wood grained Formica would be your best option, I think wood veneer with some poly on it will hold up better than contact paper.
Looking good! | ||
|
Post# 749780 , Reply# 80 4/13/2014 at 16:20 (3,657 days old) by ultramatic (New York City) |
||
|
| ||
|
Post# 750228 , Reply# 81 4/15/2014 at 09:48 (3,655 days old) by ultramatic (New York City) |
||
|
| ||
|
Post# 750322 , Reply# 82 4/15/2014 at 15:22 (3,655 days old) by ovrphil (N.Atlanta / Georgia ) |
||
|
Amazon
I just quickly looked at Amazon, Louie - and they have burled and straight grain wood contact paper...it's flexible, not wood - I like this burl but you can peruse and decide what you prefer.
CLICK HERE TO GO TO ovrphil's LINK 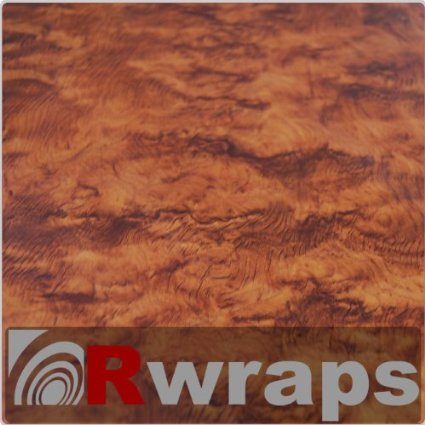
| ||
|
Post# 751573 , Reply# 83 4/21/2014 at 01:09 (3,650 days old) by ultramatic (New York City) |
||
|
I haven't forgotten this. I am currently reinforcing the upper cabinets. I noticed there was a 1/4 inch gap between the ceiling and the front of the cabinets. The rear is fine though. So some heavy duty "L" brackets and concrete screws is taking care of the problem. Once this is done, it's full steam ahead with the hood, then stove and finally the fridge. This post was last edited 04/21/2014 at 01:31 | ||
|
Post# 804561 , Reply# 84 1/17/2015 at 09:08 (3,378 days old) by ovrphil (N.Atlanta / Georgia ) |
||
|
Just curious�. | ||
|
Post# 804634 , Reply# 85 1/17/2015 at 20:51 (3,378 days old) by Ultramatic (New York City) |
||
|
| ||
|
Post# 804713 , Reply# 86 1/18/2015 at 08:33 (3,377 days old) by searsbest (Attleboro, Ma) |
||
kenmore range hood | ||
|
Post# 804783 , Reply# 87 1/18/2015 at 17:54 (3,377 days old) by ovrphil (N.Atlanta / Georgia ) |
||
|
Louie - | ||
|
Post# 806803 , Reply# 88 1/30/2015 at 23:19 (3,365 days old) by Ultramatic (New York City) |
||
|
| ||
|
Post# 806837 , Reply# 89 1/31/2015 at 06:51 (3,364 days old) by DaveAMKrayoGuy (Oak Park, MI) |
||
|
| ||
|
Post# 806983 , Reply# 90 2/1/2015 at 01:43 (3,364 days old) by Ultramatic (New York City) |
||
|
Test fit. | ||
|
Post# 807342 , Reply# 91 2/2/2015 at 16:28 (3,362 days old) by Ultramatic (New York City) |
||
|
| ||
|
Post# 807344 , Reply# 92 2/2/2015 at 16:34 (3,362 days old) by Ultramatic (New York City) |
||
|
| ||
|
Post# 807345 , Reply# 93 2/2/2015 at 16:36 (3,362 days old) by Ultramatic (New York City) |
||
|
| ||
|
Post# 807354 , Reply# 94 2/2/2015 at 18:04 (3,362 days old) by combo52 (50 Year Repair Tech Beltsville,Md) |
||
|
Blower Installed Backwards Louie that reminded me of when we were having Sears install a complete new kitchen in our house in 1966. The hood was very similar to the one you are restoring except it was vented up through the cabinet, the installer commented that we finally got a quite one. After they left for the day one of my brothers noticed that the blower assembly was installed blowing to the rear, so we turned it around and pointed out to the installer the next day that the fan was not all that quite LOL.
After a few years of constantly replacing the two incandescent light bulbs every few months I modified the hood to hold a 24" florescent light bulb and never replaced the bulb again till I redid the kitchen in 1988 [ I also cut the power consumption down to 1/4 the former usage ]. | ||
|
Post# 813553 , Reply# 95 3/12/2015 at 03:43 (3,324 days old) by Ultramatic (New York City) |
||
|
| ||
|
Post# 813603 , Reply# 96 3/12/2015 at 13:31 (3,324 days old) by ovrphil (N.Atlanta / Georgia ) |
||
|
Good job Louie, so far�even if you reversed that motor(have done worse, in my experiences, lol). Did you remove contact paper to the left of the wood grain contact-vinyl/paper? Is that white with star pattern available for replacement or is that a metal panel you'll be reapplying?
JohnL- funny story about the reversed motor. %^p | ||
|
Post# 813614 , Reply# 97 3/12/2015 at 13:45 (3,324 days old) by Ultramatic (New York City) |
||
|
| ||
|
Post# 813717 , Reply# 98 3/13/2015 at 02:10 (3,324 days old) by Ultramatic (New York City) |
||
|
Closer and closer... | ||
|
Post# 813738 , Reply# 99 3/13/2015 at 06:42 (3,323 days old) by ovrphil (N.Atlanta / Georgia ) |
||
|
Louie, it's looking good. It's not easy to just paint lettering without masking it off. But it looks good anyways.
One more question - this is 42" and your space is 44"? So your vent is really an inch over the edge of your stove if it's a 40 inch Caloric, right? If so, once you get this completed, could you take a photo of the stove and hood face-on, too? (if you have room in your kitchen). Nice job. | ||
| Post# 813751 , Reply# 100 3/13/2015 at 08:37 (3,323 days old) by ken (NYS) | ||
Louie
You can do the lettering with an ink roller (brayer). They are available in varying widths. I use them to restore vintage license plates. Even though the lettering you need to do is much smaller the principle would be the same. You don't want the paint too thin or too thick. Don't use too much pressure. I don't imagine it would be necessary to make more than one pass to do those letters but if it were let the first coat dry before doing the second.
View Full Size
| ||
|
Post# 813802 , Reply# 101 3/13/2015 at 13:59 (3,323 days old) by Ultramatic (New York City) |
||
|
| ||
|
Post# 813803 , Reply# 102 3/13/2015 at 14:03 (3,323 days old) by Ultramatic (New York City) |
||
|
| ||
| Post# 813805 , Reply# 103 3/13/2015 at 14:14 (3,323 days old) by ken (NYS) | ||
|
| ||
|
Post# 813807 , Reply# 104 3/13/2015 at 14:18 (3,323 days old) by Ultramatic (New York City) |
||
|
| ||
|
Post# 813810 , Reply# 105 3/13/2015 at 14:29 (3,323 days old) by ovrphil (N.Atlanta / Georgia ) |
||
|
Scan the lettering. Cut out around the letters. Attach with museum clay(it comes off easily) or use a rubber glue that will come off by rolling your fingers around it. But you could make this mask, use that roller(good idea Ken) and prevent any over-paint around the lettering. It might be more work or difficult in concept, but the idea of making a mask would keep the paint on the letters. Maybe someone else can clarify this idea or come up with another similar. It might be easy to just roll it on, lightly, and remove anything with an artist charcoal paper stumps. Just some ideas. I'm sure you'll get it to work, Louie - and you can always sandpaper the lettering or rough it up with a fine nail file(cheap-o paper ones).
Phil CLICK HERE TO GO TO ovrphil's LINK | ||
|
Post# 813830 , Reply# 106 3/13/2015 at 17:19 (3,323 days old) by Ultramatic (New York City) |
||
|
| ||
|
Post# 813831 , Reply# 107 3/13/2015 at 17:23 (3,323 days old) by ovrphil (N.Atlanta / Georgia ) |
||
|
| ||
|
Post# 813999 , Reply# 108 3/14/2015 at 21:47 (3,322 days old) by Ultramatic (New York City) |
||
|
| ||
|
Post# 814158 , Reply# 109 3/16/2015 at 05:44 (3,320 days old) by Ultramatic (New York City) |
||
|
| ||
|
Post# 814165 , Reply# 110 3/16/2015 at 06:48 (3,320 days old) by combo52 (50 Year Repair Tech Beltsville,Md) |
||
|
Charcoal Filters For An Old Restored Range-Hood | ||
|
Post# 814253 , Reply# 111 3/16/2015 at 15:35 (3,320 days old) by Ultramatic (New York City) |
||
|
| ||
|
Post# 814365 , Reply# 112 3/16/2015 at 23:49 (3,320 days old) by Ultramatic (New York City) |
||
|
I give up. No technique I have tried gave me satisfactory results. The problem is those damn letters are so slightly embossed on that aluminum tag, it's virtually impossible to do a neat job. I tried the brayer, a small stamp and a paint pen. I used different consistencies of ink. I used the lightest touch. Nope. So, that's it, it stays as is. | ||
|
Post# 814368 , Reply# 113 3/17/2015 at 00:28 (3,320 days old) by Ultramatic (New York City) |
||
|
It's finished...finally
After almost two years, It's been totally disassembled, cleaned, painted, polished and put back into service. One less hood that had to be manufactured.
This post was last edited 03/17/2015 at 04:30 | ||
| Post# 814418 , Reply# 114 3/17/2015 at 08:31 (3,319 days old) by ken (NYS) | ||
|
Very Nice Louie | ||
|
Post# 814455 , Reply# 115 3/17/2015 at 11:34 (3,319 days old) by Ultramatic (New York City) |
||
|
| ||
| Post# 814457 , Reply# 116 3/17/2015 at 11:40 (3,319 days old) by ken (NYS) | ||
|
| ||
|
Post# 814468 , Reply# 117 3/17/2015 at 12:18 (3,319 days old) by ovrphil (N.Atlanta / Georgia ) |
||
|
| ||
|
Post# 814490 , Reply# 118 3/17/2015 at 15:01 (3,319 days old) by Ultramatic (New York City) |
||
|
| ||
| Post# 814499 , Reply# 119 3/17/2015 at 15:34 (3,319 days old) by Stricklybojack (South Hams Devon UK) | ||
I think
.
it looks better without painted lettering..great work. I wish our apartment, and even more so the guy below us, had a hood for the stove. Thank god he doesn't smoke. Apparently there are no laws regarding this in NYC. In a gut rehab it would be high on the list of to do's around here. Getting grease out of that mesh is murder. I second the charcoal refill idea. Also perhaps the mesh can be bought and cut to fit. I think buying replacements gets pricey if i recall correctly. | ||
|
Post# 814504 , Reply# 120 3/17/2015 at 15:54 (3,319 days old) by Ultramatic (New York City) |
||
|
Thanks! I think it looks better too. One thing about the paint for the lettering, it seemed way too "black". The older paint seemed to be a more grayish black, perhaps due to age. Anyhow, while many in this building have hoods, they are all interior venting.Sometimes you get the "aroma" of frying fish or garlic.
Grease, oh God, don't remind me. That was the most time consuming, messy and difficult task done. These things were NOT designed to keep clean easily. So many nooks and crannies and SHARP edges! The only thing that helped remove the grease was ZEP degreaser. And of course a lot of scrubbing. Thankfully, I don't fry much, so a major cleaning won't be in the cards for the next 12 months or so. | ||
|
Post# 815249 , Reply# 121 3/23/2015 at 00:42 (3,314 days old) by Ultramatic (New York City) |
||
|
Just when I thought I was done. | ||
|
Post# 815278 , Reply# 123 3/23/2015 at 06:59 (3,313 days old) by combo52 (50 Year Repair Tech Beltsville,Md) |
||
|
Humming Ballast | ||
| Forum Index: | 
| Other Forums: |

|

|

|

|

|

 Comes to the Rescue!