Thread Number: 48305
Hoover 455 (A3072) Washer Overhaul Pt 3
[Down to Last]

automaticwasher.org's exclusive eBay Watch:
scroll >>> for more items --- [As an eBay Partner, eBay may compensate automaticwasher.org if you make a purchase using any link to eBay on this page]
Post# 700039   8/30/2013 at 19:36 (3,885 days old) by crouzet951 ()        

Hi again folks

This is the third and final instalment of overhauling my Hoover 455 washer. The previous instalment is at the link.

I had decided that anything that was easy to get at, and was in good condition, would be reused on the washer. As you'll see later, this doesn't totally work out.

This time:

Reassembly, frustration... then success.

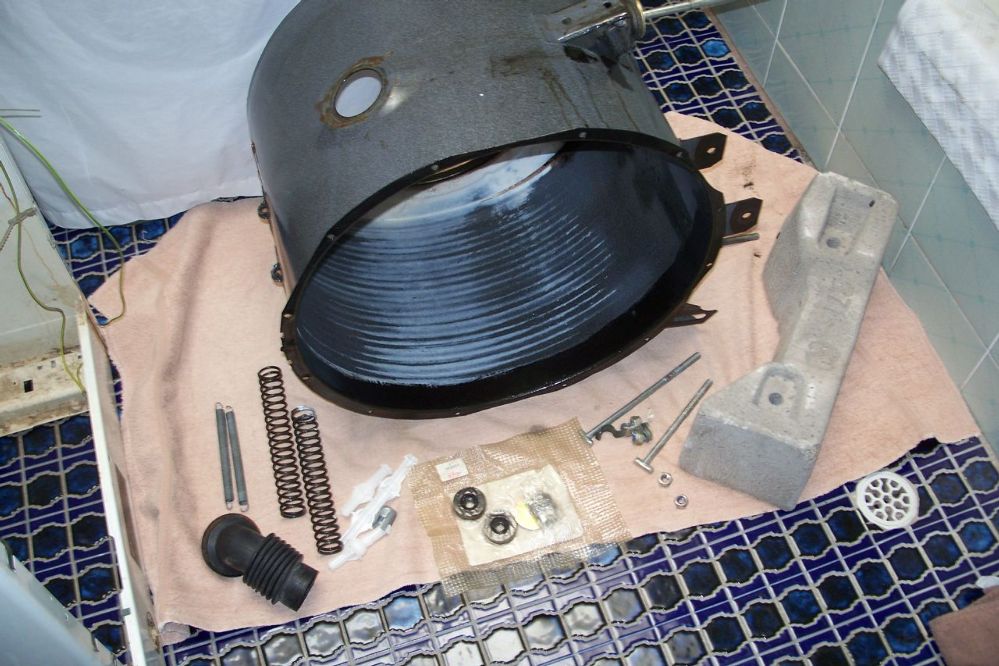
This was the best I could get the cabinet base to, even using kerosene. The fish-oil based paint has made a mess. Short of stripping the whole cabinet back to bare metal, it will do.

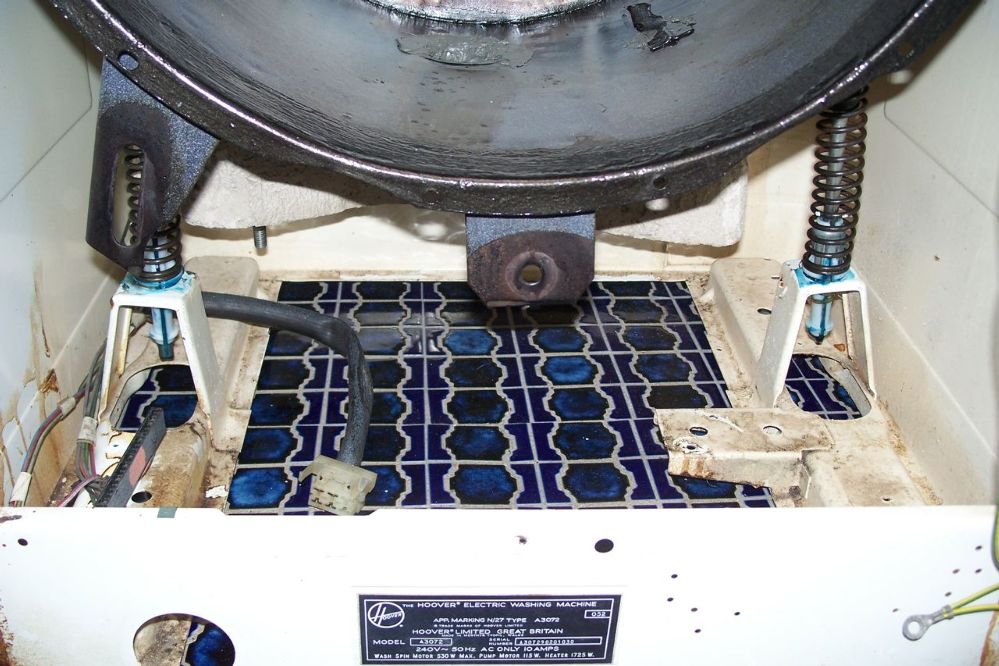
I had never noticed before that the suspension strut supports are located asymmetrically. It makes sense considering where the main motor is located on the drum.


CLICK HERE TO GO TO crouzet951's LINK


Post# 700040 , Reply# 1   8/30/2013 at 19:37 (3,885 days old) by crouzet951 ()        

It begins...


Post# 700041 , Reply# 2   8/30/2013 at 19:40 (3,885 days old) by crouzet951 ()        

A new anti-twist suspension kit was installed.
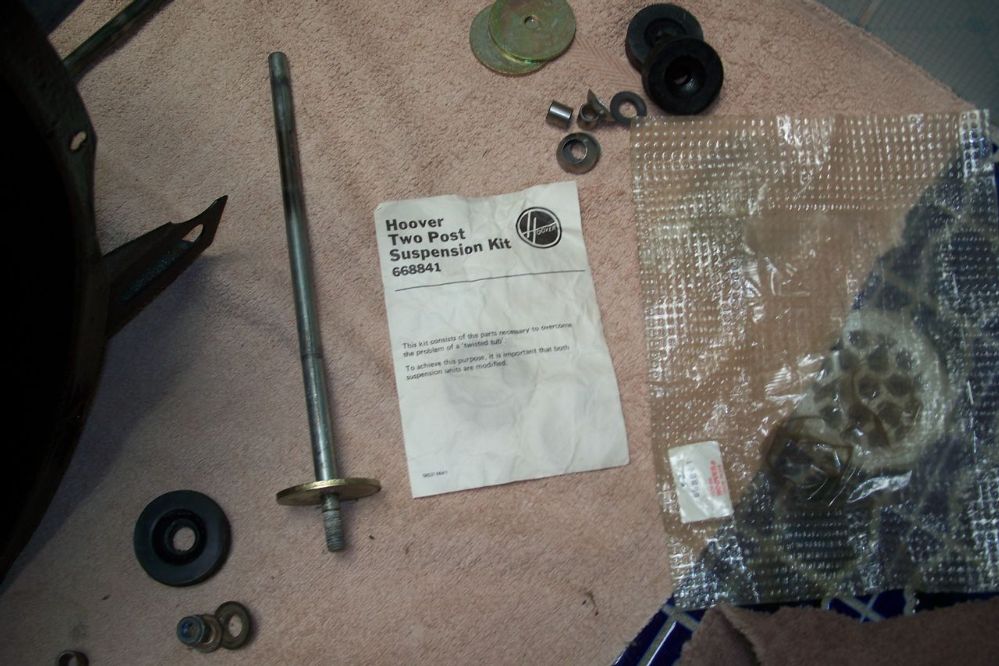
Post# 700043 , Reply# 3   8/30/2013 at 19:41 (3,885 days old) by crouzet951 ()        

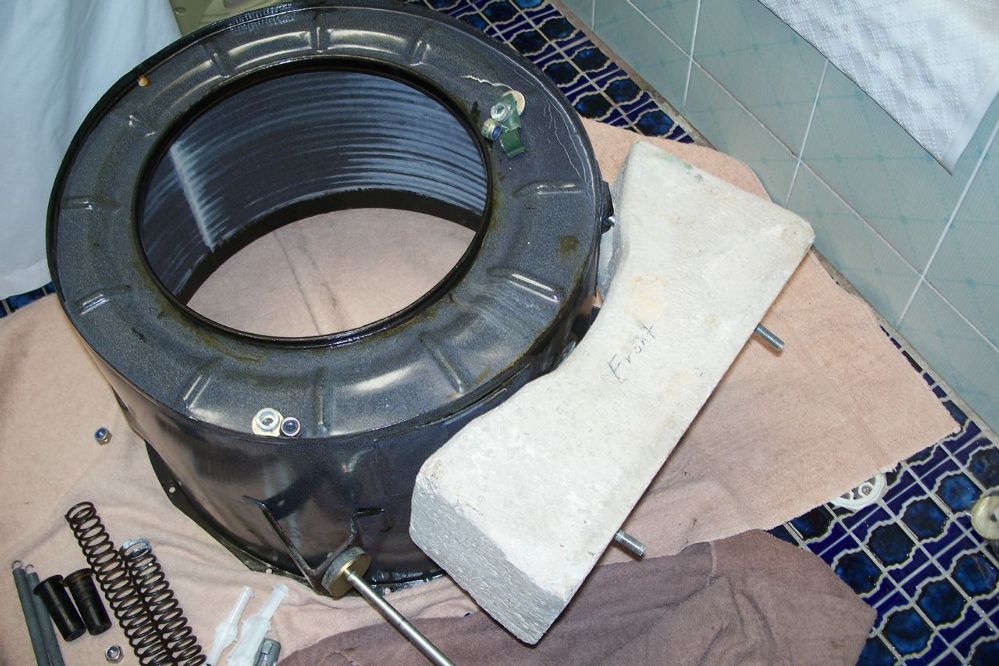
Replacing the weight. New nyloc nuts were used.
Post# 700044 , Reply# 4   8/30/2013 at 19:44 (3,885 days old) by crouzet951 ()        

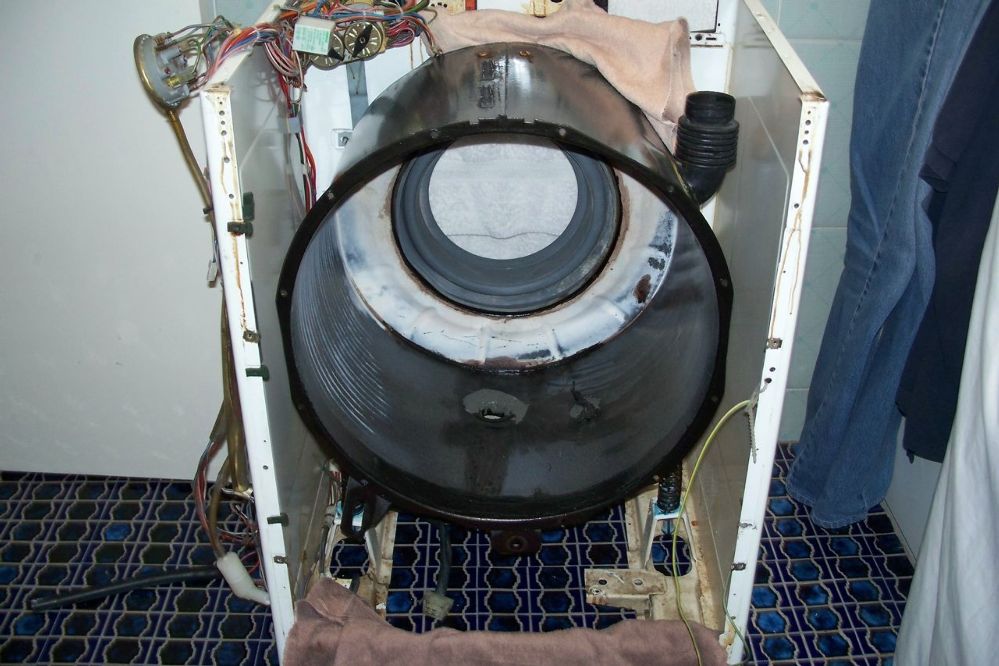
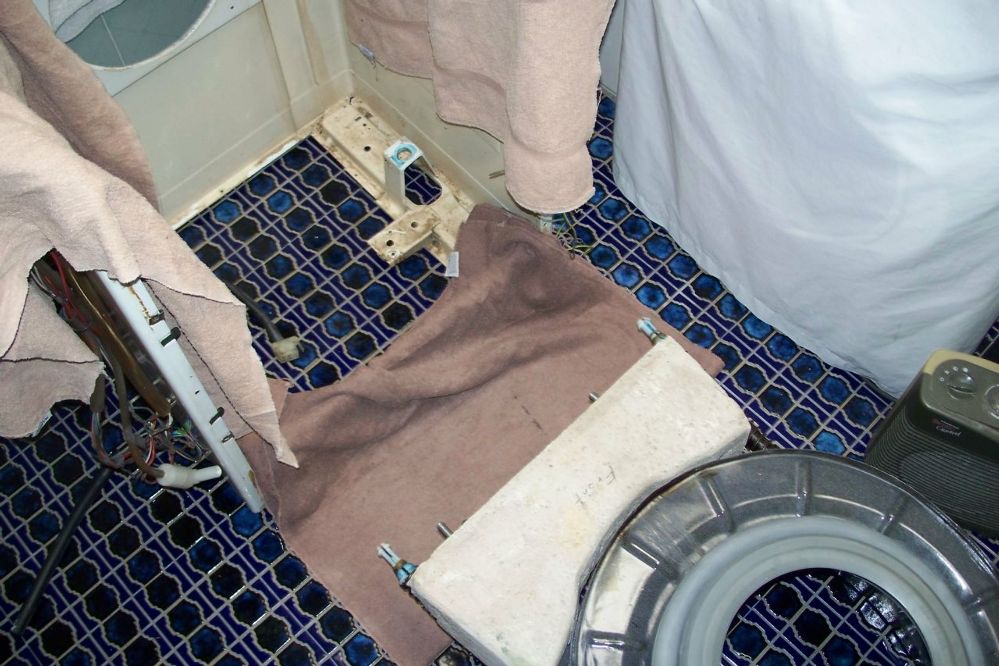
The drum ready to go back into the cabinet. The old rubber bands on the dampers trick worked a treat.
Post# 700045 , Reply# 5   8/30/2013 at 19:45 (3,885 days old) by crouzet951 ()        

Success!

Post# 700046 , Reply# 6   8/30/2013 at 19:46 (3,885 days old) by crouzet951 ()        

I bought some multi-purpose grease and it's blue!
Post# 700048 , Reply# 7   8/30/2013 at 19:49 (3,885 days old) by crouzet951 ()        

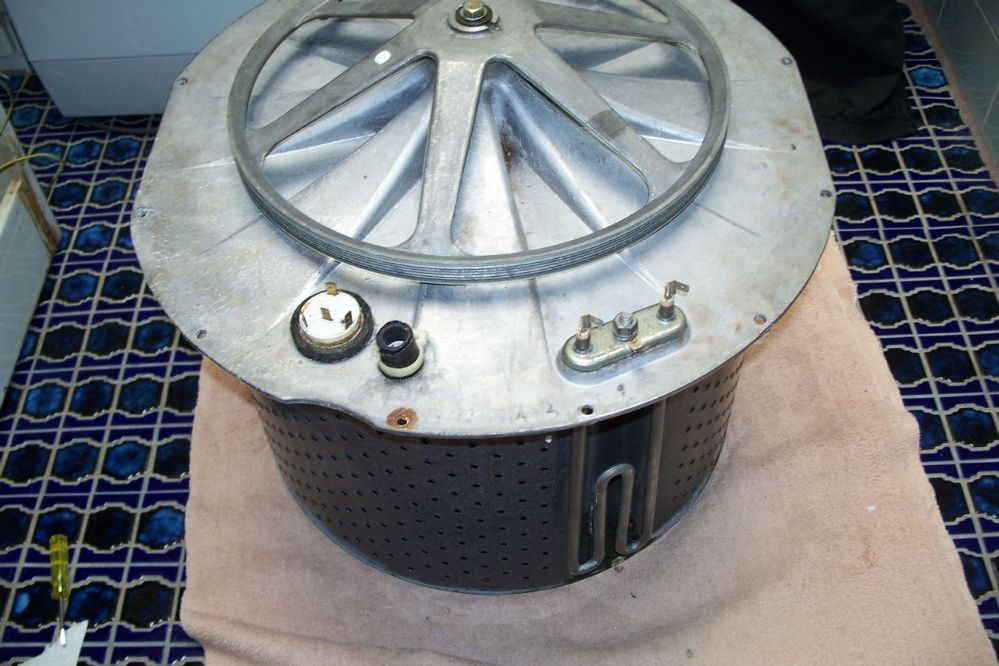
The cleaned up drum and backplate ready to install. The thermostat was treated to a new seal.
Post# 700050 , Reply# 8   8/30/2013 at 19:58 (3,885 days old) by crouzet951 ()        

Sorry, no pictures were taken when installing the drum and backplate. All screws, nuts and washers retaining the backplate are now stainless steel.

The main motor (with its snazzy new windings), belt, pump (with newly painted cover), tub and drain hoses, module, and wiring all installed. The module supports are now located with 3mm screws and nuts.


Post# 700051 , Reply# 9   8/30/2013 at 19:59 (3,885 days old) by crouzet951 ()        

The newly painted upper rear support was installed.
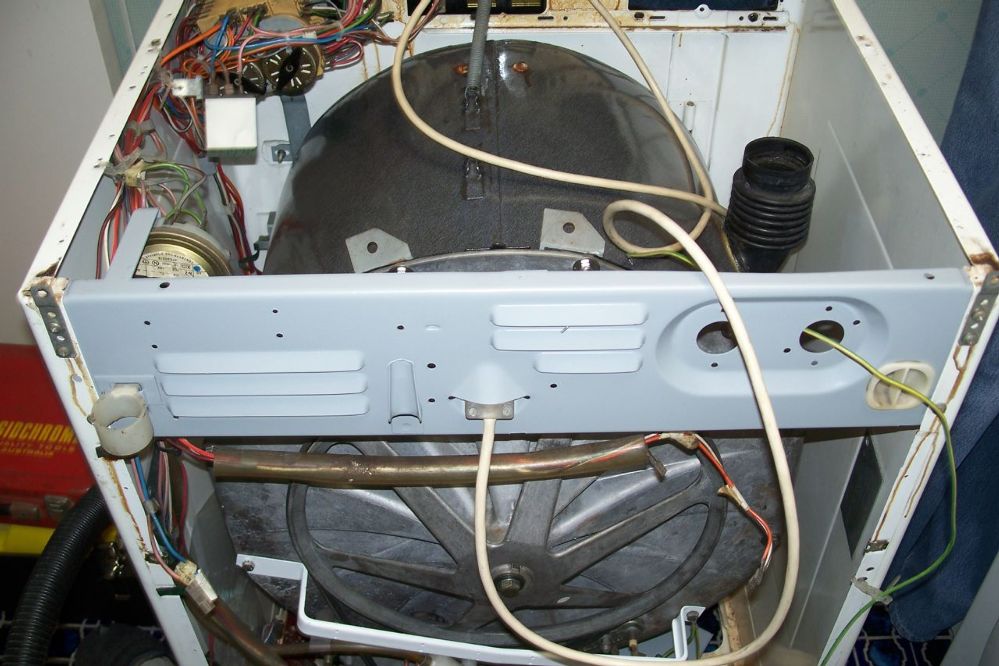
Post# 700052 , Reply# 10   8/30/2013 at 20:01 (3,885 days old) by crouzet951 ()        

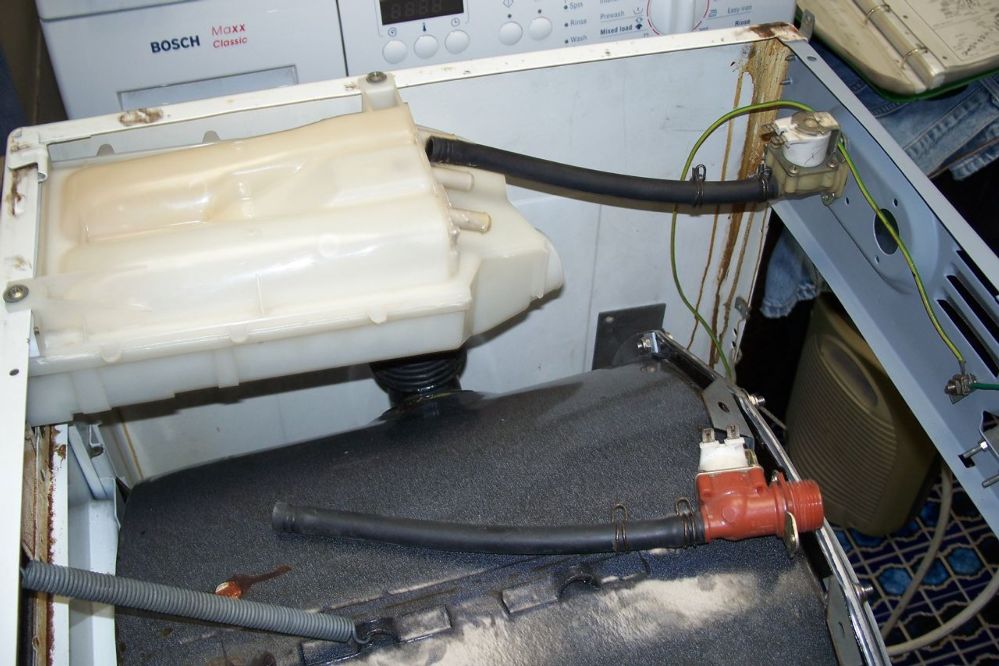
Installing the detergent dispenser, water inlet solenoids, and hoses.

Post# 700054 , Reply# 11   8/30/2013 at 20:03 (3,885 days old) by crouzet951 ()        

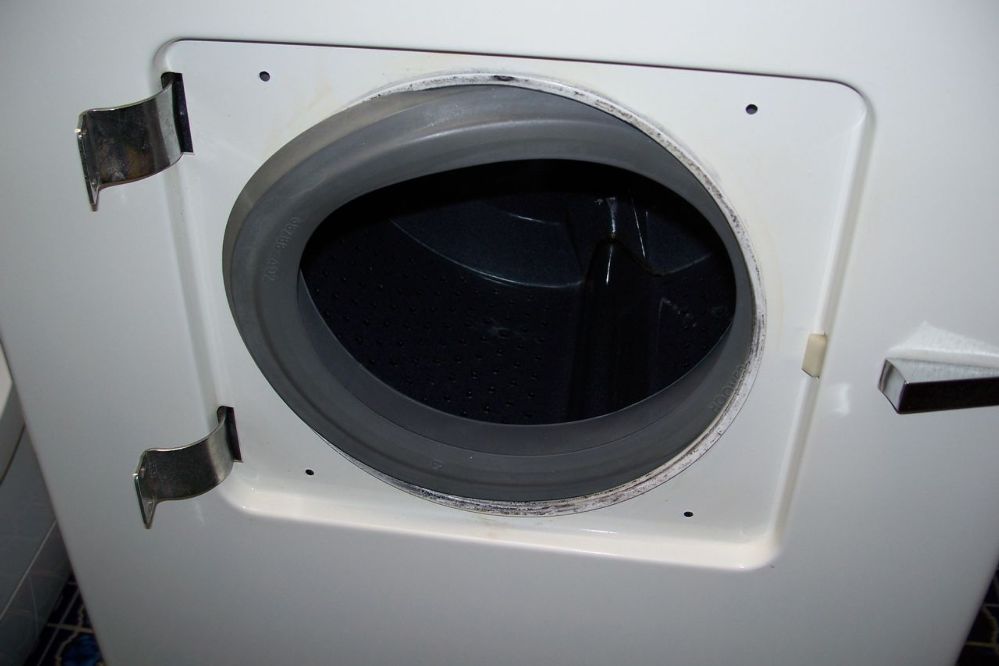
Installing the door seal onto the cabinet lip.
Post# 700056 , Reply# 12   8/30/2013 at 20:08 (3,885 days old) by crouzet951 ()        

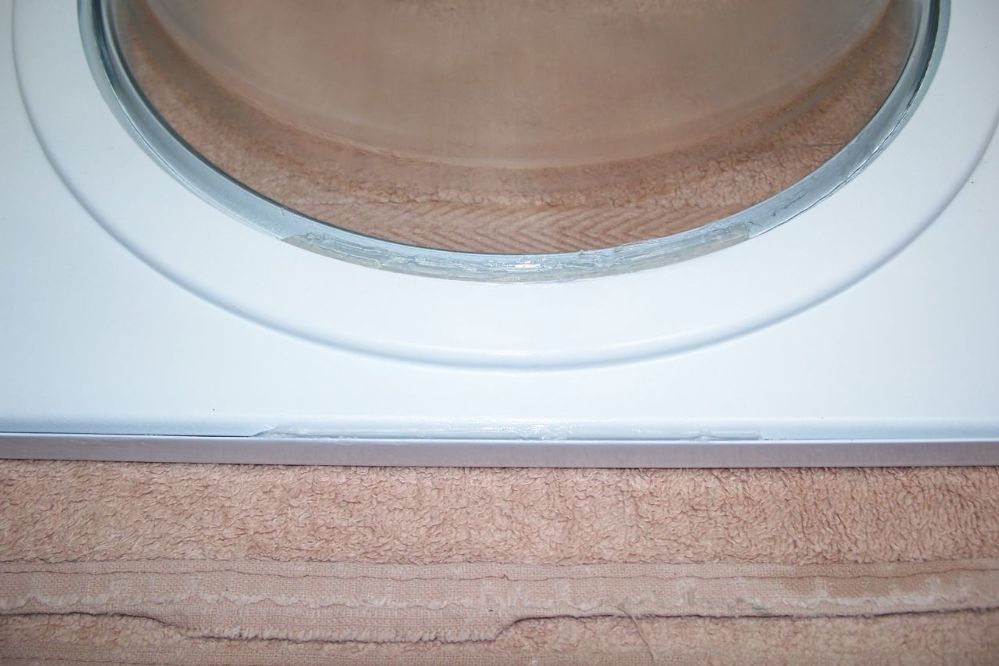
I applied an approximately 100mm bead of silicon sealer between the glass and inner door, and between the inner and outer doors. Hopefully this will keep any water running down the door glass from entering and causing rust, when the door is opened after a wash.
Post# 700058 , Reply# 13   8/30/2013 at 20:11 (3,885 days old) by crouzet951 ()        

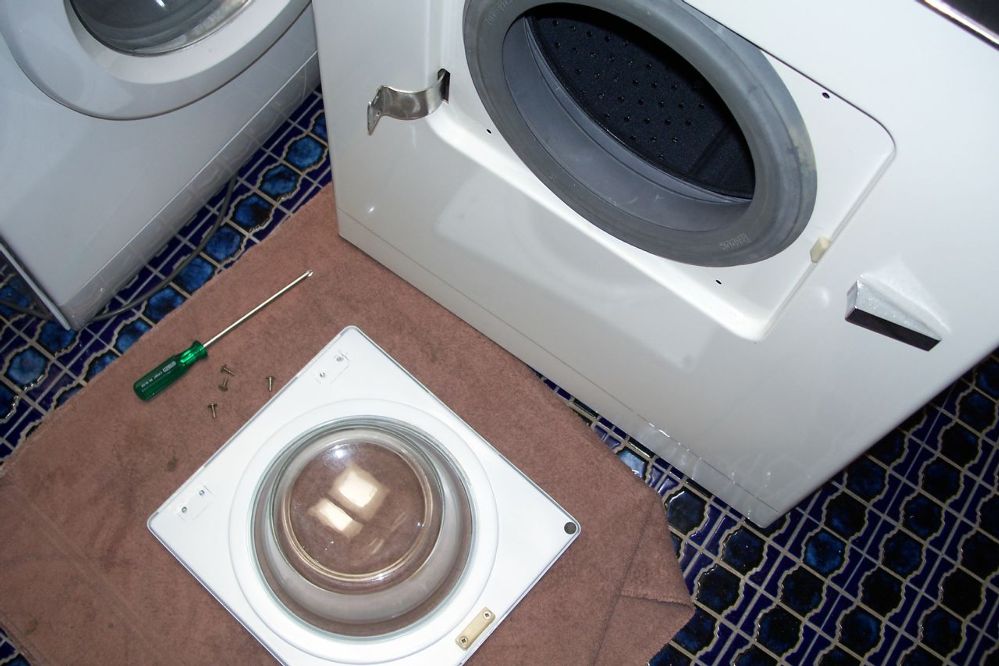
Installing the freshly repainted door.

I had previously installed and adjusted the door without the drum installed (much easier), and used a whiteboard marker to mark the positions of the hinges.

Post# 700060 , Reply# 14   8/30/2013 at 20:13 (3,885 days old) by crouzet951 ()        

Connect the hoses after one final look around, and gingerly pull the control knob.
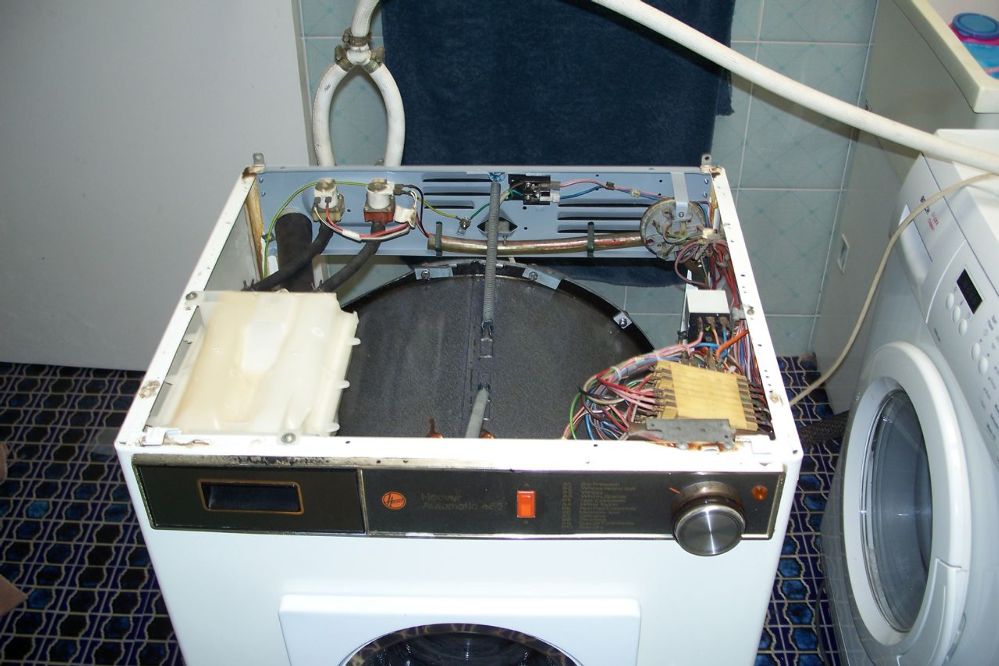
Post# 700062 , Reply# 15   8/30/2013 at 20:19 (3,885 days old) by crouzet951 ()        

Water is entering, then... my frustration begins!

Three problems:

two reasonably major (as in constantly dripping) water leaks; and

the main motor was dead (the timer could be heard operating, but the motor did not operate).

At this point I pumped the water out (at least the pump was working, hehe), then went and had a coffee.


Post# 700066 , Reply# 16   8/30/2013 at 20:29 (3,885 days old) by crouzet951 ()        

Coming back re-caffeinated, the leaks were tackled first.

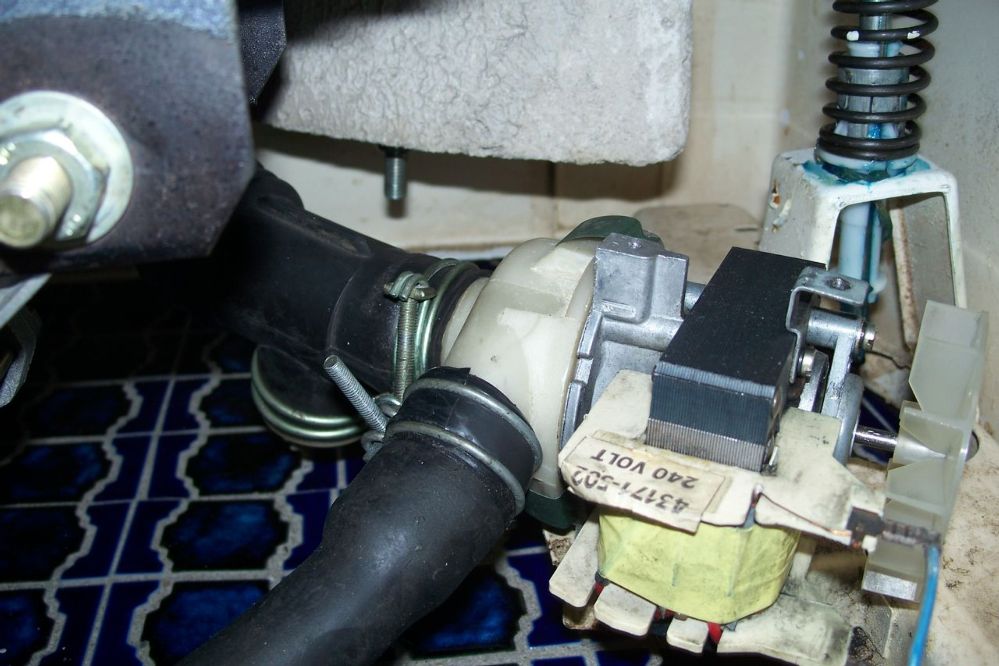
One was from the bottom of the backplate, and the other was from the pump. The latter concerned me most, as I thought my drum repair had failed and water was running down the drain hose.

In the image attached, the water stain on the motor can be seen. The *tasteful* floor tiles of my 80s bathroom make it almost impossible to see water on the floor, so I ended up putting a towel underneath to make it easier to see where the leaks were.


Post# 700067 , Reply# 17   8/30/2013 at 20:34 (3,885 days old) by crouzet951 ()        

The rear leak turned out to be nothing more than the water level bellows grommet.

As mentioned in an earlier post, this backplate is from a later Aus made washer. They simply have a hole where the grommet and short hose fits. I had reused the original as it looked fine. I decided to replace it with a new one, and apply a liberal amount of silicon sealer. There is also a clamp that goes around the hose which is not shown here.

I left this to set overnight.


Post# 700069 , Reply# 18   8/30/2013 at 20:39 (3,885 days old) by crouzet951 ()        

After much investigation, the second leak turned out to come from the drain hose where it attached to the pump outlet.

Looking at the attached image, the pump cover outlet on my machine (at left), was slightly out of round. It probably could have been reused, but as I had another good pump cover (right), it was used.

A new seal had been installed in the pump, so no leaks from there.


Post# 700071 , Reply# 19   8/30/2013 at 20:41 (3,885 days old) by crouzet951 ()        

I took the opportunity to reconnect the original drain hose from the machine, which was retrieved from my parents' house the week-end before.
Post# 700074 , Reply# 20   8/30/2013 at 21:09 (3,885 days old) by crouzet951 ()        

Right, there should be no more leaks, so onto the main motor.

The machine was again switched on, the water filled to the low mark and no leaks (yippee!), but the main motor was still dead. There was the awful contemplation of what could be causing it, and how difficult it would be to diagnose.

I took the motor off and checked the male terminals in the socket at the back of the motor, to ensure they were clean and tight. I also checked the resistance of both the field windings, and the armature while slowly rotating it. I had no idea of the correct resistance readings, but neither of them were open circuit.

The motor was reinstalled without the belt, and a quick spray of Electrolube was applied to both the socket and plug.

When the machine was turned on again, the motor started operating. It was very noisy, as would be expected after the commutator was skimmed and new brushes fitted, bur nevertheless, it ran.

I turned the machine off, reinstalled the belt, and turned it back on. The motor was dead again. AARRGH!

As a last resort the motor came off again, and I fitted my last pair of genuine Hoover brushes. Non-genuine new brushes had been fitted and perhaps this was the problem.

Reinstalled once again, it was still dead. When I say dead, the rest of the machine was working perfectly (filling, heating, pumping, and timer running), but the motor was not operating.

In final desperation, I lifted the rear of the machine about an inch and dropped it. The motor sprang to life.

I then tilted the machine, and with the timer at distribution, I compressed the clips and jiggled the plug in the back of the motor. Success! It could be made to stop and start when moving it.

The motor was taken off again and the male terminals were removed from the socked and cleaned properly, and the same was done with the female terminals in the plug. The motor was reinstalled, another light spray of electrolube, and the plug pushed home.

The machine was finally working. However, there were a couple more surprises in store. It was as if the machine was getting back at me for being left in the garage for all those years. Hehe.


Post# 700076 , Reply# 21   8/30/2013 at 21:23 (3,885 days old) by crouzet951 ()        

The machine was started on a programme and seemed to be running properly. That was until it filled to the high level before the initial pump out, when there was another leak. Unbelievable.

Looking under the machine, it appeared this time that either the rust repair, or the drain hose where it connects to the drum, were leaking, as water was running down the hose. After switching the machine off, and further investigation, the water seemed to be coming from the front of the drum. The front?

If you look at the attached image, at about the four o'clock position there is a noticeable gap between the seal and the inner drum. It turned out that the seal was slightly twisted where it was attached to the outer drum, hence the leak only when it filled to the high level.

The sad thing was, was that I attached the seal to the outer drum when it was out of the machine so this exact thing wouldn't happen. Simply amazing.

All fixed? No, the machine had one further little surprise.


Post# 700079 , Reply# 22   8/30/2013 at 21:39 (3,885 days old) by crouzet951 ()        

I forgot to take pictures of this so no images.

Not wanting the motor to run at spin speed much until the brushes had bedded in, I selected the B2 programme, which is the prewash high level fill at 50 degrees, than the main wash low level at 85 degrees. This would run the machine for a long time at wash and distribute speeds only, before spinning. The heat would also test everything for leaks, but as it turned out, leaking wasn't to be the problem.

When the very hot water was being pumped out following the low level wash, the water started pumping - but then it stopped. I looked at the drain hose, where no water was being pumped out (the drum was still half full of water), and looked at the pump, which was still running. It was a bit of a double take at first. This could only mean one thing, the pump impeller had come loose.

The water was drained out manually, and the three pump clips removed, The impeller fell out, as it had detached from the threaded insert still attached to the shaft. The very hot water must have expanded the impeller enough to detach it.

I didn't have a spare pump, so a small batch of the trusty Chemical Metal was mixed up, and the boss was glued back in place in the impeller. The repair was allowed to set overnight. I normally don't do 85 degree washes, but it has been perfect ever since at 50 degrees.


Post# 700080 , Reply# 23   8/30/2013 at 21:41 (3,885 days old) by crouzet951 ()        

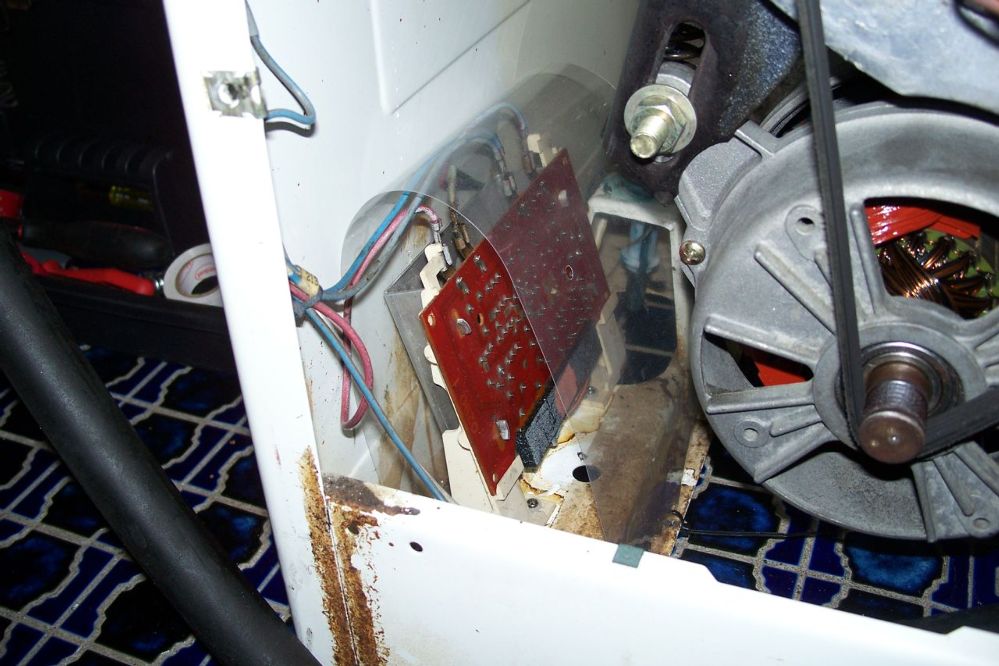
Some more images before closing the machine up.

The new module guard turned out well.

Post# 700081 , Reply# 24   8/30/2013 at 21:44 (3,885 days old) by crouzet951 ()        

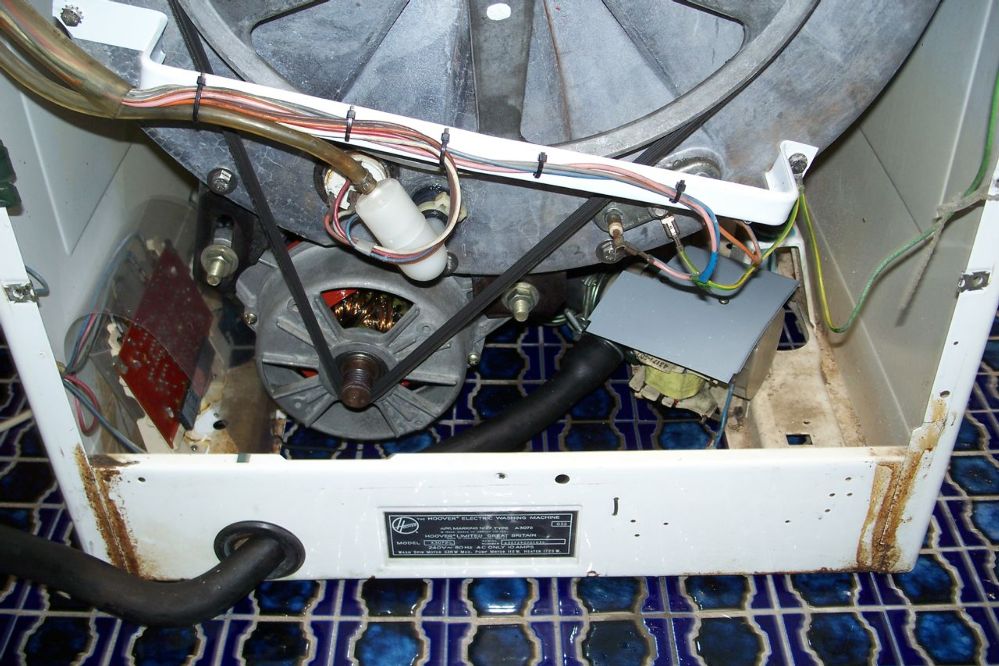
All looks good down here.

Two more holes were drilled in the wire support to allow another cable tie for the thermostat wires.

Post# 700082 , Reply# 25   8/30/2013 at 21:45 (3,885 days old) by crouzet951 ()        

Everything looks OK.

Post# 700083 , Reply# 26   8/30/2013 at 21:47 (3,885 days old) by crouzet951 ()        

Before the rear panel is attached.

Post# 700085 , Reply# 27   8/30/2013 at 21:49 (3,885 days old) by crouzet951 ()        

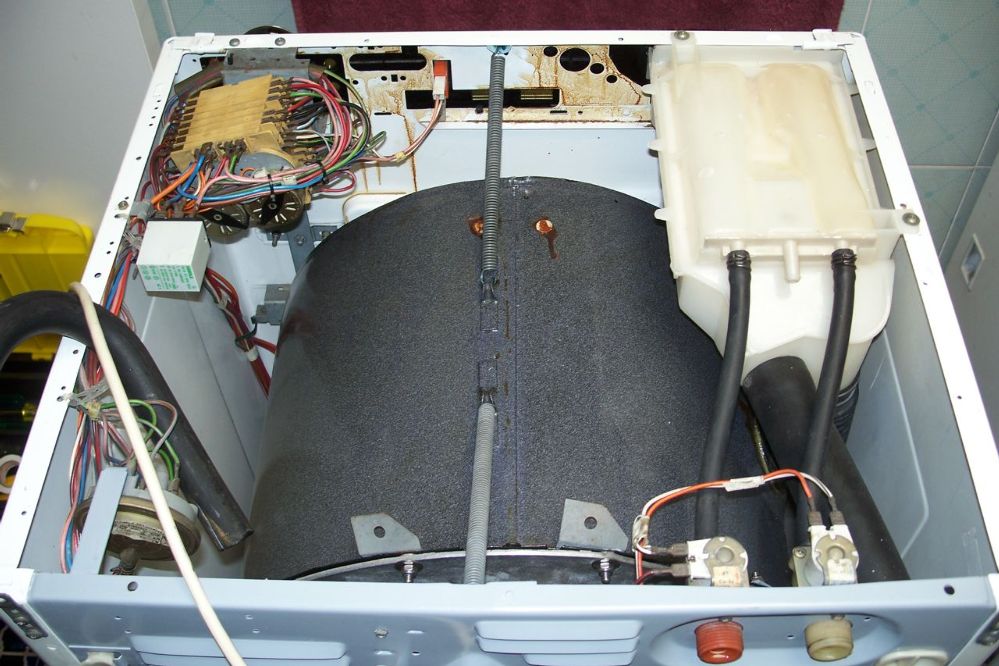
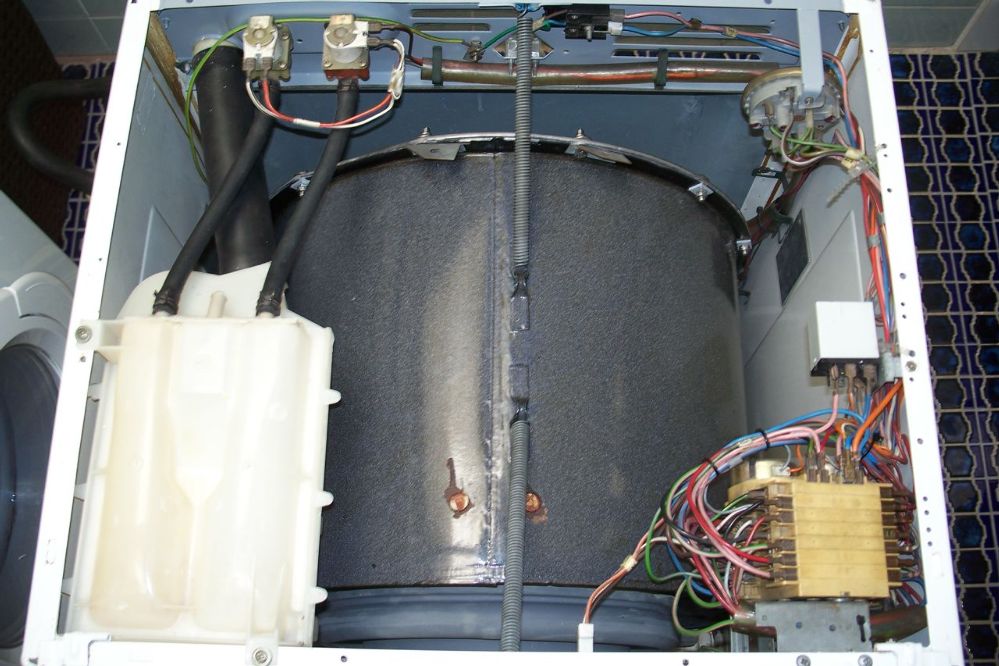
One last look inside from the front.

There is supposed to be a suppressor on the rear upper panel, but the new one hasn't arrived yet.

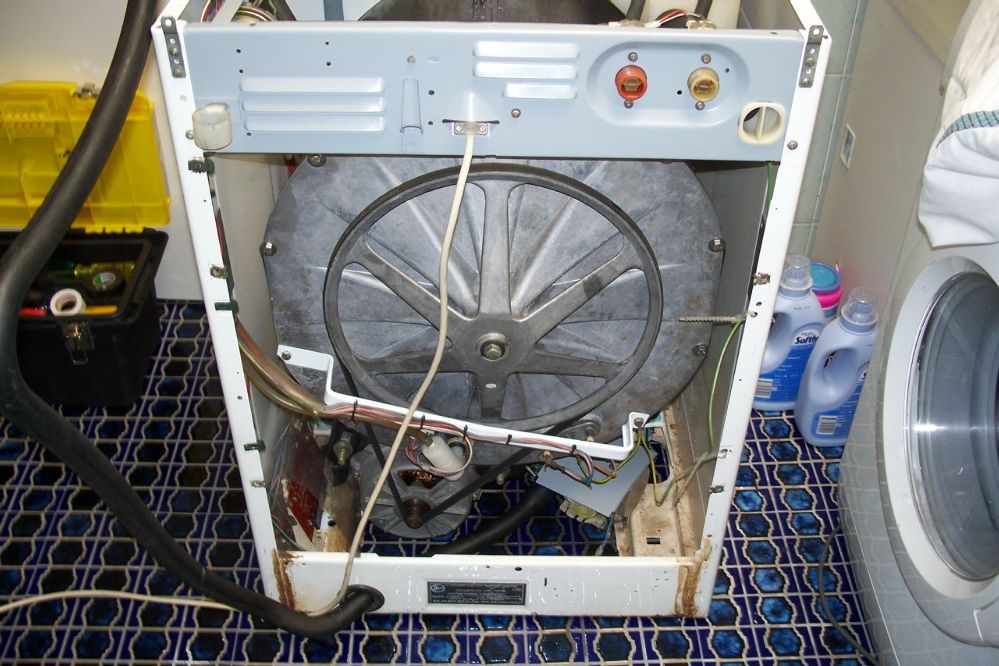
Post# 700086 , Reply# 28   8/30/2013 at 21:50 (3,885 days old) by crouzet951 ()        

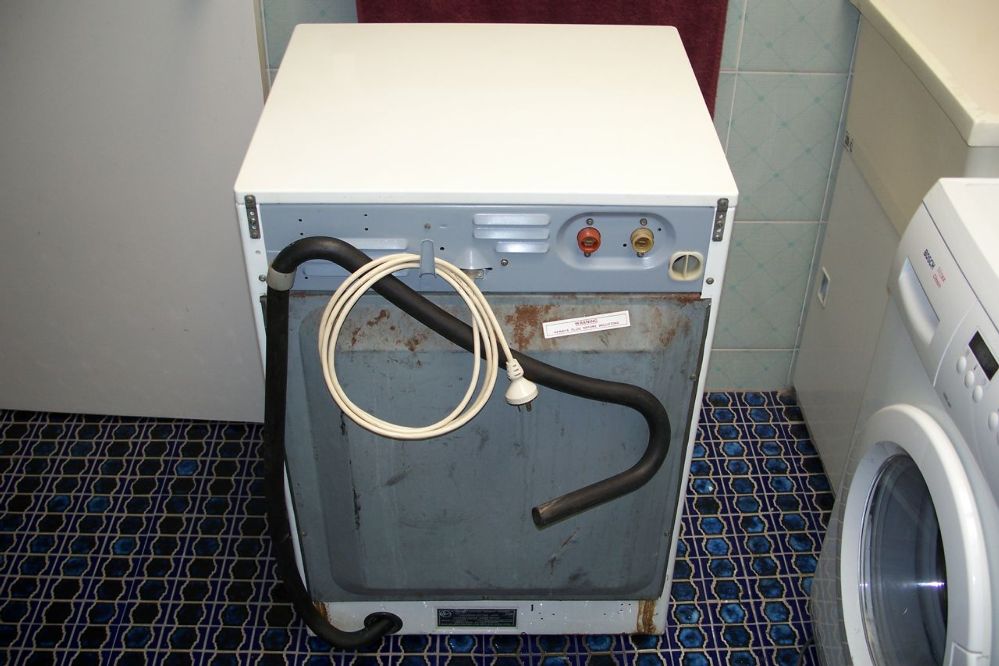
From the rear with the back panel and lid installed.
Post# 700087 , Reply# 29   8/30/2013 at 21:51 (3,885 days old) by crouzet951 ()        

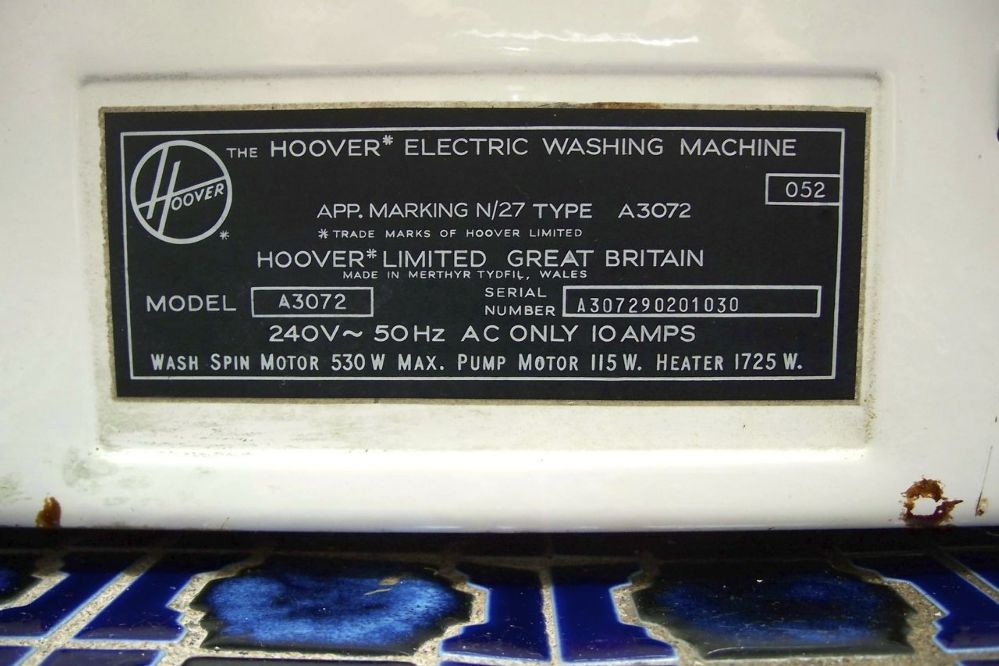
Manufactured in February 1979.

Post# 700090 , Reply# 30   8/30/2013 at 21:54 (3,885 days old) by crouzet951 ()        

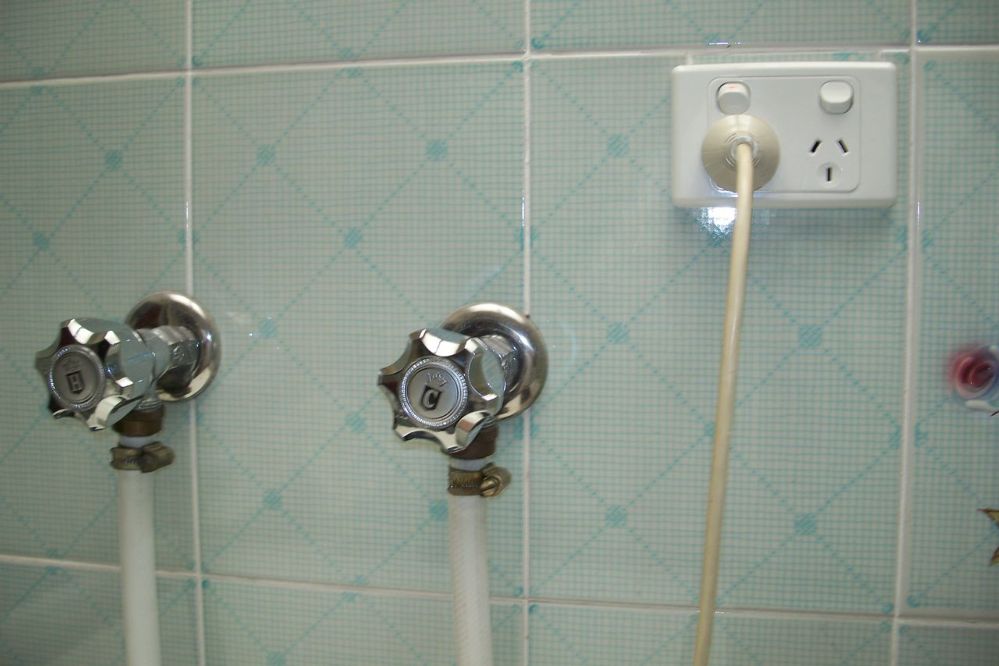
To complete the olde worlde installation, new hoses were made from bulk hose using the original brass fittings.

As can be seen, it's now running on hot and cold water

Post# 700093 , Reply# 31   8/30/2013 at 21:56 (3,885 days old) by crouzet951 ()        

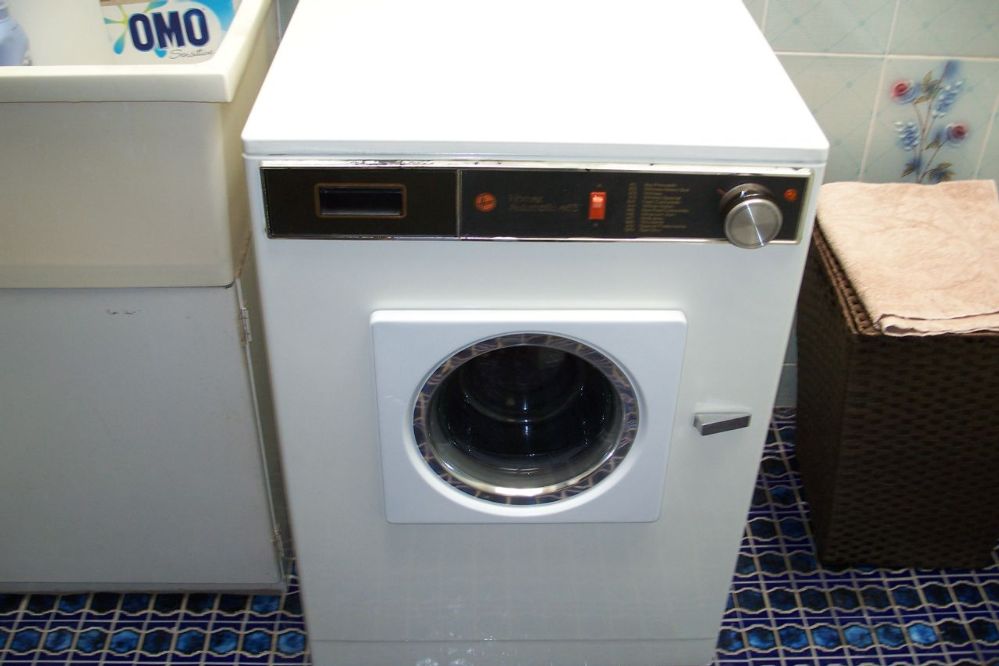
Finally, it's back in the correct space.

The paint on the cabinet has yellowed slightly over the 34 years, so unfortunately the door colour is a little jarring. My bathroom has two enormous skylights, so perhaps the door paint will mellow too in the sunlight.

Post# 700095 , Reply# 32   8/30/2013 at 22:00 (3,885 days old) by crouzet951 ()        

That's it folks.

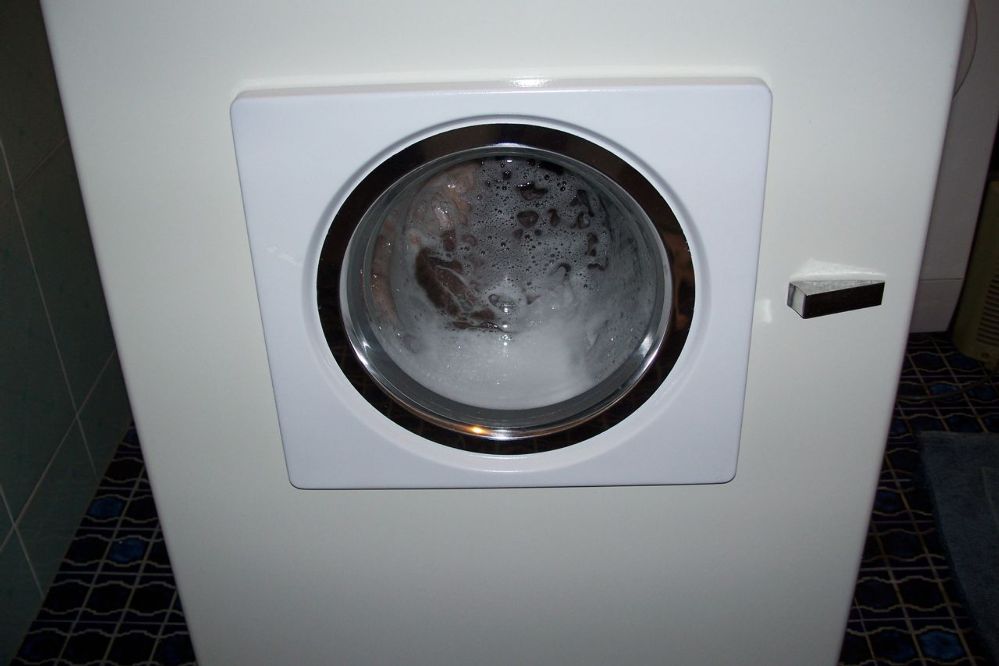
Just one last thought, I know it's not very ecologically responsible, but it's sooooo nice to see the clothes actually tumbling in visible water.

Thanks to everyone for their assistance.

Best wishes
John


Post# 700137 , Reply# 33   8/31/2013 at 01:14 (3,885 days old) by mrprojectionist ()        

Fantastic!

A great job!


Post# 700144 , Reply# 34   8/31/2013 at 02:12 (3,884 days old) by electron1100 (England)        
Well Done

electron1100's profile picture
I would like to congratulate you aswell an excellent job and machine
Gary


Post# 700152 , Reply# 35   8/31/2013 at 04:36 (3,884 days old) by fido ()        

Quite a labour of love! I hope the repair to the sump hose stub holds up with the vibration etc. If not, it could be welded at a later date. I suppose it is different when you are doing the restoration as an enthusiast rather than (as in my case) as a reconditioner. I would have fitted a modern universal pump, as the old type with the cooling fan will always end up leaking when the shaft and seal become worn.

Post# 700155 , Reply# 36   8/31/2013 at 05:17 (3,884 days old) by hotpoint95622 (Powys)        
hotpoint95622

hotpoint95622's profile picture
John

Bravo dear man bravo, excellent work and fine tuning of a magnificent machine I have been following this from the start, I have I job like this waiting to be started on a Hoover machine, just fantastic.

Lee


Post# 700157 , Reply# 37   8/31/2013 at 07:02 (3,884 days old) by chestermikeuk (Rainhill *Home of the RailwayTrials* Merseyside,UK)        
Hoover Oovah...

chestermikeuk's profile picture
John, congratulations on a great restore and for taking the time to show the complete process, its a labour of love with any of these machines getting them up and running again - has the Bosch been retired ?

Cant get over how good the motor looks for a strip down and paint job - glad to hear its working as it should...

What next - matching dryer on top?


Post# 700293 , Reply# 38   8/31/2013 at 20:22 (3,884 days old) by ronhic (Canberra, Australia)        

ronhic's profile picture
John,

Congratulations. Looks wonderful and I bet sounds great too!


Post# 700487 , Reply# 39   9/1/2013 at 18:52 (3,883 days old) by crouzet951 ()        

Hi to all

mrprojectionist, hotpoint95622 & ronhic

Thanks guys, and it really sounds great now that the brushes have bedded in.

fido

That's a good point about the pump. I'd too replace it with a new type pump if it was being fixed for someone else. The time and money I spent on the washer could never be justified on a commercial basis, as it really was a labour of love. Hehe.

chestermike

The Bosch washer will be stored in the garage for a while to see how the 455 holds up. It really is a great machine and has given no trouble over the six years of ownership. I'd recommend Bosch to anyone.

My ultimate plan is to stack the 155 dryer on top of the 455. I'd prefer to put them side by side, but there simply isn't room. The dryer will be dismantled before stacking to make sure it's free from lint and dust.

electron1100

Thank you for your great advice with the KURUST - Hammerite - Chemical Metal process. I wouldn't have known how to treat and patch the drum without it. I'll now keep an eye out for a later Aus washer with the stainless steel outer drum to keep as a spare.

When commencing the repair, the thing I dreaded most was getting the motor apart, but it turned out to be quite simple. It does look rather good with the red windings.

I'd also like to thank meadowbank for his advice about checking the distribution speed after playing around with the motor and module. I probably wouldn't have thought to do that. It turned out the speed was rather low at 77 rpm.

Cheers to all
John


Post# 700492 , Reply# 40   9/1/2013 at 19:22 (3,883 days old) by optima (Cumbria England)        
Hoover A3072

optima's profile picture
I am enjoying everything about this thread. Thank you for the step by step re-build of this classic Hoover Autowasher.

Post# 700621 , Reply# 41   9/2/2013 at 12:41 (3,882 days old) by sesteve (London, UK)        
Haynes manual

sesteve's profile picture
Hey John

This restoration has been fantastic and hope you are really pleased with the result. The thread has been like the Haynes manual for repair but much much better and in colour too. Well done and love the fact it has its original drain hose. That's one of my pet subjects lol

Happy washing in it
Steve :)


Post# 700650 , Reply# 42   9/2/2013 at 15:21 (3,882 days old) by chestermikeuk (Rainhill *Home of the RailwayTrials* Merseyside,UK)        
"original drain hose

chestermikeuk's profile picture
ha ha, Steve, I keep a spare original in the boot for filming, its just not right seeing those grey things...

You`re right about the Haynes manual, better in colour!!


Post# 701039 , Reply# 43   9/4/2013 at 06:04 (3,880 days old) by crouzet951 ()        

Hi optima, sesteve, and chestermikeuk

I'm glad you enjoyed the restoration. I too prefer the original drain hose. Replacement plastic hoses do look strange on the early machines, eventhough they're so much more flexible than the original.

The washer gave me another scare the other night. I was doing an actual real load of washing, and when it came time to remove the clothes, the floor was wet in front of the machine.

With heavy heart I pulled the machine out from the wall, leaving the hoses connected to have a look. The screwdriver was in my hand to remove the back panel again, when I noticed water was dripping from the hot hose. It seems my olde worlde hoses made from bulk hose and screw clamps, had produced an olde worlde leak. The hot water flowing through the hose must have softened it and allowed a leak at the tap end clamp. A quick tighten up of the hose clamp stopped the leak. Whew! I also nipped up the other clamps.

The machine's really sounding good now that the brushes have quietened down. Here's hoping for many reliable years, or a few at least. Hehe.

Cheers
John


Post# 701185 , Reply# 44   9/4/2013 at 16:19 (3,880 days old) by supermaticjames (Donegal, Ireland)        

Congratulations on your big restoration job I'm proud of your patience, labour and effort!

Post# 701304 , Reply# 45   9/5/2013 at 01:52 (3,879 days old) by mattywashboy (Perth, Western Australia)        

mattywashboy's profile picture
Looks great! What a labour of love but so worth it im sure. Great to see another australian representing this side of the hemisphere!

Enjoy!

Matt


Post# 701912 , Reply# 46   9/8/2013 at 02:51 (3,876 days old) by crouzet951 ()        
Supressor

Hi to all

supermaticjames & mattywashboy

Thanks guys. It must be admitted that my patience almost left me a couple of times - especially with the leaks!! Hehe.

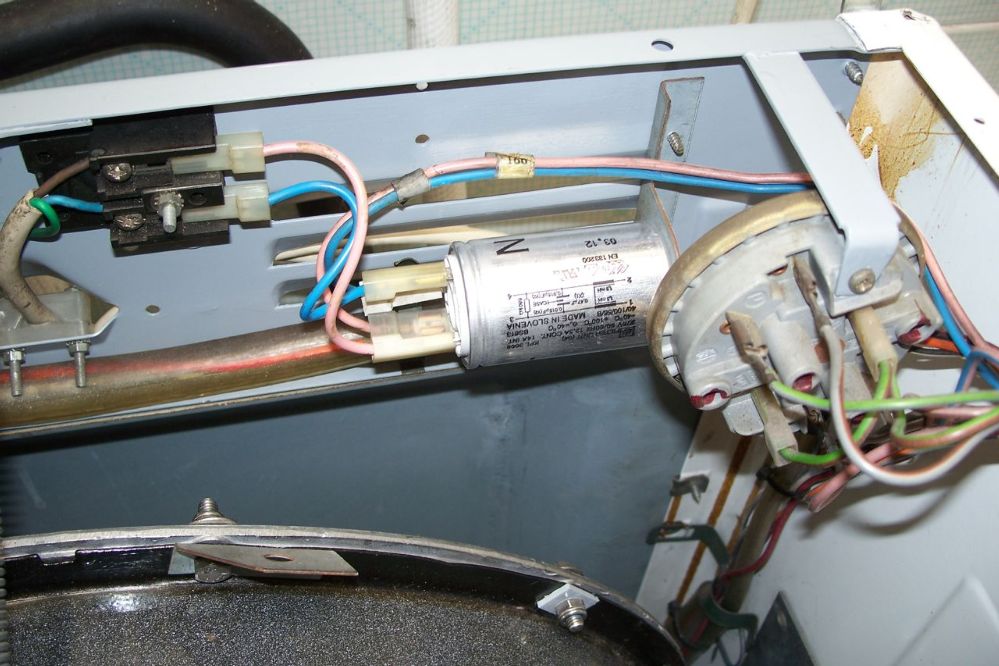
Just a few more pictures, as the new suppressor arrived from the UK.

About 10 years ago, the original suppressor had burst open. This was announced by a very loud bang, and clouds of smoke. I'd say that moisture must have got in. It happened to someone else on Discuss-o-Mat at the link.

The washer was run for several years without the suppressor, but I'd rather have one installed. As can be seen, the new suppressor has four terminals, rather then the two leads and two terminals of the original.


CLICK HERE TO GO TO crouzet951's LINK


Post# 701913 , Reply# 47   9/8/2013 at 02:54 (3,876 days old) by crouzet951 ()        

As mentioned before, I have some old matchbox washer wiring looms, so it was easy to make up a couple of correctly coloured leads with the proper insulators.
Post# 701914 , Reply# 48   9/8/2013 at 03:03 (3,876 days old) by crouzet951 ()        

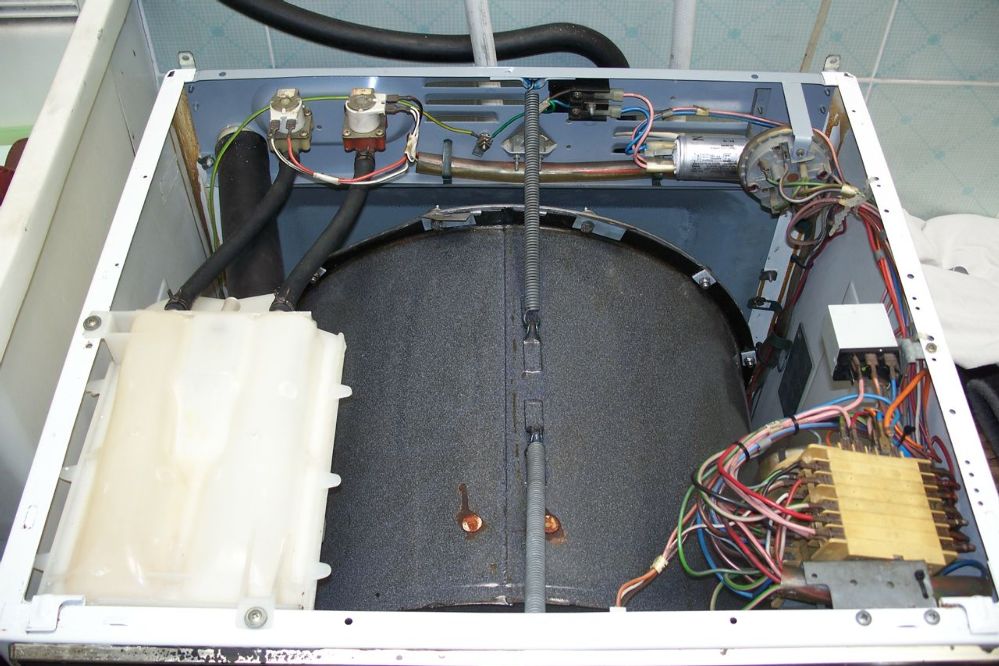
I stood well clear when turning on the power, but the new suppressor didn't explode. Whew!

The motor brushes have now fully bedded in, and the machine is running beautifully. Thanks for all the comments and encouragement.

Kind regards
John

Post# 702111 , Reply# 49   9/8/2013 at 19:07 (3,876 days old) by optima (Cumbria England)        

optima's profile picture
Loving this thread John

The amount of work & determination you have put in to this just so great !!!

Craig-


Post# 703367 , Reply# 50   9/15/2013 at 09:31 (3,869 days old) by matchboxpaul (U.K)        

Hi John.

Apologies for delayed response to your repair threads - am certainly playing catch up at the moment!

The machine looks in excellent fettle and thankyou for the photographs, which will certainly prove a useful reference point for when the time comes to deal with mine and Mathews 3236H.

Though the 3236H's tub is still hopefully watertight underneath, there is rather a lot of rusty marks on top of the tub, which will have to be sorted when life is a bit more settled for me (currently in the throes of buying a house).

We have an A3058 from the post Matchbox UK machines and it has a leaky tub down below, so you repairs with Gary's recommended products, will be a good starting point for repair.

Seeing your A3072 with an empty bodyshell reminds me of my dad's last repair to our 3236H. Its innards were arranged all over the garage floor, with its empty cabinet stood in the kitchen for a few days. Would have been 1985 and it received a new backplate during that repair - was then despatched to my aunts for a few more years service, before finally giving in around 1989ish.

For the last couple of years I had been trying to find a decent photograph of Australia's Automatic 455 and I just could not find one. Then over the last 6 months, Leon managed to acquire one and then you introduce us to your machine and its rebuild. Has been a real treat to be introduced to your machine.

Be sure to update us further with progress and news of the 155 dryer!
Paul


Post# 703369 , Reply# 51   9/15/2013 at 09:42 (3,869 days old) by matchboxpaul (U.K)        

Below is the URL that takes you to the only image I had of a 455, prior to yours and Leon's machines surfacing.

The hard to find newspaper archive part of google has some good adverts in them - happy searching!


CLICK HERE TO GO TO matchboxpaul's LINK


Post# 703723 , Reply# 52   9/17/2013 at 18:34 (3,867 days old) by crouzet951 ()        

Hi folks

Craig

Thanks again. Keep an eye out for the 155 dryer clean-out. It should only need a vacuum out, as quite a bit was done to it when it first arrived.

Paul

Good luck with buying the new house. Does that mean you'll have to move all your machines?

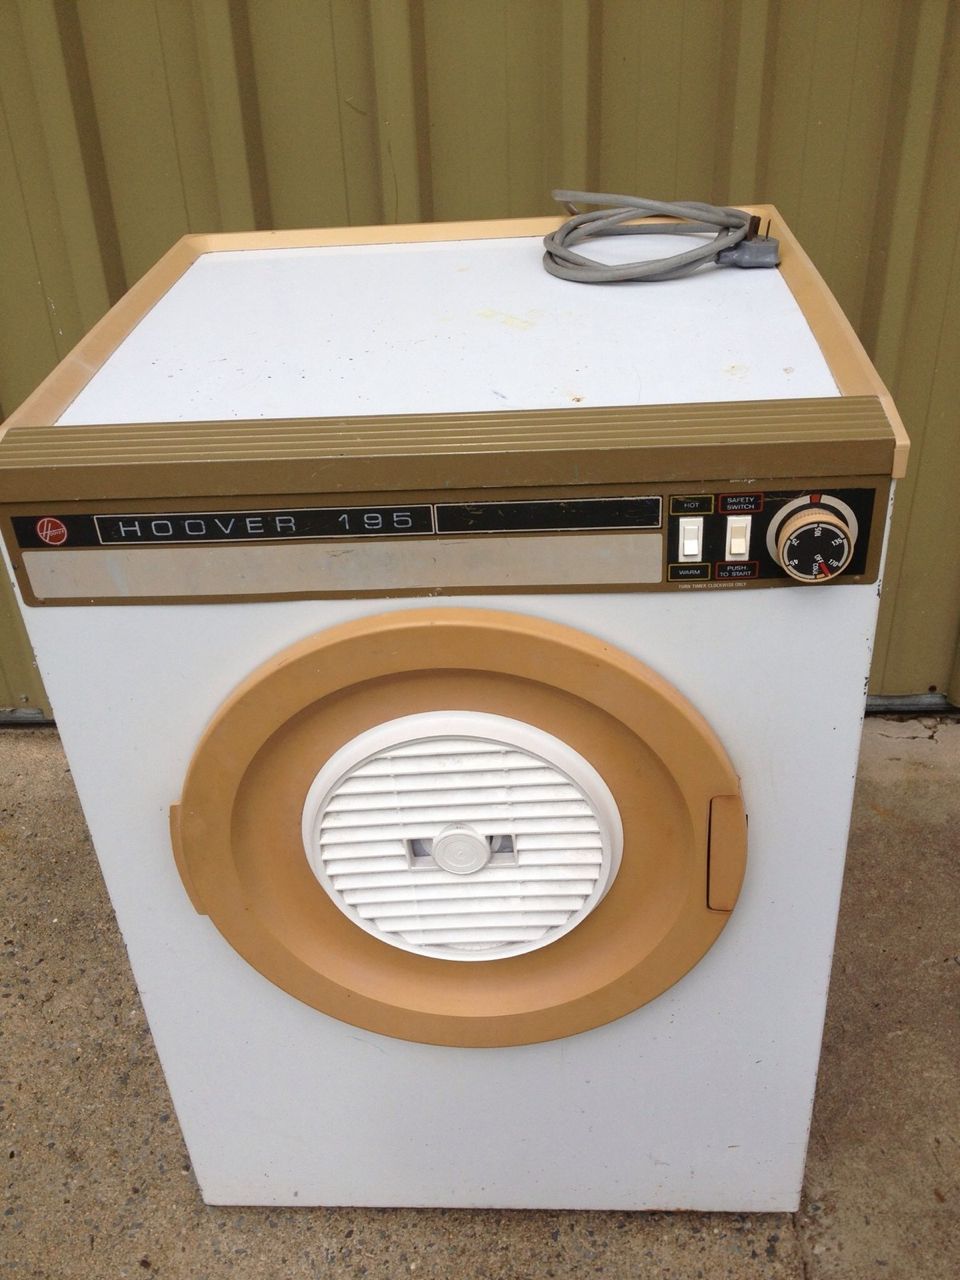
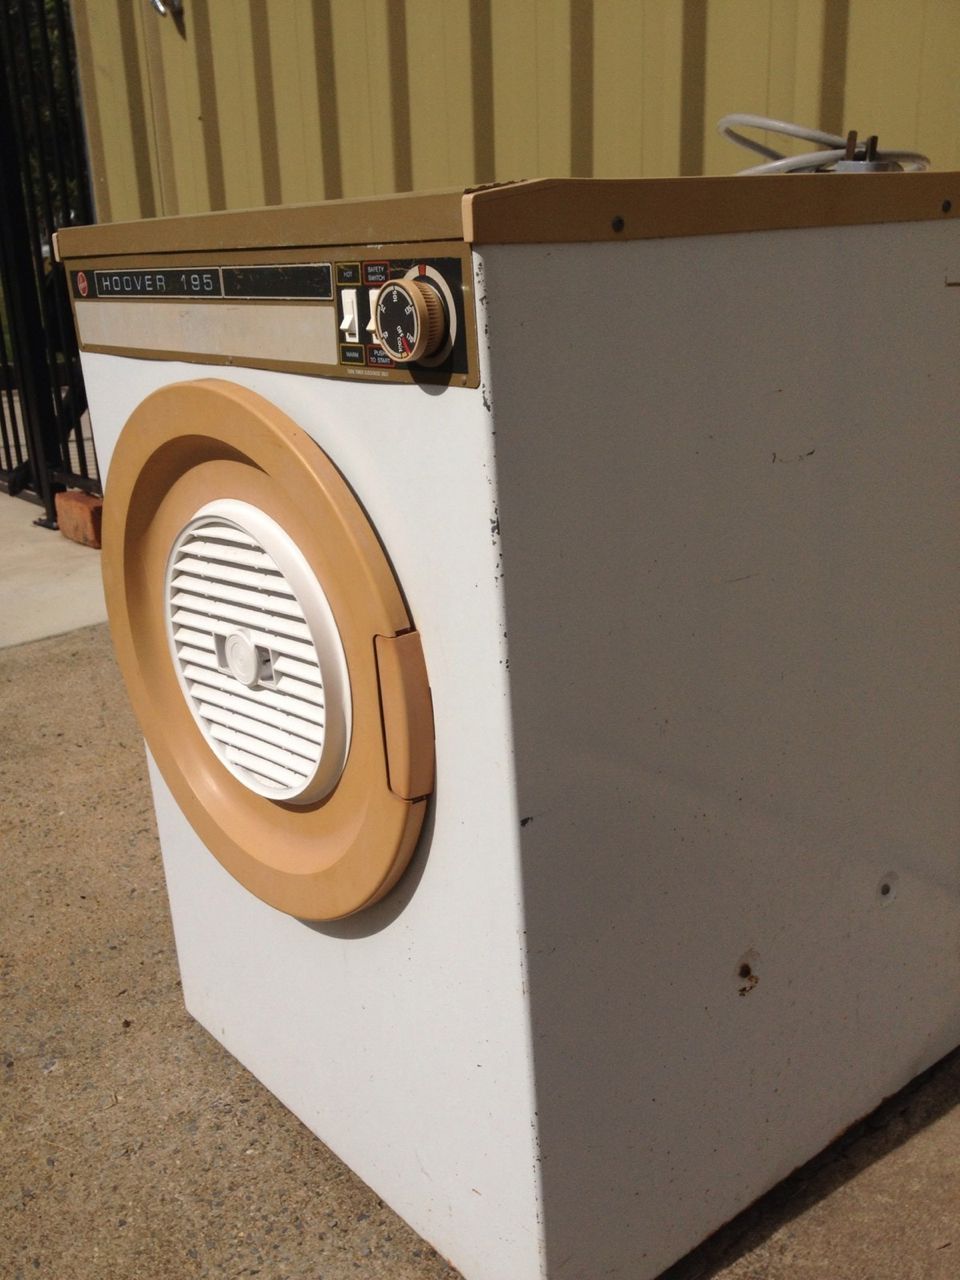
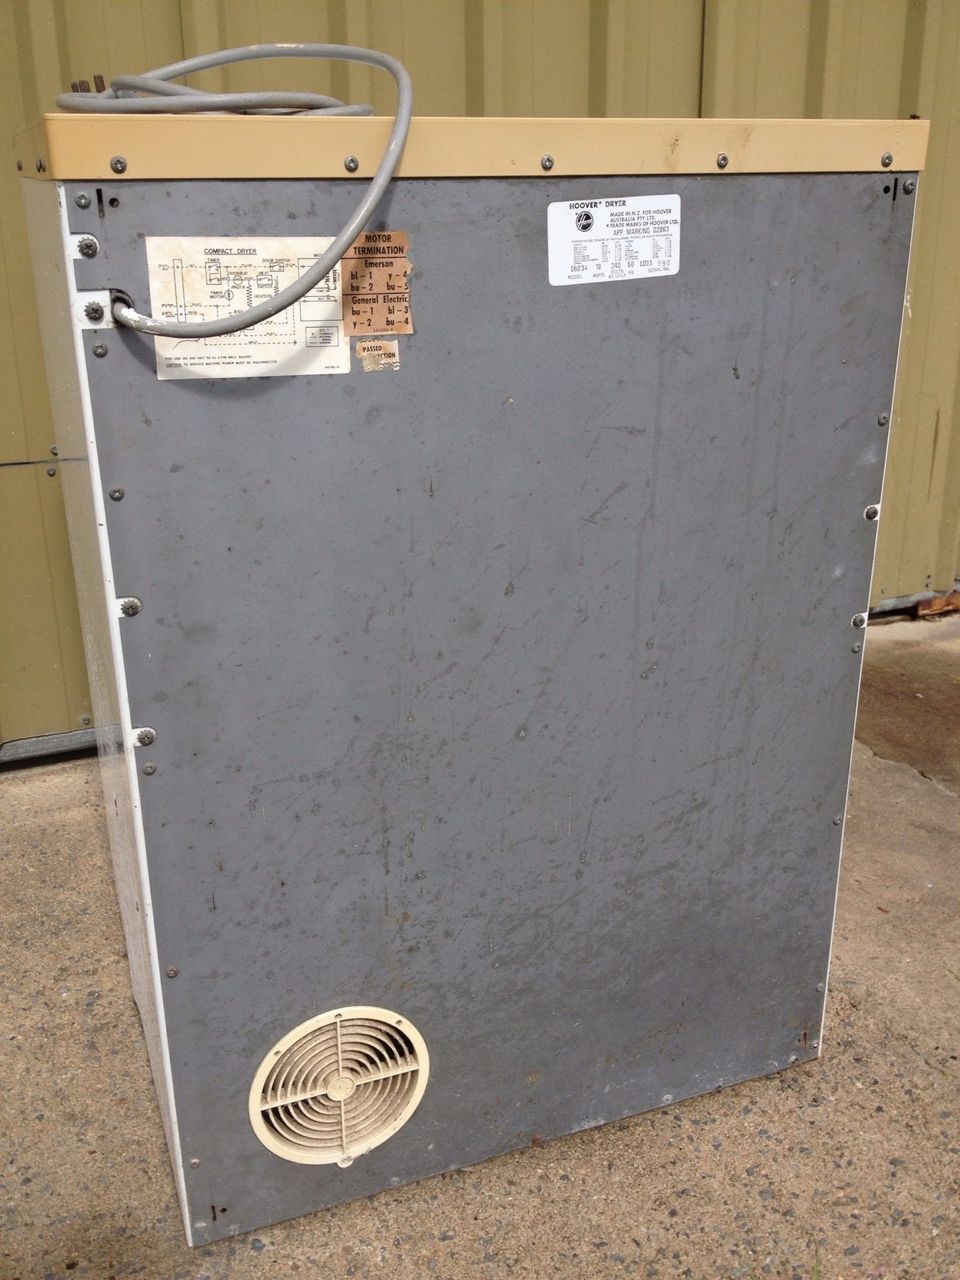
Thanks for the fantastic newspaper reference, as it's somewhere I'd never thought to look. You'll notice in the ad that there's a Hoover dryer. It's a bit hard to see but it's a 195.

A few months ago there was an auction for one of these on Aus eBay. I'd never seen one before, and I presume it's the first model of Hoover dryer designed and made in Australia, with a colour scheme to match the big 600 series top loaders. Someone on the board may have more information on this. Even the model number sort of fits into the naming convention. The lack of the 155 dryer in the ad seems to reinforce my view that the UK built 155 and 165 dryers were quite expensive niche items at the time.

Luckily I kept the images of the 195 from the auction.

On a last note, if you or someone else on the board could assist me, I have some queries about the A3058 shown in your posting at the link. It's regarding the neon light on the front of the machine.

Does the light indicate that the machine is running, or does it indicate that the heater is heating?

If it is the former, does the light extinguish when the cycle is finished, and the control knob is still out?

If it does indicate the machine is running, would you have a wiring diagram that indicates what terminal the black/white lead connects to. The blue lead is no problem as it's the neutral wire.

Thanks again to all, and happy washing.

Regards
John


CLICK HERE TO GO TO crouzet951's LINK


Post# 703724 , Reply# 53   9/17/2013 at 18:35 (3,867 days old) by crouzet951 ()        

Hoover 195 image 2

Post# 703725 , Reply# 54   9/17/2013 at 18:36 (3,867 days old) by crouzet951 ()        

Hoover 195 image 3

Post# 703727 , Reply# 55   9/17/2013 at 18:40 (3,867 days old) by crouzet951 ()        

Hoover 195 image 4

Sorry folks, looking at the plate on the back it appears the dryer was made in New Zealand, and the model no is D6034.

I should look at my own images before posting. Hehe.

Post# 703819 , Reply# 56   9/18/2013 at 05:46 (3,866 days old) by chestermikeuk (Rainhill *Home of the RailwayTrials* Merseyside,UK)        
Hoover A3058

chestermikeuk's profile picture
Hi John, the Hoover A3058 orange indicator on the fascia indicates the "Mains On", have scanned the wiring diagram if thats any help for you,


Post# 703827 , Reply# 57   9/18/2013 at 06:52 (3,866 days old) by chestermikeuk (Rainhill *Home of the RailwayTrials* Merseyside,UK)        
Hoover a3058

chestermikeuk's profile picture
And heres a pic of the later A3100 said washing machine to compare.


Post# 703828 , Reply# 58   9/18/2013 at 06:54 (3,866 days old) by chestermikeuk (Rainhill *Home of the RailwayTrials* Merseyside,UK)        
A3100

chestermikeuk's profile picture
Britains Best Selling 800

Post# 703846 , Reply# 59   9/18/2013 at 09:13 (3,866 days old) by gizmo (Victoria, Australia)        

I'm pretty sure those NZ made Hoover dryers are actually Fisher and Paykel.

Post# 704204 , Reply# 60   9/20/2013 at 05:56 (3,864 days old) by crouzet951 ()        

Hi Mike

Many thanks for the scanned circuit diagram. I thought that might be the case for the neon.

It's interesting in the circuit diagram that it shows there's a third water inlet valve for fabric conditioner. The valve is connected to terminal 12C, which does not exist on my timer. The A3058 shown in the thread at the link definitely has no third inlet valve, so perhaps the diagram is for a later revision of this model, hence the 'E' suffix in Crouzet 951E.

Thanks also for the scanned brochure. Oh how I'd love an A3062 Keymatic. Sigh!

Hi Gizmo

You are probably correct that the dryer was made by Fisher & Paykel. Just today I was checking out the laundry appliances at David Jones (an upmarket Australian department store), and there was a Fisher & Paykel dryer that was remarkably like the Hoover 195 from all those years ago. An image is attached. I wonder if Hoover Aus licensed the F&P design as the basis of their later Aus made Apollo dryers.

Cheers to all
John


CLICK HERE TO GO TO crouzet951's LINK


Post# 704216 , Reply# 61   9/20/2013 at 08:01 (3,864 days old) by chestermikeuk (Rainhill *Home of the RailwayTrials* Merseyside,UK)        
Crouzet Timer 951

chestermikeuk's profile picture
Hi John, yes the 951 covers the 3006 and previous models, the 951E as you say does have the 3rd valve for fabric conditioner dispensing, the E being Electronic..

Heres the Crouzet 951 sheet..


Post# 704220 , Reply# 62   9/20/2013 at 08:09 (3,864 days old) by chestermikeuk (Rainhill *Home of the RailwayTrials* Merseyside,UK)        
Hoover Timers Reference Sheet

chestermikeuk's profile picture
Hers the grid guide, you can also identify the two and three compartment dispensers, hope this helps...

Post# 704241 , Reply# 63   9/20/2013 at 10:58 (3,864 days old) by electron1100 (England)        
Poxy Door Interlocks

electron1100's profile picture
hmm just link out the two black wires on the motor module and the suppressor and hey presto no door delay on finishing, yahhhhhhhhhhh ;-)

Ps you don't have to do this but I hate them

Good luck
Gary


Post# 704310 , Reply# 64   9/20/2013 at 19:13 (3,864 days old) by crouzet951 ()        

Hello to all.

Mike

Thanks again for the great diagrams.

Duh! (whacks head) Now I see what "3 Comp" means on the 951E diagram. Three compartments!

The 951E diagram is also interesting in that it shows alternative door interlocks. My 455 has the three wire interlock, but two of the wires are different colours to the 951E diagram.

On the grid guide, I am surprised to see that some washers changed to the AC motor (and AC module presumably) during their model lives. Is it confusing to ascertain whether the washer being worked on is DC or AC, or did the AC models always have the Crouzet timer? I suppose this would really only be an issue if the motor or module needed to be replaced.

I note from the grid guide that the A3090 has only 10 programs (Bio Prewash & Whites Special are missing), though with a 951 timer. As Whites Special is really just Whites with the spin-hold switch on hold, I wonder did Hoover just not mark the Bio Prewash program on the knob, or were there other changes to the timer. On the 951 circuit diagram, the A3090 doesn't appear to have any wiring differences to the other models.

It would be interesting to see an A3090 control knob up close to see if there is a gap where Bio Prewash would normally be, and if this is so, to be able to check if this unmarked position can be selected. If this hidden position can be selected, it seems to me that this model having only 10 programs was done for marketing reasons, seeing this was the bottom of the range model at that time.

Gary

An interesting idea. Presumably the active wire would be just taped back, and the other two wires would be joined to bypass the three-wire interlock. I am forever grateful that my washer has a mechanical interlock, as these days I'd be stupid enough to open the door without thinking when the machine's on hold.

The washer's still going well. I'm amazed at how quickly it heats the water now. I guess removing all the years of scale from the element might have something to do with that.

Cheers and thanks.
John


Post# 834422 , Reply# 65   7/29/2015 at 17:30 (3,187 days old) by mikeymatic (Manchester UK)        
Very impressive !

mikeymatic's profile picture
Just read your posts on your 455 refurb from a couple of years ago - what a fantastic job you've done.

Is it still going strong ?

I've just started on a Hoover Logic A3670 - it's my first big overhaul - your posts have given me lots of inspiration and motivation, and some great tips.

Would love to hear how the 455 is doing, being a fan of Hoover Washing Machines and Oz !

Mike.


Post# 1160374 , Reply# 66   9/25/2022 at 11:40 (572 days old) by chetlaham (United States)        

chetlaham's profile picture
Question. When you pull off the leads to the timer, how do you know where to reconnect them? How do you go about changing a timer in a UK or EU based machine?

Post# 1160488 , Reply# 67   9/27/2022 at 03:43 (570 days old) by Ricky5050 (Durham Britain)        
Photos.

ricky5050's profile picture
Hi when changing a timer take lots of photos from all angles. And draw a simple diagram of needed. Some times the cables are on blocks which is easier as they often only fit one way. Some are lord of wires. Some don’t need to come off until after the timer is or I’ve bridging wires so leave them until the timers out and on a bench

Good luck


Forum Index:       Other Forums:                      


Comes to the Rescue!

The Discuss-o-Mat has stopped, buzzer is sounding!!!
If you would like to reply to this thread please log-in...

Discuss-O-MAT Log-In


New Members
Click Here To Sign Up.


automaticwasher.org home
Discuss-o-Mat Forums
Vintage Brochures, Service and Owners Manuals
Fun Vintage Washer Ephemera
See It Wash!
Video Downloads
Audio Downloads
Picture of the Day
Patent of the Day
Photos of our Collections
The Old Aberdeen Farm
Vintage Service Manuals
Vintage washer/dryer/dishwasher to sell?
Technical/service questions?
Looking for Parts?
Website related questions?
Digital Millennium Copyright Act Policy
Our Privacy Policy