|
Thread Number: 66323
/ Tag: Vintage Dryers
Maytag center dial dryer ID- 806? |
[Down to Last] |
Post# 889262 7/13/2016 at 14:17 (2,840 days old) by Lowefficiency  (Iowa) (Iowa) |
||

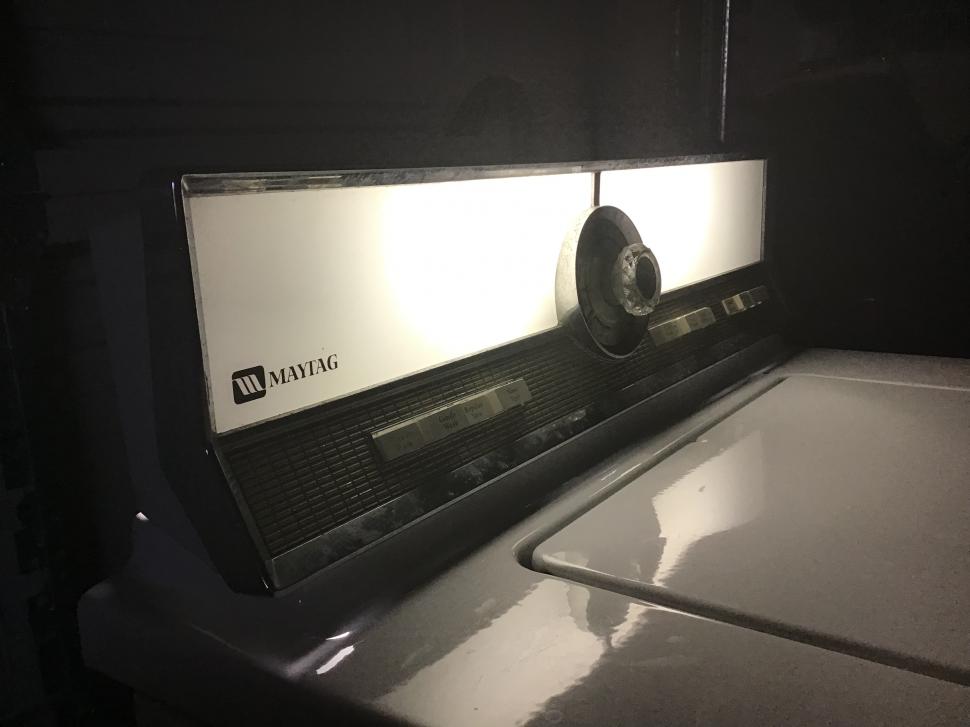
Hey everyone. This isn't the best picture, but can anyone identify this Maytag dryer from the dial? I'm pretty new to this, but does the split above the dial indicate that this was one of the models that had the backlit panel?
It looks like the dial has just a few options, and then a large section for "electronic control"... Is this an 806? Thanks! | ||

|
|
Post# 889264 , Reply# 1 7/13/2016 at 14:21 (2,840 days old) by swestoyz (Cedar Falls, IA) |
||
 | ||
|
Post# 889273 , Reply# 2 7/13/2016 at 15:49 (2,840 days old) by Volvoguy87 (Cincinnati, OH) |
||
DE806
That is a DE806, electric Halo of Heat dryer, and it is an oddball. It is odd because it is one of the last produced as it has a gold colored control panel instead of a blue one. There is no gas access door on the front, so this is an electric dryer.
It is entirely electronically controlled, it is impossible to set a specific time. 806 dryers have their fans (I am one) and their detractors. I find it to be extremely accurate and always drys things just right. Dave | ||
|
Post# 889275 , Reply# 3 7/13/2016 at 15:56 (2,840 days old) by DADoES (TX,�U.S. of A.) |
||
|
| ||
|
Post# 889322 , Reply# 4 7/13/2016 at 22:41 (2,840 days old) by Lowefficiency (Iowa) |
||
|
| ||
|
Post# 889330 , Reply# 5 7/14/2016 at 01:35 (2,840 days old) by rp2813 (Sannazay) |
||
 The most efficient, most accurate, most user-friendly set-and-forget, quietest, fastest, and best dryer we've ever owned was a mid-'70s DG806 HOH that we acquired for a daily driver when it was a dozen or more years old.
I wish I knew about this group when the bearing was failing and the screeching was intolerable because we might still have that dryer now, with an 806 washer to match. Alas, we didn't even own a computer yet. | ||
| Post# 889338 , Reply# 7 7/14/2016 at 05:39 (2,839 days old) by mrb627 (Buford, GA) | ||
Temps | ||
|
Post# 889490 , Reply# 8 7/15/2016 at 10:56 (2,838 days old) by Lowefficiency (Iowa) |
||
|
Malcolm- I was wondering the same thing, and after some searching, I found this post from Bob (appnut):
------------------ www.automaticwasher.org/cgi-bin/T... Post# 838926 , Reply# 3 8/31/2015 at 11:06pm by appnut Keith, although this was the TOL, it only had one drying temperature--"low" or delicate. Lower models had regular and delicate. The 806 was viewed as an all-fabric heat setting. The Perm Press was also intended for loads one wanted to have extra dry. The moisture sensor was calibrated for the extra dryness. It had to do with the way perm press fabrics were processed and treated back then. they needed a higher bit of heat to relax wrinkles. It also had a longer cool down than regular fabrics. Many I knew who owned this dryer, the pretty much just left it on the Perm Press setting. ------------------ | ||
|
Post# 891108 , Reply# 9 7/26/2016 at 12:39 (2,827 days old) by Lowefficiency (Iowa) |
||
|
It's here!
Well, it took a little coordination, but this DE806 is now sitting in my garage!!
I spent a few hours checking it out and giving it the basic outside/inside cleaning. It's in surprisingly good shape, and really didn't have very much loose lint inside the cabinet. The belts have take a shape around the small pulleys, so it must not have been run for a while. I'll probably replace them, and keep these as spares. I wired it up for 110V for testing, following the instructions in this thread: Thread Number: 42684 "Coverting a Maytag model de308 220V dryer to 110V" www.automaticwasher.org/cgi-bin/T... It started right up and sounded horrible, so I shut it down. A little bit of searching led me to this thread: Thread Number: 32586 "Tuning up the DE306 Dryer" www.automaticwasher.org/cgi-bin/T... Where I learned that the back panel needs to be installed to keep things in alignment, otherwise the drum will rub on the case. Whoops!! Put the panel back on, and it purrs along quietly. :-) Rookie mistake. The drum light worked, but I had to replace both the tube and the starter to get the fluorescent panel light operable. It might be a gimmick, but it's cool. :-) Next steps are to take it apart further, check that front felt seal, oil everything that needs it, and change the belts. I'll run some tests as well on that capacitor, and replace it if I need to. Then all I have left is to find a matching washer! | ||
|
Post# 891110 , Reply# 10 7/26/2016 at 12:47 (2,827 days old) by Lowefficiency (Iowa) |
||
|
And Ben, you were correct with your date estimate. It's a "WS" date code on the serial number, which looks like it means this dryer was made in August of 1975.
(Based on the info from this thread) Thread Number: 41918 "My Maytags" Birthdate" www.automaticwasher.org/cgi-bin/T... | ||
|
Post# 891117 , Reply# 11 7/26/2016 at 13:48 (2,827 days old) by rp2813 (Sannazay) |
||
|
. . . it purrs along quietly. | ||
|
Post# 891877 , Reply# 12 7/31/2016 at 21:45 (2,822 days old) by Lowefficiency (Iowa) |
||
|
Ok, I had a few minutes and was able to do a bit of disassembly. I was a bit surprised, the front felt seal is still intact. I don't see any signs of damage, but it might not be 100% secure judging from the part I tried pulling on gently.
What do you guys typically do in this situation? Should I just re-glue this existing seal, or should I replace it with a new one?
View Full Size
| ||
|
Post# 891935 , Reply# 13 8/1/2016 at 08:05 (2,821 days old) by panthera (Rocky Mountains) |
||
Wow! That is so cool. I've never seen these as too small - but, then, I like my loads slightly undersized so items tumble freely. What a great find! Regarding the felt, how 'loose' is loose? My feeling is, if you've gone this far, you might want to replace the major causes of failure, felt seal, capacitor, rear bearing. That capacitor should definitely be replaced. Even if it's still 'good' now, it's way way, far and away out of it's expected lifespan. While I'm not quite sure it's right to call this system 'electronic', it's a well thought out and extremely accurate control. | ||
|
Post# 891946 , Reply# 14 8/1/2016 at 08:55 (2,821 days old) by Lowefficiency (Iowa) |
||
|
>>My feeling is, if you've gone this far, you might want to replace the major causes of failure
Absolutely. The intention is to put this dryer back into regular service, so I'd rather do any preventative maintenance while it's outside here in the garage, BEFORE I haul it upstairs and replace the other dryer. :-) This is my first HoH dryer, so I'm reading everything I can to figure out what should be looked at. The capacitor is a Maytag-branded capacitor, so it's either an original or a factory replacement. I've read that the factory changed the value of this capacitor during the production run, so I'll have to find that reference again to make sure I get the correct value. I also remember reading something about the pulley on the motor, and one type (I think it was the steel version?) being preferred for some reason? | ||
|
Post# 891948 , Reply# 15 8/1/2016 at 09:12 (2,821 days old) by Lowefficiency (Iowa) |
||
|
A few quick before/after pictures. It cleaned up pretty nicely without too much trouble, I'll give it a light buffing to fix a few areas and make it shine before installing it.
| ||
|
Post# 891950 , Reply# 16 8/1/2016 at 09:19 (2,821 days old) by Lowefficiency (Iowa) |
||
|
This is what the heating element looks like. It's functional, and I've vacuumed out the lint. Is the rust on the heat shield anything to be concerned about?
View Full Size
| ||
|
Post# 891953 , Reply# 17 8/1/2016 at 09:27 (2,821 days old) by Lowefficiency (Iowa) |
||
|
And I love helpful repair notes like this one! I have a few loose connectors to re-crimp or solder in place on the control module.
View Full Size
| ||
|
Post# 891962 , Reply# 18 8/1/2016 at 10:14 (2,821 days old) by Lowefficiency (Iowa) |
||
|
No lint whatsoever behind the fan! Perfectly clean! :-D
View Full Size
| ||
|
Post# 891992 , Reply# 19 8/1/2016 at 11:36 (2,821 days old) by panthera (Rocky Mountains) |
||
|
The rust | ||
|
Post# 892260 , Reply# 20 8/2/2016 at 16:56 (2,820 days old) by goatfarmer (South Bend, home of Champions) |
||
The pictures
| ||
|
Post# 892415 , Reply# 21 8/3/2016 at 19:20 (2,819 days old) by Lowefficiency (Iowa) |
||
|
Perfect, thanks!
So I would need a little paint or a panel swap for the gold/blue, adding or removing the chrome strip, and then an aluminum dial and they'd be a match. Shouldn't be too difficult... Based on this reference for the 806 series changes: www.automaticwasher.org/cgi-bin/T... Your washer is from somewhere between late 1971 and early 1975? (Painted dial, but with the acrylic knob). | ||
|
Post# 892529 , Reply# 22 8/4/2016 at 16:19 (2,818 days old) by goatfarmer (South Bend, home of Champions) |
||
|
| ||
|
Post# 904037 , Reply# 23 10/23/2016 at 18:59 (2,738 days old) by Lowefficiency (Iowa) |
||
|
Ok, we're making good progress with the cleanup, oiling, and re-assembly, but I have a question about the idler pulley.
Should there be anything between the idler pulley and the tensioning spring? Perhaps another fiber washer, or a spacer of some sort? (See photo attached.) Also, is it normal for the idler pulley to be a few degrees out of alignment with the other pulleys due to the pull of the tensioning spring, or do I need to replace the sliding part with the shaft to fix that? Thanks!
View Full Size
| ||
|
Post# 904038 , Reply# 24 10/23/2016 at 19:08 (2,738 days old) by Lowefficiency (Iowa) |
||
|
It's a little tricky to see, but here is what I was saying about the pulley alignment.
View Full Size
| ||
|
Post# 904040 , Reply# 25 10/23/2016 at 19:14 (2,738 days old) by Lowefficiency (Iowa) |
||
|
One last question. How should this style of motor be lubricated? I'm not seeing any obvious oiling points...
Thanks.
View Full Size
| ||
|
Post# 904430 , Reply# 26 10/26/2016 at 22:26 (2,735 days old) by lowefficiency (Iowa) |
||
|
| ||
| Post# 904434 , Reply# 27 10/26/2016 at 22:56 (2,735 days old) by hippiedoll ( arizona ) | ||
CONGRATULATIONS!!
On buying that DE806, and getting it up, running & back into service!
Looks like you're coming along nicely. And it's looking really great! Sorry I can't answer any of your fix-it questions. But I wanted to share in your enthusiasm for your newly acquired center-dial maytag 806 dryer. WOOOO HOOOOOO! :o) Keep up the GREAT work & progress!! | ||
|
Post# 1019778 , Reply# 28 1/1/2019 at 23:39 (1,938 days old) by LowEfficiency (Iowa) |
||
|
Where does the time go? I can't believe it's been almost 2 1/2 years... but after fixing it up so long ago, this DE806 is finally now back in service!
Here are a few quick photos, from my other thread about my recently acquired A408 washer: "A Second Chance for a Rusty Maytag A408" www.automaticwasher.org/c... We still need to have some electrical work done on the house, so for the time being I have the dryer wired for 120V (aka 115V, aka 110V). We've done over a dozen loads now, of all types of clothing and bedding, and couldn't be more pleased with how well it operates. I'm half tempted to just keep it at 120V because it works so well, but I know that it's less efficient, as the house furnace has to heat more makeup air when the dryer runs longer. Anyone know why Maytag (and others) didn't make ALL dryers just sense the fabric moisture this way, like the 806s? It seems simple, and it works very well as far as I can see... | ||
| Post# 1145710 , Reply# 29 4/2/2022 at 14:40 (751 days old) by Charles99 (Surrey) | ||
|
This is useful information! Any tips? This is useful information! Any tips on getting the top/front off of this machine? | ||
|
Post# 1145741 , Reply# 30 4/2/2022 at 21:33 (751 days old) by LowEfficiency (Iowa) |
||
|
>> Any tips on getting the top/front off of this machine? What you have to do on these is remove the back first, then disconnect the wiring. After that, I believe it was just some screws on the sides at the bottom, and the whole thing (sides, front, and top) lifts off and forward. I don't think I ever separated the pieces any further than that, as that gave me all of the maintenance access I needed. I do remember using wood shims against the floor to help level/align it when reinstalling though. Having a helper would be beneficial as well. Good luck! | ||
|
Post# 1180530 , Reply# 31 5/13/2023 at 17:19 (345 days old) by LowEfficiency (Iowa) |
||
|
After years in regular service, it looks like this machine is going to need a door switch replacement. Everything functions normally, it just doesn't stop when the door is opened. Am I correct that this requires pulling the whole cabinet off to access? It sure seems that way from the KDG606 we just disassembled, but I didn't know if there were any shortcuts... | ||
|
Post# 1180542 , Reply# 32 5/13/2023 at 18:13 (345 days old) by goatfarmer (South Bend, home of Champions) |
||
|
| ||
| Post# 1180545 , Reply# 33 5/13/2023 at 18:26 (345 days old) by Maytag85 (Sean A806) | ||
The door switch on the customized Maytag HOH dryer I just finished a few weeks ago isn�t functioning but since there�s no small children around the house, not really worried about it. Since it�s a timer model, just turn the timer to the off position if you need to check on something.
I agree with goatfarmer, just slide the cabinet out a little, remove the 4 screws that hold the heating halo to the front of the cabinet, remove the 2 small phillips screws that hold the upper door hinge/door switch. May even be possible to remove the top panel off of the machine to get access to the door switch. Pretty sure that�s how most authorized Maytag repair personnel replace the door switch since removing the entire cabinet off from the base would have been expensive because of the labor that�s involved. | ||
|
Post# 1180680 , Reply# 34 5/15/2023 at 12:50 (343 days old) by LowEfficiency (Iowa) |
||
|
| ||
| Forum Index: | 
| Other Forums: |

|

|

|

|

|

 Comes to the Rescue!


;)
;)
;)
;)
;)
;)
;)
;)