|
Thread Number: 72140
/ Tag: Vintage Automatic Washers
GE Filter Flo washer motor removal questions |
[Down to Last] |
Post# 953978 8/22/2017 at 08:00 (2,432 days old) by turquoisedude  (.) (.) |
||
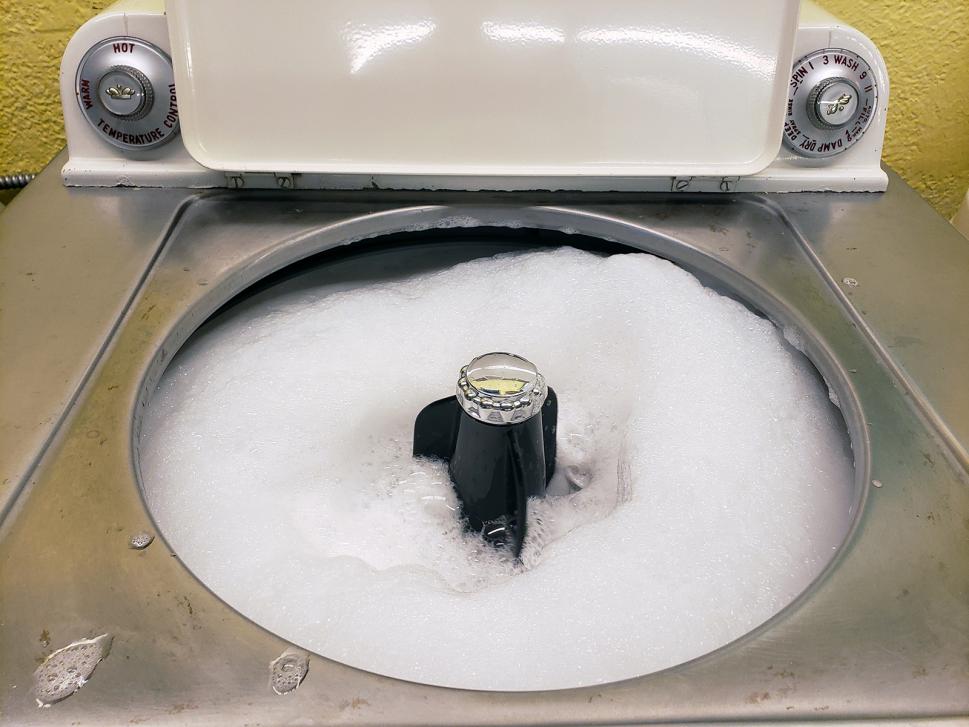
 Well, actually more like a need to rant.... Canyon's getting fed up with hearing about this... LOL
So, I figured it was time to get something done with that '57 GE washer that I got in fall of 2012. I knew when I got it, the machine wasn't running. Last week, I spent the week down in Ogden so that I could some exploratory surgery. The machine would simply buzz, then very quickly pop the breaker if I attempted to make the machine spin or agitate.
I tried to be logical (a big change for me...LOL) in my diagnosis. I disconnected the flexible pump coupler and tried spinning the pump manually. Suprisingly, it turned smoothly so that wasn't the problem. Next, I tried spinning the transmission pulley in both directions to see if I could make full rotatations, simulating agitate and spin modes. Well, by golly, I could! Recall that the poor old 60 GE BOL washer tranny could be made to rotate manually to simulate spin, but not to agitate. My conclusion was the transmission may be OK.
So that left the motor... Not surprising that it may have seized up - I checked my notes on the machine and as per the grandson of the former owner, the machine had been in use until 1980 when his grandmother gave up her home. The machine sat in a damp basement until I got it.
I actually have a manual for the 57 GE washer, so there are reasonably detailed instructions as to how to remove the motor. Per the manual, the clutch assembly has to be removed in order to take the motor out.
And this is where the wheels fell off... There is a drive hub above the clutch that is held on by a pin (I guess it's a roll pin of some kind). GE makes mention of a special tool (GE part WH50X55) to drive the pin out. Now, I did attempt to drive the pin out with one of my limited punches but I don't seem to have one that is the right size....
I did some searching for the 'right' tool - I found references to a Gemline tool (model TB665 - picture attached) and a set of punches made by a company I believe was called Bidwell and Wells in Orlando. But do you think I could find the tool or specs as to the size of the punch? Nope...
I did some further searching for pin punches and what seem to be the best possibility is a set made by Wheeler Engineering used typically for gun repairs.
Any thoughts or suggestions? I will attempt to get some better photos of the clutch pin itself, if I can.
The darndest thing in all of this is that I know I need to do work on the motor for the '53 GE as well, so I'll have to get that clutch removed also....
In the meantime, I am trying not to drive myself too crazy with this dilemma!! | ||

|
|
Post# 953997 , Reply# 1 8/22/2017 at 09:10 (2,432 days old) by Unimatic1140 (Minneapolis) |
||
Hey Paul, yes I've had to deal with those punch pins as well and they can be a total pain in your rear panel.
Some observations: #1 is the motor shaft frozen or clutch housing not turning? If yes than the motor has to come out to fix it, if no then it may be the external motor relay causing the issue. #2 Any hardware store punch of the right size should work, that's what I've always used. You need to get a bright light in there and make sure your punch is just slightly smaller than the diameter of the punch pin. Also it can't be too small as it will go inside the center of the pin and expand the pin making it impossible to remove. #3 You may want to try heating the shaft under the cap that connects the flexible pump coupler with your torch gently to loosen things up. #4 You may have to drill out that pin #5 Worse comes to absolute worse, you might be able to remove the spin tub and the outer tub so you have room to remove the motor and clutch without removing the clutch first. Although I'm not sure if that is even possible without seeing the whole assembly again. Also the other side of the pin (facing away from you) might be easier to drive that pin out. If the motor shaft isn't turning that would make it difficult/impossible to get to. You might try using a vice grip on the coupler cap to see if you can get the shaft to move. | ||
|
Post# 954017 , Reply# 2 8/22/2017 at 10:28 (2,432 days old) by combo52 (50 Year Repair Tech Beltsville,Md) |
||
Removing a roll pin | ||
|
Post# 954023 , Reply# 3 8/22/2017 at 11:10 (2,432 days old) by turquoisedude (.) |
||
|
Relay Robert, Jetcone Jon had also mentioned a relay as a possible fault, but I'll be damned if I can find one... I couldn't see any reference to one on the wiring diagram for the machine and I broke the ffff....fill flume taking the top off of the machine for a better look!
Otherwise, the motor shaft does seem to turn but it's not 'loose'. However, the clutch dome itself turns freely in both directions.
I have a couple of motor and clutch assemblies from later GE Filter-Flo washers and it looks like those were mounted on a removable plate. Probably this is why... LOL
Sadly the punch sets in the local hardware stores here are the same as what I already have (sets of 6). So.... I'll be doing some on-line shopping this afternoon!! | ||
|
Post# 954024 , Reply# 4 8/22/2017 at 11:31 (2,432 days old) by combo52 (50 Year Repair Tech Beltsville,Md) |
||
|
| ||
|
Post# 954031 , Reply# 5 8/22/2017 at 12:14 (2,432 days old) by turquoisedude (.) |
||
|
| ||
|
Post# 954041 , Reply# 6 8/22/2017 at 13:15 (2,432 days old) by Unimatic1140 (Minneapolis) |
||
|
Yes checking the 1957 service manual I see there is no external relay, so the motor has an internal start switch. I've had to repair many of those over the last 20 years. All they usually need is contact cleaning and cleaning/lubrication of the sliding shaft.
Paul I remember clearly having problems getting that punch pin out on my '58 GE and it took me at least an hour to do if not more. By the time I was done I needed to have my mouth washed out with soap because of some of the words that came out lol. Over my lunch hour I did some checking on my spare 1958 motor/clutch which should be the same as on the 1957. It seems that the cap hole size allows for 5/32" punch pin, however 5/32" is too big for the hole in the clutch rotor shaft itself. A 1/8" punch pin is needed to get through. I seem to remember having trouble because the 1/8" punch would go through the center of the pin. I wonder if there is a punch pin size between 5/32" and 1/8"???? 1/8" though is probably the size you need and you may have to heat the shaft to get the pin moving. 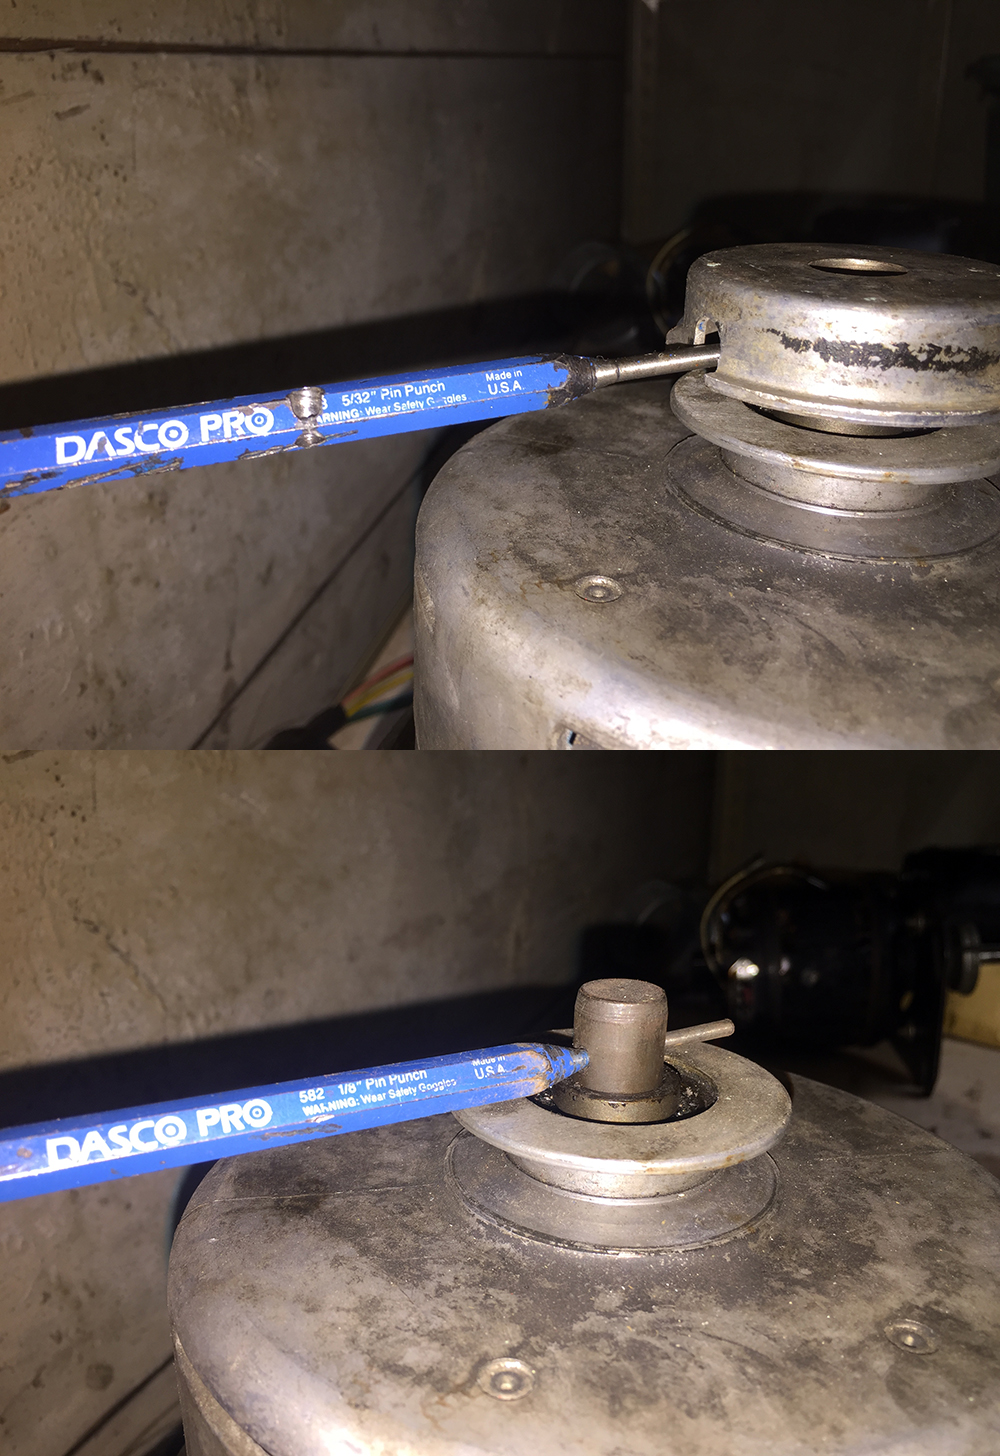
| ||
|
Post# 954045 , Reply# 7 8/22/2017 at 14:02 (2,432 days old) by turquoisedude (.) |
||
|
OK, so I am not losing my mind... I tried a 1/8" punch unsucessfully also and had a very loud and profane discussion with myself about its maternal heritage. However, you've given me a good hint regarding heating the motor shaft, Robert - thank you!!
I am thinking I may just pull the '53 GE motor right away if this works! | ||
|
Post# 954047 , Reply# 8 8/22/2017 at 14:18 (2,432 days old) by swestoyz (Cedar Falls, IA) |
||

It has been a long time since I did this myself, but I seem to recall what Robert mentioned about the 1/8" punch being a bit too small. I had to move the punch off center in an attempt to drive the pin on a later GE clutch.
A 9/64" drive punch would probably do it, but they are difficult to find (different from a centering punch). Ben | ||
|
Post# 954062 , Reply# 9 8/22/2017 at 17:42 (2,432 days old) by turquoisedude (.) |
||
|
| ||
|
Post# 954625 , Reply# 10 8/26/2017 at 13:51 (2,428 days old) by turquoisedude (.) |
||
|
Newsflash from Ogden I did it! I got the roll pin out!
I will post pictures soon but what seemed to work was letting the pin marinate in PB Blaster since last Sunday then alternately poundin the pin with the 9/64" and 1/8" punch. Using the tapered end of a ball-pein hammer seemed to get the right amount of force.
Now if I could get the upper drive plate off the motor shaft... it's 'soaking in it' now. Keep your fingers crossed!! | ||
|
Post# 954646 , Reply# 11 8/26/2017 at 16:26 (2,428 days old) by Unimatic1140 (Minneapolis) |
||
|
| ||
|
Post# 954826 , Reply# 12 8/27/2017 at 11:54 (2,427 days old) by turquoisedude (.) |
||
|
Success! Robert, you were right on the money with the tip about heating the hub. I did so and off it came!! Thank you. I think the 9/64" punch loosened the pin. It is a round punch. It also wasn't quite as long as the 1/8" punch I had tried earlier; but that 1/8" is what got the pin out. Now, if I start whining about clutch hubs when I tackle the 53 GE, please yell at me to remind me that I should know what to do... LOL
View Full Size
| ||
|
Post# 954853 , Reply# 13 8/27/2017 at 13:55 (2,427 days old) by turquoisedude (.) |
||
|
Oy, this is turning out to be "interesting"... I can now completely understand why a Camco technician would've told the little old lady in Guelph who used to own this washer that 'the motor can't be fixed'. Dude didn't feel like breaking his head getting the blessed thing out.... So as you can see, I've taken more of the whole clutch assembly apart than I had anticipated. Fingers crossed that I'll remember how to put this all back together again! For the moment I am stuck again trying to remove the shaft extension assembly from the motor shaft. Would it be safe to heat this for removal? I am paranoid about burning or melting something...
View Full Size
| ||
|
Post# 954855 , Reply# 14 8/27/2017 at 14:01 (2,427 days old) by swestoyz (Cedar Falls, IA) |
||
|
I was thinking about this earlier over the weekend - glad you had success! The rounded punch is called a set punch, and typically those are useful to create a set divot in metals before drilling/machining, or also to driving finishing nails. They can sometimes mushroom a rolll punch. A driving punch is flat and helpful to do exactly what you were needing, and often times are longer as well. Something to keep in mind in the future.
I can't wait to see this beauty up and running again. Ben EDIT - after I posted I see you've made more progress. Gently warm the shoe arm (that's what I call it) with the torch and pry using a screw driver, side to side. May help to take some emery cloth or sand paper to the shaft before you start. Enjoy! 😉 | ||
|
Post# 955037 , Reply# 15 8/28/2017 at 13:33 (2,426 days old) by turquoisedude (.) |
||
|
Thanks, Ben! I gave it a short heat-up yesterday, but didn't manage to remove it... I was worried about damaging the lower (outer) clutch shoes by prying. I also kinda ran out of gas so I'll try again when I get back down to Ogden again on the weekend.
On a more positive note, I had a feel around the transmission boot and it seemed good! Still, I'm not going to take that for granted.
Also, while I have the clutch apart, are there any big red flags that I should be looking for that would indicate worn pads, slippy shoes, etc? If I can figure out how to get this clutch back together again, I'm hoping I can figure how to fix that poor ol' Hotpoint washer clutch... Yeah, I know, I don't need to start a 3rd simultaneous project!! | ||
|
Post# 955048 , Reply# 16 8/28/2017 at 14:31 (2,426 days old) by swestoyz (Cedar Falls, IA) |
||
|
I believe it has been almost a decade since I did a similar job on the 3-speed clutch I had, so I'm glad the service lit was available for your '57 so I could refresh my memory on this fun procedure. | ||
|
Post# 955049 , Reply# 17 8/28/2017 at 14:34 (2,426 days old) by turquoisedude (.) |
||
|
| ||
|
Post# 955051 , Reply# 18 8/28/2017 at 14:36 (2,426 days old) by Unimatic1140 (Minneapolis) |
||
|
| ||
|
Post# 955944 , Reply# 19 9/3/2017 at 15:32 (2,420 days old) by turquoisedude (.) |
||
|
What am I doing wrong? I will have to admit that I am getting really frustrated with this motor removal business... I'm still unable to budge the clutch arm support off of the motor shaft. I am scared of damaging the outer clutch arms so perhaps I may not be prying forcefully enough. Any suggestions?? And heaven help me trying to get that spring washer that's below the plate off...
I have a new respect and admiration for any GE service tech who did this in the field!!! | ||
|
Post# 955966 , Reply# 20 9/3/2017 at 19:16 (2,420 days old) by combo52 (50 Year Repair Tech Beltsville,Md) |
||
|
Stuck GE Clutch Driver On GE Washer Motor Hi Paul, these can get stuck a little, but you must soak the motor shaft with some type of penetrating oil if you want to get these loose in most cases, because this part is not lubricated in normal use it can get very stuck.
You may also have to use a slide hammer type puller if the PO does not work.
John L. | ||
| Post# 955969 , Reply# 21 9/3/2017 at 19:46 (2,420 days old) by pierreandreply4 (St-Bruno de montarville (province of quebec) canada) | ||
turquoise dude
turquoisedude if you ever neede for your saint lib home a spare washer dryer found this ge set for free in montreal here the link for you screen shots in the link as well
CLICK HERE TO GO TO pierreandreply4's LINK | ||
|
Post# 956134 , Reply# 22 9/4/2017 at 16:07 (2,419 days old) by turquoisedude (.) |
||
|
Still soaking... I managed to forget to bring a brand-new can of PB Blaster down to Ogden for the ling weekend (this serves me right for doung simultaneous washer repair work in both houses...) but I gave the clutch holder a few shots of WD40 and let it work. I think I got the danged thing to move but that could be the effect from inhaling the fumes... I will have to get back on this next weekend - someone is reminding me that 2 cars are supposed to be in the garage...
Pierre André, I saw that Filter Flo set in Montreal but I just don't have the room. I am remaining optimistic that I'll have a working washer in St-Lib soon. Place your bets, folks... it could be the Lady K or a mystery Frigidaire! | ||
|
Post# 959791 , Reply# 23 9/29/2017 at 08:24 (2,394 days old) by turquoisedude (.) |
||
|
My 'to do' list says it all... So I have once again failed "GE washer restoration 101".... I just cannot seem to budge that blasted clutch arm support. Phil suggested that perhaps the GE manual is not giving all the necessary instructions and I would agree... I had also been struggling with removing the timer dial; manual said "pull knob off timer shaft". Nope. There was a kind of cotter pin (called a detent pin) that had to be removed first. Very disappointing that I no longer seem to have the strength to take things apart anymore but I got a few saves in. Ironically not one GE stand-alone washer but that is life. Not sure if I am up to even trying to work on the '53 now...
View Full Size
| ||
|
Post# 960065 , Reply# 24 10/1/2017 at 15:37 (2,392 days old) by turquoisedude (.) |
||
|
You may not believe this.... But I got that cursed motor out.... After a pep talk from our own Jon 'jetcone' and the person who patiently listens to all my washer kvetching (PhilR not hubby...LOL) I decided to make one more attempt at removing the clutch shaft extension assembly. The current thinking was to turn the washer upside down to allow the ol' PB Blaster to trickle down into the motor shaft. (sorry the photo from my phone came out sideways...)
View Full Size
| ||
|
Post# 960069 , Reply# 25 10/1/2017 at 15:45 (2,392 days old) by turquoisedude (.) |
||
|
I kinda broke up the very brittle tub gasket but at this point, I was sure this project was good and over. I let the PB Blaster do its thing but that extension arm wasn't going anywhere. I figured I had nothing to lose so I removed the motor bolts to see if I could ease, coax, or trick the motor out. The latter did it... Here's the trick: the motor mount on a GE this old was welded to the suspension frame (newer Filter-Flo motor mounts are bolted) but there were still 2 bolts to secure the rear part of the motor mount to the frame. Once removed, the sides of the motor mounting plate had some 'give'. Turns out it was just enough to allow the motor with the lower carrier plate still attached to be removed. Son of a.....
View Full Size
| ||
|
Post# 960073 , Reply# 26 10/1/2017 at 15:53 (2,392 days old) by turquoisedude (.) |
||
|
I took the motor apart (still with the darned shaft extension firmly attached) and was able to clean the starting switch contacts. I gave the motor a good overall cleaning and a shot of turbine oil. And..... the motor is running again! I shot a short video but I don't seem to be able to attach an mp4 file to this post....
It figures that I got this solved on the eve of my return to St-Lib .... but it's a long weekend next weekend here!!
View Full Size
| ||
| Forum Index: | 
| Other Forums: |

|

|

|

|

|

 Comes to the Rescue!


;)
;)
;)
;)
;)
;)