|
Thread Number: 82804
/ Tag: Vintage Automatic Washers
A 1958 GE, brought back to life! |
[Down to Last] |
Post# 1069950 4/29/2020 at 21:19 (1,454 days old) by swestoyz  (Cedar Falls, IA) (Cedar Falls, IA) |
||

Hello everyone! I wanted to share a recent restoration success story with the group, that does include a bit of drama (i.e. learning opportunities). This may take a few days to write up, and if so thank you for your patience. For archival purposes the more details the better, right? Thankfully the drama in this saga doesn't really begin until half way through.
In late winter/early spring of 2019, Jetaction and Gansky1 stopped by CF to pay a visit on an overnight stay, and like all good appliance collectors, the topic of our "wish lists" came up while doing some wash that evening. When the question came to me I immediately responded with a solid tub GE, a washer that had eluded me up until that point. A few other machines were rattled off, laughs and intrigue were exchanged, and we continued on with our conversation. A few weeks later a fellow collector reached out to see if I was interested in a GE set they were looking to sell. After seeing the pictures immediately I said - yes, of course, tell me more! Were the washer Gods looking down on me with delight? I asked for some additional photos in hopes to see that the outer tub boot was something that could be salvaged. Thankfully the boot had been replaced at some point with a later replacement "star boot" for these special 1956-1960 machines. Knowing it had a good boot, a deal was struck and a shipper was arranged to pick up the set so they could come live in Iowa. Here's a sampling of photos that were shot my way --- This post was last edited 04/29/2020 at 22:29 | ||

|
|
Post# 1069951 , Reply# 1 4/29/2020 at 21:22 (1,454 days old) by swestoyz (Cedar Falls, IA) |
||
|
Upon arrival in Iowa, later that summer, I was happy to report that the machines arrived without major issue. A chip on the dryer top, but otherwise everything was intact, as expected.
| ||
|
Post# 1069952 , Reply# 2 4/29/2020 at 21:27 (1,454 days old) by swestoyz (Cedar Falls, IA) |
||
|
Restoration efforts were held off until a few other machines could be finished during the summer/fall/early winter.
By the time New Years 2020 had passed the '58 GE was next in queue! First off a quick test was in order to see what condition the mechanicals were in. The shreaded pump coupler was toast! It lasted maybe 10 minutes before finally giving out completely. Also, take caution when removing the original spring style coupler clamps. These things can take an eye out! | ||
|
Post# 1069957 , Reply# 3 4/29/2020 at 21:37 (1,454 days old) by swestoyz (Cedar Falls, IA) |
||
|
With the intial tests looking promising it was time to dissemble the machine.
The three tub bolts came out with ease using an impact wrench. The pre-'61 machines use a steel flange that the three bolts thread into, rather than the threaded die-cast basket hub on the later perforated tubs. No fear of stripping out the basket hub on these. And, yeah, the wires are a mess. You could take photos of each wire as you remove them, but the board is also labeled as well. With the top removed (BE CAREFUL NOT TO KILL THE FILLER FLUME!!! Read the service manual carefully for this step), the sins of previous installers were exposed. The top seal was not seated properly along the outer tub top, near the fabric softener dispenser. I imagine it may have leaked during spin. Overall, YUCK. Ancient fabric softener is gross. We also get to see how the auxiliary hose runs for the fabric softener. It's pretty ingenious. The solenoid is activated during the fill for wash to hold back water flow, and not activated during rinse fill to allow water to reach the fabric softener trough. And of course, everything that is rubber is as brittle as can be. The only items that were soft was the water inlet hose from the water valve and the Filter Flo outlet. This post was last edited 04/29/2020 at 22:32 | ||
|
Post# 1069960 , Reply# 4 4/29/2020 at 21:41 (1,454 days old) by swestoyz (Cedar Falls, IA) |
||
|
With the fabric softener dispenser and filler flume removed, the wash tub can be pulled.
And yes, the sock catcher did it's job!! After cleaning things up I contemplated the idea of just using the machine as is. Would that have been a wise bet? | ||
|
Post# 1069963 , Reply# 5 4/29/2020 at 21:45 (1,454 days old) by swestoyz (Cedar Falls, IA) |
||
|
...and no, no it would not have been good bet. YIKES!
Years of water sitting between the tub boot and outer tub rotted away the flange that holds the large boot clamp from the outside. The rust was so bad it almost looked as if the boot was actually growing chips of rust. What a mess. | ||
|
Post# 1069965 , Reply# 6 4/29/2020 at 21:55 (1,454 days old) by swestoyz (Cedar Falls, IA) |
||
|
With the outer tub pulled from the cabinet, rust repair was done over several days.
First, everything was cleaned up with some steel wool and a coat of POR-15 was applied along the flange to seal up all rust that would have been covered by the patch. Next, hole repair was done both with plumbers epoxy and JB Weld. If I had to do it over again I probably would have just used the JB Weld, or had let the plumbers epoxy set longer than 24 hours before sanding to shape. It would ball up due to the heat from sanding reactivating the compound. With the patch sanded and a test fit of the boot checked off, several coats of POR-15 were applied to both the patched area as well as spots within the outer tub that would see a lot of standing water. The top edge was also painted with a few coats for good measure. This post was last edited 04/29/2020 at 22:33 | ||
|
Post# 1069967 , Reply# 7 4/29/2020 at 21:58 (1,454 days old) by swestoyz (Cedar Falls, IA) |
||
|
In parallel to letting the paint dry for the outer tub, the wash basket was cleaned and also touched up with a few shots of POR-15. 1958 was the last year for the two piece tub; starting in '59 they went to the integrated balance ring version of the wash basket.
The plastisol coating on the balance ring had a few stains (from fabric softener?) but overall it still presents well. | ||
|
Post# 1069970 , Reply# 8 4/29/2020 at 22:09 (1,454 days old) by swestoyz (Cedar Falls, IA) |
||
|
Drama - first round
During the mechanical test the transmission sounded great in both agitate and spin, and probably could have been left well enough alone. But, if the whole washer was going to be disassembled the transmission could use some new seals.
The evening started off innocently enough with pulling the agitator block and agitator shaft seal. A little bit of heat from the torch and a three arm puller and both popped off with ease. I figured, "heck with this success, why not try my luck with taking the basket hub off?" Several years ago I had recalled reading Robert's post about disassembling an AW6 transmission and he detailed how he successfully removed the basket hub. I apparently did not heed his warnings. At all. His suggestion was to clamp the spin shaft in a heavy vice, heat the basket hub, and while using a pipe wrench start twisting the hub on the shaft, rather than hitting it up the shaft. Yeah, in the haze of earlier success I totally biffed it. If you ever decide to take the hub off a GE transmission and you want to reuse said hub, NEVER attempt to use the agitator bearing mount as a point of impact. IT WILL BREAK. I also didn't have a vice available that night so I have no idea what I was thinking when attempting this. Usually I'm pretty methodical when approaching mechanical work. Not that night. Please let my poor decision making sway you from doing the same. The WH17X41 basket hubs for the 1960 and earlier solid trub transmissions cannot be replaced with the later perforated tub version - WH17X51 or WH17X69. CLICK HERE TO GO TO swestoyz's LINK This post was last edited 04/29/2020 at 22:44 | ||
|
Post# 1069972 , Reply# 9 4/29/2020 at 22:25 (1,454 days old) by swestoyz (Cedar Falls, IA) |
||
|
Drama - second round
After that night I swore to myself that I'd be more careful in the future. Slow down. Measure twice, cut once. Or in my case, read the manual and do as it says.
Yeah, that didn't last. A few days later it was time to inspect the original two speed clutch. While the principal behind the original 1957-1961 two speed clutch is the same as the later versions for the perforated tubs, what does make them different is the carrier plate. The earlier version of the carrier plate acts like the drum of an automobile brake drum and a solenoid activates a brake shoe that presses against the carrier plate to keep it stationary, when slow speed is called for. Amazingly all the parts for the clutch were in great shape - the linings were good, the drums looked great, but the bearings for the carrier plate and primary drum were shot. I thought, oh that will be easy. Just drive them out and replace them with a new WH4X12 bearing. Again, don't do what I did. Read the instructions that are clearly stated in the service manual. Both the primary drum and the carrier plate have a flange plate that hold the bearing in place via a retainer around the bearing. It is impossible to drive the bearing out without first drilling out the four rivets and then driving the bearing out from the opposite side that had the retainer fastened to either the drum or the plate. No, I took the impossible to replace carrier plate and literally pounded the center of the die cast out of the plate in an attempt to drive it out. I'm too ashamed of this to show you the after picture. DON'T DO THIS. At this point I have an impossible task ahead of me - find a replacement basket hub and carrier plate, or try to improvise. Did I find a way to repair the basket hub? Did a carrier plate fall from the sky via the washer Gods who trusted me to take care of this GE? Find out in tomorrow's installment. Until next time!
View Full Size
| ||
|
Post# 1069999 , Reply# 10 4/30/2020 at 04:26 (1,454 days old) by akronman (Akron/Cleveland Ohio) |
||
Hey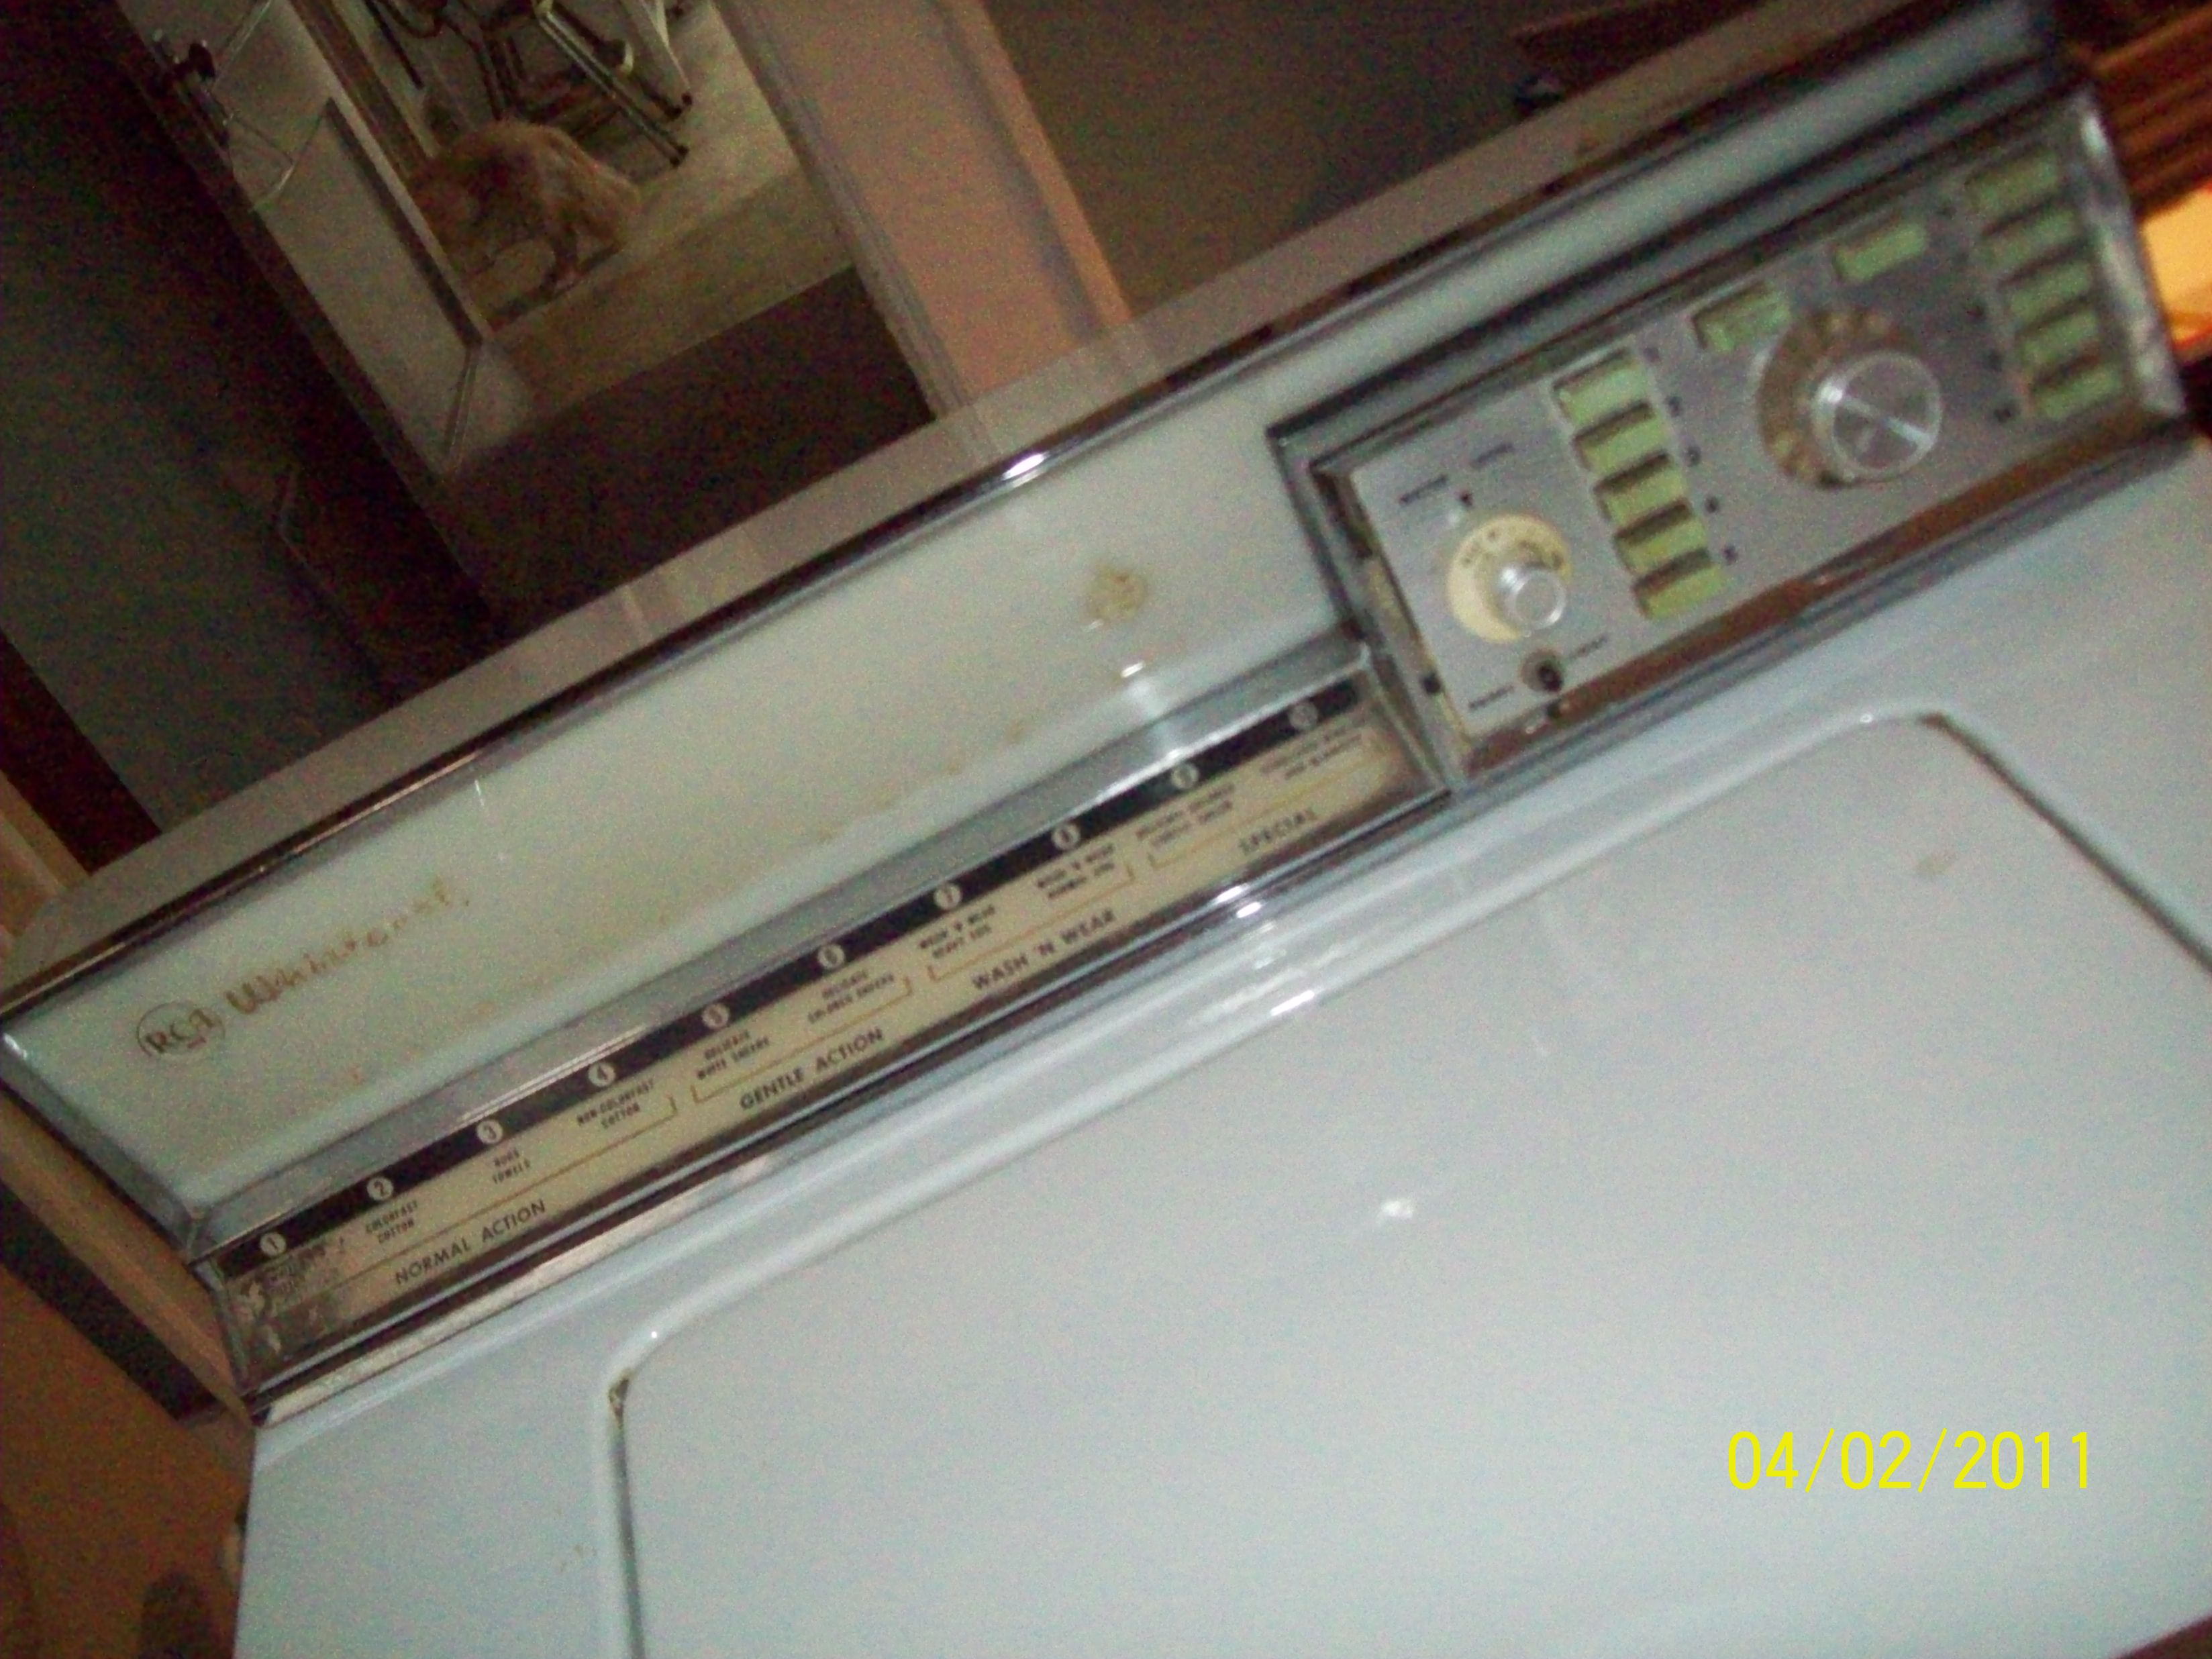 | ||
|
Post# 1070012 , Reply# 11 4/30/2020 at 07:26 (1,454 days old) by goatfarmer (South Bend, home of Champions) |
||
 | ||
|
Post# 1070033 , Reply# 12 4/30/2020 at 08:13 (1,454 days old) by pulltostart (Mobile, AL) |
||
Ben, | ||
|
Post# 1070054 , Reply# 13 4/30/2020 at 09:31 (1,454 days old) by turquoisedude (.) |
||
 | ||
|
Post# 1070058 , Reply# 14 4/30/2020 at 09:45 (1,454 days old) by bajaespuma (Connecticut) |
||
I second that emotion
My thanks as well. What a great gift to wake up to this morning. I love Solid Tub Filter-Flo's with Rinse Agent dispensers (I will NEVER understand the strategy GE used when they went to the Perforated-Tub models, eliminated the really useful built-in Rinse Agent dispensers, replaced them with very complicated Bleach dispensers and then, after a couple of years, offered their customers lame and faulty Activator-mounted FS dispensers).
I have a 1960 Dream Machine that has a faulty 2-speed clutch so your post is timely and helpful.
View Full Size
| ||
|
Post# 1070073 , Reply# 15 4/30/2020 at 10:30 (1,454 days old) by peteski50 (New York) |
||
1958 GE | ||
| Post# 1070096 , Reply# 16 4/30/2020 at 13:03 (1,454 days old) by toploader55 (Massachusetts Sand Bar, Cape Cod) | ||
Wonderful Ben.
I Love that Old Style Activator. The earliest machine I remember Mom having was a 54 (I think) with the Temp did on the left, Cycle Dial on the right and the Green Water Saver Bar in the middle with the Round GE Medallion on the from of the machine. Ours was a Non Filterflo but had the same Activator and only one speed. | ||
| Post# 1070128 , Reply# 17 4/30/2020 at 16:42 (1,454 days old) by cycla-fabric (New Jersey (Northern)) | ||
|
| ||
| Post# 1070159 , Reply# 18 4/30/2020 at 19:52 (1,453 days old) by Northwesty (Renton, WA) | ||
|
Very Great restoration can you go to a machine shop and fabricate or weld up the damaged piece? | ||
|
Post# 1070172 , Reply# 19 4/30/2020 at 20:33 (1,453 days old) by bradfordwhite (central U.S.) |
||
 | ||
|
Post# 1070181 , Reply# 20 4/30/2020 at 21:28 (1,453 days old) by swestoyz (Cedar Falls, IA) |
||
|
Drama solution - round one
Thanks for the kind words, everyone!
Come early February I had two problems to solve: 1. Come up with a solution for the basket hub 2. Figure out a way to power the transmission without the original clutch Tonight I'll tackle problem number one. In the photo groupings I shared earlier I did try putting hub clamp back on the basket hub to see if there was enough meat left within the casting to safely hold the hub on the shaft. While there probably was enough material to get by it wasn't something I was comfortable with. This, on top of the busted agitator bearing mount (or sleeve, not sure what this feature would officially be called). I contemplated the idea of using some JB Weld to fasten the bearing mount back to the hub, but still was weary of then coating the hub clamp with JB Weld. At this point I reached out to friends to see if any spares were around knowing full well that this wasn't going to be a part that many would have spares of. Concurrently, I started a nationwide search to parts houses, etc., to see if anyone had a lead on some old GE parts. After several failed attempts I got extremely lucky and found one place that probably had the last NOS WH17X41 basket hub left on a shelf. I naturally bought the part immediately, along with a few other solid tub GE parts. With the NOS hub secured it was time to properly remove the hub.
View Full Size
| ||
|
Post# 1070183 , Reply# 21 4/30/2020 at 21:40 (1,453 days old) by swestoyz (Cedar Falls, IA) |
||
|
Not having a garage bench with a vise really is a short coming. Thankfully the local Makers Space came to the rescue. On a Saturday afternoon I brought the transmission to the shop along with a hand held torch, some emery cloth, a pipe wrench, and a dead blow hammer.
With the hub loose from twisting back and forth using the pipe wrench, the dead blow hammer can be used to smack the flange while gripping the upper half of the hub with your hand and twisting it upwards along the spin shaft. It was an ugly process, but with time, a bottle of WD-40, some heat from the torch, and some patience, it finally worked past the rust. Success! I highly recommend using a dead blow hammer for this process. The soft molded rubber of the hammer face will not distort the item you're impacting and it is loaded inside with ballast that will shift during the swing to provide some extra oomph. I believe the hammer I used was the four pound version from Harbor Freight, but you can get them at Menards, etc. | ||
|
Post# 1070185 , Reply# 22 4/30/2020 at 21:49 (1,453 days old) by swestoyz (Cedar Falls, IA) |
||
|
Next up - pop the bottom cover from the transmission. First, take the pulley nut, washer and seal, as well as the spring clutch and hub off from the shaft.
The manual is pretty vague about the next step of removing the bearing frame assembly. If you find yourself in this position you'll quickly find that it's not a walk in the park. I found that if I heated up the bearing frame assembly and the outside of the housing with a torch, and then tapped with a solid straight blade screw driver, I could get it to start moving. The key is to keep the bearing frame from moving as you pry against the housing. I used a small screw driver to hold both in place as I worked along the edge with the screw driver. Eventually it will pop off. And yuck. There is just a bit of water in the oil. And what's this? Part of the snubber band has broken off? And why does the snubber look so funny? | ||
|
Post# 1070186 , Reply# 23 4/30/2020 at 21:56 (1,453 days old) by swestoyz (Cedar Falls, IA) |
||
|
After some parts cleaning I did some test runs to see if the snubber could indeed be reused. From what I can tell it may have come in contact with the snubber band while the tub was still spinning on agitation. I could have happened in 1958, 1968, or during my dry run test.
Either way, it did hold the tub stationary at one point so I figured it would probably continue to do the job. The idea of trying to make one did cross my mind, but to attempt to emulate the weight of the snubber and ensuring that the pitch of the fins was enough to have it glide through the oil during spin was not a risk I was willing to take. | ||
|
Post# 1070189 , Reply# 24 4/30/2020 at 22:09 (1,453 days old) by swestoyz (Cedar Falls, IA) |
||
|
The beauty of GE
One of the great things about GE automatic washers is parts interchange, or more specifically the ability to use seals from the last of the perforated tub machines built in 1995 all the way back to the original AW6 in 1947.
From top to bottom, the following seals can be used on all GE transmissions - Agitator shaft seal - WH8X291 (you do not need to use the extension for the large capacity tubs if the seal was a kit, designated as WH8X291K) Drive tub seal assembly - WH8X318 (bellows style, for metal housing transmissions, seal between the basket hub and housing top) Ring seal - WH8X242 (rubber, between the bearing frame assembly and housing) The single pulley, internal snubber style solid tub transmission from 1956 to 1959 requires two lip seals. One for the bearing frame and one for the pulley. Neither are available as replacements from GE, however they can be substituted for generic replacements. Yay! (The 1960 transmission uses the same seal as the later transmissions, WH8X281) WH8X184 - tube seal (upper, within the bearing frame assemlby) (1 ea) SKF - 13537 - Grease Seal (Grainger 35UA53) WH8X185 - tube seal (lower, within the pulley) (1 ea) SKF - 13534 - Grease Seal (Grainger 35UA51) | ||
|
Post# 1070190 , Reply# 25 4/30/2020 at 22:11 (1,453 days old) by swestoyz (Cedar Falls, IA) |
||
|
With all the seals procured, it was time to assemble the transmission. I did some prep work on the drive tube by coating the rust with some POR-15.
| ||
|
Post# 1070192 , Reply# 26 4/30/2020 at 22:25 (1,453 days old) by swestoyz (Cedar Falls, IA) |
||
|
First off, the thrust washer is installed under the spring retainer. GE mentions that this is meant to act as a brake when the motor/clutch has stopped running. I can only imagine how long it would take to actually stop spinning if this wasn't in place. Funny also that this is only used on the 1956, 1957, 1958, and early 1959 transmissions. Otherwise it isn't used on the early two belt transmissions and isn't needed on the revised 1960 and later improved brake transmissions. The spring retainer was full of disgusting gunk. This alone was a great reason to completely disassemble the transmission.
With the drive tub push through the housing, the face seal for the WH8X318 seal can be installed. I did add a dab of 40w oil to the carbon face and had the curved edge of the o-ring face inside the face seal. Also, when the bellows was driven into the housing I did add a dab of Permatex No 2 to the housing. This was the only seal GE didn't call for any additional compound. But, better to be safe than sorry. Be careful if you do add some sealer to not allow it to get into the oiling holes in the housing. That bearing will need all the help it can get! Lastly, and not easily, the basket hub is installed with the bar against the bar flat on the drive tube. Because of the spring pressure this isn't a treat considering the POR-15 made it somewhat difficult to position the hub on the shaft. A new bar clamp was used along with some grade 8 bolts from the hardware store. | ||
|
Post# 1070194 , Reply# 27 4/30/2020 at 22:29 (1,453 days old) by swestoyz (Cedar Falls, IA) |
||
|
Next, the WH8X291 agitator shaft seal was installed. I used an aluminum vacuum hose extension from an Electrolux, a 2x4, and the dead blow hammer to drive the metal ring on the drive tube, and a piece of 3/4 inch copper tubing to carefully drive the top seal on the agitator shaft. GE did call for their sealing compound for the metal ring in the 1973 service manual, so more Permatex No 2 as used.
This seal did not come with any lubrication and squeaked upon install. Off it went and another seal was installed with some Maytag center seal grease on the inside of the sealing surface. All better! The threads for the agitator cap were chased with a 7/16-24 die. This post was last edited 04/30/2020 at 22:54 | ||
|
Post# 1070195 , Reply# 28 4/30/2020 at 22:32 (1,453 days old) by swestoyz (Cedar Falls, IA) |
||
|
With the top side done the transmission can be flipped over and filled with 54 oz of 40w oil. The only place I found locally that still stocks it was Fleet Farm. Better grab a few extra bottles for the future.
54 oz is roughly a quart and a half. The new WH8X242 ring seal was installed with the groove facing up. Thankfully, no leaks from the agitator shaft seal or drive tube seal assembly! Don't forget to install the WH1X1163 collar over the bearing. It is keyed to fit the bearing retainer. | ||
|
Post# 1070196 , Reply# 29 4/30/2020 at 22:38 (1,453 days old) by swestoyz (Cedar Falls, IA) |
||
|
When the transmission was disassembled the snubber lining showed that it was tired. Partially missing and compressed from years of force from the band, it wouldn't have held the tub at all during agitation.
I used the nifty 70-B Snap On vacuum grip pliers that the 1958 Product Man calls for when removing the band, rather than the vice grip and screw driver the service manual calls for. Much, much easier and doesn't put stress on the band. Make sure to put a coating of 40w oil the bearing frame and the lining prior to install, per the recommendations of the Product Man revisions. A shout out to our very own Jetcone for researching and getting new snubber linings made! www.automaticwasher.org/c... | ||
|
Post# 1070197 , Reply# 30 4/30/2020 at 22:40 (1,453 days old) by swestoyz (Cedar Falls, IA) |
||
|
With the new lining installed, the bearing frame assembly can now be fastened to the housing and the spring clutch and hub are inserted into place, along with the tube over the clutch spring.
The new WH8X184 and WH8X185 seals were driven into their corresponding parts with a coating of Permatex No 2 on the outside of the seals, per GE's recommendations. With the tube in place the pulley can be placed over the shaft. It is a dance to get the pulley in place and hold the shaft so that it goes to the opening in the pulley. I cut a new rubber gasket and used a hole punch for the center hole. I don't recall the size, but it looks like it might be about 3/8". With the rubber seal in place the washer can be installed, along with the nut. With the transmission now fully assembled, it can be flipped back over and set for a few days to ensure that it does not leak and install the drive block. So, drama number one was solved with complete luck, and the transmission is fully assembled with no leaks! Tune in tomorrow to find out how drama number two was solved! Until next time! | ||
|
Post# 1070207 , Reply# 31 5/1/2020 at 00:07 (1,453 days old) by askolover (South of Nash Vegas, TN) |
||
|
What was the last year of the flo flume at 12 o'clock position? I remember my grandmother having a white GE when I was very little but I can't remember the control panel. She replaced it in 1974 when I was 3 with a new green FF. My mother told me the white one was Grandmother's first automatic washer. It very well could have been this model. I think my mother said she was in her teens when Grandmother got her first automatic. Mother was born in 1945. | ||
|
Post# 1070255 , Reply# 32 5/1/2020 at 07:45 (1,453 days old) by panthera (Rocky Mountains) |
||
I am impressed. | ||
|
Post# 1070349 , Reply# 33 5/1/2020 at 20:46 (1,452 days old) by swestoyz (Cedar Falls, IA) |
||
|
| ||
|
Post# 1070351 , Reply# 34 5/1/2020 at 20:57 (1,452 days old) by swestoyz (Cedar Falls, IA) |
||
|
Drama solution - round two
While the transmission was humming along, the research phase of figuring out how to power the washer began. Last summer I stumbled upon a fairly decent stash of GE parts so I had some spare motor and clutch parts from the defunct dealer. Most of the parts were used but they were helpful in getting things figured out.
One of the motors had the top plate still attached from an early 70's GE, and side by side the motor mounting holes lined up just fine. How does it look installed in the washer with the solenoid attached? Not too bad! Plenty of clearance between the frame, the belt, and the transmission.
View Full Size
| ||
|
Post# 1070352 , Reply# 35 5/1/2020 at 21:02 (1,452 days old) by swestoyz (Cedar Falls, IA) |
||
|
My preference was to use the original motor, if at all possible. With the 70's plate lined up over the 1958 plate, I could see that there was enough material on the 50's plate to drill holes for the solenoid shifter bracket.
After marking through the 70's plate, holes were drilled and I had a perfect match! Both styles of brackets could now be used.
View Full Size
| ||
|
Post# 1070353 , Reply# 36 5/1/2020 at 21:11 (1,452 days old) by swestoyz (Cedar Falls, IA) |
||
|
While I had plenty of used parts on hand the decision was made to just buy a new two speed clutch assembly. They are plentiful and you get brand new parts with new bearings. PN WH49X265
When the new clutch arrived I had to laugh as it had a bent finger on the newer style carrier plate from shipping damage, similar to one of the used parts I had. Ended up straightening it out. With the new carrier plate installed on the 1958 motor I got a sense of how high I needed to raise the solenoid shifter bracket. A trip to Menards I grabbed a handful of nylon spacers of various sizes. I don't recall which size did the trick, but this worked out great. GE has quite the procedure drawn out on how to adjust the shifter. I made sure I had the space between the lock-in shoe and the arm locked in, as well as the height of the arm free spinning over the shifter when the shifter was resting. | ||
|
Post# 1070354 , Reply# 37 5/1/2020 at 21:13 (1,452 days old) by swestoyz (Cedar Falls, IA) |
||
|
With the revised motor/shifter figured out the test fit was perfect in the machine, but it dawned on me that it would be extremely difficult to adjust the shifter if needed with the outer tub installed. Several tests were done to ensure it was positioned properly before the outer tub was installed.
| ||
|
Post# 1070356 , Reply# 38 5/1/2020 at 21:30 (1,452 days old) by swestoyz (Cedar Falls, IA) |
||
|
Assembly of the clutch itself wasn't a huge deal, but getting the right combination of parts was a PITA. The clutch kit doesn't come with instructions so if you're doing what I'm doing and trying to combine 1958 parts with a 1970's-1990's clutch, it can be tricky.
Long story short, ditch ALL parts from the 50's clutch. The only part you'd be ok reusing would be the secondary/outer drum. Use the parts from the kit, and assemble in this order. Do NOT put any spacers between the leaf spring and the primary drum bottom bearing, OR any spacers above the fiber washer and the outer/secondary drum. I tried all combinations of parts - the original spring load primary clutch shoes, new radial bearings on the primary drum, different coupler plates, etc. This was the best combination. | ||
|
Post# 1070357 , Reply# 39 5/1/2020 at 21:37 (1,452 days old) by swestoyz (Cedar Falls, IA) |
||
|
Here we can see where the shifter would engage with the clutch, should slow speed be called for. Pretty nifty that all of this actually works!
The 1956 - 1960 single pulley solid tub transmission uses the same belt as the last of the filter flo GE washers. Original PN was WH1X1249, RMA belt number 4L300. Getting the coupler drive plate on can be tricky. The later 80's GE repair guide suggests using a 6 penny nail to hold the coupler in place on the shaft extension through the roll pin hole. This will allow you to more easily set the roll pin in place and give you one hand to hold the roll pin and punch, and the other to hand holding the hammer. Also, take note of any wear on the inside of the coupler drive plate. If there is a large groove worn inside the shaft on the inside it will need to be replaced. Don't ask me how I know, LOL. The clutch still had a slight and random rattle in slow speed. I'm attributing this to the bent finger on the carrier plate that I attempted to straightened out. It's ok, it at least sounds like a GE ;) | ||
|
Post# 1070358 , Reply# 40 5/1/2020 at 21:48 (1,452 days old) by swestoyz (Cedar Falls, IA) |
||
|
An extra step that was very much needed for this washer was to disassemble the cabinet from the bottom frame. So much oil from previous transmission oil leaks was left behind. While it wasn't required I'm not a fan of getting greasy hands when putting something back together.
The outer cabinet also saw a full automotive detail process to bring back some of the original luster of the single stage paint. It's not perfect but this washer is never going to be a contours level restoration (Hi, Bud!). Leveling legs were cleaned on a wire wheel and chased with a die and new lock nuts and NOS cover caps installed. | ||
|
Post# 1070360 , Reply# 41 5/1/2020 at 21:53 (1,452 days old) by swestoyz (Cedar Falls, IA) |
||
|
With the transmission rebuilt, motor/clutch buttoned up, it was time to figure out what to do with the fabric softener hoses. Earlier I mentioned all hoses were brittle with few exceptions, and these really odd hoses were well beyond bad. If anyone had tried running this washer before the restoration it would have leaked all over the place.
Pulling out the hoses from the outer tub I was pleasantly surprised to see round holes with a standard size - 1 inch! I came up with the idea to use some rubber grommets to fill the hole and use some 3/8" 90 degree barb fittings from Menards to pass through the grommet hole. It was a perfect fit! If anyone needs these grommets I'd be happy to drop a few in the mail. Specs - 1" OD, 3/8" ID, 1/16" panel thickness. | ||
|
Post# 1070362 , Reply# 42 5/1/2020 at 22:03 (1,452 days old) by swestoyz (Cedar Falls, IA) |
||
|
The next hurdle of the fabric softener hose routing were the sharp angles required. The solenoid is located in a super tight spot in the front left hand side of the cabinet. A full loop 180 degree loop is required from the solenoid up to the barb, and another 90 degree bend from the barb to the solenoid. Oh, and that 90 degree bend from the filler flume? YIKES.
So, after some Googling of 3/8 90 degree bend fuel line I found two products that were going to fit the bill. Oddly enough, a PCV hose for a 1967 to 1969 Big Block Chevy Camaro was the perfect hose replacement for the line from the filler flume to the first barb, and a super crazy custom hose from ebay took care of the 180 and second 90 degree bend. Neither are cheap but it makes this so much easier and reduces the amount of splices and fittings needed to get the job done. With the line routed for the softener solenoid the outer tub can be installed. | ||
|
Post# 1070364 , Reply# 43 5/1/2020 at 22:12 (1,452 days old) by swestoyz (Cedar Falls, IA) |
||
|
With the outer tub in place, the pump can be installed. These pumps are super unique - did anyone other than GE/Hotpoint use a pump like this?
NOS housing, valve, pump body, and gasket. New motor to pump coupler and clamps, both for later perf tub GEs. Blue RTV sealer was used on the pump body and the ring gasket between the body and the outer tub. | ||
|
Post# 1070365 , Reply# 44 5/1/2020 at 22:19 (1,452 days old) by swestoyz (Cedar Falls, IA) |
||
|
Next up was installing the star boot and the water level switch.
The rust growth was a pain to remove on the boot and eventually I took two files and gently rubbed the majority of the rust off. It really is a shame these are rare as hens teeth and that the later perforated tub versions cannot be used. I'd love to figure out a way to make more of these. To ensure that the boot would not leak water between the boot and the outer tub I used the best sealer in the world - The Right Stuff. Messy, expensive, but worth it. First coat went between the tub and the boot before pressing it in and smoothing it out, and a second coat was feathered out further on the tub and up the boot. If this leaks then hell has frozen over. New clamps for a later GE can be used, but a longer screw will be needed for the bottom/outer clamp. I ended up using the longer spring loaded version of the screw from a used lower clamp. Upper - WH1X1292 Lower/outer - WH1X1580 | ||
|
Post# 1070366 , Reply# 45 5/1/2020 at 22:25 (1,452 days old) by swestoyz (Cedar Falls, IA) |
||
|
The water level switch is an odd mechanism. I'm sure it worked great when new but they don't age well. The service manual calls for 4 to 6 gallons of water in the outer tub which fills to over the basket hub flange.
After lots of futzing to get it to trip somewhere in that range, I think it's kicking on around 7-8 gallons, or right about the bottom of the wash tub. Maybe with time it will get better. In this shot it was bucket filled with about 4-5 gallons and manually activated. Water level is just below the flange. Good news though - NO LEAKS!!
View Full Size
| ||
|
Post# 1070370 , Reply# 46 5/1/2020 at 22:35 (1,452 days old) by swestoyz (Cedar Falls, IA) |
||
|
With all plumbing checking out leak free it was time to button up the machine. Wash tub installed, water valve rebuilt/tested/installed, filler flume installed, fabric softener dispenser cleaned and installed, new clamps for all hoses, NOS outer tub seal installed (found one for a 59/60 that was easily modified for the '58 version of the fabric softener dispenser), and all fasteners required to hold everything together.
Outer tub seal received a liberal coating of The Right Stuff. Again, this stuff is amazing. Rather than reuse the leaded washers for the tub bolts I used these bonded washers. 3/8 ID, 3/4 OD. From Menards. | ||
|
Post# 1070371 , Reply# 47 5/1/2020 at 22:39 (1,452 days old) by swestoyz (Cedar Falls, IA) |
||
|
The machine top had been cleaned months before and was assembled just after buttoning up the rest of the machine. Control panel was cleaned, pedestals were buffed with Mother's polish, and a 25w equivalent 2700k LED bulb installed for the timer dial light. Now there is no need to worry about the bulb heat melting the dial!
NOS lid bumpers from a 59/60 were installed on the lid. Sadly one of the super cool '58 and earlier pads was missing. | ||
|
Post# 1070372 , Reply# 48 5/1/2020 at 22:43 (1,452 days old) by swestoyz (Cedar Falls, IA) |
||
|
So, without further ado, I'm proud to present the 1958 GE automatic! Featured next to it's best friend, the 1958 Frigidaire.
| ||
|
Post# 1070373 , Reply# 49 5/1/2020 at 22:54 (1,452 days old) by Supersuds (Knoxville, Tenn.) |
||
Congrats! | ||
|
Post# 1070374 , Reply# 50 5/1/2020 at 22:55 (1,452 days old) by swestoyz (Cedar Falls, IA) |
||
|
And, the maiden wash with video!
Thankfuly, with a load (tub & water) and some break-in time, the clutch is starting to sound much better. Agitation is super quiet and it revs up to spin quite nicely. The copper pan was in pretty poor shape, so it received a very light coat of Rustoleum copper paint. Not perfect, but better. The original pink filter mount on this machine is shot. If anyone has an NOS or gently used mount I'd love to borrow it so copies can be made. Please shoot me a PM if you're interested in helping out. This machine has exceeded my expectations. GE built a really great washer, and it is unfortunately they don't get as much attention as the dramatic Frigidaires of the same time period, or notoriety as say a belt drive Kenmore/Whirlpool. Yes, there are weak points (outer tub boot/overly weak snubber system), but they also wash the heck out of your clothes. I'm not sure what the future holds for the dryer. I'd like to find either another '58 920, or enough parts to get the missing trim strips and a good top. If anyone has one they'd be willing unload let me know. So, I tip my hat to you, GE. You did build some fine appliances, even if you threw in a bit too much value engineering. Ben | ||
| Post# 1070375 , Reply# 51 5/1/2020 at 22:59 (1,452 days old) by mjg0619 (Scranton, Pennsylvania) | ||
 | ||
|
Post# 1070382 , Reply# 52 5/1/2020 at 23:32 (1,452 days old) by CircleW (NE Cincinnati OH area) |
||
|
Excellent work. The filter pan looks good - wouldn't have known it was painted if you hadn't said so.
Perhaps the fill flume moved when the top was restyled to have the lid with clipped corners. I think that was either for '62 or '63. | ||
|
Post# 1070423 , Reply# 53 5/2/2020 at 06:59 (1,452 days old) by Losangeles (Muscle Shoals, AL 35661) |
||
1958 GE Restoration I have watched your YouTube presentation of the 1958 GE FF many times now and am fascinated each time. I then read thru you restoration process and found it to be equally fascinating and interesting. I am not mechanically minded and would never attempt a restoration as complicated as this. I only understood about 1/4 of the process and was totally lost when you got to the transmission tear down. Your engineering ingenuity and problem solving skills leave me in awe. The most I have attempted is a belt, timer and water valve replacement. Recently I have been attempting to bring life back into a 1963 Frigidaire Custom. (A big SHOUT OUT) and thank you to BEN for a motor and to BUD (Atlanta) for the many hours of phone consults, answered questions, advice and encouragement plus one office visit. Without you guys I would never even begin to realize a dream. Thank you, Tommy (Losangeles) | ||
|
Post# 1070426 , Reply# 54 5/2/2020 at 07:35 (1,452 days old) by combo52 (50 Year Repair Tech Beltsville,Md) |
||
TOL GE Filter-Flow Restoration Excellent job Ben, really glad you restored this machine so throughly and it came out so well, I very much enjoyed seeing what you went through doing it.
I will keep a lookout for the trim pieces you need for the dryer, also let me know if there are any other parts you need for the dryer. I hate to mention I have a lot of the parts you needed for the washer like the basket drive blocks, water pumps etc.
Thanks for documenting the rebuild process so nicely
John L. | ||
|
Post# 1070434 , Reply# 55 5/2/2020 at 08:12 (1,452 days old) by pulltostart (Mobile, AL) |
||
|
Such a beautiful washer! And a great job of bringing it back to life. It's fun to imagine how it would have been back in the day to go shopping for a new laundry pair and these are what you'd be looking at. As stated above, I only understand about 1/4 of what you did but find your documentation and process fascinating. Best of luck as you attempt to do a job on the dryer!
Again- a beautiful machine and a great job.
lawrence | ||
|
Post# 1070439 , Reply# 56 5/2/2020 at 08:40 (1,452 days old) by Unimatic1140 (Minneapolis) |
||
Super cool thread Ben and great restoration, it's practically a brand new 1958 washer! So much fun to just sit back and be able to use the machine now.
By the way I too wondered about that pressure spring on top of the transmission gearing assembly. I really wonder how much of a difference it really makes in slowing the tub during after spin???? | ||
|
Post# 1070441 , Reply# 57 5/2/2020 at 09:12 (1,452 days old) by chestermikeuk (Rainhill *Home of the RailwayTrials* Merseyside,UK) |
||
1958 Restore | ||
|
Post# 1070442 , Reply# 58 5/2/2020 at 09:27 (1,452 days old) by pulltostart (Mobile, AL) |
||
|
GE questions In response to questions posed above -
This washer would have been produced at Appliance Park, Louisville, KY.
The lid with the 'clipped corners' debuted in 1961 with the perforated tub/V12 models.
Advertisements for the 1961 models also show the filter flo flume still at the 12 o'clock position. I am guessing that the flume moved in 1962, possibly related to the development of the Mini-Basket.
lawrence This post was last edited 05/02/2020 at 11:08 | ||
|
Post# 1070504 , Reply# 59 5/2/2020 at 17:16 (1,452 days old) by swestoyz (Cedar Falls, IA) |
||
|
Thanks for the kind comments, everyone! The transmission just purrs during agitation. If it didn't have the filter flo flowing, it'd almost be silent.
John, I'll shoot you a PM regarding the trim for the dryer. And don't worry, I may have another GE project coming up where assistance from your parts department will be of help :) I forgot to post the obligatory shot of the model tag for Ken. The parts master shows that GE pretty much left the 950 alone in '58, with no revisions past R1. However the 953, TOL without the fabric softener, did have a revision, R3, that had the '59 style lid. Ben
View Full Size
| ||
| Post# 1070518 , Reply# 60 5/2/2020 at 18:16 (1,451 days old) by Hippiedoll ( arizona ) | ||
WOWZERS!!
so many points to touch on here...
First, you did an AMAZING restoration here Ben! That 1958 GE looks & works AMAZING! The motor running clip in the video, it just hummed along so smoothly! WOW... Second, I love the black & pink color combination of this washer. The black speckled tub, black agitator, pink agitator cap, pink tub ring, pink fabric softener dispenser, and pinkish metal filter pan. It just all pops so beautifully together. I wouldn't have known either, that the filter pan was painted if you hadn't mention it. And that the fabric softener dispenser "tray" was clear, that was really cool! That was cool the way you worked through the drama issues that popped up on you. Again, what a FANTASTIC restoration you did here! Doing the HAPPY DANCE for you on this side of the computer! WOOOOO HOOOOOO!!! :oD | ||
|
Post# 1070536 , Reply# 61 5/2/2020 at 21:17 (1,451 days old) by sambootoo (Moody, AL) |
||
|
Job well done, Ben. Thanks for an amazing restoration and such thorough documentation. | ||
|
Post# 1070731 , Reply# 62 5/3/2020 at 23:20 (1,450 days old) by abcomatic (Bradford, Illinois) |
||
|
HI Ben, Wow, another great restoration! Sure sounds good to hear it go again. | ||
|
Post# 1070752 , Reply# 63 5/4/2020 at 06:41 (1,450 days old) by bajaespuma (Connecticut) |
||
|
Rating plate
Thank you Ben!
I'd like to volunteer to be your assistant when you do one of these rebuilds (very good at holding wrenches)... I'd learn what I need to know.
View Full Size
| ||
| Post# 1166442 , Reply# 65 12/13/2022 at 00:27 (497 days old) by tinbarreiro (ecuador) | ||
Help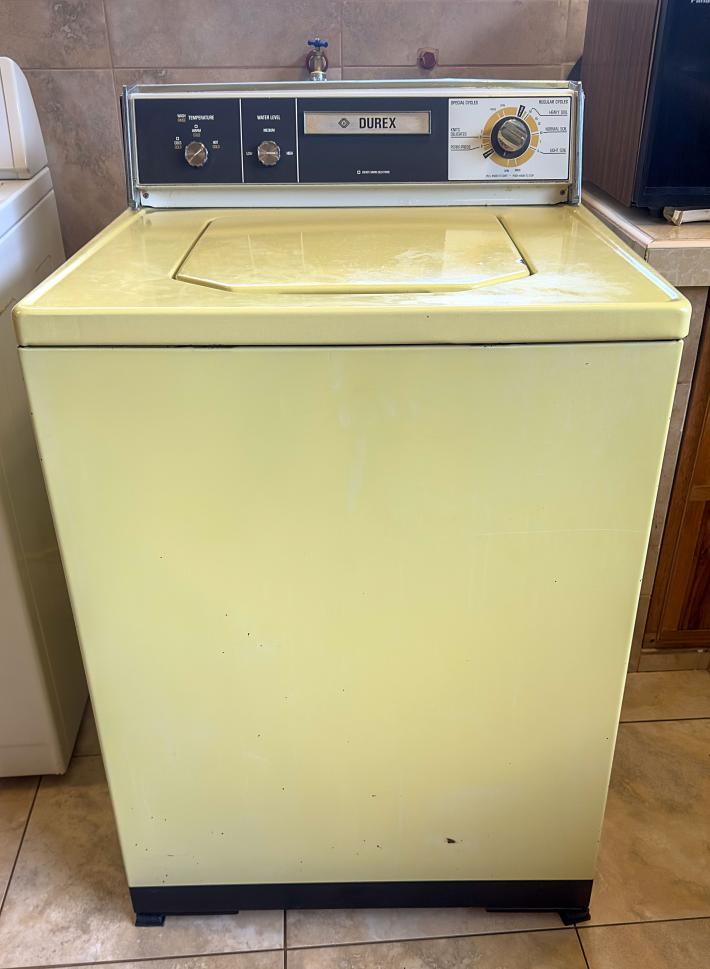
Hello everyone. Totally new to this forum came across this greatly detailed restoration process and used it as reference to fix my machine. My washing machine is a GE.....well actually a Durex brand (made in Ecuador under General Electric license) that was built around 1980 or few years prior. It uses the exact same transmission and after checking how to change a couple of broken water and oil seals, changing the oil that was basically turned to mud, replacing the belt and doing a deep cleaning or detailing of the entire thing I was able to successfully put it back together. It worked like a charm for a couple of months but now im having a bit of an issue that with your help, could hopefully be corrected. On the washing cycle, the drum is suppose to spin back and forth or clockwise and counterclockwise but that is now kinda limited and it makes a pretty loud knocking noise. It is still moving just not as much as it was before. The center spider moves as normal. The machine goes through the cycles and the clothes come out extra dry (I suspect the old belt was slipping a bit on high speed as it was covered oil and gunk). When I change the transmission oil, all the gears or pinions where in great shape and they are all made of metal so I don't think the issue is coming from there. However I did not clock the spring clutch at all, nor did I have to fiddle with the latch tube nor the clutch hub as it all fell into place very easily. As a comparison, when I work on the CVT transmission of my ATV, there is a need to actually spin the secondary clutch into position and they most people refer to this as clocking the clutch..... Not sure if that is needed on a washing machine as the system is different. Maybe some of you fine gentleman can share the knowledge or maybe give me another possible cause of this problem as I am totally out of ideas. I did order all new seals in case I have to take the transmission apart again but I forgot to order "The right Stuff" sealant. I only try it after seeing it here and wow that stuff is amazing. Any way, hope to hear back from you soon and thanks a lot in advance. Take a look at pictures of my machine. 40+ years of service and until now, going strong.
| ||
|
Post# 1166453 , Reply# 66 12/13/2022 at 07:37 (497 days old) by combo52 (50 Year Repair Tech Beltsville,Md) |
||
|
Reply number 65
1980 GE top load, automatic washer
Very impressive that you�re keeping this machine running, when the machine is washing agitating, the basket should lock into position and not move on this machine, if the basket is moving some and making a knocking noise, the brake that is supposed to hold the basket in place is broken my sister-in-law�s GE did this it�s entire life. It�ll probably keep working this way, but it�s a defect in the way the brake holds the gear case from turning internally. You would have to take it apart and see what�s broken if you want to correct it but you may be able to leave it alone. Keep us posted John. | ||
|
Post# 1166456 , Reply# 67 12/13/2022 at 08:22 (497 days old) by swestoyz (Cedar Falls, IA) |
||
|
John is spot on that the wash tub should latch in place after a few seconds of agitation. The latch slide should engage with the tang on the brake band once the assembly finds that spot within the 360 degrees of rotation, found on the outer diameter of the base bearing frame. Between the frame and the brake band is the brake lining, which on your washer is much longer and larger in height to the small band on the '58. No "clocking" required during reassembly, but rather that lowering the bearing frame on the housing doesn't interfere with the latch.
During wash, often you'll hear a clunk as the latch engages with the brake band, but it shouldn't make much noise after that. When the transmission is reversed for spin the clutch hub draws the latch away from the tang on the brake band and allows the assembly to freely spin. The release for spin happens immediately upon reversal (within roughly 90 degrees of rotation of the pulley). I don't have any decent interior shots of the later style GE transmission with the updated brake, but Jon took some great shots a few years ago when he rebuilt the transmission on one of his late 60's/early 70's GE's. This should match yours. www.automaticwasher.org/c... Ben
View Full Size
| ||
| Post# 1166504 , Reply# 68 12/13/2022 at 21:21 (496 days old) by tinbarreiro (ecuador) | ||
|
John thanks for the information and your incredibly quick reply. To be hones I remember the basket on my washer always doing that back and forth movement reason why I thought it was normal operation. This machine is actually 2 years older than I am as my parenst bought it to wash my sister's dirty dippers...yeah back in the day when dippers where not disposable. I am now 40 so it is unbelievable that a 42 year old machine is still in service. Guess I never saw the brake working but what caught my attention was the sudden knocking noise that appeared out of the blue. I am planning to take it apart just to check it again as the first time I did not see any signs of broken parts, but then again I was not looking too hard for it as I only wanted to chance the seals and put new oil on the transmission. I already place the other for the necessary parts but still haven't received them and that could take a very long time since I am in Ecuador. I will try to do a video of how the machine is operating these days and maybe post the link to YouTube. You are awesome and I really do appreciate all your help.
Thank you. Martin | ||
| Post# 1166506 , Reply# 69 12/13/2022 at 22:03 (496 days old) by tinbarreiro (ecuador) | ||
|
Ben wow you totally PhD'ed your explanation and definitively took me to school. When I took apart the transmission I did not studied the brake in much detail as it was not of my concern and since it was my first time ever to take apart any washing machine ever I really did not know what I was doing. No service manual, no previous experiences and only this post as references. I started to have problems of oil stains in my clothes after washing and by reading this post decided to try to fix the issue by changing the seals. It was great fun and since the machine had been on service for son long I had a "what's the worts that could happen" kind of attitude because it was already not working properly and staying clothes rather than making them cleaner. I was unable to take the basket hub out of the axel as it was basically rust welded to it so I decided to take the transmission to a shop. In the metal shop they told me that the hub might break when they heated the piece to get it out but I green lighted the operation and luckily they where able to take it apart without any damage. Once the guys in the shop saw the insides of the transmission they where sooo surprise that they bold told me to make sure I fixed the machine because of the quality of the gears. These men usually work on tractors and heavy machinery so their comment was totally unexpected and it motivate me to fix the washer. The funny part is that there is some kind of brake that actually works in different cycles and it does stop the wash tub and the agitator dead in their tracks. If I for instance open the top in the middle of a cycle the machine stops immediately. Maybe that's a different system but since it does stop I never thought there could be a problem with the brakes. Again I have some parts comming hopefully some time soon and maybe then I will take apart the transmission just to inspect it again now that I know what to look for. Thanks fo the link to Johns other post, that really does help.....but after his struggles with impressing and installing the spring back into place I am having second thoughts about taking that thing apart and loosing an eye in the process. That little breakdown diagram is helpful to and would keep an eye on that latch slide too. I am amazed at the response time, your bast knowledge and also the fact that I can still find replacement parts for a 42 year old machine.
Thank you very much Ben. Martin | ||
|
Post# 1166530 , Reply# 70 12/14/2022 at 08:08 (496 days old) by swestoyz (Cedar Falls, IA) |
||
|
Martin, you're welcome! Thanks for sharing the fun story of taking the transmission to the machine shop. A huge gamble in attempting to remove the hub but I'm glad to hear they were able to pull it off without damaging it or the spin tube.
If the machine is stopping the wash tub and agitator "dead in their tracks" upon opening the lid during spin, the brake is working just fine. You'll hear a pop when the latch grabs the brake band tang when power is cut from the motor. Keep us posted on what you find, and feel free to start a new thread. :) Ben | ||
|
Post# 1166548 , Reply# 72 12/14/2022 at 11:59 (496 days old) by swestoyz (Cedar Falls, IA) |
||
|
Helicaldrive - great question. The middle button on the dryer is the De-wrinkle setting. It triggers a separate thermostat calibrated for the de-wrinkling cycle mark on the timed portion of the timer.
When activated, a 160 degree thermostat overrides the compensating resistor within the control thermostat, allowing for a fixed limit rather than the standard compensating control. | ||
| Post# 1166586 , Reply# 73 12/14/2022 at 19:32 (495 days old) by Helicaldrive (St. Louis) | ||
|
Thanks! All very interesting. | ||
|
Post# 1166688 , Reply# 74 12/15/2022 at 21:22 (494 days old) by GELaundry4ever (Nacogdoches, TX, USA) |
||
|
startup sound I like the startup sound of agitation on normal speed. | ||
|
Post# 1187379 , Reply# 75 8/12/2023 at 01:57 (255 days old) by lotsosudz (Sacramento, CA) |
||
INCREDIBLE RESTORATION | ||
|
Post# 1188044 , Reply# 76 8/20/2023 at 16:03 (247 days old) by chetlaham (United States) |
||
|
Durex Washer | ||
| Forum Index: | 
| Other Forums: |

|

|

|

|

|

 Comes to the Rescue!


;)
;)
;)
;)
;)
;)
;)
;)
;)
;)
;)
;)
;)
;)
;)
;)
;)
;)
;)
;)
;)
;)
;)
;)
;)
;)
;)
;)
;)
;)
;)
;)
;)
;)
;)
;)
;)
;)
;)
;)
;)
;)
;)
;)
;)
;)
;)
;)
;)
;)
;)
;)
;)
;)
;)
;)
;)
;)
;)
;)
;)
;)
;)
;)
;)
;)
;)
;)