|
Thread Number: 83731
/ Tag: Modern Automatic Washers
Can you repair a hole in a door boot seal? |
[Down to Last] |
| Post# 1080909 7/13/2020 at 19:54 (1,379 days old) by stricklybojack (South Hams Devon UK) | ||
.
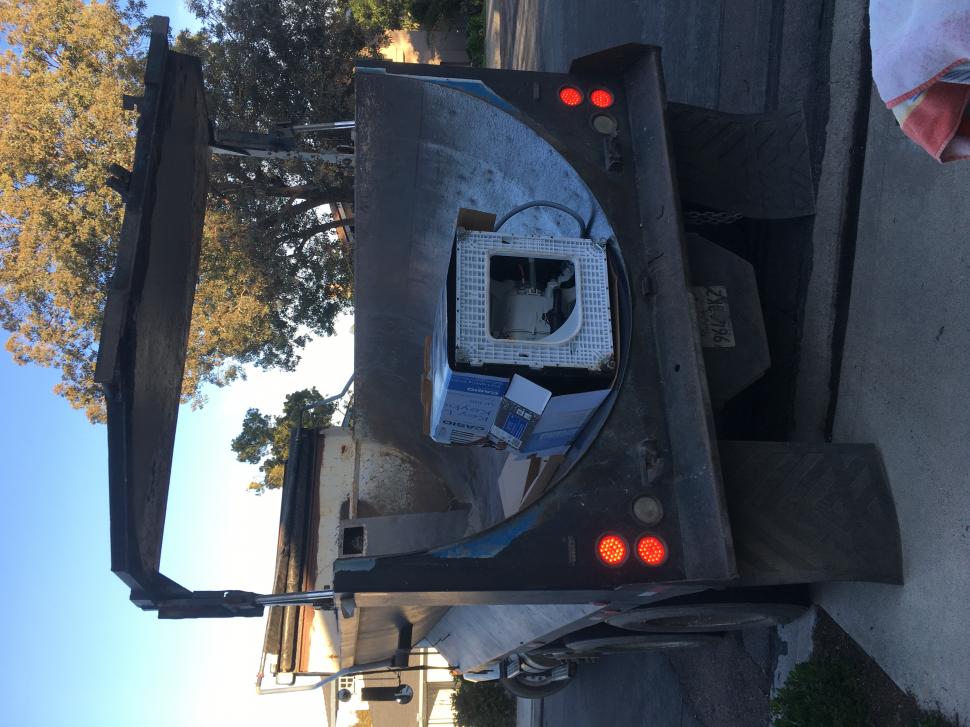
GE �RightHeight� washer...got it free, then I found out why. During a test run, using the �basket clean� cycle on this grungy freebie, it started leaking water out of the front left corner of the machine. After tearing into it I found the reason, a cigarette sized oval hole at the 6 o'clock position of the door boot-seal. Anyone have success patching one of these? | ||

|
Post# 1080913 , Reply# 1 7/13/2020 at 20:31 (1,379 days old) by Yogitunes  (New Jersey) (New Jersey) |
||
 | ||
|
Post# 1080916 , Reply# 2 7/13/2020 at 20:43 (1,379 days old) by LowEfficiency (Iowa) |
||
 | ||
|
Post# 1080938 , Reply# 3 7/13/2020 at 23:45 (1,379 days old) by Launderess (Quiet Please, There�s a Lady on Stage) |
||
 | ||
|
Post# 1080941 , Reply# 4 7/13/2020 at 23:50 (1,379 days old) by foraloysius (Leeuwarden, Friesland, the Netherlands) |
||
 | ||
| Post# 1080947 , Reply# 5 7/14/2020 at 01:00 (1,379 days old) by stricklybojack (South Hams Devon UK) | ||
|
| ||
|
Post# 1080955 , Reply# 6 7/14/2020 at 04:13 (1,378 days old) by chestermikeuk (Rainhill *Home of the RailwayTrials* Merseyside,UK) |
||
Patching a Hole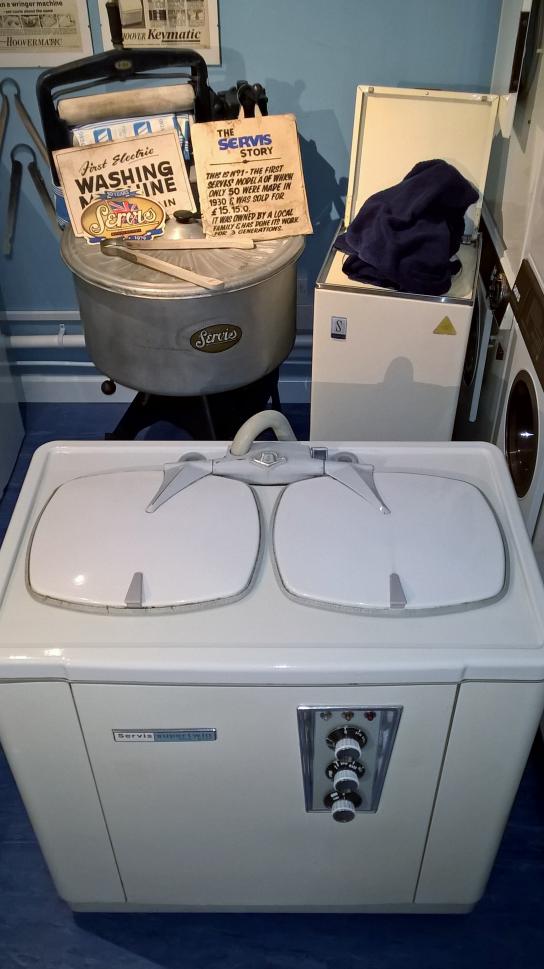
Ive used a variety of bike inner tube puncture kits as well as marine / fishpond liner repair kits , both work fine with the correct watertight glue !!
Here I`ve used it on a rare Hoover Keymatic door boot from 1961. | ||
| Post# 1081055 , Reply# 8 7/14/2020 at 17:22 (1,378 days old) by stricklybojack (South Hams Devon UK) | ||
|
.
Because I plan on selling the washer (two buyers are interested already), and I found a new boot for a fair price, and I have already done most of the work to replace it...that is what I am going to do. The hole is on a fold and that gave me extra pause. I was thinking of sticking a plug in and sealing around and over it as the best way to fix it. This post was last edited 07/14/2020 at 18:09 | ||
| Post# 1081075 , Reply# 9 7/14/2020 at 20:49 (1,378 days old) by Good-Shepherd (New Jersey) | ||
|
Ugh! Should have warned us your gnarly foot was going to be in the photo.. | ||
| Forum Index: | 
| Other Forums: |

|

|

|

|

|

 Comes to the Rescue!


;)
;)
;)
;)