Thread Number: 86557  /  Tag: Vintage Automatic Washers
SERVIS quartz 6035 drum bearings and parts
[Down to Last]

automaticwasher.org's exclusive eBay Watch:
scroll >>> for more items --- [As an eBay Partner, eBay may compensate automaticwasher.org if you make a purchase using any link to eBay on this page]
Post# 1111449   3/15/2021 at 05:56 (1,131 days old) by bureaucrazy (UK)        

Hello, my washing machine is very noisy on spin. I think I may need to replace the bearings.

Are they a common generic part or do I need to find the specific parts? Where can I get them?

I will also need a drum seal. Can I just get one from another brand and cut it to size?

Where can I get a door seal? The door opening looks small compared to other machines, so a specifc seal will be needed.

I have looked at the main spare parts websites and searching by model number does not find parts specific to this machine. Is there any dealer in refurbished or salvaged parts? I guess drum bearings really need to be new due to wear and tear but circuit boards, door catches and such may be fine if used.

It's a fantastic machine, so I really want to keep it running as long as possible.

Is there any place who deal in or repair older machines who could help me get the right parts?

Many thanks


Post# 1111453 , Reply# 1   3/15/2021 at 06:45 (1,131 days old) by ozzie908 (Lincoln UK)        
Servis Quartz

ozzie908's profile picture
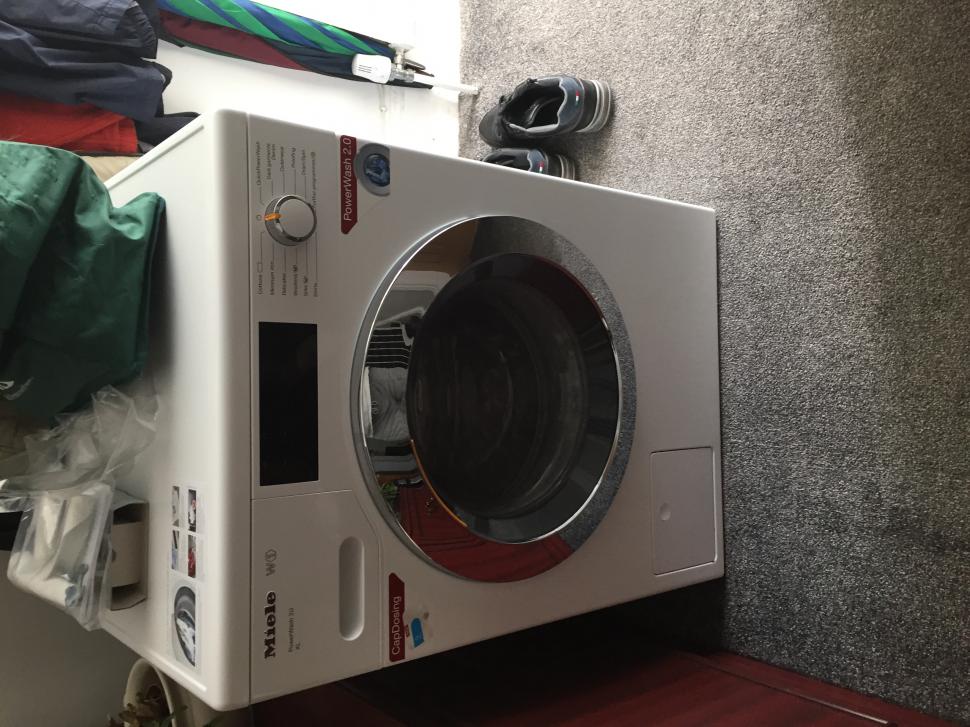
I have a feeling that the bearing is the same size as used on many Hoover/Hotpoint machines of that era, However I could be wrong.
If your able to get the bearings out along with any seals you may need you can get the bearings from any manufacturer. There are a few around you just need the sizes.
The seals however may be more of an issue as you won't be able to get them unless some kind soul on here may help you by donating/selling some spares they have collected.
I also have an inkling that the Hoover Matchbox range of washer has the same door seal at least its of similar dimensions and I have fitted one to a Servis before now.

Good luck with your quest I am sure you will receive some more encouraging messages soon.

Regards Austin.


Post# 1111470 , Reply# 2   3/15/2021 at 09:49 (1,131 days old) by Chestermikeuk (Rainhill *Home of the RailwayTrials* Merseyside,UK)        
Servis Quartz

chestermikeuk's profile picture
Afternoon Bureaucracy, welcome to AW, am sure we will be able to get the info for you, as you will know this series are now over 35 years old and the original manufacturer , Servis UK is long gone .Some parts are available on eBay and the likes as well as independent shops that may have old stock, some members may have spares from cannibalised old machines .

Please help us out by showing us a pic of the serial plate and number from inside the door .,this will let us identify what series it is and which parts are needed as they changed with production runs .

Have you had the washer from new, has it had many repairs ? Look forward to hearing from you and the gang at AW helping you out.

Cheers , Mike


This post was last edited 03/15/2021 at 12:20
Post# 1111483 , Reply# 3   3/15/2021 at 10:58 (1,131 days old) by bureaucrazy (UK)        

Thank you for making me welcome here Mike. I prefer not to reveal my name online though, for privacy reasons, so could you please edit your post just to remove my name?

I have attached the picture of the label inside the door if that is what you mean?

I bought it used in 1995 for £50 as my first and only washing machine amd have used it on and off since then. It was kept in storage for some years and when I took it out about 7 years ago there was a fault and I remember calling engineers who said to chuck it out as it was too old (how sad). Undeterred, I was eventually able to get a new motor fitted and it has worked fine until now.

It's a great machine, much better than many new ones. I like the 30min quick wash, the hot fill and the small drum for efficiency. It also fits into smaller spaces.

The design is also visually appealing, so I can see why there are enthusiasts for this applicance. It really is from a time when British manufacturers really tried to make the very best possible products and built them to last.


  View Full Size
Post# 1111512 , Reply# 4   3/15/2021 at 14:01 (1,130 days old) by Chestermikeuk (Rainhill *Home of the RailwayTrials* Merseyside,UK)        
Servis 6035

chestermikeuk's profile picture
Here's a link to a thread previously on here with regards to your Quartz 6035 , a good source of issues although a change of bearings is not documented so good they seem to be ...

Also I've listed the original spares catalogue numbers from Qualtex which tend to crossover with regards to searching across other spares suppliers if they have any left. The bearings can be cross referenced with current bearing manufactures when identified as fitted , also codes for the front tub seal and door gasket .

The door seal is DBT50
Ball Race Bearing kit is BKT 46
Front tub seal GSK52

Hope this helps , they are great washers and seem to last longingly with a little TLC when required.

Cheers Mike


CLICK HERE TO GO TO Chestermikeuk's LINK


Post# 1111628 , Reply# 5   3/16/2021 at 06:49 (1,130 days old) by bureaucrazy (UK)        

Thanks so much for the part numbers (and the edit). I have found a stockist of the door seal so far. Could the drum seal be substituted with something similar if I bring the old one to the local spares shop - or even use silicone sealant?

The bearing kit is elusive. I have only found it on one website - out of stock:
www.yourspares.co.uk/part...

There are 6 pieces but pictures of bearing kits for other machines only seem to have 3 pieces.

In the photo the middle piece and the one at top left look unusual (what are they?) but the other 4 look as though they would be easy to source as standard parts once removed and identified.

I guess I won't know what the damage is until the machine is dismantled but is it possible that perhaps that the unusual parts might still be servicable and only the standard parts need changing or is it likely that all of it them be worn out?


  View Full Size
Post# 1111633 , Reply# 6   3/16/2021 at 07:50 (1,130 days old) by bureaucrazy (UK)        

I think I may have found the unusual parts. the top left part might be upside down?
Do you think this will work?

Hoover Bearing Kit - 7056

Hoover 1100 Washing Machine Bearing Seal Kit Pre Logic Series

Homespare:
HOOVER
A3060, A3110, A3140, A3146, A3156, A3172, A3186, A3188, A3190, A3260, A3292, A3294, A3350, A3356, A3386, A3388, A3392, A3394, A3470, A3472, A3474:

Pack Qty 1

Product Code: 7056


  View Full Size
Post# 1111640 , Reply# 7   3/16/2021 at 08:32 (1,130 days old) by Chestermikeuk (Rainhill *Home of the RailwayTrials* Merseyside,UK)        
Servis 6035

chestermikeuk's profile picture
Is it an original Spin Care drum ( no holes) or later Chevron drum ( patterned hold chevron shape)because some later drums have taper bearings , they tended to be on later higher spin speed models , just in case its had a drum change etc ..

The bearing kit shows on the top the rubber spring seals , then the bearings , middle is the crush washer and spacer , your right the SKF bearings.

As you can imagine original parts are like hen's teeth , the drum seals being the issue , I've checked with Steve who is in the other thread as he's the only person I know who has changed bearings on this series , all mine have held up , my mum had here's washing for family of six and new baby grandchild for 18yrs and no bearing changes ...

Cheers, Mike


Post# 1111641 , Reply# 8   3/16/2021 at 08:35 (1,130 days old) by Chestermikeuk (Rainhill *Home of the RailwayTrials* Merseyside,UK)        
Servis 6035

chestermikeuk's profile picture
Hold fire at the moment we are just checking if yours are taper bearings rather than ball race bearings , Just been speaking to Steve who is checking , also that kit may contain a seal that is workable so it may be worth getting it for the seals alone which are the most difficult part to source ..

Cheers, Mike


Post# 1111650 , Reply# 9   3/16/2021 at 10:10 (1,130 days old) by bureaucrazy (UK)        

The drum is likely original. I bought the machine second hand in 1995 and it has so far only needed a new motor due to tachometer failure.

  View Full Size
Post# 1111721 , Reply# 10   3/16/2021 at 19:17 (1,129 days old) by SEsteve (London, UK)        

sesteve's profile picture
Here are some pictures I took of the bearings on the model before yours - the grey fascia 6030 with a spincare drum . This machine had a leaking seal but when I stripped it down the bearings were fine - just needed greasing and a new water seal fitted. These bearings are built to last so you might find greasing sorts it out. I think the bearing kit I show there is for the earlier quartz models but the seal was the same. Have you taken the belt off to check to see if it’s not the motor bearing as these can be quite loud when they wear?

I was able to reuse the tub seal and didn’t need to silicon it as I couldn’t find a new one.
I took more photos than this as I actually removed the cabinet off the chassis but I can’t seen to find them. If I do I’ll pop them up as having the cabinet off made things so much easier.

There was a new door seal on eBay a few weeks back as I flagged to another member who was on the lookout for one so they do pop up from time to time.

Good luck.


  Photos...       <              >      Photo 1 of 8         View Full Size
Post# 1111765 , Reply# 11   3/17/2021 at 03:37 (1,129 days old) by chestermikeuk (Rainhill *Home of the RailwayTrials* Merseyside,UK)        
Servis 6035 Drum

chestermikeuk's profile picture
The drum in your 6035 throws up a dilemma as it must be a changeover model from the smoothe spin care drum, BUT I thought the new drum was the Chevron style, holes in the shape of a chevron arrow etc, yours is showing holes with no pattern.

Which makes it either a new original or it has been changed at some point, very interesting !!


Cheers Steve for posting the bearing pics, I wonder did many other manufacturers use the taper bearings do we know ?


  Photos...       <              >      Photo 1 of 3         View Full Size
Post# 1111827 , Reply# 12   3/17/2021 at 14:22 (1,128 days old) by bureaucrazy (UK)        

I called rthe place with the Hoover parts and they said they can't be sure if it is available as it might be at a 'feeder' centre. (some sort of supplier I think). They won't be able to check until the reopening of shops etc.

The machine was pretty new when I got it. The couple sold it to me as they bought a bigger one. I doubt the drum was changed before I got it so it might be a newer edition as you suggest.

When I turn the drum by hand, it feels a bit 'rumbly' hence I suspect the bearings. I am not an engineer though so I can't be sure. When spinning it makes a similar noise to normal, only far louder.

I need to clear some space to pull it out and then I will take some photos of the insides and post them here.


Post# 1112850 , Reply# 13   3/27/2021 at 08:31 (1,119 days old) by bureaucrazy (UK)        

Thanks for the tips and the part numbers have been very useful in trying to track down the parts.

I removed the back. The drum is plastic and looks the same as on the other thread.
There is a rusty stain near the centre coming from a small hole.

Does this stain confirm the drum bearings are gone?

The belt seems firm and the motor is almost new so I think the noise is coming from the drum bearings.

I have never tried this kind of repair before so i might need a bit of advice along the way.

I hopefully will be able to get the BKT46 kit but will need to wait til next week to be sure. The tub seal is nowhere to be found but I have tracked down a door seal (I hope). Quite often websites show a part as in stock only to find they have not updated the page since selling out.

As this is a major repair job, I want the machine to last as long as possible and don't want to find something else breaks and I can't get hold of the part in future.

Are there any other parts I ought to get or replace now while I can still obtain them?

Once it has a new motor and new bearings, what else is likely to wear out? e.g.

heating element?, suspension?, door catch, thermostat?

I think the pump, the pressure switch, inlet valves and so on do not need to be exact matches for original parts as long as any replacement does the same job.

There is corrosion on most parts and the rubber hoses feel a little dry but they are not quite perished and are still usable if I am careful not to damage them.


  Photos...       <              >      Photo 1 of 2         View Full Size
Post# 1113194 , Reply# 14   3/30/2021 at 04:44 (1,116 days old) by chestermikeuk (Rainhill *Home of the RailwayTrials* Merseyside,UK)        
Servis 6035

chestermikeuk's profile picture
Great to know you are proceeding with repairs, as this is a 35+ yrs old washer its likely that it will need repairs, for the hoses we use "Son of a Gun" spray to keep them supple or get some of the sticky mastic tape to cover them with , also there are manufacturers of rubber piping for new stuff when needed.

The weeping stained brown water is coming from the bearing seal channell, if the tub seal fails water should bypass the bearings and drain from the channell rather than ingress the bearings , if you take the belt off and spin the drum you will hear the growl and feel the rumble if bearings are going , saying that my drum just went very stiff to turn and seized spectacularly on spin .

Only other items are the heater and thermistor but non of mine have ever blown, so yes its prob best to keep searching and build up a stash of new or from scrapped machines to keep it going .

look forward to hearing how you get on with the repairs !!


  View Full Size
Post# 1113379 , Reply# 15   3/31/2021 at 14:04 (1,114 days old) by bureaucrazy (UK)        

I removed the belt and spun the drum by hand. It felt a bit rumbly and the was a slight scraping sound on one part of the turn. It was noisy on spin like in this video:


so I hope my diagnosis is right.

After having no luck searching online for the bearing kit, I resorted to phoning random independent shops and managed to find one in stock!

The bearing and seal kit arrived today!
However, the 2 sivler washers shown in Reply 5 above are not in the pack.

also seen here:https://www.yourspares.co.uk/parts/hotpoint/cookers-and-ovens/9545/parts/ys77753/hotpoint-9545-washing-machine-bearing-kit-BKT46.aspx

The pictures show what I got and it says QUALTEX BKT46.
The two seals are packaged on top of one another. The bearings are marked L44649.

Question1: What are the sivler washers for and do I need them?

Question2: Should I remove all the white metal case and then take the inner drum apart with the plastic outer drum remaining still in the machine?

or do I need to disconnect everything from the drum and remove the entire drum before taking it apart?


  Photos...       <              >      Photo 1 of 2         View Full Size
Post# 1113392 , Reply# 16   3/31/2021 at 17:53 (1,114 days old) by SEsteve (London, UK)        

sesteve's profile picture
Well done on tracking down the bearing kit. You might find once you strip the.machine down that it is just the seal and the bearings are ok and just need greasing. The replacement ones are a different design and in my opinion not as good as the originals. As Mike said, the water coming out from the hole is where it has got past the seal but not into the bearings so it will be wear on them if they do need replacing. Wait and see when you strip it down. I think the silver washers are to make up for the reduced depth of the replacement bearings but I could be wrong.

I’ve searched everywhere for the photos but must have deleted them but you will need to take off the outer cabinet to get the outer tub cover off and the drum out. It’s quite easy as you don’t need to disconnect everything. You basically remove the soap dispenser and disconnect the facia control board and remove it, undo the door catch screws, remove the door seal from the cabinet, unclip any wires from the cabinet and remove the screws holding the cabinet to the base and the back panels and it should pull off. You’ll be left with the outer tub on its suspension on the plinth a bit like the earlier model in the picture. The front cover unclips. Be careful removing the pulley as they can break - I always use a wooden wedge which I try to hold near to the centre where the spikes are thicker.

Take lots of pictures as you go as a reference but also so we can see here! Good luck!


  Photos...       <              >      Photo 1 of 2         View Full Size
Post# 1113594 , Reply# 17   4/3/2021 at 04:13 (1,112 days old) by Chestermikeuk (Rainhill *Home of the RailwayTrials* Merseyside,UK)        
Servis 6035 Schematics

chestermikeuk's profile picture
Here's the schematic diagrams showing exploded parts .The beauty of the Servis UK washing machines is they are built on a solid metal chassis baseplate , so removing the cabinet is easy as Steve says above and much easier to work on bearing changes etc ..

  Photos...       <              >      Photo 1 of 7         View Full Size
Post# 1113888 , Reply# 18   4/6/2021 at 08:47 (1,109 days old) by bureaucrazy (UK)        
Stuck already

Thank you so much for the schematics. Very very useful.

It looks like my kit also has taper bearings but doesn't have the spacing washers so i'll see if I can reuse the old ones.

However, I am stuck already. I have removed the back panel and the control panel and drawer but cannot remove the metal band surrounding the door seal. There is a clip underneath like a flat staple with prongs that go through holes in the band and fold under itself. I have tried to tease it off (calling it all kinds of names!) but I cannot seem to undo the prongs. I don't want to break it. Is there a tool or technique that helps?


  Photos...       <              >      Photo 1 of 2         View Full Size
Post# 1113893 , Reply# 19   4/6/2021 at 09:53 (1,109 days old) by bureaucrazy (UK)        
It's off!

Spoke to soon. Just needed to slide the tip of a small screwdriver towards the prong bend and it came apart without breaking!

Now I see 4 rusted bolts inside the bottom holding the upper body onto the chassis. If I remove them it should come off...


  Photos...       <              >      Photo 1 of 2         View Full Size
Post# 1113920 , Reply# 20   4/6/2021 at 15:08 (1,108 days old) by bureaucrazy (UK)        
Progress...

For anyone else who needs to do this, you should lay the machine on it's back and use a screwdriver to remove the 4 crosshead bolts holding the case to the chasis. Then remove the nut and bolt under neath the front. Then get someone to help stand it up again. If on your own, you should lay it on it's front and undo to nut and bolt and the two forward most crosshead bolts. Then stand it up and undo the rear bolts with a short handle spanner or special angle screwdriver that can reach in and under.

Once standing up, you can carefully remove all stuff attached inside the body and then lift it off.

Ok, so I've removed the body without having to disconnect any gubbins.
The front of the drum is now accessible.

However, there is a lot of gubbins dangling around the top and back such as the soap box and the top back panel, etc.

I don't know how awkward changing the bearings will br or how much force is required to remove them, etc. Will I need to lay the machine on it's front or back during the operation?

Before I go further, is it better to remove the loose gubbins and then try to remember how it goes back together or do you think it would be OK to just tie it and tape it in place so it stays put while I work on the drum?


  Photos...       <              >      Photo 1 of 2         View Full Size
Post# 1113923 , Reply# 21   4/6/2021 at 16:16 (1,108 days old) by SEsteve (London, UK)        

sesteve's profile picture
Well done so far. Yes those clamp bands are a bit of a pain especially to put back on - I think the other holes are used to let you squeeze it together to get the clip in place. A fellow member had a nasty accident with a screwdriver trying to put one of these back on though!

I would just try and secure the loose gubbins as best as you can - they won’t go far but you don’t want to loosen any seals with the hoses with the dispenser moving etc. The machine is best left upright for doing the bearings. Again be careful taking the clips off as they have a tendency to ping off in all directions. The hardest part will probably be loosening the bolt holding the pulley on depending on how tight it’s been done up. Use a piece of wood that will fit snugly in the recesses in the outer tub to jam the pulley to stop it turning while you undo the bolt and also use it to protect the end of the drum shaft as you will have to give it a couple of whacks to free the drum so you can pull it out. If it has the same bearings mine had they should just pull out by hand. If it’s the other sealed type then you will need to knock them out.

Hope that’s not teaching you to suck eggs! You are well on your way so shouldn’t take too long from here.


Post# 1113999 , Reply# 22   4/7/2021 at 15:44 (1,107 days old) by bureaucrazy (UK)        

Not teaching me to suck eggs at all. I have never tried anything this mechanical before.

The front of the drum came off easily. The pulley nut was easy and the pulley came off by turning the drum from inside. Then the inner drum came out.

The seal inside the drum looks terrible and hardly recognisable in the new one. I hope the new one (PART 4) is correct as it looks so different.

There is rusty mush inside the hole so I think the front bearing is long gone.

The rear bearing has a felt washer (maybe aspestos?) Should I reuse this or where can I get one from as it was not in the kit?

At the bottom of the spider spindle there looks like a seal with gaps in it. I think PART 3 is to replace this.

I am going slowly and carefully. Any advice is welcome. Thank you for everything so far.


  Photos...       <              >      Photo 1 of 5         View Full Size
Post# 1114031 , Reply# 23   4/8/2021 at 09:37 (1,107 days old) by bureaucrazy (UK)        

Inside the drum, the old face seal (3343 on the schematic) seems like it's cemented in and will not come out. Please see pictures. Somehow I must remove this without damage to the hole it sits in so that the new seal will have no leaks.

In my pictures the red arrow shows the cememnt like stuff. Or is it limescale?
Bits of the old seal like the carbon ring have crumbled and fallen out.

I must also be careful not to damage the felt washer if the inner bearing has one (see last pic for felt washer of rear bearing (removed)).


  Photos...       <              >      Photo 1 of 4         View Full Size
Post# 1114036 , Reply# 24   4/8/2021 at 11:49 (1,107 days old) by SEsteve (London, UK)        

sesteve's profile picture
Great progress and yes they have definitely failed!

So you are right your new part 3 is the counterface and looking at your 5th picture the original one has split. You need to lever this out and clean up the housing and the new one should push in - usually would use some debor glue under the rubber seal. You might want to clean up the bush at the base of the shaft first with fine wet and dry paper as it looks rough and could damage the new seal.

Part 4 is correct. The original spring has probably rusted and collapsed. This will be glued in so just pull it out and again clean up the recess and glue the new one in. I think what you can see there is limescale as the glue will be on the rear of the seal. For both these parts make sure you keep the carbon seal clean. When the drum goes back in it will compress the spring and that will provide the seal. Its a good idea to do a couple of spin cycles without water when it’s all back together to help the two faces to bed in.

I don’t remember a felt washer on mine so maybe it stayed on the bearing - it’s not shown in the drawing Mike posted so I would reuse these. I doubt very much that they are asbestos.

Keep up the good work


Post# 1114047 , Reply# 25   4/8/2021 at 15:02 (1,106 days old) by bureaucrazy (UK)        
Element scale

Thanks for the tips. I will do as you recommend.

Looking at the state of the drum, both the outside of the steel inner drum and the inside of the plastic tub are caked in limescale. I bought some HG limescale remover to try and clean it off, at least in places that need cleaning up to stick rubber parts to.

Is the steel drum fully stainless steel or is it chrome plated? I don't want to dissolve the plating by mistake.

The element is very thick in scale. I could try to clean it off in situ but it may be better to replace it with a new one so as to avoid having to open her up again in the future.

Do any of you know the part numbers for the heating element and the thermostat?

The thermostat is labelled Crossland components 38381090.

I notice the element has 2 thin straight wires that are attached to the ends and poke out the back into two square things. What are these? Maybe some kind of fail safe that cuts it off if it overheats?

I have seen HTR51 on spares sites which looks similar but only has one wire and one square thing.

I have no idea how long the thermostats last but I imagine it has to be an exact replacement otherwise the temperature won't be right. I am not sure if it has a thermistor inside or something else. If so, might it be possible to cut it open and solder in a new thermistor should it go wrong in future?

If I can find the parts now, I might as well change them to get the job done right so any help with part numbers would be ace.


  Photos...       <              >      Photo 1 of 4         View Full Size
Post# 1114134 , Reply# 26   4/9/2021 at 13:25 (1,105 days old) by sesteve (London, UK)        

sesteve's profile picture
The drum is stainless steel and the spider is an alloy so be careful with that as it might not be as robust.

I'm not sure about the spare part numbers but you can change both the heater and thermostat from the rear so probably best to leave as is until they stop working and source spares just in case. The thermostat is a thermistor type but they are generally reliable so if you clean the scale off then it should be OK.

The thinner wire is the overheat protection. The design of the heaters has changed a few times -the first picture is my 6035 with just one connection for the protector (you can also see the staining from that bearing seal too) and the others from the 6030 with a thermal fuse. Generally most heaters are suitable as long as the wattage and length is correct so its possible to use alternatives as the protection is in line with the heater.


  Photos...       <              >      Photo 1 of 4         View Full Size
Post# 1115046 , Reply# 27   4/19/2021 at 08:27 (1,096 days old) by bureaucrazy (UK)        
Removing bearing sleeves?

Just an update. It is taking a very long time to remove the limescale from the heater but it's about 75% clean.

I removed the bearing seal and cleaned up what is left. The inner and outer bearing sleeves are stuck inside. Are these glued in? As you can see in the photos the 1st is the outer sleeve and it is still fairly smooth, the 2nd pic is the inner bearing sleeve and is quite rough. The third picture shows there is a lip at the back of the bearing sleeve. I have tried poking a flat screwdriver against the lip and hitting it with a small hammer but the thing won't budge.

Also, the whole drum wobbles on the shock supports absorbing some of the force.

Presumably I need to get both bearing sleeves out as there may be wear or slight differnces that don't mate up properly with the new bearings?

How can I get these out without damage?

Cheers.


  Photos...       <              >      Photo 1 of 3         View Full Size
Post# 1115132 , Reply# 28   4/20/2021 at 10:18 (1,095 days old) by Chestermikeuk (Rainhill *Home of the RailwayTrials* Merseyside,UK)        
Bearings

chestermikeuk's profile picture
Hello , have just checked and we've found some other info, there was a transition on these models from metal tubs to plastic , and also newer drums from the spin care smoothe type , some plastic tubs had sleeves fused in so think they stay in , have put a call out to an engineer to check ..

Here's the other schematics ..hope this helps .


  Photos...       <              >      Photo 1 of 3         View Full Size
Post# 1115149 , Reply# 29   4/20/2021 at 16:03 (1,094 days old) by bureaucrazy (UK)        
More details.

Hi, thanks for going to so much effort to find this out for me.
Looking at the back of the heater element, it has markings: IRCA 09 90 230V 2500W.

Could the 09 90 indicate the date of manufacture of the element? Late 1990 or early 1991 would make this a very late model. It has a normal perforated inner drum (cleaned up nicely!) (no chevrons or spincare).

Comparing the new schematics with the old one, the new one shows a felt washer.

My machine has a felt washer see reply 23 photo 4.
My machine does not have a collapsible washer like the one in the centre of the photo in reply 5.

So, you may be right that the bearing sleeves cannot be removed. I did not hit them that hard, but it was using a small lump hammer and should have been enough force to dislogde it a little if it was just tightly pressed in.

The inner sleeve is very rough but the outer one is quite smooth and the outer original bearings looked OK condition.

Looking at the old and new bearings, it could be just my eyesight but the original ones look very slightly more angled but it might be just wear and tear? (they have all the same numbers/markings old and new)

Look at this photo below, there is a ring of darker dull grey material (might be metal)around the centre hole where the bearing sleeve is fixed. The inner sleeve is in poor condition with a very rough surface. There was a lot of limescale inside the hole so I used limescale remover and it has dulled the sheen on the outer sleeve but at least that one is still smooth.

Good job I checked with you guys before demolishing it trying to remove the sleeves!


  Photos...       <              >      Photo 1 of 2         View Full Size
Post# 1115225 , Reply# 30   4/21/2021 at 09:49 (1,094 days old) by sesteve (London, UK)        

sesteve's profile picture
I'm not sure if that is a date code on the heater or not. There was a date sticker on the plastic tub of mine and I think on the underside of the lid and possibly the module so you could double check to see if there are any other date references that might match up.

As Mike says, I think the sleeves are welded to the tub. You could probably sand them with fine wet n dry paper to smooth them out. I'm guessing the machine has been running on one bearing looking at what was left of the front one and that is probably why the sleeve is quite rough. Did you have the spacer tube (photo 3 in reply#10) as I didn't see it in your pictures?

Hopefully you are nearly there for reassembly


Forum Index:       Other Forums:                      


Comes to the Rescue!

The Discuss-o-Mat has stopped, buzzer is sounding!!!
If you would like to reply to this thread please log-in...

Discuss-O-MAT Log-In


New Members
Click Here To Sign Up.


automaticwasher.org home
Discuss-o-Mat Forums
Vintage Brochures, Service and Owners Manuals
Fun Vintage Washer Ephemera
See It Wash!
Video Downloads
Audio Downloads
Picture of the Day
Patent of the Day
Photos of our Collections
The Old Aberdeen Farm
Vintage Service Manuals
Vintage washer/dryer/dishwasher to sell?
Technical/service questions?
Looking for Parts?
Website related questions?
Digital Millennium Copyright Act Policy
Our Privacy Policy