|
Thread Number: 87954
/ Tag: Vintage Automatic Washers
1964 Frigidaire Custom Deluxe washer |
[Down to Last] |

|
| Post# 1125285 , Reply# 1 8/7/2021 at 16:09 (982 days old) by Repairguy (Danbury, Texas) | ||
 | ||
| Post# 1125325 , Reply# 2 8/8/2021 at 05:51 (982 days old) by christfr (st louis mo) | ||
 | ||
Post# 1125329 , Reply# 3 8/8/2021 at 06:05 (982 days old) by HobartHero  (New York) (New York) |
||
Pictures? | ||
|
Post# 1125727 , Reply# 4 8/13/2021 at 22:26 (976 days old) by swestoyz (Cedar Falls, IA) |
||

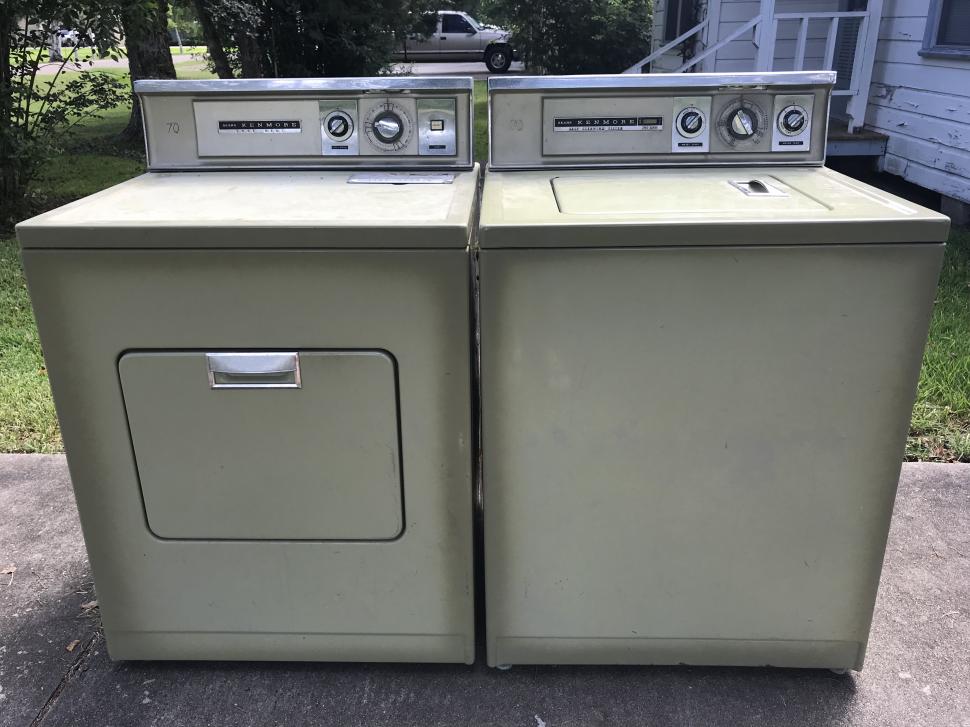
This was a fun restoration, and Gary was quite patient with me as the '64 was here in Iowa for well over a year before it was ready to head back home to IL.
I'll slowly post the full details over the next several days, but until then... Ben
View Full Size
| ||
|
Post# 1125779 , Reply# 6 8/14/2021 at 12:57 (975 days old) by philcobendixduo (San Jose) |
||
I am glad this wasn't.... | ||
| Post# 1125782 , Reply# 7 8/14/2021 at 13:56 (975 days old) by lesto (Atlanta) | ||
|
That's a beautie! I'm looking forward to seeing more pics. I know you are going to get a lot of enjoyment out if it. | ||
|
Post# 1125787 , Reply# 8 8/14/2021 at 15:15 (975 days old) by abcomatic (Bradford, Illinois) |
||
|
Diatribe also means a long discourse. | ||
|
Post# 1125885 , Reply# 9 8/15/2021 at 21:21 (974 days old) by swestoyz (Cedar Falls, IA) |
||
|
Part One - So, what's good and what's bad?
I'm going to attempt to not go into too much detail on this overall post as the last thing I want to do is bore folks. So, here it goes -
Gary and a few of his friends dropped of his Frigidaire in early June 2020 and we chatted briefly about washers and such before the made the trek back to Illinois. Before Gary dropped off the Frigidaire I had mentioned that I was about to start working on a few things around the house and that I wouldn't actually get to the washer until the end of the year. Well, as things go those projects took way longer than expected and the open window came around mid March this past spring. Over the spring break week I brought the washer in the newly minted workshop and started taking it apart. The washer was still wearing it's original 1963/1964 pulsator column and rings but was missing the cap. A fellow member lent me one while I worked on the washer just in case the machine ended up using it's original pulsator column. While there was some surface rust on the outer cabinet, the rest of the machine was in really nice shape, overall. The timer dial was not in sync with the timer itself, but otherwise it all was looking good outside of the lid switch and out of balance lever which were both as rusted as they could be. | ||
|
Post# 1125886 , Reply# 10 8/15/2021 at 21:25 (974 days old) by swestoyz (Cedar Falls, IA) |
||
|
Next it was time to pull the tub and inspect the outer tub. The outer tub on these is the Achille's heel of a 1961 - 1969 Frigidaire as they often have rusted out so badly that it the outer tub is not safe enough to use. Thankfully, this one was in GREAT shape, in fact I was even able to unscrew the mechanism support screws using a wrench and not a Dremel! There was a nice layer of detergent reside caked on the upper walls, and detergent mixed with rust and muck at the base. This actually preserved the porcelain finish/metal of the outer tub.
There was evidence that water had sat in the outer tub for an extended period of time, and the remains of the out of balance lever was found lodged in the drain outlet, both were probably related. Sadly, the mechanism support bellow seal was just about shot. | ||
|
Post# 1125889 , Reply# 11 8/15/2021 at 21:47 (974 days old) by swestoyz (Cedar Falls, IA) |
||
|
With the top side now taken apart it was finally time to see what did this washer in. My initial thought was that it had a broken torque spring by the symptoms Gary had provided, so it was time to find out.
Taking the Multimatic transmission apart is pretty straight forward. The cross brace comes out of the machine, support the mechanism and remove the two bolts out of the support bracket towards the motor and loosen the other two to swing the bracket away from the trans. At this point the oil can be drained (any type of pan works, I like to use old ice cream pail/containers). Next, remove the four 5/16" 12 point bolts from the agitate pulley, then remove the final two shorter bolts with the agitate pulley off the mechanism. At this point take a soft mallet and tap the bottom half and it should pop right off the upper half with the wobble plate shaft sliding out of the spherical bearing in the lower housing. Slide the shaft out of the bearing and the bottom half should now be free. Next step is to remove the wobble plate. Flatten out the tab on the lock washer against the nut on the agitate shaft and remove the nut (I believe it was either 13/16" or 15/16"?) either using a box wrench or an adjustable wrench. Remove the lower hub from the shaft and at this point the wobble plate should come off the upper hub. I've found that it is wise to use a gear puller to remove the upper hub as it can hang up on the shaft. The first of two keys hold the upper hub in place, it is the shorter of the two keys inside the transmission. Next, the large nut that holds the lower support against the drive shaft/lower mechanism support is 1-5/16". GM sold a Robinair wrench to remove this nut (12157) but I've found it is easier to initially remove it with an impact socket with an impact wrench. It just takes a quick pulse on the trigger to get it to pop off (of course, after flattening the tab on the lock washer). With the nut and washer removed the mechanism support should slide off the drive shaft, exposing the fate of what is to come. | ||
|
Post# 1125892 , Reply# 12 8/15/2021 at 22:11 (974 days old) by swestoyz (Cedar Falls, IA) |
||
|
And, kaboom
So, that didn't end up as anyone would want to see. After pulling the lower mechanism support and the de-accelerator shoes and cup, it was clear the brake had failed.
Bud has detailed on a few threads why this happens, and it is important to highlight this again. Moisture can find its way into the mechanism, even if water never gets past the bellows or the mechanism support bellows seal. When this does happen the cloth lining on the upper brake cup (both versions thru '64 and all commercial '65 thru '69) and cloth lining of 1959 through early 1962 lower brake plate can absorb moisture and then rust the cloth to the brake disc. Many of these washers, if found in the wild after having sat for several decades, can have this happen even if the washer ran great "when parked". The first time someone plugs it in and turns it to agitate the washer will work just fine and the unsuspecting user will thing "Ok great, this thing is awesome!" Even the initial spin will again work just fine as the rotating mass of the mechanism is moving in sync with the tub/drive shaft/brake disc. But, once torque is removed from the rotating mechanism, that rusted brake disc is being asked politely to rotate between the now idle brake cup and lower brake plate of which the brake disc is rusted to. And thus, the brake assembly is destroyed. Further catastrophic damage can happen if the unsuspecting operator decides to attempt to wash again and some of the brake cup fragments can get lodged in the large wobble plate bearing and tear that to shreds, as well. This is the third Multimatic I've taken apart that has had this unfortunate damage, and the only fix is to find a replacement brake assembly and any other parts that may have gotten take out during destructive event. Thankfully the drive torque spring was not damaged. So, what do we do when we find a Multimatic out in the wild that hasn't been used in decades? DRAIN THE OIL. Any signs of moisture in the oil will certainly point to an issue with the brake. Even if the oil is ok attempt to spin (by hand) the tub clockwise against the brake. If you can't get the tub to spin at all it means something is not good. If you can get the tub to spin the brake disc is more than likely moving in-between the cup and the lower plate (which is good). This post was last edited 08/15/2021 at 22:40 | ||
|
Post# 1125894 , Reply# 13 8/15/2021 at 22:18 (974 days old) by swestoyz (Cedar Falls, IA) |
||
|
At this point the rest of the machine needed to be torn down as I had a spare, albeit used, brake assembly that could be installed in this mechanism.
The handy impeller holder makes getting the impeller bolt off so much easier but heat from the torch was required to get the impeller off the motor shaft. This is an area where you MUST be careful to not damage the impeller as the backside of the impeller is actually about an inch long past the back side of the impeller. Some heat and gentle tugging from behind should get it to pop off the motor shaft. The mechanical seal was completely shot on this pump and showed signs of water getting past it. A gear puller is used to remove the two pulleys from the motor shaft, and from there with the last of the two bolts removed from the support bracket, the motor bracket can be slid off the drive housing flange. | ||
|
Post# 1125896 , Reply# 14 8/15/2021 at 22:25 (974 days old) by swestoyz (Cedar Falls, IA) |
||
|
With everything from the lower end disassembled, the balance of the mechanism support was removed from the machine. A small to medium sized oil filter wrench (see link below) from a local auto parts store can be used to remove the mechanism support nut (first pop the tab from the lock washer flat) by carefully supporting the support and rapping the wrench with a soft blow hammer. If you have the Robinair tool used to remove this support nut, guard it with your life :)
The the support nut and seal removed the spin shaft bushing can be removed as well as the mechanism support. A retainer clip holds the upper bearing in the housing and once removed the drive shaft can be slid out of the housing. The whole mechanism has now been disassembled. Look at that nasty supper spin bearing! Water most certainly got in here and just enough got past to soak up in the brake cup cloth lining. CLICK HERE TO GO TO swestoyz's LINK This post was last edited 08/15/2021 at 23:03 | ||
|
Post# 1125897 , Reply# 15 8/15/2021 at 22:26 (974 days old) by Jetaction (Minneapolis) |
||
Wow!! | ||
|
Post# 1125898 , Reply# 16 8/15/2021 at 22:32 (974 days old) by swestoyz (Cedar Falls, IA) |
||
|
By the middle of April the machine was completely disassembled and parts were being procured and/or accumulated.
This is the phase of restoration I absolutely love when restoring a washer - the mechanical cleaning phase. Everything transmission or drive related gets cleaned in mineral spirits, sometimes twice depending on the item. Oil chambers are blown out. All bolt heads and threads are cleaned on wire wheel, as well as other parts or pulleys that may have corrosion or rust that needs to be removed. Everything needs to be cleaned and free of any old oil, sludge, gasket material, etc. Photo posted below is the midpoint of cleaning with several steps to go after this shot. The next installment will be posted in a few days... will the washer work on the first try or will I have left a socket in the transmission? Will the belts magically fall into place the first time with perfect tension? Will anything leak when water first touches it? Stay tuned! Ben
View Full Size
| ||
|
Post# 1126221 , Reply# 17 8/19/2021 at 09:37 (970 days old) by Unimatic1140 (Minneapolis) |
||
Wow amazing restoration as always Ben, you do such amazing work!!! I totally understand what you mean about turning the tub against the brake to see if it is free before powering the machine up, that's a very good tip for everyone. And that just doesn't go for Frigidaire Multimatics that really could be for any vintage washer.
I shocked to hear that this has been the third Multimatic you found with a seized brake. I guess I've been lucky over the years, I have found 5 machines of this design over the years: 3 Multimatics (1959 and 1960 Custom Imperials and 1962 Deluxe), a 1967 Super-Duty Multimatic and a '57 Pulsamatic, non of them had stuck brakes thankfully. Even this one the Super-Duty the Multimatic with 1010rpm spin didn't have a stuck brake, you'd think if anyone would would be stuck it would have been this one lol... 
| ||
|
Post# 1126675 , Reply# 19 8/23/2021 at 20:33 (966 days old) by swestoyz (Cedar Falls, IA) |
||
|
Part Two - the little things
So, it's been several days since my initial post. Time to get at it before this is lost in the wind!
With everything apart and cleaned it was time to tend to a few of the little things before putting the transmission back together. First on the list was swapping out the 5431073 pump seal. The old seal was shot and showed signs of water seeping past. Frigidaire offered this handy tool (Robinair 12472) to press out the old seal and install the new. I used some Permatex Number 2 sealer on the hard surfaces, as well as the paper gasket included with the seal. I did end up having to coat the inside of the pump housing with some RTV, post seal install, due to some of the No. 2 sealer seeping around the seal as my thought was I wanted it to seal around the crumbled surface of the housing. If I were to do it again I would have used a much smaller amount of RTV or The Right Stuff along the flange of the seal and smoothed it out over the housing with my finger. This post was last edited 08/23/2021 at 21:16 | ||
|
Post# 1126677 , Reply# 20 8/23/2021 at 20:50 (966 days old) by swestoyz (Cedar Falls, IA) |
||
|
Next up was swapping out the original shielded bearings within the two drive pulleys. The bearings could be removed with a set of sockets and a soft mallet, or even a press, but I found that the seal remover/installer tool for the pump seal worked perfectly for this task. The pulleys have a shoulder machined on one side where the bearing sits against, make sure to drive them out on the opposite side.
The measurements for these bearings are in inches - 0.5 in Bore Dia., 1.125 in Outside Dia (thanks, Bud!), bearing number 1616 2RS PRX, Grainger 35JC45. I suspect the bearing within the bottom of the motor housing is the same size but I was unable to get the Delco installed collar off the motor to swap the bearing out. The manual provides instruction for installing the pulleys on the motor shaft. After the initial spacer is installed, put a dab of red Loctite on the shaft and slide the larger of the two pulleys (drive) up against the spacer. Next, the helix/key is installed along with the clutch. the manual indicates that there is no specific direction the helix needs to be placed on the shaft. Lastly, the smaller of the two pulleys (agitate) is installed with a dab of red Loctite, as well. | ||
|
Post# 1126678 , Reply# 21 8/23/2021 at 21:04 (966 days old) by swestoyz (Cedar Falls, IA) |
||
|
Housing Seals
On a previous post of Bud's regarding replacement Multimatic parts, he suggested using some 3/32 square cord stock to make new rubber gaskets for the transmission housing.
While I did go and buy some cord stock I decided to take it a step further to see if I could find some square o-rings that would work for this task. Sure enough, I found one that fits! Sadly I wasn't able to source this through Grainger, but McMaster had these readily available. Square-Profile Oil-Resistant Buna-N O-Ring, 3/32 Fractional Width, Dash Number 156, McMaster number 4061T212, pack of 25. www.mcmaster.com/4061T212... So, would I push my luck trying to find the square gasket replacement for the spherical bearing cover on the lower housing? Not at all. Square-Profile Oil-Resistant Buna-N O-Ring. 3/32 Fractional Width, Dash Number 128, McMaster number 4061T174, pack of 100. www.mcmaster.com/4061T174... Both fit perfectly and I have not seen a drop of oil come through from either. If anyone is needing a set for a future rebuild, shoot me a message and I'd be happy to drop some in the mail (2 ea. of dash 156, 1 ea. of dash 128). Bud also provided a seal PN for the upper housing lip seal. Make sure to swap this out before putting the transmission back together, but also take care not to plug the drain hole between the seal and the housing with any excess sealer. Dual Lip with Spring Rotary Shaft Seal with 40 mm Inside Dia. and 62 mm Outside Dia, Grainger number 53XK04. I forgot to take a photo of the new seal installed. | ||
|
Post# 1126682 , Reply# 22 8/23/2021 at 21:30 (966 days old) by swestoyz (Cedar Falls, IA) |
||
|
With most of the transmission cleaned up it was time to reassemble the bits and pieces. First up was the installation of a new, sealed, upper housing bearing. Doesn't that look so much better than before?
Radial Ball Bearing, Double Sealed, 30 mm Bore Dia., 55 mm Outside Dia., bearing number 6006 2RS/C3 PRX, Grainger number 35HZ80 Next up, after the muffler seal is installed below the bearing housing, it is time to install the mechanism support. I opted to throw some Permatex No 2 on the threads, similar to what would be done with a Unimatic. The manual doesn't call for this but a bit of extra protection from water intrusion isn't going to hurt anything. Tighten the seal assembly nut with the oil filter wrench and flatten a tab within one of the four recesses in the nut. Flip the assembly over to install the upper housing, the NTTWBU brake assembly (new to the washer, but used), spacer, torque spring, key, deacceleration shoes assembly. Coat all surfaces with oil during the installation. There is a future opportunity to highlight these steps greater detail in a later post (insert ominous music here). With the lower mechanism plate and bearing assembly in place and the nut set with the washer flattened over the nut, the wobble plate assembly can be installed on the agitator shaft. You can set the torque against the spherical bearing by twisting the outer ring to the point where it begins to drag slightly while moving the bearing in a circular motion. I did coat all surfaces of the bearing with oil to help get the proper drag. At this point the lower housing can be installed over the wobble plate shaft and fastened to the upper housing. Done! (or so I thought!) | ||
|
Post# 1126683 , Reply# 23 8/23/2021 at 21:34 (966 days old) by swestoyz (Cedar Falls, IA) |
||
|
With the transmission assembly completed it was time to tackle the rust. And there was plenty of it in the outer tub. Along with the cleaning of the outer tub, several hours were spent meticulously removing all the old soap and lint from the wash tub side supports. The outer tub top was also cleaned up during this phase. The base of the outer tub was coated in some POR-15.
| ||
|
Post# 1126684 , Reply# 24 8/23/2021 at 21:45 (966 days old) by swestoyz (Cedar Falls, IA) |
||
|
Now with the tub assemblies looking much better it was time to start putting the washer back together. While the 7522375 pump impeller was salvageable the seal portion of the impeller needed some TLC. The original seal backing behind the bronze seat was removed and a new 5433974 gasket was installed with some RTV, along with a new 5433973 bronze seat. With all new mechanical hardware on the pump end of the equation we were certain to be leak free.
With the mechanism and motor installed in the cabinet, the pump assembly could continue. I put a light coat of anti-seize on the motor shaft to prevent the impeller from freezing to the shaft in case it needed to be disassembled. Prior to all of this a new set of belts were installed - Grainger Dayton 3L280 for the upper/drive pulley, and a Grainger Dayton 3L320 for the lower/agitation pulley. a new 7528577 pump housing gasket was installed. With the bottom buttoned it, it was time to fill it with oil and adjust the belts! I ended up making my own belt adjustment tool, which was crafted using a mending brace from Menards, cut to size, and part of a cutting board for the outer section. a 5" carriage bolt was originally used on the first version, along with a wing nut, similar to the original Robinair tool 12618. More about adjusting belts on a Multimatic will come. | ||
|
Post# 1126685 , Reply# 25 8/23/2021 at 21:54 (966 days old) by swestoyz (Cedar Falls, IA) |
||
|
With the bottom side done the machine was flipped over and the top seal was attended to. The bronze seat was refaced, per instructions from Bud, using some 1000 grit paper. The bronze seat was installed on the tub with a new gasket and some RTV.
The new 5439025 seal assembly needs to be pressed into the seal nut far enough that the upper ridge needs to be just below the top of the housing nut, if you are just replacing the bellows seal and not using a full 6591465 seal assembly. If the seal is not pressed in properly the inner race of the seal will ride higher than the bushing and will rub against the bottom of the tub, producing a "swish swish" noise during spin. With the seal assembly taking care of all new SS hardware was used to install the mechanism to the outer tub. | ||
|
Post# 1126686 , Reply# 26 8/23/2021 at 22:03 (966 days old) by swestoyz (Cedar Falls, IA) |
||
|
The original pulsator and 63/64 column were in sorry shape. So, rather than send the machine off with a droopy pulsator and a column that wouldn't hold a cap, I was able to install a used 1-18 pulsator in the machine, using a bushing made from some 3/4" PEX line, along with a nice conditioned Jet Action agitator. This seemed to work really well and provided the correct spacing between the tub and the pulsator.
Once I determined everything was going to work, RTV was applied to the top of the a NOS water bellows (NOS oil bellows were also installed), on top of the pulsator/bushing, and a bit more around the threads over the vinyl gasket. While Bud does provide some wise guidance on omitting this as it can causing leaking between this gasket and the pulsator, I wanted the vinyl surface against the Jet Action agitator base. Knowing that the RTV would keep water at bay I felt this was a great combination of parts that would last a long time. One of the last solutions I had to come up with was trying to mend the out of balance lever. While it isn't elegant, it works! I used a mending brace from Menards and some SS hardware to fasten the brace to what remained of the lever and an stainless cotter pin to hold the lever in place. This post was last edited 08/23/2021 at 22:27 | ||
|
Post# 1126687 , Reply# 27 8/23/2021 at 22:06 (966 days old) by swestoyz (Cedar Falls, IA) |
||
|
One of the final things needed was to recalibrate the timer dial to the timer itself. With that done I could do some testing of the belt tensioning using a Kill-A-Watt meter. The Dayton belts were producing the right amount of slip/tension, and were within range of what the manual called for for wattage during agitation and spin! The belt adjustment tool was a HUGE help during this process.
During testing the nice but used Jet Action agitator had signs of early cone hop, so I used one of the square o-rings for the mechanism housing to act as a shim between the two cones. This worked perfectly! Lastly, the originally installed water valve was rebuilt with new seats and stainless hardware. It was now time to test the fruits of my labor! | ||
|
Post# 1126688 , Reply# 28 8/23/2021 at 22:13 (966 days old) by swestoyz (Cedar Falls, IA) |
||
|
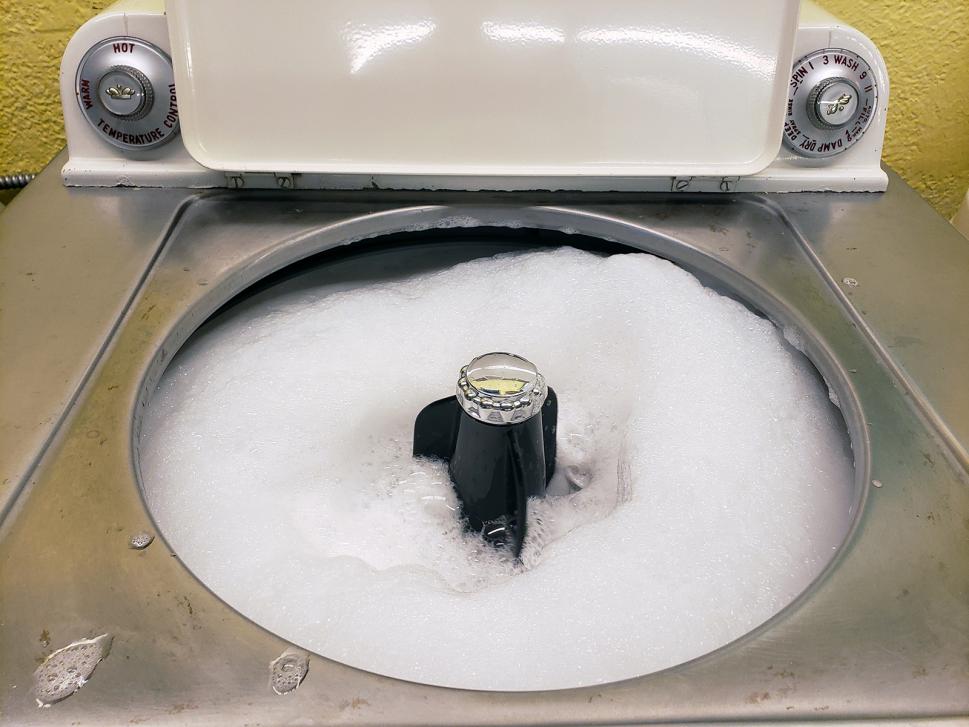
So, how did things turn out? | ||
|
Post# 1126689 , Reply# 29 8/23/2021 at 22:16 (966 days old) by swestoyz (Cedar Falls, IA) |
||
|
While looking through the service manual, GM provided some hints that the issue was probably the brake. The NTTWBU brake assembly (new to the washer, but used) was put together from three different machines and it was quite possible that the clips had become too weak to hold the mechanism in place.
At this point, it was late May and I was DONE with the machine. I pushed it back into the workshop and let Gary know that I would now need to hunt for a replacement brake and get back to the machine when the time was right. And with that, I'll leave everyone in anticipation of what happens next! Did I throw in the towel? Does it magically find a new repair person to fix the problems? Does a fellow club member come to the rescue? Stay tuned! Ben
View Full Size
| ||
|
Post# 1126695 , Reply# 30 8/24/2021 at 00:46 (966 days old) by abcomatic (Bradford, Illinois) |
||
|
And now a word from our sponsor. "Use All, the controlled suds detergent." "Rinso Blue, Rinso White."
"Tides in, dirt's out." "Tide, the washday miracle." "Use new Blue Cheer, for brighter, whiter washes." | ||
| Forum Index: | 
| Other Forums: |

|

|

|

|

|

 Comes to the Rescue!


;)
;)
;)
;)
;)
;)
;)
;)
;)
;)
;)
;)
;)
;)
;)
;)
;)
;)
;)
;)
;)
;)
;)
;)
;)
;)
;)
;)
;)
;)