|
Thread Number: 32159
Maytag DE806 Moisture / Temperature Sensing |
[Down to Last] |

|
| Post# 485094 , Reply# 1 12/29/2010 at 21:52 (4,866 days old) by qsd-dan (West) | ||
|
The one place I got stuck during reassembly was with the internal felt ring that goes between the drum and the mount.
That's the slip ring. Did you remove and install that tiny spring and carbon brush that contacts the slip ring from the holder? If not, it shot off into space during the disassembly process. | ||
Post# 485118 , Reply# 2 12/30/2010 at 00:02 (4,866 days old) by Volvoguy87  (Cincinnati, OH) (Cincinnati, OH) |
||
Yup, carbon brush. | ||
| Post# 485152 , Reply# 4 12/30/2010 at 04:12 (4,865 days old) by qsd-dan (West) | ||
|
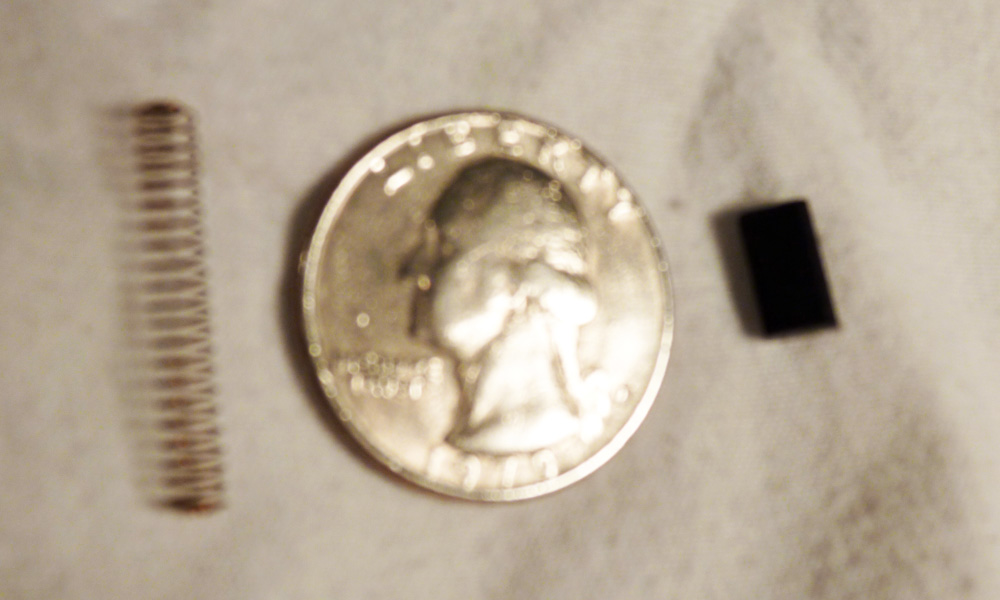
I did find a small rectangular piece of what appears to be black carbon, a little larger than a pencil eraser but flat, like the lead in a carpenter's pencil.
That definitely sounds like the brush. The spring will probably be nearly impossible to find since it's extremely thin (in some circumstances, thinner than hair) and camouflages itself very well in plain sight. However, with a lot of persistence and a dash of luck, you may just stumble upon it. I'm not sure I know where to install it. Don't fret about that right now. Lets attack one disaster at a time. | ||
| Post# 485153 , Reply# 5 12/30/2010 at 04:21 (4,865 days old) by beekeyknee (Columbia, MO) | ||
Solid Brush? | ||
| Post# 485344 , Reply# 7 12/30/2010 at 21:35 (4,865 days old) by qsd-dan (West) | ||
|
My wife says I'm the best garbage picker she ever marrie
WHOA, great job!! Certainly can't argue with your wife ;>)
No need to disassemble the unit. Just remove the carbon brush holder, insert the spring followed by the carbon brush, and reinstall in reverse. Here's a breakdown pic. The group of numbers starting with 2-11642 points to the carbon brush holder you want to remove and install. Feel free to ask any other questions and keep us updated! 
| ||
| Post# 485361 , Reply# 8 12/30/2010 at 22:12 (4,865 days old) by qsd-dan (West) | ||
|
| ||
|
Post# 485527 , Reply# 13 12/31/2010 at 17:07 (4,864 days old) by goatfarmer (South Bend, home of Champions) |
||
 | ||
| Forum Index: | 
| Other Forums: |

|

|

|

|

|

 Comes to the Rescue!