|
Thread Number: 42901
1954 Frigidaire Test Run |
[Down to Last] |
Post# 630972 10/11/2012 at 21:43 (4,214 days old) by countryford  (Austin, MN) (Austin, MN) |
||

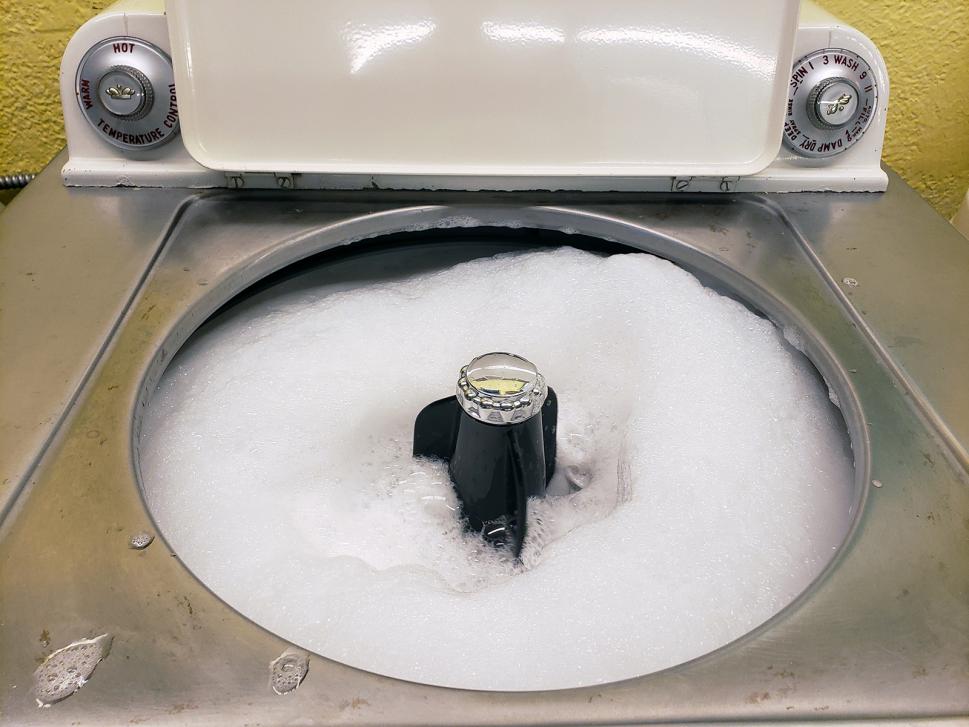
Some of you may remember about a year ago, I found this Frigidaire Washer and Kevin was so kind enough to pick it up for me. It was safely stored in Kevin's Museum for several months. Some may remember me playing with it at the First Annual Kevin's Wash-In. Well about a little over a month ago, I went back to Long Beach and brought it home. I finally bought the new hoses for it and installed them. I also replaced the cord. I drug the hose out and hooked it up and here is the videos of the inital run. Excuse the poor film quality. I was all over the place. I had an initial leak with the inlet hose not being fully on. I did fix that and discovered another leak somewhere. I believe it to be coming from the pump, but am not sure. It does appear that the tub seal is in good shape. :)
CLICK HERE TO GO TO countryford's LINK | ||

|
|
Post# 630973 , Reply# 1 10/11/2012 at 21:46 (4,214 days old) by countryford (Austin, MN) |
||
|
| ||
|
Post# 630977 , Reply# 2 10/11/2012 at 21:54 (4,214 days old) by countryford (Austin, MN) |
||
|
Here is part 3 and the final for the initial run. Towards the end I am showing the pump and trying to find the leak. While its draining, I'm getting splashed with water. I beleive it to be coming from the pump. Maybe some of you may have an idea by watching the video.
Kevin: Just wanted to say thank you for going and picking this machine up, and keeping it at your place so safe. John L. Thank you for your assistance at Kevin's 1st Annual Wash-IN. Without your help, I doubt I'd have the timer unstuck. CLICK HERE TO GO TO countryford's LINK | ||
|
Post# 630979 , Reply# 3 10/11/2012 at 22:00 (4,214 days old) by joelippard (Hickory) |
||
 | ||
|
Post# 630981 , Reply# 4 10/11/2012 at 22:07 (4,214 days old) by countryford (Austin, MN) |
||
|
| ||
|
Post# 630984 , Reply# 5 10/11/2012 at 22:22 (4,214 days old) by joelippard (Hickory) |
||
|
No not terribly difficult unless you get screws that are stuck. The way you do it is to lay the machine on it's side ( I think right side facing front) but be sure to check that you are not laying it on the side where the breather pipe is off the transmission as the oil will run out of it.
Locate a good socket wrench and remove the crossbrace/snubber assembly. While you have this out clean it and give the snubber a few good figure 8 type passes over some light grit sandpaper. Find a flathead screwdriver that you can develop a good amount of torque with. Per our webmaster Robert I learned from one of his threads that you should heat the screws up with a torch and then remove them carefully with the use of a vice grip clamped to the screwdriver handle. Remove all the screws and the pump/snubber plate, take note of the dimensions of the old gasket as you will need to fashion a new one using gasket material of a similar thickness. I draw mine out and use scissors and "pre-drill" the holes using a ice pick. Be sure the clean the contact areas.
While you are in there you need to wiggle the cooling fan to see if it rattles, if it does then the big screw in the impeller needs tightening up, this is another task in and of itself, let's hope you don't need to do that.
Reassemble using a very light coating of gasket sealer and tighten carefully, give it proper time to dry out as well, and before reassembling clean the snubber/pump plate in the same figure 8 fashion with the sandpaper then wipe with a clean rag. Put it all together and see what you've got. | ||
| Post# 630991 , Reply# 6 10/11/2012 at 22:48 (4,214 days old) by dishwasherfan (Phoenix, AZ) | ||
Finally home. | ||
|
Post# 631008 , Reply# 7 10/12/2012 at 03:29 (4,214 days old) by pdub (Portland, Oregon) |
||

Justin,
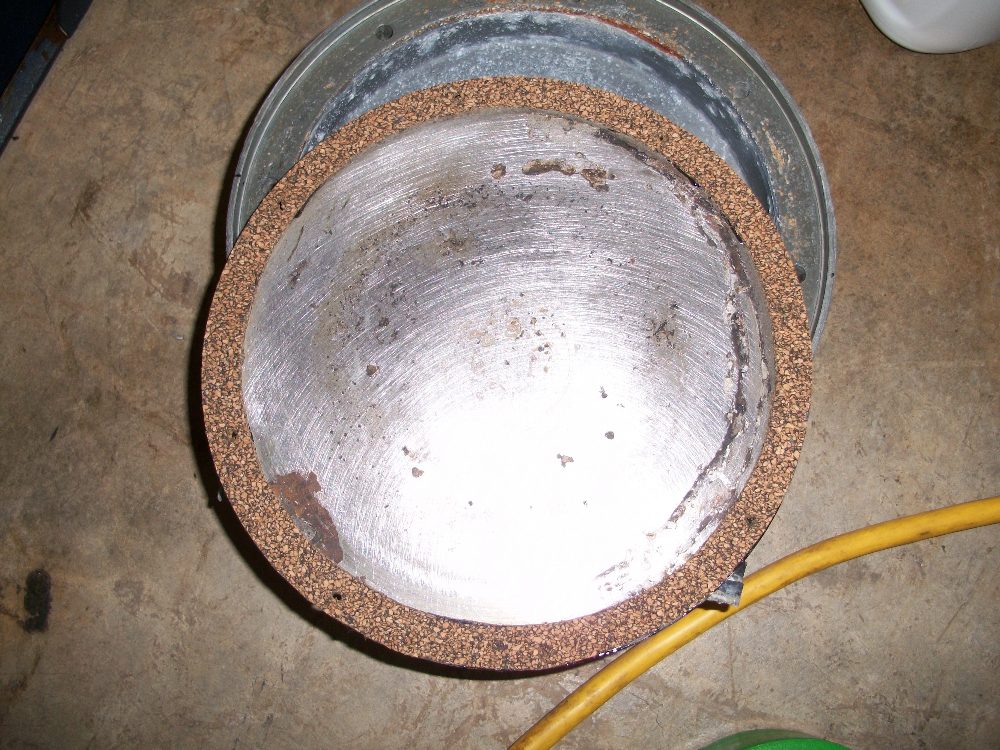
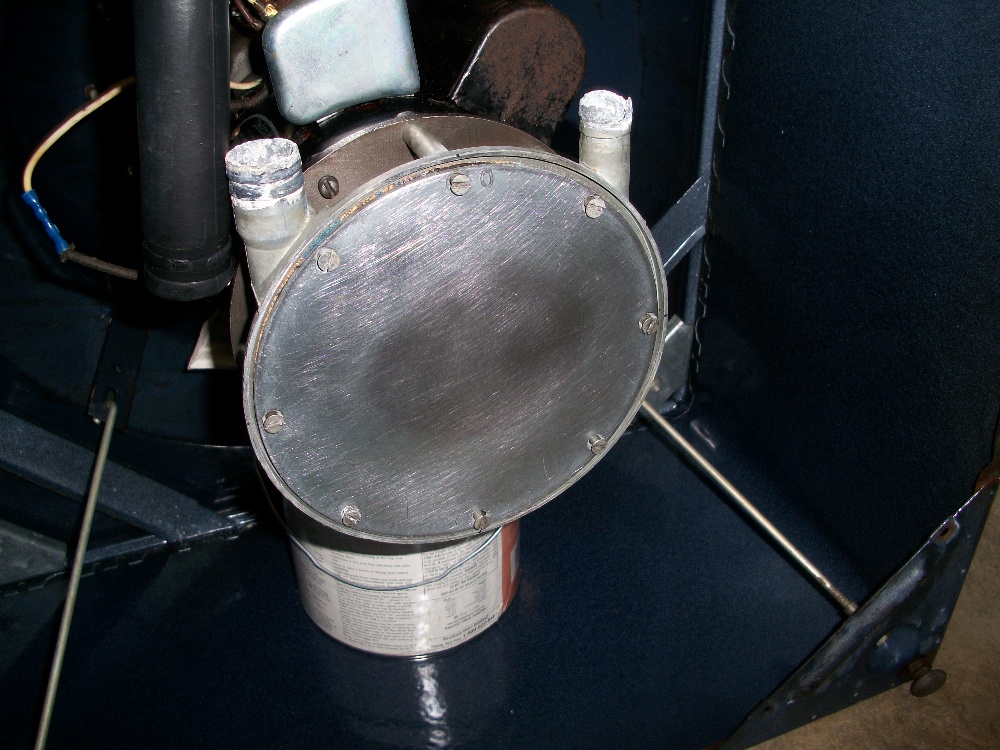
I replaced the gasket on my Unimatic and it really was quite easy. Get some cork gasket material from an Auto Parts store then after you remove the bottom crossbrace and snubber spring you loosen and remove the pump cover. Have a pan under it to catch the water as you remove the cover. I used a paint can to support the motor and mechanism. Here is a pic of the machine on its side with the crossbrace removed before any restoration work had started (so ignore those pesky wires showing that are no longer there). The pump cover was pretty dirty in this pic but cleaned up well. 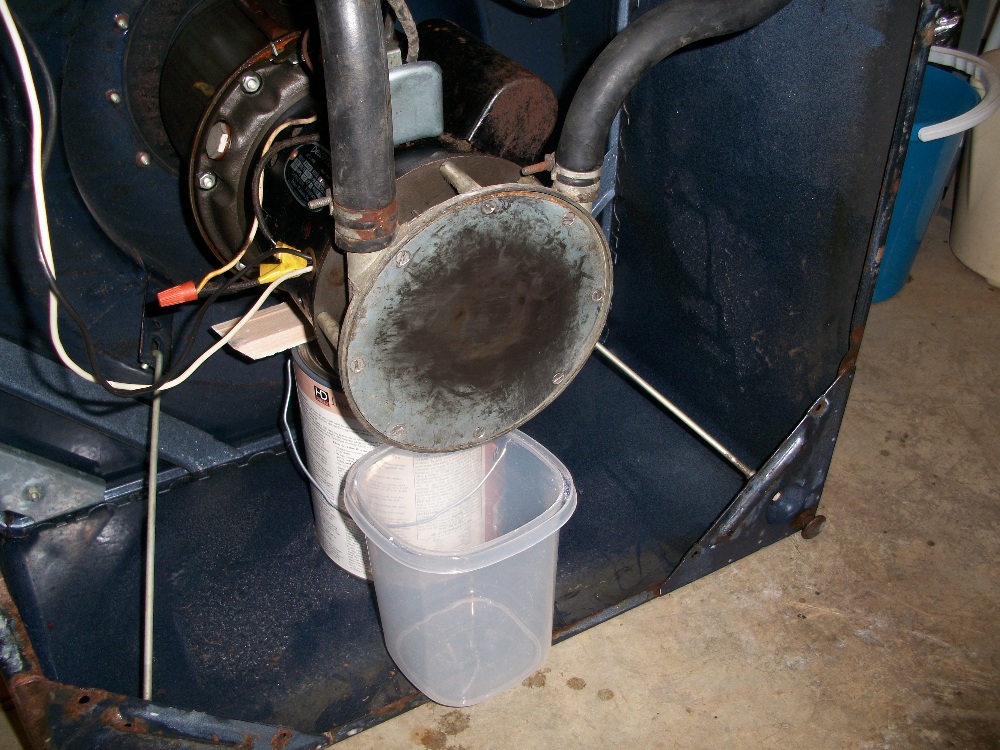
| ||
|
Post# 631009 , Reply# 8 10/12/2012 at 03:35 (4,214 days old) by pdub (Portland, Oregon) |
||
|
Make sure the top of your pump is dry and no water is leaking from where the motor shaft goes into the pump before you start all this. If in fact it is only leaking from the bottom cover gasket then don't remove or disturb the impeller. If you don't have to disturb the impeller you wont have to worry about a fan that rattles later (assuming it doesn't rattle now).
Here's a pic with the cover off and impeller removed for reference. 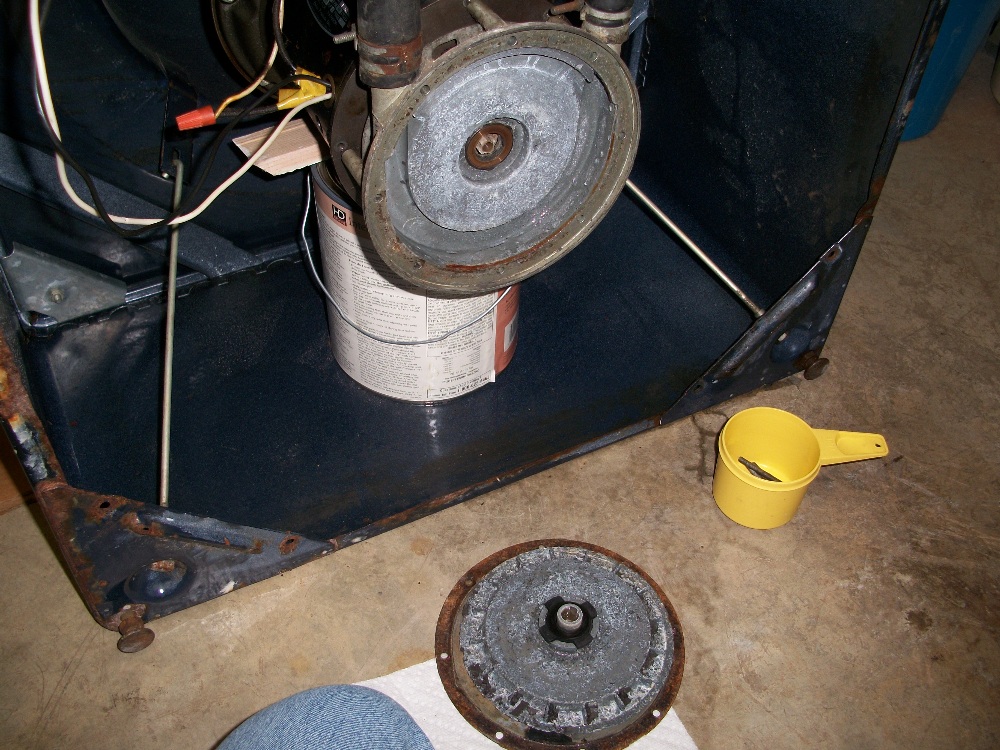
| ||
|
Post# 631010 , Reply# 9 10/12/2012 at 03:37 (4,214 days old) by pdub (Portland, Oregon) |
||
|
| ||
|
Post# 631011 , Reply# 10 10/12/2012 at 03:42 (4,214 days old) by pdub (Portland, Oregon) |
||
|
| ||
| Post# 631042 , Reply# 11 10/12/2012 at 09:23 (4,213 days old) by dishwasherfan (Phoenix, AZ) | ||
|
Teaching material. | ||
|
Post# 631055 , Reply# 12 10/12/2012 at 11:09 (4,213 days old) by Unimatic1140 (Minneapolis) |
||
In the link below is another thread that might help. It takes more of the pump apart than you will need to if the problem is located at the cork seal. Many times some real hot water will expand and seal up the old cork seal without having to do anything.
There is also the possibility that it is leaking from the carbon shaft seal in the center of the pump. If you feel a fine spray when it pumping most likely it is leaking from that center seal and not the cork seal. CLICK HERE TO GO TO Unimatic1140's LINK | ||
|
Post# 631077 , Reply# 13 10/12/2012 at 13:32 (4,213 days old) by pdub (Portland, Oregon) |
||
|
Best tutorial ever in above link!
Robert, I should have put the link you have just given when giving my advice as I owe all my knowledge to you and for you documenting and posting that very link.
Thank you again Robert for sharing your vast knowledge. I agree on the possibility of a leak from the pump shaft between the carbon seal area. That was why my suggestion is to verify if there is any leak in that area before beginning this whole tear down. I was able to kind of rebuild my seal and it has worked flawlessly since but I did end up with the dreaded rattling fan issue and so had to disassemble a second time to correct it. Not fun but was a very good learning experience! Thanks Bob from Phoenix for the compliment. I'm not a trainer but just expounding on what I have learned over the years from this website. Patrick | ||
| Post# 632914 , Reply# 14 10/19/2012 at 20:15 (4,206 days old) by stan (Napa CA) | ||
Hi Justin  | ||
|
Post# 632948 , Reply# 15 10/19/2012 at 23:36 (4,206 days old) by rp2813 (Sannazay) |
||
Love to have one like it!  | ||
| Post# 633840 , Reply# 16 10/23/2012 at 22:45 (4,202 days old) by stan (Napa CA) | ||
|
the high speed spin | ||
| Forum Index: | 
| Other Forums: |

|

|

|

|

|

 Comes to the Rescue!