Thread Number: 51821
Hotpoint Liberator Dryer 1701 Strip Down
[Down to Last]

automaticwasher.org's exclusive eBay Watch:
scroll >>> for more items --- [As an eBay Partner, eBay may compensate automaticwasher.org if you make a purchase using any link to eBay on this page]
Post# 742065   3/15/2014 at 10:40 (3,694 days old) by hotpoint95622 (Powys)        

hotpoint95622's profile picture
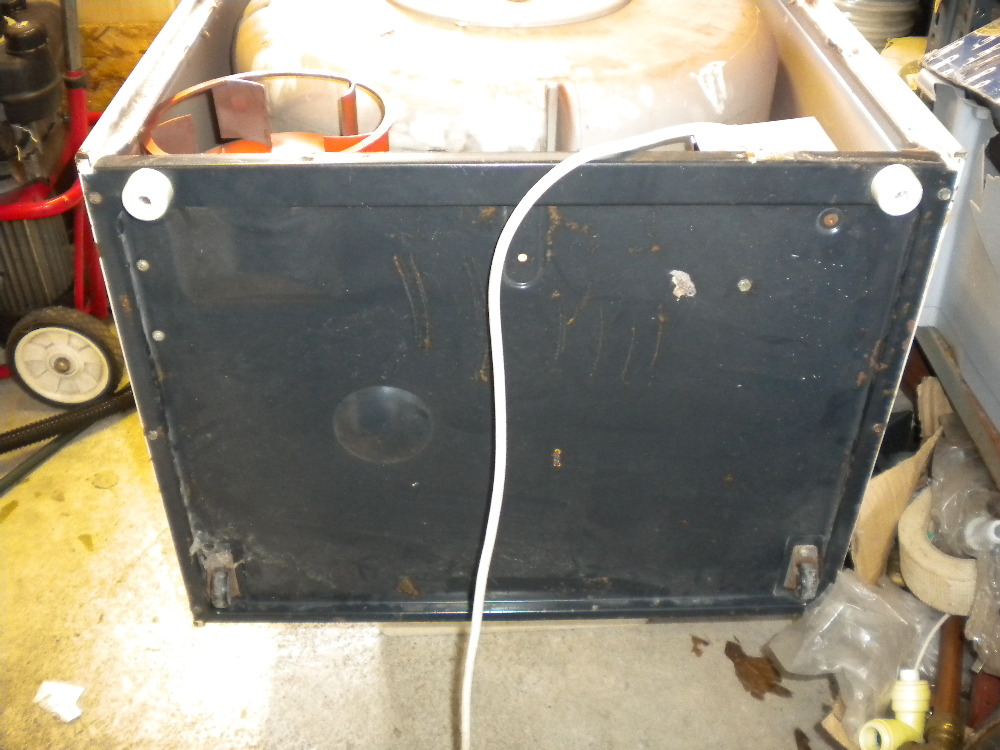
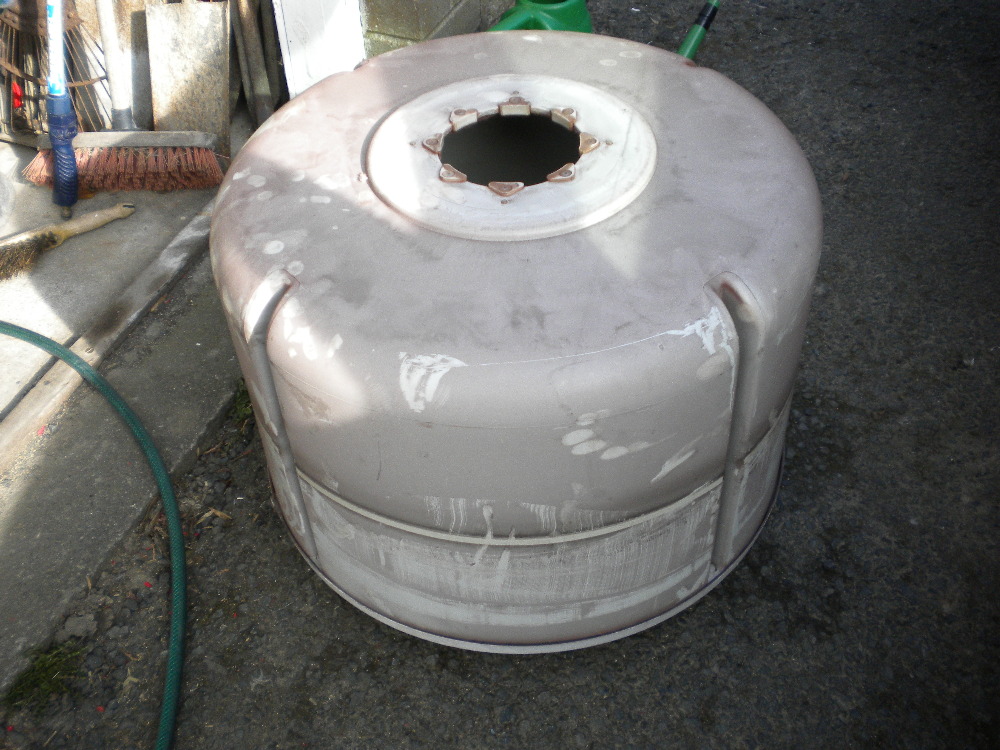
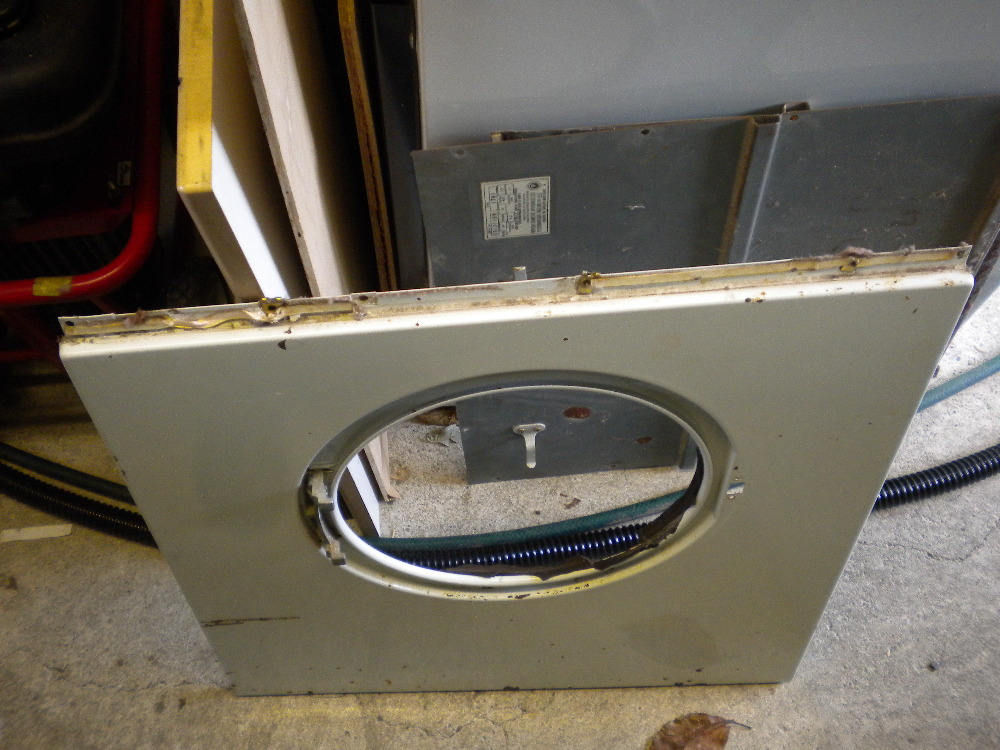
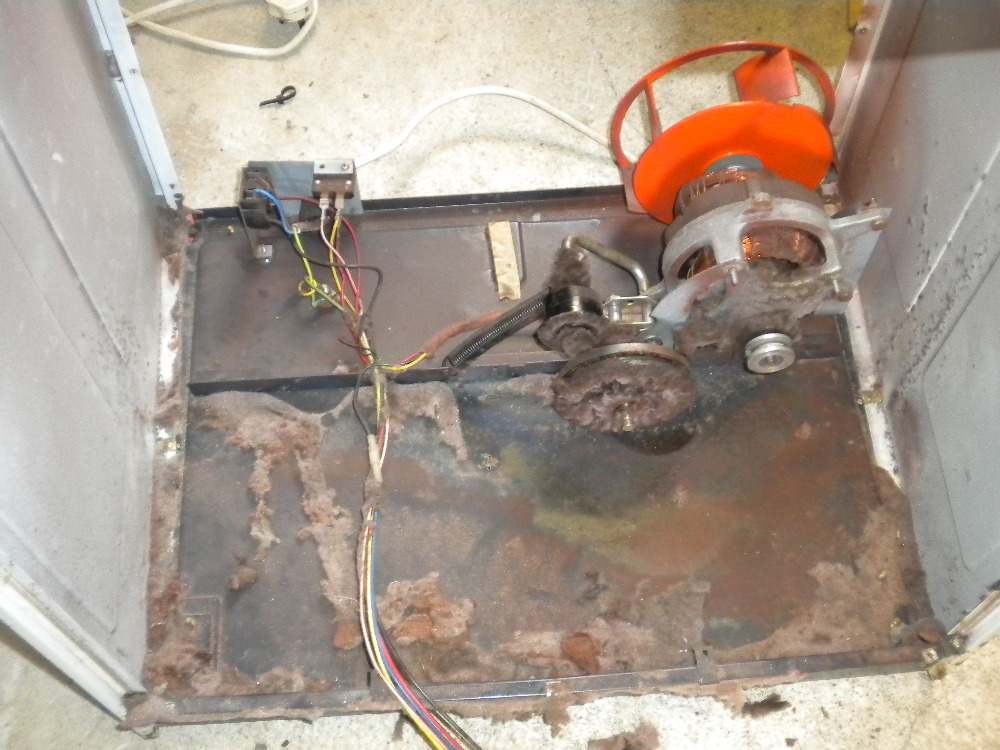
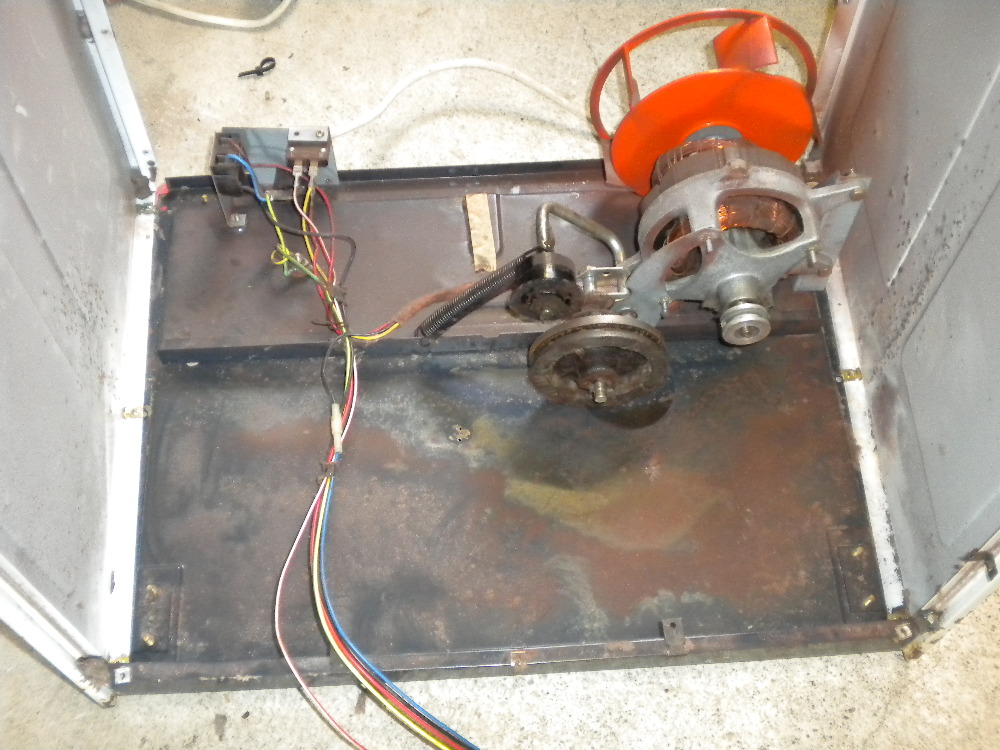
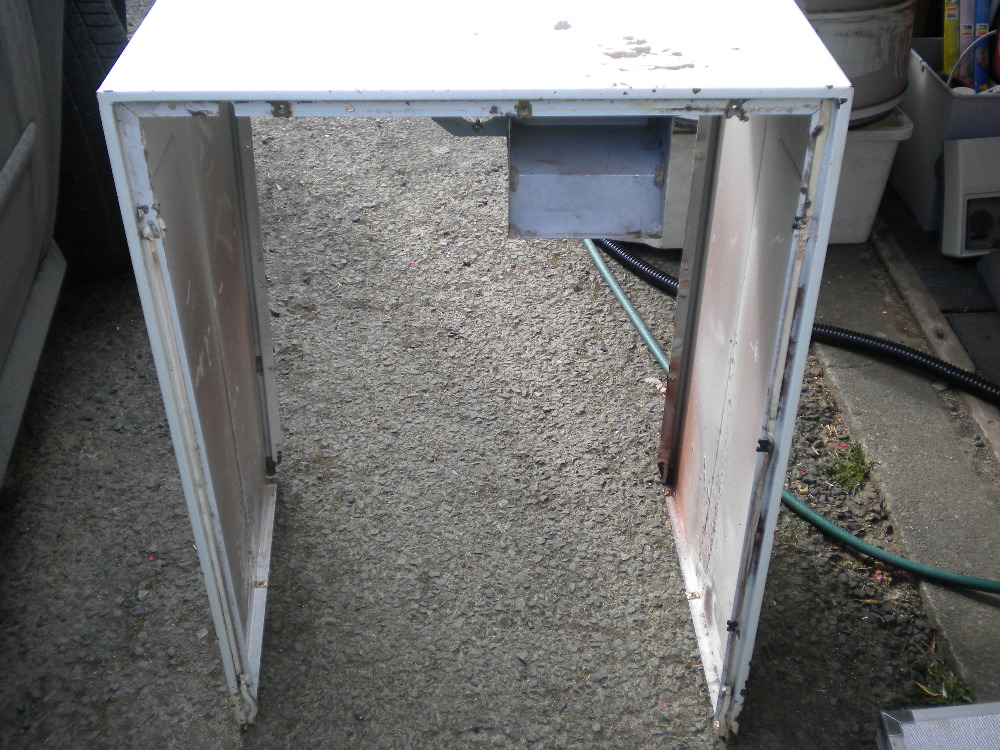
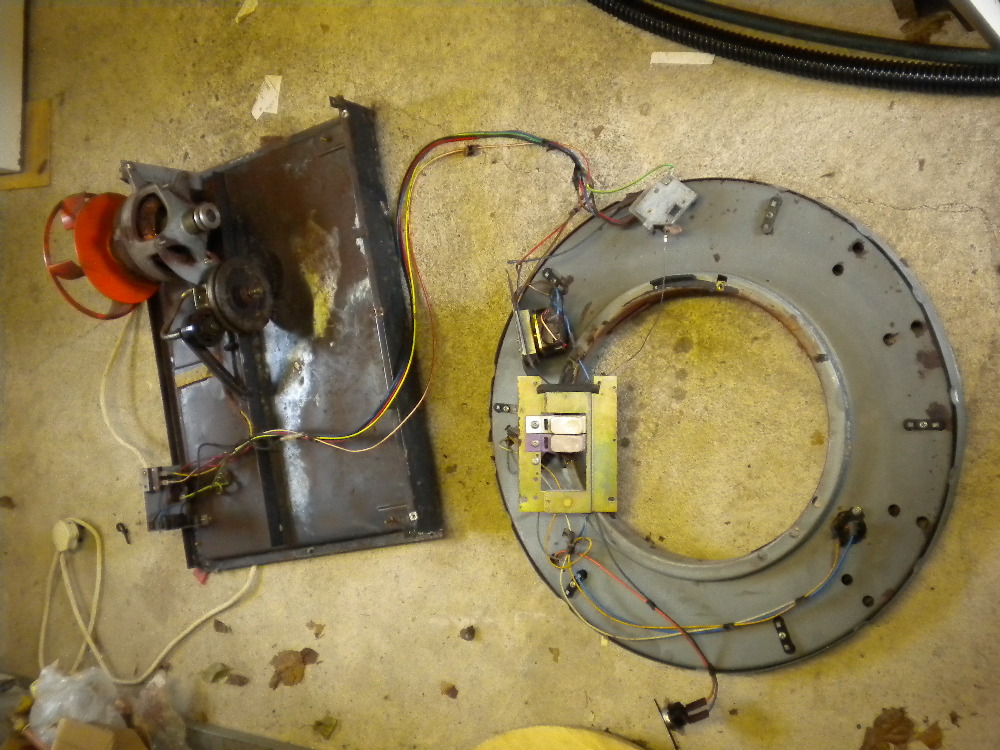
Started the strip down of this dryer ready for cabinet refinishing and taking full advantage of the warm dry weather.

Link to the introduction thread.


CLICK HERE TO GO TO hotpoint95622's LINK


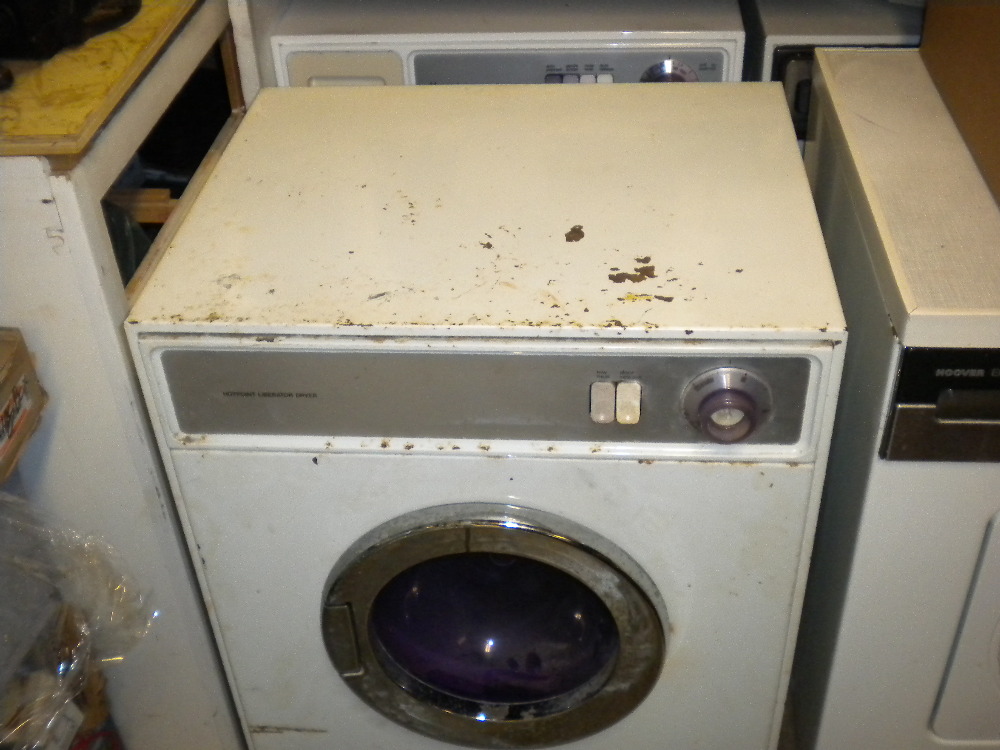
Post# 742068 , Reply# 1   3/15/2014 at 10:44 (3,694 days old) by hotpoint95622 (Powys)        
Hotpoint 1701

hotpoint95622's profile picture
Armed with the service data supplied by Paul we can begin.

First remove the lint filter at the back of the drum, exposing the 3X screws holding the back bearing plate in place.

But first remove the outlet hose attachment at the back of the cabinet.


Post# 742069 , Reply# 2   3/15/2014 at 10:47 (3,694 days old) by hotpoint95622 (Powys)        
Hotpoint 1701

hotpoint95622's profile picture
3x screws removed and the baring plate out, some signs of wear from the drum rubbing.

Post# 742073 , Reply# 3   3/15/2014 at 10:50 (3,694 days old) by hotpoint95622 (Powys)        
Hotpoint 1701

hotpoint95622's profile picture
Back of the net, I mean the drum minus the bearing plate.

Post# 742074 , Reply# 4   3/15/2014 at 10:55 (3,694 days old) by hotpoint95622 (Powys)        
Hotpoint 1701

hotpoint95622's profile picture
As per the instructions the machine was placed door face down on the floor, well not quite, placed face down on a large plastic storage box, protecting the door and raising it up a bit to save my back.

Post# 742076 , Reply# 5   3/15/2014 at 10:58 (3,694 days old) by hotpoint95622 (Powys)        
Hotpoint 1701

hotpoint95622's profile picture
Fan grill and bottom back panel removed to expose the drive unit.

Post# 742077 , Reply# 6   3/15/2014 at 11:02 (3,694 days old) by hotpoint95622 (Powys)        
Hotpoint 1701

hotpoint95622's profile picture
Next, remove the top cabinet back.

Post# 742078 , Reply# 7   3/15/2014 at 11:06 (3,694 days old) by hotpoint95622 (Powys)        
Hotpoint 1701

hotpoint95622's profile picture
Ho my, is this thing put together well, photo of the back used to stick the screws too so I now where all the fixings are for the rebuild. .

This is not for the faint hearted one little bit.


Post# 742079 , Reply# 8   3/15/2014 at 11:09 (3,694 days old) by hotpoint95622 (Powys)        
Hotpoint 1701

hotpoint95622's profile picture
Let the dog see the rabbit, shot showing the back panels removed

Post# 742081 , Reply# 9   3/15/2014 at 11:13 (3,694 days old) by hotpoint95622 (Powys)        
Hotpoint 1701

hotpoint95622's profile picture
Back bearings, plastic snap in units, well I never thought the drum to be plastic either I truly thought it was enamelled steel.

Post# 742083 , Reply# 10   3/15/2014 at 11:16 (3,694 days old) by hotpoint95622 (Powys)        
Hotpoint 1701

hotpoint95622's profile picture
Close up of the drive unit:

Fan
Motor
Drive pulleys
Jockey
Tension springs


Post# 742084 , Reply# 11   3/15/2014 at 11:19 (3,694 days old) by hotpoint95622 (Powys)        
Hotpoint 1701

hotpoint95622's profile picture
Right, need to remove the 6 bolts on the under side which secure the sides of the cabinet to allow it to splay so the drum can be extracted from the machine.

Post# 742085 , Reply# 12   3/15/2014 at 11:23 (3,694 days old) by hotpoint95622 (Powys)        
Hotpoint 1701

hotpoint95622's profile picture
Here I need three pairs of hands, one to hold the cabinet splayed, one to hold the jockey at it’s slackest to allow the drive belt to slacken and the other hands to lift and extract the drum.

Some shouting and swearing later the drum is free.


Post# 742086 , Reply# 13   3/15/2014 at 11:27 (3,694 days old) by hotpoint95622 (Powys)        
Hotpoint 1701

hotpoint95622's profile picture
Time for coffee and cake, ho yes the next project is on an E what could it be.

Post# 742087 , Reply# 14   3/15/2014 at 11:28 (3,694 days old) by hotpoint95622 (Powys)        
Hotpoint 1701

hotpoint95622's profile picture
Drum from the side

Post# 742090 , Reply# 15   3/15/2014 at 11:34 (3,694 days old) by hotpoint95622 (Powys)        
Hotpoint 1701

hotpoint95622's profile picture
drum front edge

Post# 742091 , Reply# 16   3/15/2014 at 11:36 (3,694 days old) by hotpoint95622 (Powys)        
Hotpoint 1701

hotpoint95622's profile picture
Some ware to the lip

Post# 742092 , Reply# 17   3/15/2014 at 11:39 (3,694 days old) by hotpoint95622 (Powys)        
Hotpoint 1701

hotpoint95622's profile picture
Cabinet with out the drum

Post# 742093 , Reply# 18   3/15/2014 at 11:44 (3,694 days old) by hotpoint95622 (Powys)        
Hotpoint 1701

hotpoint95622's profile picture
Back of the timer and part of the heater unit.

Silver box contains the door release button and half heat button, fixed to it’s side is the cabinet over heat cut out protection stat..


Post# 742095 , Reply# 19   3/15/2014 at 11:49 (3,694 days old) by hotpoint95622 (Powys)        
Hotpoint 1701

hotpoint95622's profile picture
The two elements at the neutral end of the supply

Post# 742096 , Reply# 20   3/15/2014 at 11:53 (3,694 days old) by hotpoint95622 (Powys)        
Hotpoint 1701

hotpoint95622's profile picture
Live end of the elements, steel sheathed units a little more robust then the wire wound exposed type often used in cloths dryers.


Post# 742097 , Reply# 21   3/15/2014 at 11:59 (3,694 days old) by hotpoint95622 (Powys)        
Hotpoint 1701

hotpoint95622's profile picture
The first major problem to over come, the front bearings have all worn away, the machine has been used for many hours in this condition causing a massive amount of friction metal drum lip on metal bearing strip causing the strip on the heater housing to wear so thin it has cracked.

Post# 742099 , Reply# 22   3/15/2014 at 12:02 (3,694 days old) by hotpoint95622 (Powys)        
Hotpoint 1701

hotpoint95622's profile picture
It’s so thin you can move it like a sheet of paper.

Post# 742101 , Reply# 23   3/15/2014 at 12:08 (3,694 days old) by hotpoint95622 (Powys)        
Hotpoint 1701

hotpoint95622's profile picture
The heater unit has also worn on the outside edge which acts as a ducked for the hot air due to the bearings.

This must have been such a screechy machine got to have been deafeningly loud.


Post# 742103 , Reply# 24   3/15/2014 at 12:11 (3,694 days old) by hotpoint95622 (Powys)        
Hotpoint 1701

hotpoint95622's profile picture
Back up right on her feet, remove the control pane and timer knob.

Post# 742104 , Reply# 25   3/15/2014 at 12:12 (3,694 days old) by hotpoint95622 (Powys)        
Hotpoint 1701

hotpoint95622's profile picture
Door removed

Post# 742106 , Reply# 26   3/15/2014 at 12:14 (3,694 days old) by hotpoint95622 (Powys)        
Hotpoint 1701

hotpoint95622's profile picture
Door hinge removed, securing screws also retain the heater unit.

Post# 742107 , Reply# 27   3/15/2014 at 12:16 (3,694 days old) by hotpoint95622 (Powys)        
Hotpoint 1701

hotpoint95622's profile picture
Time for lunch, the next project is now washing a load on program D

Post# 742109 , Reply# 28   3/15/2014 at 12:18 (3,694 days old) by hotpoint95622 (Powys)        
Hotpoint 1701

hotpoint95622's profile picture
Yummy, I’m starving; ham and cheeses roll with ploughman’s pie.

Post# 742112 , Reply# 29   3/15/2014 at 12:21 (3,694 days old) by hotpoint95622 (Powys)        
Hotpoint 1701

hotpoint95622's profile picture
Refreshed and re-agenized the front panel comes off next.

Post# 742113 , Reply# 30   3/15/2014 at 12:25 (3,694 days old) by hotpoint95622 (Powys)        
Hotpoint 1701

hotpoint95622's profile picture
More photos with the fixings stuck to it ready for the rebuild.

Post# 742115 , Reply# 31   3/15/2014 at 12:26 (3,694 days old) by hotpoint95622 (Powys)        
Hotpoint 1701

hotpoint95622's profile picture
Heater unit dangling by the wiring loom

Post# 742116 , Reply# 32   3/15/2014 at 12:31 (3,694 days old) by hotpoint95622 (Powys)        
Hotpoint 1701

hotpoint95622's profile picture
Heater thermostat facing onto the cabinet front panel.

Post# 742117 , Reply# 33   3/15/2014 at 12:34 (3,694 days old) by hotpoint95622 (Powys)        
Hotpoint 1701

hotpoint95622's profile picture
Door release cable and door catch, switch assembly

Post# 742118 , Reply# 34   3/15/2014 at 12:37 (3,694 days old) by hotpoint95622 (Powys)        
Hotpoint 1701

hotpoint95622's profile picture
Close up of one of the knackered bearing strips and what remains of the door seal.

Post# 742119 , Reply# 35   3/15/2014 at 12:39 (3,694 days old) by hotpoint95622 (Powys)        
Hotpoint 1701

hotpoint95622's profile picture
Time for afternoon coffee and that E is on pump and distribute

Post# 742120 , Reply# 36   3/15/2014 at 12:42 (3,694 days old) by hotpoint95622 (Powys)        
Hotpoint 1701

hotpoint95622's profile picture
Timer and switch bank removed, just look at how the sun has damaged those buttons

Post# 742121 , Reply# 37   3/15/2014 at 12:44 (3,694 days old) by hotpoint95622 (Powys)        
Hotpoint 1701

hotpoint95622's profile picture
Sun damage

Post# 742123 , Reply# 38   3/15/2014 at 12:48 (3,694 days old) by hotpoint95622 (Powys)        
Hotpoint 1701

hotpoint95622's profile picture
Heat shield for the switch bank, riveted in place and it will require drilling those out, and just like any other time the drill battery is flat and I will have to wait for it to charge up.

Post# 742124 , Reply# 39   3/15/2014 at 12:51 (3,694 days old) by hotpoint95622 (Powys)        
Hotpoint 1701

hotpoint95622's profile picture
Cabinet over heat protection thermostat removed and the wiring loom ties also removed.

Post# 742126 , Reply# 40   3/15/2014 at 12:54 (3,694 days old) by hotpoint95622 (Powys)        
Hotpoint 1701

hotpoint95622's profile picture
Heater unit, door switch unit, timer and switch bank all laid out on the floor.

Post# 742127 , Reply# 41   3/15/2014 at 12:56 (3,694 days old) by hotpoint95622 (Powys)        
Hotpoint 1701

hotpoint95622's profile picture
Drive unit and base of machine, inch of fluff

Post# 742128 , Reply# 42   3/15/2014 at 12:58 (3,694 days old) by hotpoint95622 (Powys)        
Hotpoint 1701

hotpoint95622's profile picture
Vacuumed and de-fluffed.

Post# 742130 , Reply# 43   3/15/2014 at 13:02 (3,694 days old) by hotpoint95622 (Powys)        
Hotpoint 1701

hotpoint95622's profile picture
Mean while the E is on the final 1100 spin, what a sweet sound, sad I know.

Post# 742138 , Reply# 44   3/15/2014 at 13:19 (3,694 days old) by hotpoint95622 (Powys)        
Hotpoint 1701

hotpoint95622's profile picture
Wrap around cabinet removed, identical to the washing machine cabinet.

Post# 742139 , Reply# 45   3/15/2014 at 13:20 (3,694 days old) by hotpoint95622 (Powys)        
Hotpoint 1701

hotpoint95622's profile picture
Base unit with the drive still in place and the heater unit.

Post# 742140 , Reply# 46   3/15/2014 at 13:23 (3,694 days old) by hotpoint95622 (Powys)        
Hotpoint 1701

hotpoint95622's profile picture
Drive unit held in place with 2x screw and one bold, come out as one.

Post# 742141 , Reply# 47   3/15/2014 at 13:23 (3,694 days old) by hotpoint95622 (Powys)        
Hotpoint 1701

hotpoint95622's profile picture
Time for an interlude, suppers on the table, back soon with the last instalment.

Post# 742147 , Reply# 48   3/15/2014 at 13:55 (3,694 days old) by hotpoint95622 (Powys)        
Hotpoint 1701

hotpoint95622's profile picture
Remove the wheels and feet from the base unit.

Post# 742149 , Reply# 49   3/15/2014 at 13:58 (3,694 days old) by hotpoint95622 (Powys)        
Hotpoint 1701

hotpoint95622's profile picture
Remove captive nuts from the base unit and taping onto photo for the rebuild

Post# 742151 , Reply# 50   3/15/2014 at 14:06 (3,694 days old) by hotpoint95622 (Powys)        
Hotpoint 1701

hotpoint95622's profile picture
Again the same for the cabinet captive nuts.

Post# 742152 , Reply# 51   3/15/2014 at 14:07 (3,694 days old) by hotpoint95622 (Powys)        
Hotpoint 1701

hotpoint95622's profile picture
And front panel

Post# 742153 , Reply# 52   3/15/2014 at 14:10 (3,694 days old) by hotpoint95622 (Powys)        
Hotpoint 1701

hotpoint95622's profile picture
The drill battery is full charged and I have drilled out the rivets holding the switch bank heat shield.

Post# 742156 , Reply# 53   3/15/2014 at 14:17 (3,694 days old) by hotpoint95622 (Powys)        
Hotpoint 1701

hotpoint95622's profile picture
Placed the drive unit inside the drum and popped the heater unit on top for safe storage

Post# 742157 , Reply# 54   3/15/2014 at 14:19 (3,694 days old) by hotpoint95622 (Powys)        
Hotpoint 1701

hotpoint95622's profile picture
Few small parts kept in plastic box…

Post# 742159 , Reply# 55   3/15/2014 at 14:26 (3,694 days old) by hotpoint95622 (Powys)        
Hotpoint 1701

hotpoint95622's profile picture
Removed yards of gasket tap which will have to be renew, the dryer works with the cabinet pressurized with air from the fan so will require this to function correctly and maintain the correct air flow though the drum..

Post# 742160 , Reply# 56   3/15/2014 at 14:30 (3,694 days old) by hotpoint95622 (Powys)        
Hotpoint 1701

hotpoint95622's profile picture
Putty substance squeezed into all the corners of the cabinet, base unit and front panel where there are gaps in the folded steel parts and also all round any nut and bolts to completely seal the unit.

Post# 742162 , Reply# 57   3/15/2014 at 14:33 (3,694 days old) by hotpoint95622 (Powys)        
Hotpoint 1701

hotpoint95622's profile picture
Well that’s it, all the cabinets’ parts waiting to be taken to the powder coaters for refinishing.


Post# 742318 , Reply# 58   3/16/2014 at 03:28 (3,694 days old) by electron1100 (England)        
I am in bits

electron1100's profile picture

well done Lee I see the visit to Mats has inspired you and as the weather is improving tis the time for these sort of jobs.

You have had stuff re-powered before I remember so when this comes back it will be a perfect match for your other Hotpoints.

And I am sure other group members can help with spare bits and pieces.

Good luck
Gary


Post# 906192 , Reply# 59   11/9/2016 at 09:54 (2,724 days old) by bobe (New Forest of England)        
I'm also trying to refurbish a 1701

A couple of questions please?

Firstly is it a "brushless" motor?
(I don't want to strip down more than I need)

Secondly is there some way of renewing the bearings at the door end of the drum?
The ones near the air outlet look ok, but I think the door end ones could be dodgy.
I hope I've managed to get a set of belts which could be the main problem but ????
great series of photos very helpful, Thanks.

Cheers Bob E


Post# 907211 , Reply# 60   11/16/2016 at 04:02 (2,717 days old) by BobE (New Forest of England)        
Hotpoint dryer continued.....

I'm an idiot!!! Of course its an induction motor and no brushes..
Great! I don't have to start filing down wrong sized carbons and at last run, the motor was, I thought fine.

My problem is now whether there is some way of repairing/renewing the door end bearings of the drum? If required?
Here's a couple of pictures of the bearings at the exhaust end. I guess replacement spares are out of the question.
As yet I have little idea of what the door end drum bearing arrangement looks like.
I'm spraying the bearing surfaces with PTFE spray to, hopefully, reduce any friction.(Might be a waste of time)
I'm not going to take off the base to "splay" the case and remove the drum until the new belts arrive from Ransoms.
Cheers Bob E


  Photos...       <              >      Photo 1 of 2         View Full Size
Post# 907214 , Reply# 61   11/16/2016 at 05:13 (2,717 days old) by chestermikeuk (Rainhill *Home of the RailwayTrials* Merseyside,UK)        
Hotpoint Liberator Dryer 1701 Re-Build

chestermikeuk's profile picture
Hello Bob and a big welcome to the club, do you have a long history in appliance repairs ? you have a great dryer for restoration, parts are getting rare but still available through ebay, sellers etc and major parts such as Qualtex and Home Spares - here is Lee`s Re-Build thread following the strip down, am glad you re-posted this as its great to see Lee`s full restorations documented for future use...


CLICK HERE TO GO TO chestermikeuk's LINK


Forum Index:       Other Forums:                      


Comes to the Rescue!

The Discuss-o-Mat has stopped, buzzer is sounding!!!
If you would like to reply to this thread please log-in...

Discuss-O-MAT Log-In


New Members
Click Here To Sign Up.


automaticwasher.org home
Discuss-o-Mat Forums
Vintage Brochures, Service and Owners Manuals
Fun Vintage Washer Ephemera
See It Wash!
Video Downloads
Audio Downloads
Picture of the Day
Patent of the Day
Photos of our Collections
The Old Aberdeen Farm
Vintage Service Manuals
Vintage washer/dryer/dishwasher to sell?
Technical/service questions?
Looking for Parts?
Website related questions?
Digital Millennium Copyright Act Policy
Our Privacy Policy