|
Thread Number: 78329
/ Tag: Modern Automatic Washers
Whirlpool TL Washer Control Panel Swap |
[Down to Last] |
| Post# 1023579 2/4/2019 at 15:18 (1,999 days old) by stricklybojack (South Hams Devon UK) | ||
.
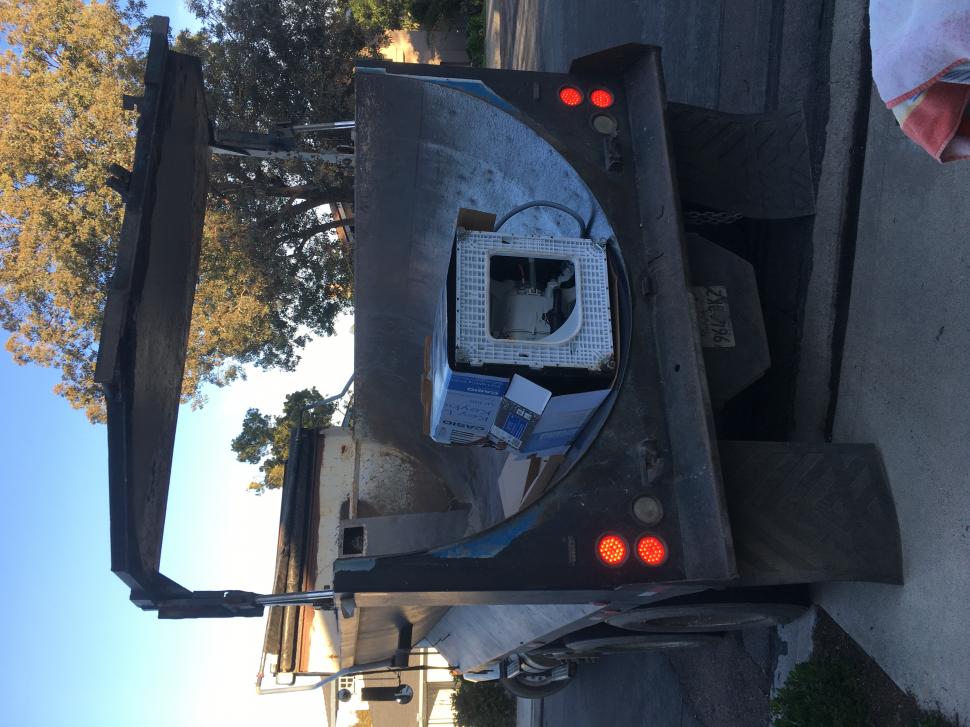
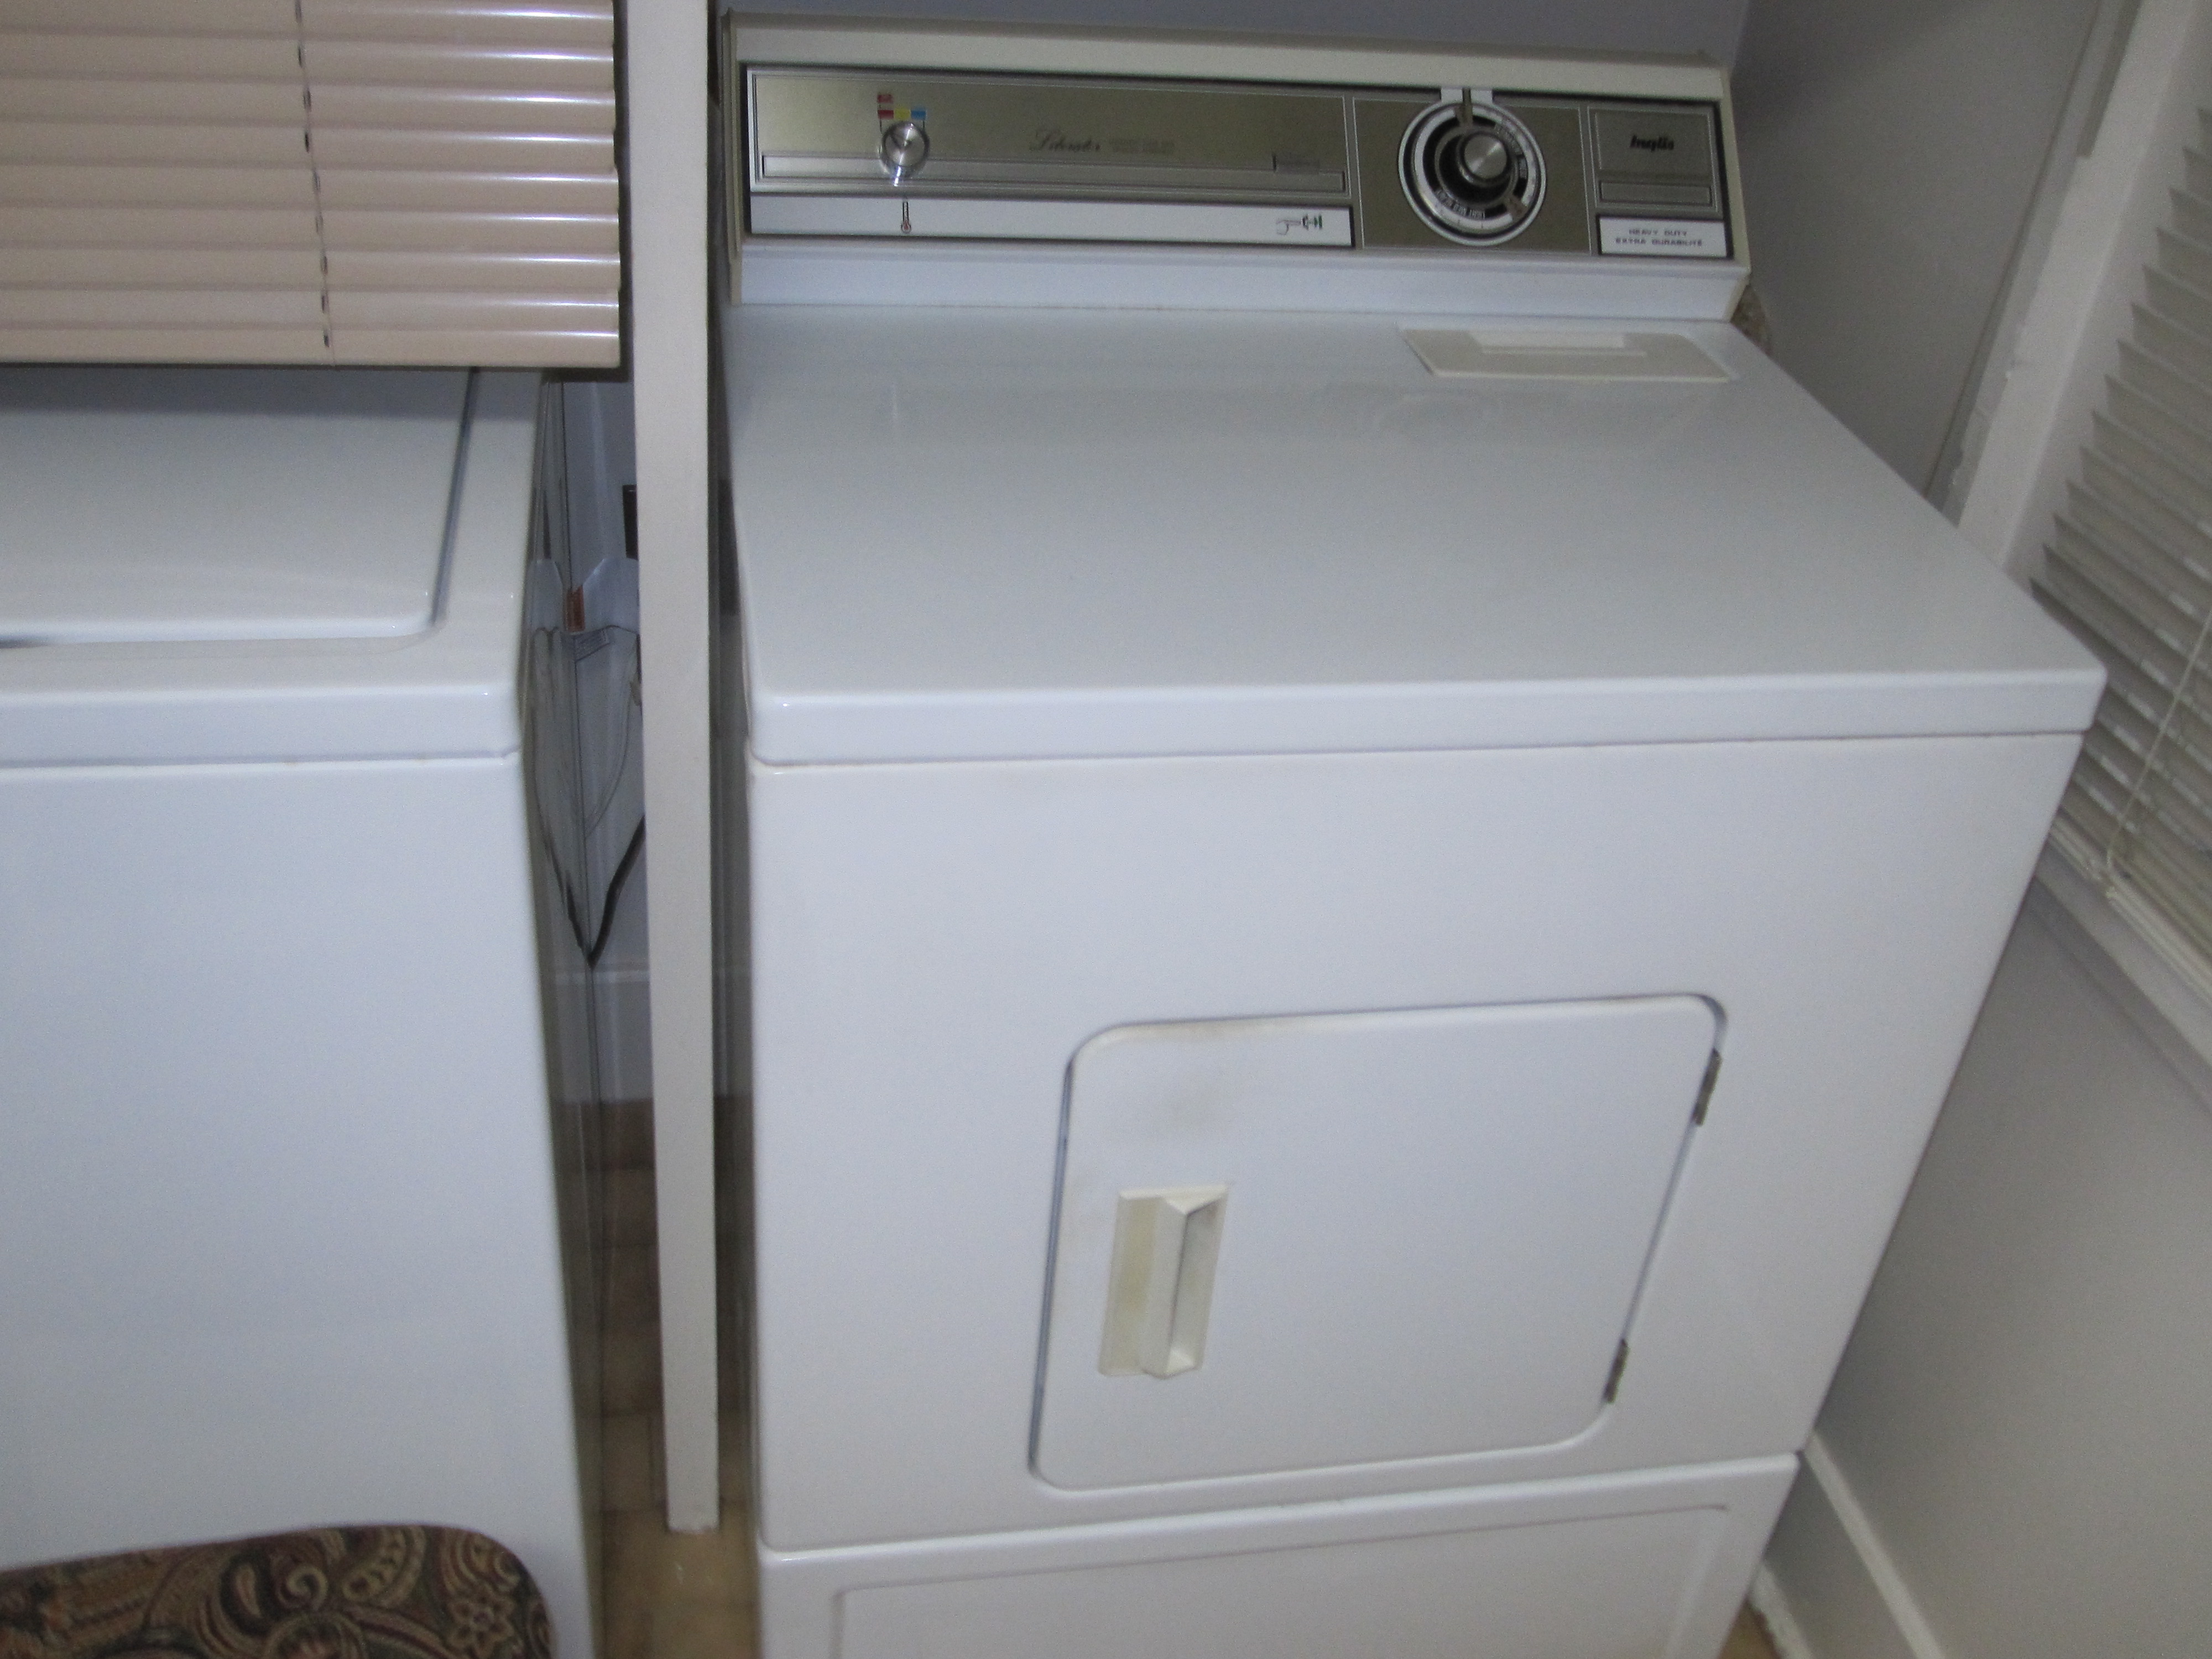
So I get this bisque washer on Sunday and it�s missing a knob, and the timer knob it does have is weirdly disintegrating. The cheapest replacement timer knob I could find was over $20...I paid about twice that for the whole machine! So i decide to use the old one and I finally clean off the rubber grip (last pic is what it should look like but very much didn�t) from the knob that has turned to goo (third pic)...and in the process of reinstalling it on the washer I broke part of the flimsy plastic on the timer that holds the knob! There should be two white arms around the center yellowish post, not one (second pic). Not my morning...then I remember I have an earlier model intact control panel with lovely knobs, also in bisque, could i swap the two? Save my dumb ass and upgrade the washer to an extra rinse option and more temp options would sure be appealing. Drilling 2 holes in the top of the cabinet won�t be very hard, the wiring could be a challenge though. As a side note, when I first looked at the machine I noticed it needed agitator dogs, the owner had no clue! She had been using it that way for who knows how long. I told her she would, �really notice a difference in the way your new machine washes.� This post was last edited 02/04/2019 at 16:38 | ||

|
| Post# 1023581 , Reply# 1 2/4/2019 at 16:59 (1,999 days old) by stricklybojack (South Hams Devon UK) | ||
|
Moving along...
.
All the wires are the same except the newer machine has 9 wires that the connect panel to the washer and the donor panel has 12. This must be due to the �extra rinse� option found on the donor panel, although the switch itself has 4 wires going to it (second pic). Sorting out those three missing wires will be at least half this job. I will probably splice in the new panel and cap the three extra wires for now, run a test wash, and then proceed later on adding the extra rinse feature. This post was last edited 02/04/2019 at 21:04 | ||
Post# 1023584 , Reply# 2 2/4/2019 at 17:09 (1,999 days old) by Yogitunes  (New Jersey) (New Jersey) |
||

whenever I swap panels from a machine.....
I remove the entire wire harness assembly.....and sometimes you have to keep the water valve, water sensor, and motor together with it....even the lid switch if needed... then you can flip the panels in a matter of minutes.... pretty fool proof after that..... with a good base, you can upgrade any number of machines... | ||
|
Post# 1023585 , Reply# 3 2/4/2019 at 17:20 (1,999 days old) by DADoES (TX,�U.S. of A.) |
||

�
Generally all the wiring between controls is inside the panel.� Wires head out of the console for the lid switch, water valve, and motor.� The water valve bundle may in some cases include wires for an ATC thermistor.� Timers & harnesses for 3-speed motors of course have more wires than 2-speeders. Mounting a different console to the top may be tricky, they aren't all the same for hooking-in and the anchor screws.� Appears the original has anchor screws at the back corners, the target substitute at the front corners. | ||
| Post# 1023600 , Reply# 4 2/4/2019 at 20:52 (1,998 days old) by stricklybojack (South Hams Devon UK) | ||
|
.
It will mount to the top after i drill two holes. The anchoring system has enough aspects in common and works as well as it originally did, other than leaving two �vents� on either side of the panel which will be left exposed. Weird how the second pic makes it look like the panel housing is over hanging the rear deck of the machine, when in fact the third pic clearly shows otherwise. This post was last edited 02/04/2019 at 21:12 | ||
| Post# 1023661 , Reply# 5 2/5/2019 at 13:49 (1,998 days old) by stricklybojack (South Hams Devon UK) | ||
|
.
I determined the three wires I will need to add to the patient are color coded tan, gray, and white on the donor panel. The nine other wires match each other, red to red, blue to blue, etc. Luckily I have another DD (Kenmore) with the same options (and likely the same wiring) I can reverse engineer from. Well I then decided to look past the control panel and on to the agitator dogs; onward, downward, and backward, all at once! �Cause I discovered the bolt holding the agitator on is a lump of rust unlikely to accept a socket of any size, much less whatever it was originally...3/8�? I have it soaking in Liquid Wrench now, but my first attempts are not promising. If i can�t get the bolt off, what then, cut away the upper part of the agitator? So glad they didn�t spend the extra few cents and make that bolt less susceptible to corrosion...NOT. This post was last edited 02/05/2019 at 14:06 | ||
|
Post# 1023662 , Reply# 6 2/5/2019 at 14:01 (1,998 days old) by coldspot66 (Plymouth, Mass) |
||
|
There is a water proof cover for the bolt and dogs. Apparently it is missing. | ||
| Post# 1023664 , Reply# 7 2/5/2019 at 14:32 (1,998 days old) by stricklybojack (South Hams Devon UK) | ||
|
.
Crap, another puke fest...apparently not everyone takes care of their machines in the manner necessary to avoid me finding these nasty surprises. Looks like the aforementioned seal broke...I am wondering if there are any dogs even left in this machine. We shall see, but this job is going to double again as that wash basket clearly has to come out! Pro tip, the black stuff on the inner tub does make tasty hors d'oeuvres when spread on crackers and topped with flakes of rust and strands hair ;-] This post was last edited 02/05/2019 at 17:42 | ||
| Post# 1023684 , Reply# 8 2/5/2019 at 16:06 (1,998 days old) by stricklybojack (South Hams Devon UK) | ||
|
My luck turned...
.
for the bettor. Got the mofo out...thank you Liquid Wrench. Like I suspected, someone let the dogs out, who, who? Ordered a cam kit, this baby is not going back together with the same crap, it�s worth a ten spot to trash that bolt alone! Look at the spindle/agitator shaft though, like frikin� new. The agitator slide right off too, with nary a fuss. This post was last edited 02/05/2019 at 17:26 | ||
| Post# 1023712 , Reply# 9 2/5/2019 at 21:04 (1,997 days old) by Pierreandreply4 (St-Bruno de montarville (province of quebec) canada) | ||
anyplan to keep the actual dual action agiator or replace it with an agitator like this one
View Full Size
| ||
| Forum Index: | 
| Other Forums: |

|

|

|

|

|

 Comes to the Rescue!


;)
;)
;)
;)
;)
;)
;)
;)
;)
;)
;)
;)