Thread Number: 85503  /  Tag: Refrigerators
1939 General Electric "Triple Thrift" CF Flat-Top refrigerator capillary tube conversion...
[Down to Last]

automaticwasher.org's exclusive eBay Watch:
scroll >>> for more items --- [As an eBay Partner, eBay may compensate automaticwasher.org if you make a purchase using any link to eBay on this page]
Post# 1100548   12/14/2020 at 09:35 (1,228 days old) by turbokinetic (Northport, Alabama USA)        

Hi folks. I've had this GE type "CF" Flat Top in storage for about 2 years and finally found motivation to get it operating. It came here with bad wiring (like they all have) and an intermittent cooling problem. The porcelain cabinet is in amazing shape, considering it's approximately 80 years old! Enjoy the pictures!

It would run but not cool, but if I tapped on the stem area of the float valve; it would start cooling "for a while" then gradually get a lower and lower frost line until it stopped cooling altogether. This cycle could be repeated but the longest I could get it to cool was about 2 days.

I decided against trying to repair the existing float valve due to wanting to get the job done in less time. I have the float chamber and will investigate it at a later time, for a learning experience, though.

First, I removed the SO2. This was done by installing the hermetic service kit onto the float valve service port, as usual. Then a refrigeration gauge hose was connected to the hermetic service kit. The other end of the service hose was connected to a cheap, throw-away air hose. That was routed outside the building and placed into a bucket of water containing lye. The SO2 was discharged into the water to neutralize it. During this process, heat was applied to the base of the compressor (where the oil stays) and to the evaporator. This was done with a heat gun. Once the SO2 was gone, I cut and capped the lines at the top, so that the compressor and condenser assembly could be set aside.

After that was done, the evaporator mount plate was removed from the cabinet. With that on the benchtop, I was easily able to bend and install a new liquid supply line to eliminate the float valve. The capillary tube specification used is 0.031" inner diameter, with 120 inch length. This happens to be one entire pack of Supco BC-1 cap tube. This applies to the 1/8 HP Scotch Yoke compressors, such as the CK and CF machines. It is also calibrated for use with R152A refrigerant.

Wanting to keep with an efficient and complete design, the new cap tube was soldered onto a coiled section of return line, to form a neat exchanger. This is the same design used in almost all factory cap tube systems. The excess cap tube length was coiled around a spray can to make a neat and concise coil. Everything up in the top is covered up and hidden, so I wanted all the modifications to be up here concealed. Therefore the drier and heat exchanger lines are here, as opposed to being a straight heat exchanger down the back of the unit, with the drier at the condenser outlet. All soldering was done with StayBrite solder and liquid acid flux (used sparingly).

The basic refrigerant circuit works like this. The original liquid line from the condenser to the float was cut off the float inlet. It was then re-routed to the inlet of the filter drier. The outlet of the drier goes to the cap tube. The cap tube then follows along the return line, to form the heat exchanger. The discharge end of the cap tube goes into the evaporator inlet line (the smaller line going into the evaporator channels). The vapor outlet from the evaporator header then goes to the heat exchanger inlet. The outlet of the heat exchanger is then soldered to the original compressor return line where it was originally cut.

Since the original service port was on the float chamber (which has been removed), I decided to put the factory-only non-threaded low-side port (on the compressor) to use. That was done by laying the compressor on its side with that port facing sideways. Then the plug was removed with the hermetic kit .216 Bristol key. I then connected a nitrogen purge to the compressor suction line to ensure air was blowing out of the port while I modified it, to prevent chips from going inside the compressor. After that, a 1/8" pipe tap was run through the original threads to prepare it for a thread-in brass fitting. Because the threads were not perfect due to the fact that I re-tapped from one thread pitch to another, I chose to solder a 90 degree brass street-ell fitting in after screwing it in the compressor. This was done with liquid acid flux and StayBrite silver bearing solder. Once the street-ell was in place, a regular screw-in 1/4" SAE flare Schrader port was installed with Loctite.

The factory charge amount was listed as 2.0 Lb of sulphur dioxide. I found that about 12 ounces by weight of R152A seems to give a full frost. It may be slightly overcharged so I will see how it does as time goes. On all accounts it was less than 15 ounces of refrigerant.

Instead of the Themokraft insulation, I went back with fiberglass stuffing. This works just as well, and I can easily pack it around the new tubing and fill in the voids around the edge of the cabinet where there was no factory insulation. The top cover and door both got new gaskets, as well. It is definitely air tight now!

For the wiring betweent he compressor relay and top of the cabinet, I used SJ cable, 4-core. This allows power and neutral to the top of the cabinet; plus a switched-hot wire from the thermostat to the compressor; and finally an equipment ground. New low-side service port is visible in the picture where the hose is connected to the top of the compressor dome at the left side.

Unfortunately, the thermostat was duff. It looked like the inside of it had been full of moisture and had corroded beyond restoration. Thankfully I have a box of junk to get another one from, so that will be an easy fix.

Hope you enjoyed seeing this repair!
Sincerely,
David


  Photos...       <              >      Photo 1 of 20         View Full Size


Post# 1100566 , Reply# 1   12/14/2020 at 12:10 (1,228 days old) by RP2813 (Sannazay)        

rp2813's profile picture

David, boy do I wish I had your skills and abilities, but I suppose if I did, I'd be swimming in old refrigerators!


It's always a pleasure to see the pride you take in your beautiful, expert workmanship.   Thanks for sharing another impressive restoration that conceals your superior mechanical improvements and keeps one more vintage refrigerator cooling efficiently for many more years.


Ralph


Post# 1100577 , Reply# 2   12/14/2020 at 13:06 (1,228 days old) by Repairguy (Danbury, Texas)        

repairguy's profile picture
Awesome as usual!

Post# 1100832 , Reply# 3   12/16/2020 at 12:24 (1,226 days old) by kevin313 (Detroit, Michigan)        
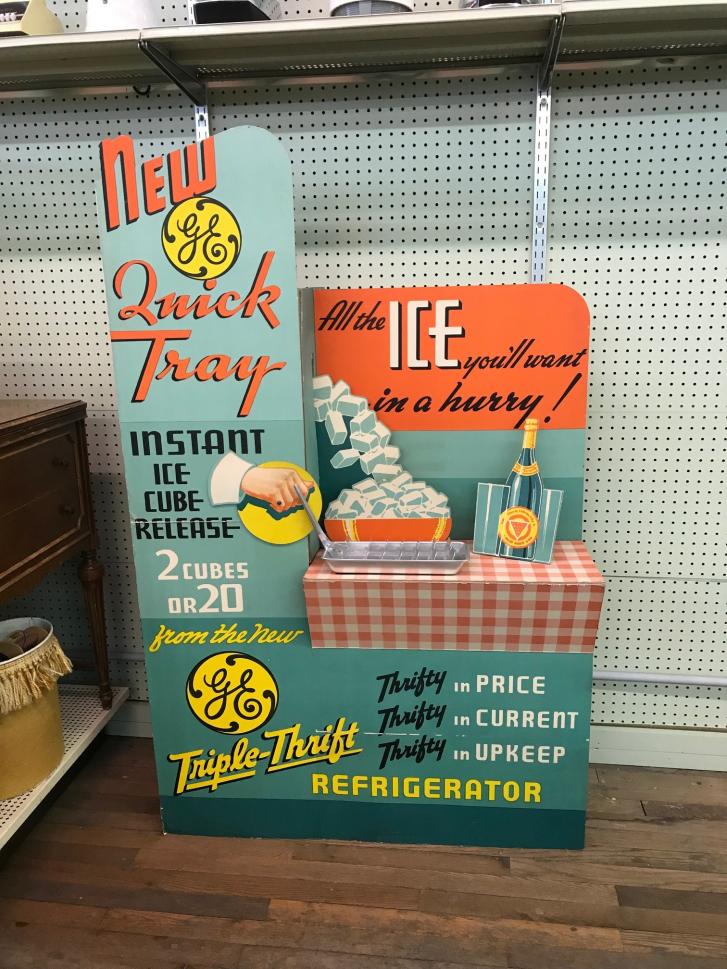
kevin313's profile picture
Hi Dave,

Incredible restoration work, as always! Thanks for sharing it.

I have a department store display for the GE "Triple Thrift" that features it's modern ice-making function!


  View Full Size
Post# 1100898 , Reply# 4   12/16/2020 at 23:53 (1,225 days old) by Supersuds (Knoxville, Tenn.)        

supersuds's profile picture
Neat display! If only those aluminum ice cube trays actually worked that well!

Post# 1100917 , Reply# 5   12/17/2020 at 08:26 (1,225 days old) by swestoyz (Cedar Falls, IA)        

swestoyz's profile picture
David - excellent work! Porcelain cabinets on these must be rare, I don't recall ever seeing one of these Triple Thrift outfitted in such luxury.

Ben


Post# 1100926 , Reply# 6   12/17/2020 at 09:43 (1,225 days old) by turbokinetic (Northport, Alabama USA)        

Thanks to all of you for the positive comments. I really appreciate it.

Hi Ben - I've never seen one of them in porcelain, either! I'm sure it was not cheap back in the day!

Kevin, that store display is neat. I've tried quite a few different ice cube tray designs and they all seem to have their limitations - but there is one I like more than others. It's a Westinghouse tray which makes a high number of flat ice "tiles" if you will. Might be worth a post about that some day!


Forum Index:       Other Forums:                      


Comes to the Rescue!

The Discuss-o-Mat has stopped, buzzer is sounding!!!
If you would like to reply to this thread please log-in...

Discuss-O-MAT Log-In


New Members
Click Here To Sign Up.


automaticwasher.org home
Discuss-o-Mat Forums
Vintage Brochures, Service and Owners Manuals
Fun Vintage Washer Ephemera
See It Wash!
Video Downloads
Audio Downloads
Picture of the Day
Patent of the Day
Photos of our Collections
The Old Aberdeen Farm
Vintage Service Manuals
Vintage washer/dryer/dishwasher to sell?
Technical/service questions?
Looking for Parts?
Website related questions?
Digital Millennium Copyright Act Policy
Our Privacy Policy