|
Thread Number: 85599
/ Tag: Vintage Automatic Washers
A806 A702 Project |
[Down to Last] |

|
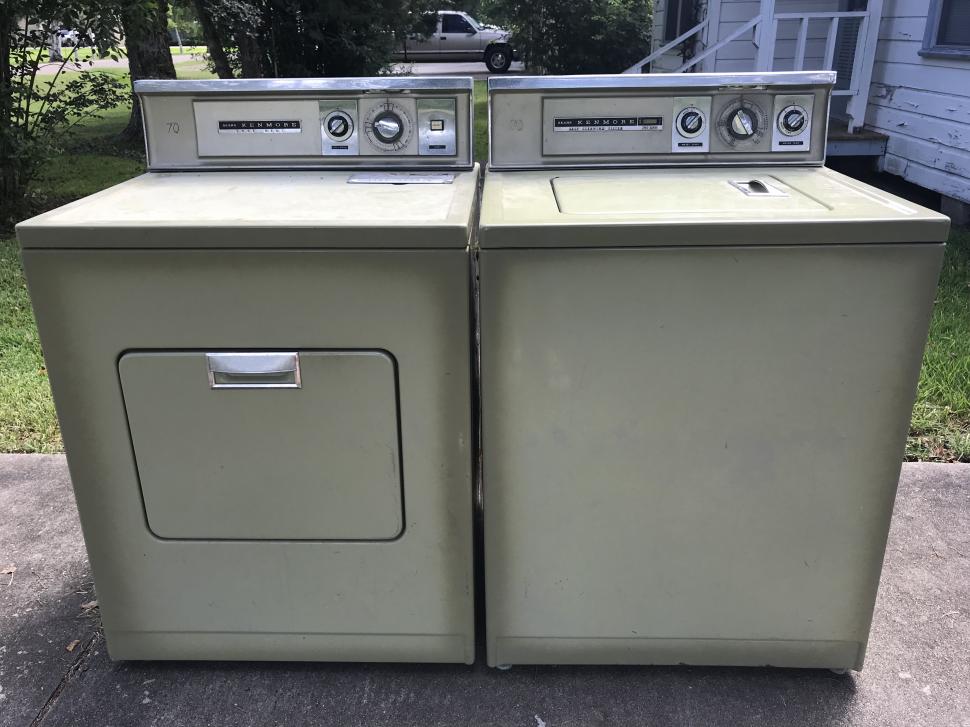
| Post# 1101979 , Reply# 2 12/25/2020 at 17:04 (1,309 days old) by eurekastar (Amarillo, Texas) | ||
|
| ||
Post# 1102028 , Reply# 4 12/26/2020 at 07:53 (1,308 days old) by combo52  (50 Year Repair Tech Beltsville,Md) (50 Year Repair Tech Beltsville,Md) |
||
A806 Rebuild Looking Good Joseph, I looked and we do not have the Chrome trim you Emailed me about for the top of the front panels.
For your ultimate rebuild I would look for a round or even a square Emerson motor, they were quieter running than the welded together GE motors, definitely add a start capacitor as well so you can achieve proper belt adjustments without excessive belt slip during agitation.
What went wrong trying to remove the brake assembly ?
It is a simple 5 step process
1 Lay washer on side & remove main drive pulley.
2 Remove locking bolt and clip.
3 spray a little penetrating oil on brake assembly threads.
4 Take a large locking vise-grip pliers and lock it on the edge of the brake assembly [ just ahead of one of the screws that hold the brake together if it the older style BA ]
5 take at least a 16 oz hammer and one or two blows on the side of the Vice-Grip jaws has always removed the BA easily.
John L. | ||
| Post# 1102210 , Reply# 6 12/27/2020 at 15:09 (1,307 days old) by qsd-dan (West) | ||
|
Looks like it's coming along nicely.
I assume you're going to POR15 the outer tub? It's the best way to preserve it from rust. Nice job polishing the aluminum damper. I polish them with a brass wire wheel, clean, then clear coat to retain its luster. Check and clean the bleach tank and hoses. It's common for the lower port to plug up, which will cause water to flow backwards and pour out of the bleach dispenser during the spin cycle. The motor looks like a 1980's GE 2 speed 1/3 horsepower unit. You can upgrade to a 1/2 hp motor that Maytag used the last 10 years of the Dependable Care washer line. Nice score on an NOS transmission! I would highly recommend purchasing a new brake package. They are still available new and probably won't be around much longer. The first 3 complete rebuilds I did, I reused the old brake package and they were all soon slipping, if not immediately after the rebuild. The internal spring gets weak after decades of being under tension and can't hold the tub stationary. Replacing them was SOP after that but I was swiping them from ebay for $15-$25 back then (they're pushing $100 now). I have experimented with disassembling older non-sealed brake packages and shimming the spring with washers, successfully regaining lost spring tension.....if you want to go that route. Just an FYI, you assembled the sliding baseplate on the motor backwards. It's currently setup to clutch the opposite direction. Also, the ground wire attaches to the right rear motor stud between the motor and baseplate. You currently have it in the right front stud. There's only one person on this forum who has yet to learn how to use a Maytag brake tool. I have had 100% success using one for the last 15 years and would never be without it! | ||
| Post# 1102438 , Reply# 8 12/29/2020 at 18:35 (1,305 days old) by qsd-dan (West) | ||
|
Bah, don't worry about the motor carriage. The first time I took one apart I was going to mark all 3 pieces with a grease pencil for easy reassembly, then laziness kicked in and decided not to. I ended up taking the whole works apart 2 more times before I got everything oriented like it was from the factory. Everybody starts somewhere ;)
In the near future, I'll dig out one of my spare brake packages and do a pictorial step by step disassembly/reassembly. I'll also explain how to shim the spring to regain tension. I could try to explain it off the top of my head but I can't remember the inner/outer diameter washer sizes and I may forget a step or 2 in the process. The last time I took one apart was about 5 years ago. The 1/2 HP motor is built a bit more rugged and has a little more power. For a machine that's in proper working order, there's no noticeable difference in the agitation cycle. Where you'll see the difference is during the ramp up of the spin cycle but once up to speed, eh, not so much. I wouldn't consider myself a master, just someone who is greatly interested in these machines and got my hands dirty as much as possible.....arguably to levels of insanity. The more one fools around with these, the quicker you'll get and find inquisitive ways to repair problems and become more efficient. It's fun coming across different issues, especially the wacky and rare ones, and then figuring them out. Also, when the manual indicates areas that shouldn't be fooled with or "take to the dealer/send to the factory" for repairs.....well, I consider that a challenge :) | ||
|
Post# 1102449 , Reply# 9 12/29/2020 at 20:36 (1,305 days old) by combo52 (50 Year Repair Tech Beltsville,Md) |
||
|
Automatic Washer Horse-Power AWs almost universally had 1/3 HP motors, I was always pleased that Maytag resisted the silly move to 1/2 HP motors that every other American manufacturer jumped to during the 60s. All these higher HP motors ever did is waste untold amounts of power.
The only thing putting a 1/2 HP motor on a DC MT will do is use 20% more electricity and may ruin the timer and WL switch contacts, it will not work any better.
MT DC machines have often had problems with the motor starting at the start of spin, the best thing you can do to tweak a MTs starting ability is adding a start capacitor to the motors start winding.
John L.
| ||
| Post# 1102905 , Reply# 10 1/2/2021 at 16:37 (1,301 days old) by Sudster () | ||
|
UPDATE Between the rain and waiting on the postal service for the remaining parts, We are right close to re-assembly day. I obtained a NOS brake and got it quick-Go Fedex! The control panel is finished.
This post was last edited 01/02/2021 at 21:29 | ||
|
Post# 1102907 , Reply# 11 1/2/2021 at 16:44 (1,301 days old) by kenwashesmonday (Carlstadt, NJ) |
||
|
Looks very nice. This machine is going to be a honey! | ||
| Post# 1102924 , Reply# 13 1/2/2021 at 18:44 (1,301 days old) by Good-Shepherd (New Jersey) | ||
|
serviceable tub bearing 204013 Which should I use? Use the old style bearing with the oil wick and shoot some extra turbine oil in there in case it dried out a little over the years. Save the new tub bearing for a lesser re-build. | ||
| Post# 1102925 , Reply# 14 1/2/2021 at 18:51 (1,301 days old) by Sudster () | ||
|
Thanks--I messed up again --Both the new & old tub bearings have the same number--204013. | ||
| Post# 1102932 , Reply# 16 1/2/2021 at 19:43 (1,301 days old) by Good-Shepherd (New Jersey) | ||
|
Brand new NOS transmission I'd love see what oil in a unused NOS long stroke MT trans looks like. By the time we get around to opening them up it has the consistency of molasses. | ||
|
Post# 1102934 , Reply# 17 1/2/2021 at 20:06 (1,301 days old) by combo52 (50 Year Repair Tech Beltsville,Md) |
||
|
MT Tub Bearing and New Brake You can use either top tub bearing the original that had extra oil wick was found to be of no value as these bearings never fail unless water gets past the main seal. I always with either type bearing squirt turban oil on top of the bearing once it is installed with the machine upright before you install the mounting stem.
If when you lay the new brake assembly on its side you can't see any thick oil go ahead and add several tablespoons of transmission oil, you can't over oil the brake within reason.
It is easy to add oil to the brake once installed, just lay the washer on its side and use a pump bottle and squirt some in through the holes in the main drive pulley.
John L. | ||
|
Post# 1102949 , Reply# 19 1/2/2021 at 21:52 (1,301 days old) by robbinsandmyers (Conn) |
||
Tub bearing wear | ||
|
Post# 1103017 , Reply# 23 1/3/2021 at 15:14 (1,300 days old) by combo52 (50 Year Repair Tech Beltsville,Md) |
||
|
MT Helical Drive Brake Reread post 17, Do Not waste your time taking the new brake apart,
Add transmission oil if non is seen as Maytag describes, this is not complicated.
Worn Tub Bearing In A MT A407, the noise may be a worn bearing, your washer is FIFTY YEARS OLD, and if you take it apart it has probably gotten a little moisture in the bearing.
John | ||
|
Post# 1103102 , Reply# 25 1/4/2021 at 06:29 (1,299 days old) by combo52 (50 Year Repair Tech Beltsville,Md) |
||
|
New Top Bearing For MT Washers Do keep in mind that this is an imitation Gemline part, while some GL parts have worked ok they were never the quality of MT OEM parts.
There is nothing wrong with a Genuine MT bearing with the old extra oil wick, But MT proved in tests and millions built that it was completely unnecessary so unless you have a great original one around you are wasting your time looking for one for a washer that is only going to be used for one or two people for maybe 5-30 years.
John L. | ||
| Post# 1103872 , Reply# 27 1/9/2021 at 18:28 (1,294 days old) by Sudster () | ||
|
I attached that new brake & Tree with springs & transmission . All contact points treated with silicone grease,
View Full Size
| ||
| Post# 1103875 , Reply# 29 1/9/2021 at 18:38 (1,294 days old) by Sudster () | ||
|
So here we are with a question. Can't I jump the motor and put her in spin mode now to seat the boot and check for tub balance?? | ||
|
Post# 1103892 , Reply# 30 1/9/2021 at 20:53 (1,294 days old) by robbinsandmyers (Conn) |
||
|
| ||
| Post# 1103896 , Reply# 31 1/9/2021 at 21:28 (1,294 days old) by Good-Shepherd (New Jersey) | ||
|
Is the Gemline tub bearing that bad? Combo52 was talking about Gemline vs. genuine Maytag OEM parts. New Maytag FSP parts, for better or worse, are Whirlpool manufactured. I wouldn't have any problem using one of those Gemline tub bearings. | ||
|
Post# 1104044 , Reply# 33 1/10/2021 at 20:06 (1,293 days old) by Yogitunes (New Jersey) |
||
 | ||
| Post# 1104045 , Reply# 34 1/10/2021 at 20:17 (1,293 days old) by Sudster () | ||
|
Martin, I was recognizing Eugene for the brake advice he gave me. A thank you!! | ||
|
Post# 1104057 , Reply# 35 1/10/2021 at 21:20 (1,293 days old) by combo52 (50 Year Repair Tech Beltsville,Md) |
||
|
MT DC Bleach Dispenser The MT pumps that I have seen that originally had the delayed bleach dispenser had what appeared to be around a 1/4" hole in the pump, 1/8" seems a little small as it could clog more easily.
What have the other MT experts seen ?
I always though calling this a timed dispenser was a little misleading as it gives you the impression that the bleach will be added at the proper time later in the wash cycle, when in reality all the bleach is in the wash water in about 60 seconds after the agitation begins and well before the detergent is barely dissolved, a proper timed dispenser would wait till the last 2-4 minutes of the wash period like MT does on their Neptunes.
John L. | ||
|
Post# 1104354 , Reply# 37 1/12/2021 at 22:14 (1,291 days old) by swestoyz (Cedar Falls, IA) |
||
KQ
Curious why the MFG year of the donor A806 matters if you�re combing parts from multiple machines to put together a home brew machine? I pulled the tag that came from the machine and it was made in May of �72.
I can�t explain the bleach hole size as I don�t recall putting a pump on it (It has now been almost 12 years since I worked on it) but if I did I could have grabbed a spare pump from the parts stash and a drill bit that would have matched the hole in the old pump. Any reason why you wouldn�t drill the hole size to the factory spec if you�re planning on reusing the pump? Ben | ||
| Post# 1104383 , Reply# 38 1/13/2021 at 07:28 (1,290 days old) by Sudster () | ||
|
CURIOUS MFG YEAR Ben,
For that exact reason,To find an ID tag as close as possible to the year. I had no idea you saved it. Would you consider selling it? BTW The cabinet is the only part that is not original to an 806 . It will have everything a 72- 806 had. | ||
|
Post# 1104464 , Reply# 40 1/13/2021 at 21:02 (1,290 days old) by swestoyz (Cedar Falls, IA) |
||
|
why save the badge
It's been a tradition of mine to save the model tag from a scrapped out appliance as the last thing to snag. It's something I look forward adding to the collection of tags each time I bring home something to part out.
You've accomplished a lot with your washer - we are all looking forward to seeing the finished product. Ben | ||
|
Post# 1104494 , Reply# 41 1/14/2021 at 09:13 (1,289 days old) by Lorainfurniture (Cleveland ) |
||
|
I�m digging the paint job | ||
| Post# 1104537 , Reply# 42 1/14/2021 at 17:31 (1,289 days old) by Sudster () | ||
|
Thanks Eugene | ||
| Post# 1104763 , Reply# 43 1/16/2021 at 19:23 (1,287 days old) by Sudster () | ||
|
99.9% I just turned 60 and it seems as though it takes me all day to accomplish 2 things .
I rebuilt the injector assy. with all new parts & hoses. That black is not silicone it's the KBS rust paint .
View Full Size
| ||
| Post# 1104766 , Reply# 45 1/16/2021 at 19:35 (1,287 days old) by Sudster () | ||
|
Only a couple things left but I need a quality drain hose. What are my options? I don't care for the cheap ribbed kind. Opinions please!
View Full Size
| ||
|
Post# 1104813 , Reply# 46 1/17/2021 at 04:19 (1,286 days old) by combo52 (50 Year Repair Tech Beltsville,Md) |
||
|
Looking Good, posts 43-45 The tub light idea works well, It might be interesting to find an LED bulb that would give a whiter light which would be impressive with the white tub and turquoise agitator.
For drain hoses I always liked WPs black rubber hoses, The best ones were the real rubber Norge or SQ Commercial TL washer drain hoses, they were really good quality heaver rubber and looked most like MTs original hoses but were much better rubber than MT used.
[ Maytag did not use very high quality rubber and plastic [ and lubricants ] in the 60s-the 80s ]
John L. | ||
|
Post# 1104819 , Reply# 47 1/17/2021 at 06:58 (1,286 days old) by goatfarmer (South Bend, home of Champions) |
||
 | ||
| Post# 1104823 , Reply# 48 1/17/2021 at 08:01 (1,286 days old) by eurekastar (Amarillo, Texas) | ||
|
| ||
|
Post# 1104844 , Reply# 49 1/17/2021 at 11:47 (1,286 days old) by Ultramatic (New York City) |
||
Stunning work. | ||
| Post# 1104845 , Reply# 50 1/17/2021 at 12:02 (1,286 days old) by Sudster () | ||
|
Thank You ALL !! I will post a YouTube video in the next few days and provide a link here. Joe | ||
| Post# 1105459 , Reply# 54 1/21/2021 at 22:41 (1,282 days old) by Repairguy (Danbury, Texas) | ||
 | ||
| Post# 1105569 , Reply# 55 1/22/2021 at 21:29 (1,281 days old) by casciomichael (Rutherford) | ||
|
That machine looks great. In regards to the tub light, did you punch a hole in the tub at the 3 oclock position for the light to pass through? Also what is the part number for the double pole switch? Thanks! Michael | ||
|
Post# 1105571 , Reply# 56 1/22/2021 at 21:39 (1,281 days old) by robbinsandmyers (Conn) |
||
|
| ||
| Post# 1105624 , Reply# 58 1/23/2021 at 08:58 (1,280 days old) by sprog (Boston) | ||
Wiring the light
Joseph,
Thanks for sharing your workflow! Excellent work! Can you share any insights regarding the tub light wiring mod.? I'll be rebuilding the transmission of my a806 (see Post# 1073856) and figure while it's all apart, why not add a light? In my scenario, I was contemplating LEDs and a relay (which may be overkill). Your solution looks more elegant. Cheers, Chris | ||
| Post# 1105687 , Reply# 60 1/23/2021 at 21:51 (1,280 days old) by latchlock8111 (Sulphur Springs Tx) | ||
|
Sweet Glow Say with that tub light you hit it outta' the park. | ||
| Post# 1105729 , Reply# 61 1/24/2021 at 14:10 (1,279 days old) by casciomichael (Rutherford) | ||
|
Lens in tub Do you think the cutout with lens in tub is present on later a806�s? I figured maytag would have eliminated that when they got rid of the light. Is your tub from 1975 or earlier? Thanks for the part number for the lid switch | ||
| Post# 1105843 , Reply# 63 1/25/2021 at 19:02 (1,278 days old) by sprog (Boston) | ||
|
Thanks Joe! | ||
| Post# 1105859 , Reply# 64 1/25/2021 at 23:57 (1,277 days old) by LowEfficiency (Iowa) | ||
 >> 1---The indentation is there but no lens. I'll drill a hole in each corner of the indentation gradually stepping up to about 3/8. You might be able to use a chassis punch too. You would then only have to drill a pilot hole, and the two dies on either side would punch out a nice clean round hole when you tightened it up. | ||
| Post# 1105916 , Reply# 65 1/26/2021 at 17:15 (1,277 days old) by casciomichael (Rutherford) | ||
|
Chassis punch Thats what I was planning to do, I have round and square punches. If i find one thst fits well, I�ll make a hole. A piece of plexiglass siliconed to the hole and it will be set. | ||
| Post# 1105918 , Reply# 66 1/26/2021 at 17:56 (1,277 days old) by Sudster () | ||
|
Check out thread #81875 in imperial it may help you figure a plan--Joe | ||
| Forum Index: | 
| Other Forums: |

|

|

|

|

|

 Comes to the Rescue!


;)
;)
;)
;)
;)
;)
;)
;)
;)
;)
;)
;)
;)
;)