|
Thread Number: 87334
/ Tag: Vintage Dryers
Maytag DG606 Prematurely shuts down despite incomplete drying |
[Down to Last] |

|
| Post# 1119050 , Reply# 1 6/2/2021 at 13:37 (1,059 days old) by Maytagbear (N.E. Ohio) | ||
|
I can think of two possibilities...... The sensor might need to be scrubbed with a lightly damp terrycloth, or the grounding may have gone wonky. Our DG502 had the sensors in the vanes, my Dependable Care's sensor was underneath the door opening. Lawrence/Maytagbear | ||
| Post# 1119054 , Reply# 2 6/2/2021 at 14:04 (1,059 days old) by WMJPate (Chicago, IL) | ||
|
This post has been removed by the member who posted it. | ||
| Post# 1119059 , Reply# 4 6/2/2021 at 14:53 (1,059 days old) by Maytag85 (Sean A806) | ||
I have a Maytag DG606 I converted to a DG306 since I didn�t feel like going through the trouble to diagnose the problem and literally was my only functioning dryer at the time in 2019 and has been working great since I put a 306 timer in.
I suspect the constant burning pilot light could be playing a role in not allowing it to shut off since it has corroded most of the wiring inside and I would also look at the wiring while you have it all apart. | ||
Post# 1119064 , Reply# 6 6/2/2021 at 16:13 (1,059 days old) by maranoman  (Des Moines, Iowa) (Des Moines, Iowa) |
||
Troubleshooting Your DG606 likely has two metal bars on each of its drum baffles. Those are the moisture sensors being mentioned. I have attached a couple of pages from the service manual for the Halo of Heat dryers. I'm assuming that your dryer is heating but just shutting down prematurely (let us know if your gas valve is not creating a flame at all during the drying process.) If my assumption is correct, then there is likely a problem in the electronic sensing circuit which could be caused by an open baffle circuit or improper grounding. You will need to get a multimeter and check for continuity from one of the baffle sensors, through the slip ring and brush and back to the electronic control board (see Dryer Shuts Off Too Soon With Load section on page 2 below.) It could also be that one of the wire connections to the control board has broken off due to corrosion caused by the ever-present pilot light. If that is the case, it will need to be re-soldered. | ||
|
Post# 1119073 , Reply# 7 6/2/2021 at 17:14 (1,058 days old) by DADoES (TX,�U.S. of A.) |
||
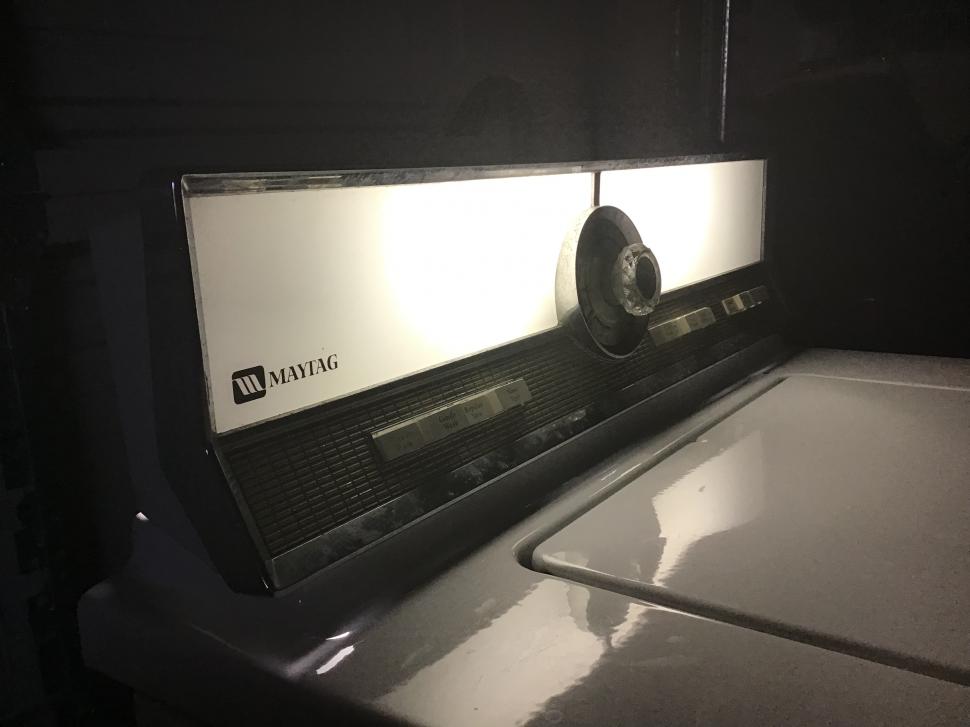
|
�
Your dryer does not have a timer in the traditional sense.� It's controlled by a moisture sensor system.� The metal bars/strips in the tumble baffles are the sensors.� Damp clothes touching across the bars completes a low-voltage electric circuit that registers a moisture hit to the control and keeps the drying cycle running.� The knob is a circuit selector for the electronic control, that's why it doesn't turn during the drying cycle or have an Off position. Damp Dry runs for a lower dryness level. Heavy/Permanent Press continues to run after the hits ease-off until a higher target temperature is reached (I think that's the difference vs. Regular) via a separate thermostat, to iron-out wrinkles ... and thus is also appropriate for heavy items such as jeans. Tumble continues without heat after drying is complete until a cool-down thermostat shuts off the motor circuit and rings the bell. Air Fluff does run without heat for a fixed time, possibly 10 mins. | ||
|
Post# 1119111 , Reply# 9 6/2/2021 at 21:46 (1,058 days old) by maranoman (Des Moines, Iowa) |
||
|
Pictures of Components
I�ve included some pictures of some of the components mentioned in the service manual in my previous post.
Pic 1: Electronic control Pic 2: Baffle with metal moisture sensors Pic 3: Selector switch Pic 4: Brush enclosure Pic 5: Zoomed out shot showing brush enclosure on slip ring Other things to check - make sure all of the wire connections to the electronic control (pic 1) are intact and not broken. They are very thin connections and prone to corrosion and breakage. If any of them are broken, they will need to be soldered directly to the board. Be careful with the brush enclosure. If you remove it for any reason, be aware that inside of it is a small spring-loaded brush that rides along the slip ring as the drum rotates. Be careful removing it as the spring and brush will fly out never to be seen again if you�re not careful. Also search this forum for Halo of Heat, HOH, DG606, premature shut down, etc. and you will see that you�re not alone with your Maytag HOH electronic control drying issue. | ||
|
Post# 1119158 , Reply# 11 6/3/2021 at 12:22 (1,058 days old) by maranoman (Des Moines, Iowa) |
||
|
Removing Cabinet You will need to remove the wires from the motor, the thermostats, and the yellow wire connected to the slip ring. Take pictures of the wiring first so you get it all back together correctly. Then remove the screws connecting the bottom of the cabinet sides to the base. Then you should be able to lift the cabinet and top cover up and over the blower housing and away from the base/tumbler. | ||
| Post# 1119159 , Reply# 12 6/3/2021 at 12:52 (1,058 days old) by WMJPate (Chicago, IL) | ||
|
Again, great advice. I'm guessing you've done this a few times in the past. :) Bill | ||
|
Post# 1119174 , Reply# 13 6/3/2021 at 18:01 (1,057 days old) by maranoman (Des Moines, Iowa) |
||
|
Too Many HOHs..
I have a little bit of practice working on my current fleet of HOH dryers. I need to shrink down the collection soon.
| ||
| Post# 1119176 , Reply# 14 6/3/2021 at 18:17 (1,057 days old) by Maytag85 (Sean A806) | ||
|
The HOH dryers I�ve worked on and serviced are my Maytag DE306 and a Maytag DG606 that I converted to a DG306 since the electronic dry control was being screwy and wasn�t shutting off at all and has worked fine ever since I converted it to a 306 dryer.
Even if my Maytag DG306 has been working great with no issues I�ll have to disassemble it soon to grease or oil the main drum bearing along with fan and tensioner shaft to have a quiet dryer in operation. | ||
| Post# 1119177 , Reply# 15 6/3/2021 at 18:33 (1,057 days old) by Repairguy (Danbury, Texas) | ||
Reply #13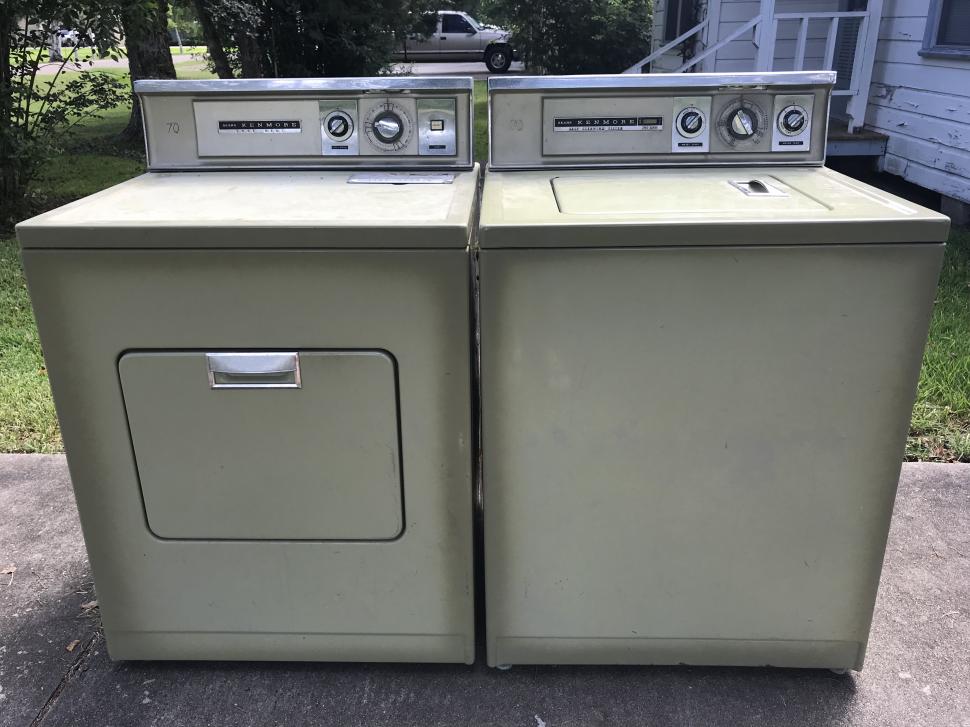 | ||
| Post# 1119247 , Reply# 16 6/4/2021 at 09:53 (1,057 days old) by WMJPate (Chicago, IL) | ||
|
What do you guys do with a stable of dryers??? I get it if you owned a laundromat but without timers and a coin box that wouldn't be too practical. Or do you have motels, service camps washing and drying kids clothing or is it strictly a love for such units? :) Bill | ||
| Post# 1119254 , Reply# 17 6/4/2021 at 10:56 (1,057 days old) by Repairguy (Danbury, Texas) | ||
|
| ||
|
Post# 1119996 , Reply# 19 6/11/2021 at 15:09 (1,050 days old) by d-jones (Western Pennsylvania (Pittsburgh Area)) |
||
 These are the parts that make up that assembly.
311538 - carbon brush holder 311539 - carbon brush spring 311540 - carbon brush cover 311542 - carbon brush
Your carbon brush cover is likely still fine (it's the copper bit you see there), but everything else will need to be replaced. The brush holder can be found at the link below, which is great since it's the only part you would have a hard time making. I have no source for the spring or the little brush, but those can be fabricated without too much trouble. The parts assemble as shown in this drawing. CLICK HERE TO GO TO d-jones's LINK
View Full Size
| ||
| Post# 1120009 , Reply# 21 6/11/2021 at 18:30 (1,049 days old) by WMJPate (Chicago, IL) | ||
|
Ugh, I now need a new burner tube I now need a new Burner Tube - Part # 1245820 Mfg Part # Y302544 3-2544 as the baffles at the discharge end have deteriorated and are mostly gone. Oh well. Didn't expect this having replaced it about 10 years ago. | ||
|
Post# 1120013 , Reply# 22 6/11/2021 at 19:36 (1,049 days old) by d-jones (Western Pennsylvania (Pittsburgh Area)) |
||
|
| ||
|
Post# 1120039 , Reply# 24 6/12/2021 at 08:35 (1,049 days old) by jons1077 (Vancouver, Washington, USA) |
||
Maranoman
Nice collection! I�d love to grab a goldenrod DE806 to match my 1970 806 washer if you ever decide to part with one.
View Full Size
| ||
| Post# 1120083 , Reply# 27 6/12/2021 at 18:17 (1,048 days old) by Maytag85 (Sean A806) | ||
|
I actually plan on doing something similar to my Maytag DG306 sometime soon and plan on painting the heck out of the base, rear panel, and many other parts so it won�t rust anymore. Even considering painting the entire inside of the cabinet with POR15 to rust proof it even more and plan on putting a coat of grey paint over that as well. Might be overkill but it�s worth it if it prevents it from rusting any further.
| ||
|
Post# 1120304 , Reply# 29 6/14/2021 at 18:13 (1,046 days old) by LowEfficiency (Iowa) |
||

I'm not quite sure that insulating the burner tube is a good choice?
Most header and exhaust wraps are heat cured, and will smoke (and smell awful) for a fair amount of time while this happens. And by insulating the burner tube, internal temperatures will rise, perhaps higher than the designers intended for the air, the burner tube itself, and the felt seals. Having loose fiberglass fibers in the intake air path could be problematic as well. | ||
|
Post# 1120342 , Reply# 30 6/15/2021 at 09:31 (1,046 days old) by d-jones (Western Pennsylvania (Pittsburgh Area)) |
||
|
I would be very cautious about enlarging that orifice. You'll notice that after traveling through the combustion cone the heated air enters a mixing chamber. That mixing chamber has a number of openings designed to allow non heated air to mix with the heated air on its way to the drum cover, which reduces the overall temperature of the air entering the drum. That was done deliberately by the folks at Maytag and I'm going to assume they had a good reason. As John (combo52) is fond of pointing out, the gas version of the Halo of Heat dryer is a somewhat wonky compromise design. Unlike the electric HoH dryers where the air is heated over the entire 360 degrees of the drums front end as it passes over the heating coil, on the gas versions the bulk of the heated air never makes it all the way across the drum before it enters it, so the heating is not as uniform. Since there's no way to increase air flow to match an increase in heat due to a larger orifice, it seems to me that overheating could become a real problem, especially as lint builds up on the filter. I won't tell anyone not to experiment, but if you're determined to make changes, just be sure to carefully consider the effects of those changes and stay safe. | ||
|
Post# 1120961 , Reply# 33 6/21/2021 at 15:15 (1,040 days old) by RP2813 (Sannazay) |
||
 It sounds like that bizzare thermocouple could be the problem. If the pilot stayed lit before, something may have been disturbed, or maybe the pilot flame needs adjusting.
The experts here will have to advise on whether a retrofit with a standard thermocouple is possible, and if you can accomplish it via the access cover on the front panel. It's been so long since we had our DG806 I can't remember what access is like down there. | ||
|
Post# 1121038 , Reply# 34 6/22/2021 at 07:48 (1,039 days old) by combo52 (50 Year Repair Tech Beltsville,Md) |
||
Pilot Won'T stay Lit On A MT HOH Dryer Hi, Your dryer does NOT have a thermocouple, MT only used a TC system on the first HOH dryers in the late 50s before going to the system your dryer has and most other manufactures used that did not have electric ignition.
Your dryer uses a Mercury pilot safety, the bulb at the end of the tiny SS tube has mercury in it and it is heated by the pilot flame. On the other end of the tube there is a small SS diaphragm that expands and extends a pin that holds a valve open so gas can flow whenever the solenoid is energized.
These MPSs get weak, this was a very common problem back in the day, I am sure I changed a few hundred of them.
John | ||
| Post# 1149502 , Reply# 36 5/25/2022 at 10:56 (702 days old) by Maytag85 (Sean A806) | ||
|
Old thread | ||
| Forum Index: | 
| Other Forums: |

|

|

|

|

|

 Comes to the Rescue!


;)
;)
;)
;)
;)
;)
;)
;)
;)
;)
;)
;)
;)
;)
;)
;)