Thread Number: 95469  /  Tag: Vintage Automatic Washers
Kenmore 80 Series Washer Repair In Progress...
[Down to Last]

automaticwasher.org's exclusive eBay Watch:
scroll >>> for more items --- [As an eBay Partner, eBay may compensate automaticwasher.org if you make a purchase using any link to eBay on this page]
Post# 1201430   3/13/2024 at 12:08 by OkJay (Hangtown,USA)        

Hello All,

Came across your Forum while researching for this repair. This is an impressive pool of knowledge & I'd appreciate some assistance! So, let me fill you in on what's going on...

Bought matched pair of washer & dryer new in 1985. Been good work horses for 39 years! See pictures for model number, machine style and current repair status.

Recently, clothes are wrapping around and under washer agitator. I saw that the tub was spinning at the same time as agitator, during wash cycle - NOT RIGHT! Took off the back panel and watched mechanism. Spin cam bar was not advancing & plunger was bent / damaged ( please see pictures). Plunger has gouged transmission case, as well.

I manually advanced the spin cam, which engaged the drive basket brake. Washed a small load to verify problem corrected - all good. So, hunted down repair parts ( cam bars, wigwag unit, plungers, drive belt - see pics) - took 3 weeks from various sources! But I got 'em!

Began repair by putting machine on face. Immediate pool of oil - so back upright it went! Appeared to come from agitator shaft... So washer repair is being done in upright position, by me in the downright uncomfortable position! By the way, machine does not normally leak oil or water when in normal position.

Plan is to replace spin cam bar & plunger today. But, I have some QUESTIONS???;

1. SHOULD I REPLACE THE AGITATOR CAM BAR & PLUNGER, TOO? It appears to work ok. But it's 39 years old & now's the time - it's apart. But it is MORE DIFFICULT TO REPLACE & I don't have a new roller or roll pin if those get damaged. From what I've read, it is very difficult to get the new cam bar back in - even when the transmission is out. Current working conditions are cramped. WHAT DO YOU THINK??? Any tips or suggestions appreciated!

2. CAN THE TRANSMISSION BE SLID OUT & REPLACED FROM THE SPIN TUBE WITHOUT DOING DAMAGE TO SEALS & BEARINGS? In the upright position the tube wants to slide out ( it seems) with the transmission. Even though the basket locknut ( p# 21366) is still on & tight. I do not want to disturb the basket drive / spin tube (p# 359699) relative to its position in the baseplate / centerpost. I understand there are seals, bearings & oil there - which I do not have replacement parts or tools for...

Thanks in advance for sharing your knowledge, experience & insights!

Wigwag & belt will be replaced once the cam bar(s) are resolved.
That's about it for now. A friend is coming over to assist & I'll post up dates later.
Jay


  Photos...       <              >      Photo 1 of 9         View Full Size


Post# 1201434 , Reply# 1   3/13/2024 at 16:08 by dominic20 (Souix falls)        
cool verry cool

dominic20's profile picture
hope it goes well

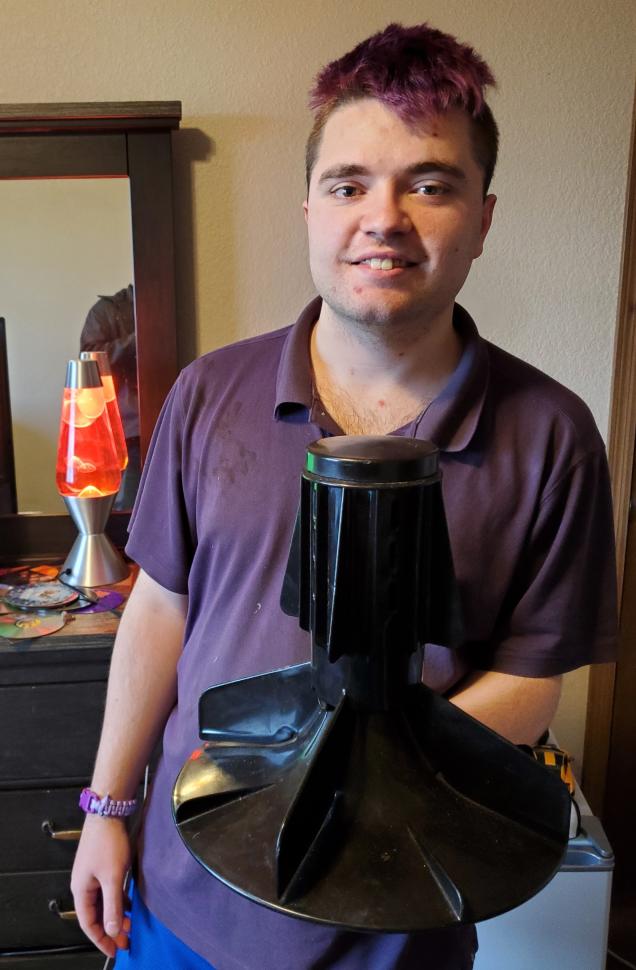
Post# 1201488 , Reply# 2   3/14/2024 at 06:23 by combo52 (50 Year Repair Tech Beltsville,Md)        
Replacing cam bar belt, etc. on a belt drive whirlpool

combo52's profile picture
It’s easier if you lay the machine on the left side when you’re looking at the front of the machine oil will not leak when you lay it that way and then remove the motor to give you more access while you’re doing the repairs.

There’s no reason to replace the agitator cam bar if there’s no problem there.

Don’t worry about the small amount of oil that you lost when you laid it on its front that will not hurt anything.

A machine of this design at this age may work for a while yet at some point it’s gonna need a complete rebuilding, but I would do as little as possible to get it back in great working shape unless you’re willing to turn this into a six-month project that will cost nearly what a new washer will cost.

John


Post# 1201501 , Reply# 3   3/14/2024 at 14:31 by OkJay (Hangtown,USA)        
Progress Update & More Pics

Hello All,

Thank you Dominic & John for your replies!!!

The washer was placed up on 4"x10" wood blocks, motor was removed, water pump was removed (see pics). This helped quite a bit with access & comfort. The motor and pump were both cleaned up. Back flush of pump cleared out some lint - GOOD! Motor had several wire connections, so took a picture.

Also included is a close picture of the original WigWag ("Control Magnet Kit" FSP Part# 84867 / Kenmore Part# 359997 "Magnet" ) and wiring connections. Notice how the wires are arranged - this was the original factory configuration. I have owned this machine since new and the original unit had not been replaced or touched. The wires seemed ( and are ) in good shape. Wires had no chaffing or visible damage. Good conductivity of all wires was confirmed using a multimeter. Original unit was removed and replaced with FSP part. The FSP replacement also included the "WigWag Bushing" ( Kenmore part# 385728 ), this is the plastic wire collar at the top of the WigWag - so don't buy another one!
NOTE: The "Taper End Screw" ( Kenmore part# 16135 ) which secures the WigWag has a 5/16" head and is UNAVAILABLE. SO, BE CAREFUL GETTING IT OUT...

The original worn Spin Cam Bar ( Kenmore part# 334838 / FSP part# 350532 ) was removed & replaced with new. The original worn / damaged Plunger ( Kenmore part# 84866 / FSP part# 350384 ) was removed & replaced with new FSP part. NOTE: Both FSP parts included the RIVET ( Kenmore part# 353959 ) & a "Rivet Clip" ( FSP part# 98872). The rivet clip is basically a push nut that is pushed over the rivet shaft, to secure the assembly of the Rivet, Plunger and Cam Bar. This avoids the difficulty of trying to form the Rivet ( as done on the original part). I can include more pictures & the instruction sheets later, if others are interested...

As John suggested, the original Agitator & Pump Cam Bar ( Kenmore part# 18642 / FSP part# 18642 ) and original Plunger were NOT replaced (see original post discussion). I did GET NOS replacements but, "IF IT'S NOT BROKE, WHY FIX IT?".
Also, this will help to pinpoint the cause of the problem by using only what's needed for the repair. Hopefully...

So, that's what I've got for today. The new belt, motor, water pump and balance of reassembly must be done, then the BIG TEST...
Hope this has been helpful. Will post more, when I have it!

Jay

P.S. Couple of photos inverted, despite originals correct - HOW TO FIX???


  Photos...       <              >      Photo 1 of 5         View Full Size
Post# 1201526 , Reply# 4   3/14/2024 at 17:50 by DADoES (TX, U.S. of A.)        

dadoes's profile picture
 
P.S. Couple of photos inverted, despite originals correct - HOW TO FIX???
The board coding was modified a while ago to automatically rotate some photos because many taken in landscape orientation with phones were displaying sideways.  It now sometimes rotates photos that shouldn't be rotated.  The fix seems to be editing/rotating affected photos into the correct orientation with photo editing software (on a computer, such as the outdated Jasc Paint Shop Pro 7 that I use) which doesn't support image file EXIF metadata that the board code apparently reads to determine whether it should rotate the image.


Post# 1201563 , Reply# 5   3/14/2024 at 23:39 by OkJay (Hangtown,USA)        
Inverted Photos Insight - THANKS! Kenmore Repair Progress.

Hello All,

Thanks DADoES for your insight regarding the inverted photos! Guess I'll try inverting them on my outdated PC software, BEFORE sending next time. Maybe they'll come out right on the post - Hah, Hah!!!
Hey DADoES, are you also a 3D printer person? Think I've seen your posts on those sites...

Regarding progress on the Kenmore 80 Series Heavy Duty washer repair; bottom side work is complete and ready for test. New 95405 drive belt (made in Mexico) was very tight & a real BOOGER to install - many 4 letter words, aches & pains required to install!!! Almost put old belt on, instead - but I never liked my uncle...
Plan is to install top panel and electronics tomorrow, rig for testing, then wash the hell out of mountains of clothes!!! We'll see... I'm an optimistic pessimist!

Sorry, no photos on this post. That drive belt beat me pretty good. Camera will be out first tomorrow - any requests for old Kenmore belt drive washer pictures?

Hope y'all have a restful night.

Jay


Post# 1201579 , Reply# 6   3/15/2024 at 08:00 by combo52 (50 Year Repair Tech Beltsville,Md)        
Adjusting belt tension on a belt drive washer

combo52's profile picture
Hi Jay, the belt should not be super tight the motor slides to adjust the belt tension loosen up the back motor mounting bolt and the motor will pivot to allow tension adjustment.

If you leave the belt extremely tight, the motor may have trouble starting and you will ruin the water pump bearing.

John


Post# 1201589 , Reply# 7   3/15/2024 at 11:47 by OkJay (Hangtown,USA)        
Belt Tension

Hi John,

Thank you for the info on the belt. I will double check tension and may slacken it a bit. Definitely do NOT want a burned out motor! It is supposed to deflect about 1/2", right?

The Spin Cam Bar seems to come very close to the motor, when it is all the way back. I will manually rotate the large pulley a few times & observe that clearance...

Thanks,
Jay


Post# 1201960 , Reply# 8   3/21/2024 at 10:41 by OkJay (Hangtown,USA)        
Repair Complete, 39 Year Old Washer back in Service

As John suggested, I rechecked the belt and loosened it a bit. Manually turned the main pulley to walk the machine thru a few rotations. All looked good, so I made connections and ran it thru a cycle.

There was a bit of a "clack - clack" noise initially, which was coming from the new plunger / cam bar. However, it began to quiet, apparently working itself in. There were no leaks.

Moved the "old workhorse" back home into position, alongside its' matching stable mate. As you can see from the pictures, they are an attractive & effective couple! A closer shot of the washer shows how clean the machine is. The transmission agitator shaft is rust free and disassembled / assembled with ease.

Well, that's about it. Hopefully this posting helps others.

Jay


  Photos...       <              >      Photo 1 of 2         View Full Size
Post# 1202019 , Reply# 9   3/21/2024 at 20:20 by Repairguy (Danbury, Texas)        

repairguy's profile picture
Congrats! May it give you many more years of service.


Forum Index:       Other Forums:                      


Comes to the Rescue!

The Discuss-o-Mat has stopped, buzzer is sounding!!!
If you would like to reply to this thread please log-in...

Discuss-O-MAT Log-In


New Members
Click Here To Sign Up.


automaticwasher.org home
Discuss-o-Mat Forums
Vintage Brochures, Service and Owners Manuals
Fun Vintage Washer Ephemera
See It Wash!
Video Downloads
Audio Downloads
Picture of the Day
Patent of the Day
Photos of our Collections
The Old Aberdeen Farm
Vintage Service Manuals
Vintage washer/dryer/dishwasher to sell?
Technical/service questions?
Looking for Parts?
Website related questions?
Digital Millennium Copyright Act Policy
Our Privacy Policy