|
Thread Number: 41978
"As the Water Heater Burns" |
[Down to Last] |
| Post# 618426 8/19/2012 at 16:41 (4,271 days old) by beekeyknee (Columbia, MO) | ||
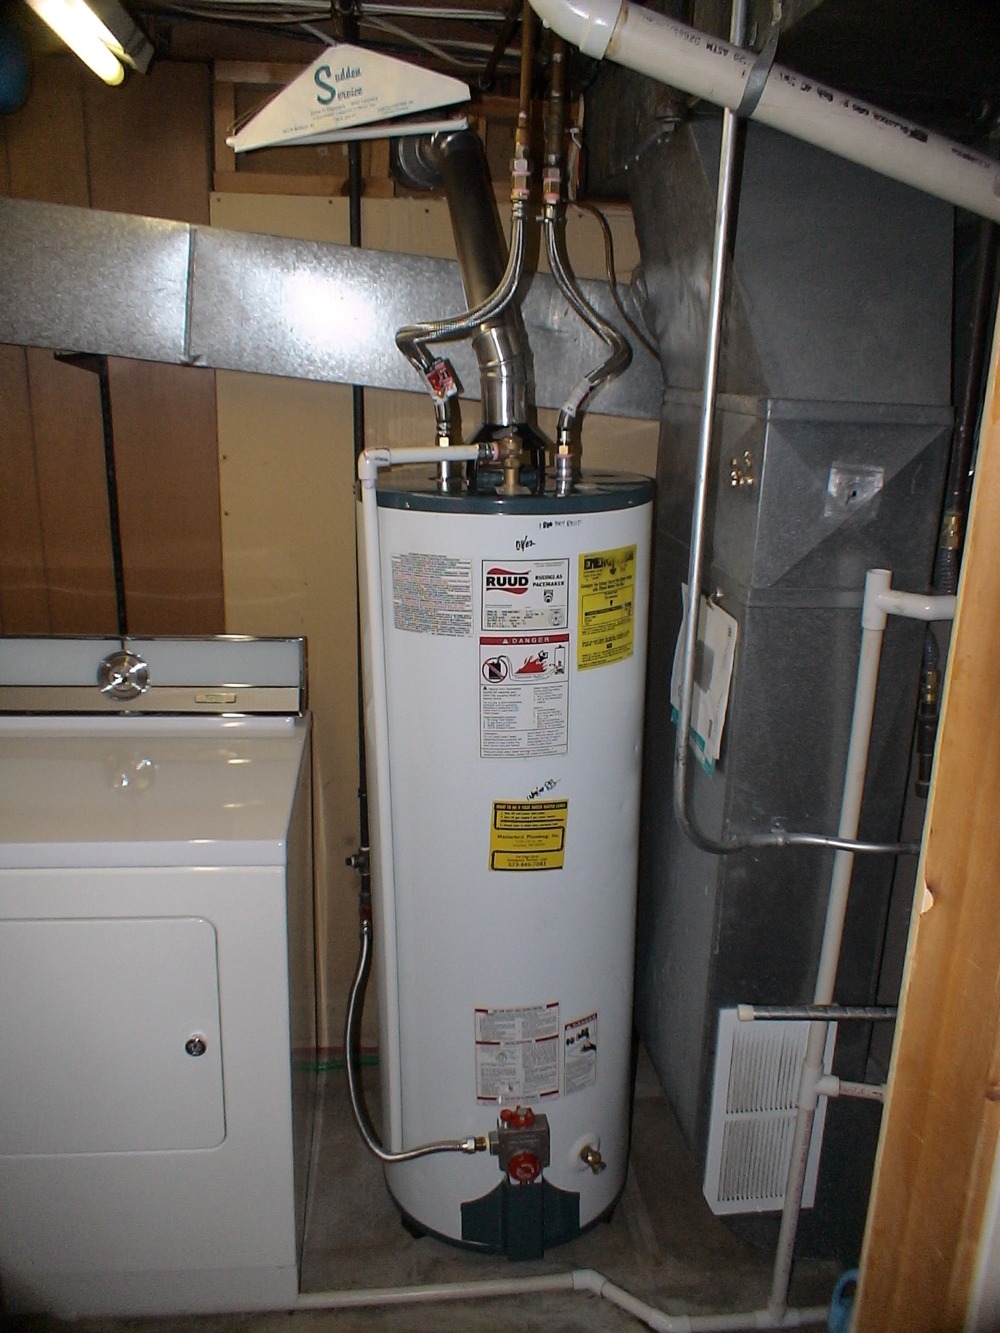
In the prequel to "As the Water Heater Burns", "Aggravated again", I found myself at odds with the w/h installed in the house on Southwood Dr.
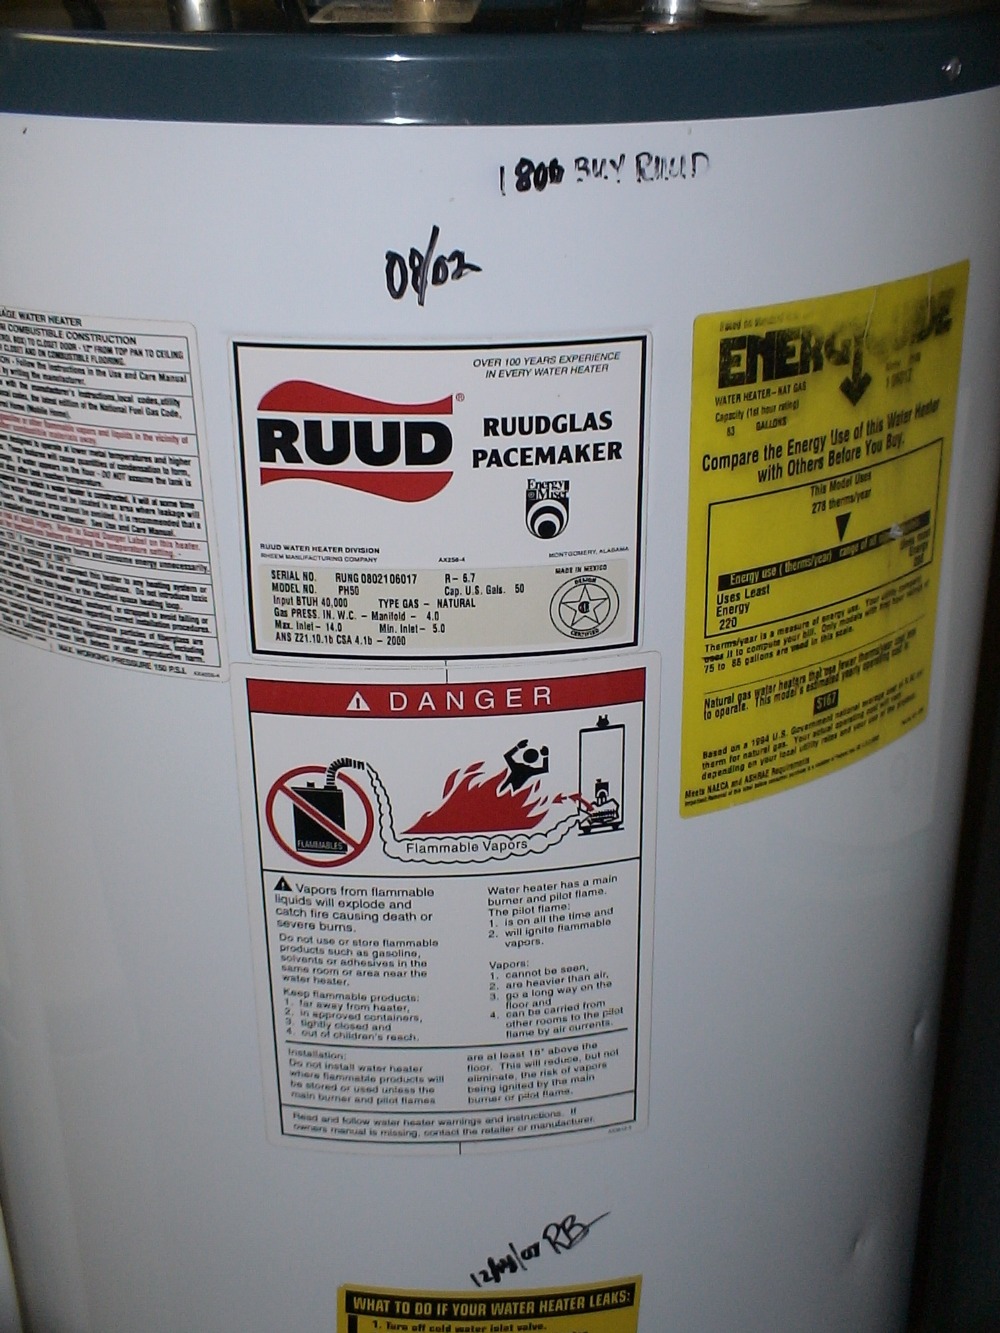
In the sequel, "As the Water Heater Burns", the story resumes on July 16th and continues to present day. Problem was from a six year old Whirlpool w/h. I was determined to find a better and longer lasting alternative. After house setting for my parents, I returned to Columbia on July 16th and resumed working on the w/h the next day. I saved the old anode rod, removed the old dip tube, put seven gal. of vinegar in the tank, plugged the open holes in the top of the heater, laid the heater on the carpet in the house, rolled it back and forth vigorously and let it lie on its side in varying positions for two or three days. After that I purchased a new combination nipple/dip tube, cut it to the proper length, wrapped the nipple with teflon tape, screwed the tube into the cold water side, plugged the other open holes on top of the heater, hooked it up to the faucet outdoors with a garden hose, opened the drain valve on the bottom of the heater and flushed the vinegar and loosened sediment out. Then I closed the drain valve, opened the T&P valve and filled the heater up with fresh water until water was released, closed the T&P valve, reopened the drain valve and flushed the heater for several minutes to clear it. As I flushed and drained the heater, I released the water on some thirsty bushes around the house as to not waste. Lastly I closed the drain valve, opened the T&P valve until water gushed out, closed the T&P valve and pressure tested the tank for 24 hours. After it passed the test I drained it, took a couple of plugs out of the top and shined a LED flashlight inside the tank while looking through one of the other holes to check for sediment. The tank was clean except for some small deposits on the stack and a few small spots on the bottom. The glass even shined. After I had drained all the water from the tank by tilting it on its side toward the drain valve, I moved it into the house to prepare for connection. The narratives in the posts finish the story. CLICK HERE TO GO TO beekeyknee's LINK | ||

|
| Post# 618427 , Reply# 1 8/19/2012 at 16:43 (4,271 days old) by beekeyknee (Columbia, MO) | ||
|
| ||
| Post# 618428 , Reply# 2 8/19/2012 at 16:45 (4,271 days old) by beekeyknee (Columbia, MO) | ||
|
| ||
| Post# 618429 , Reply# 3 8/19/2012 at 16:48 (4,271 days old) by beekeyknee (Columbia, MO) | ||
|
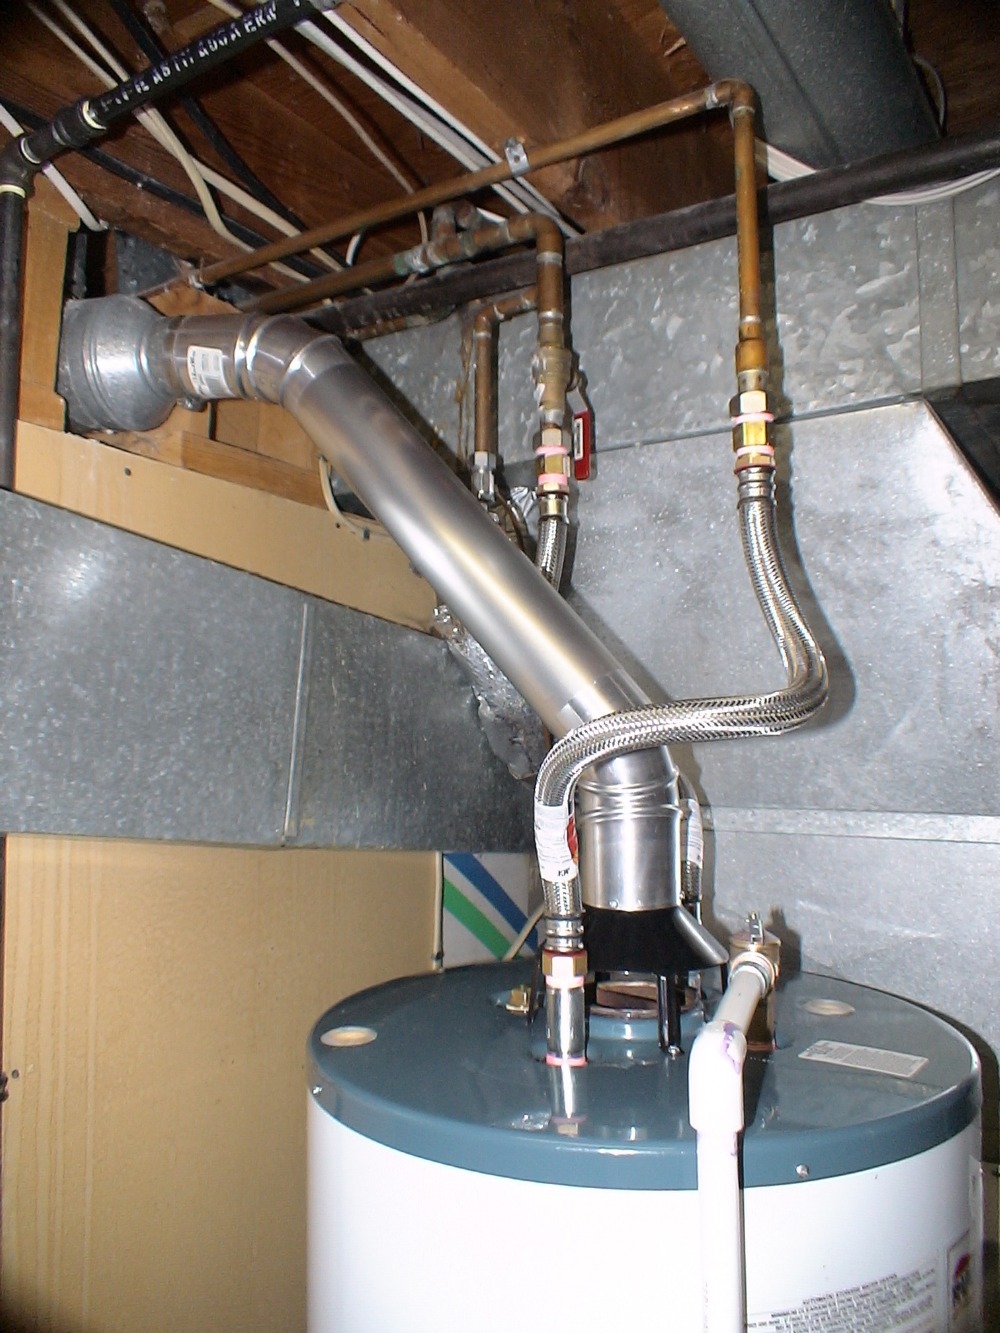
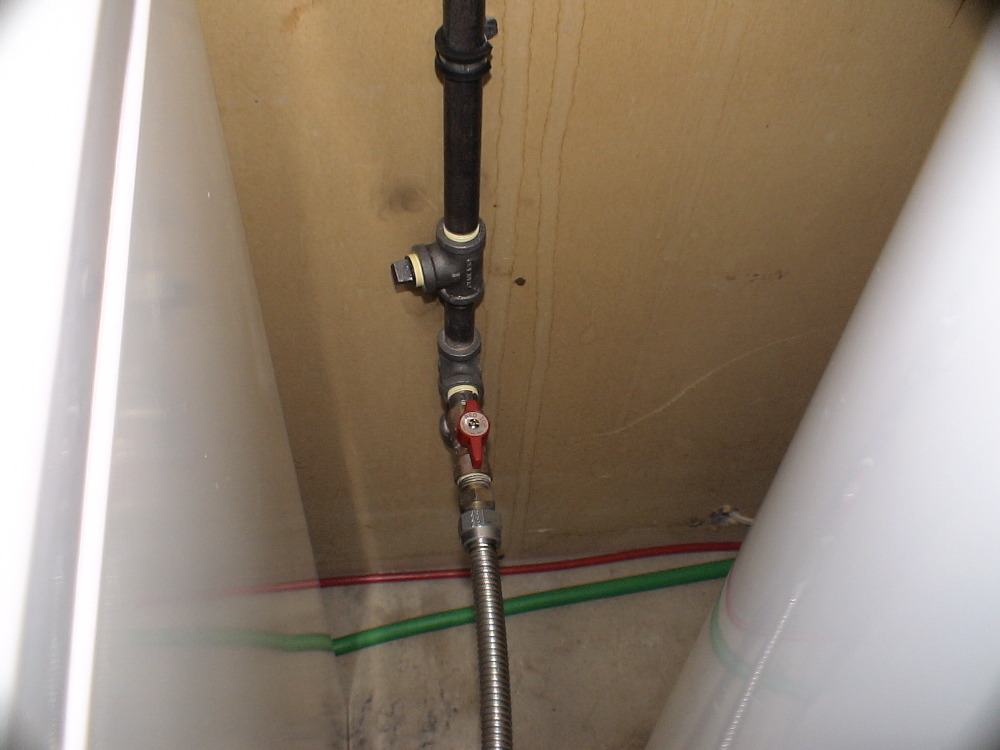
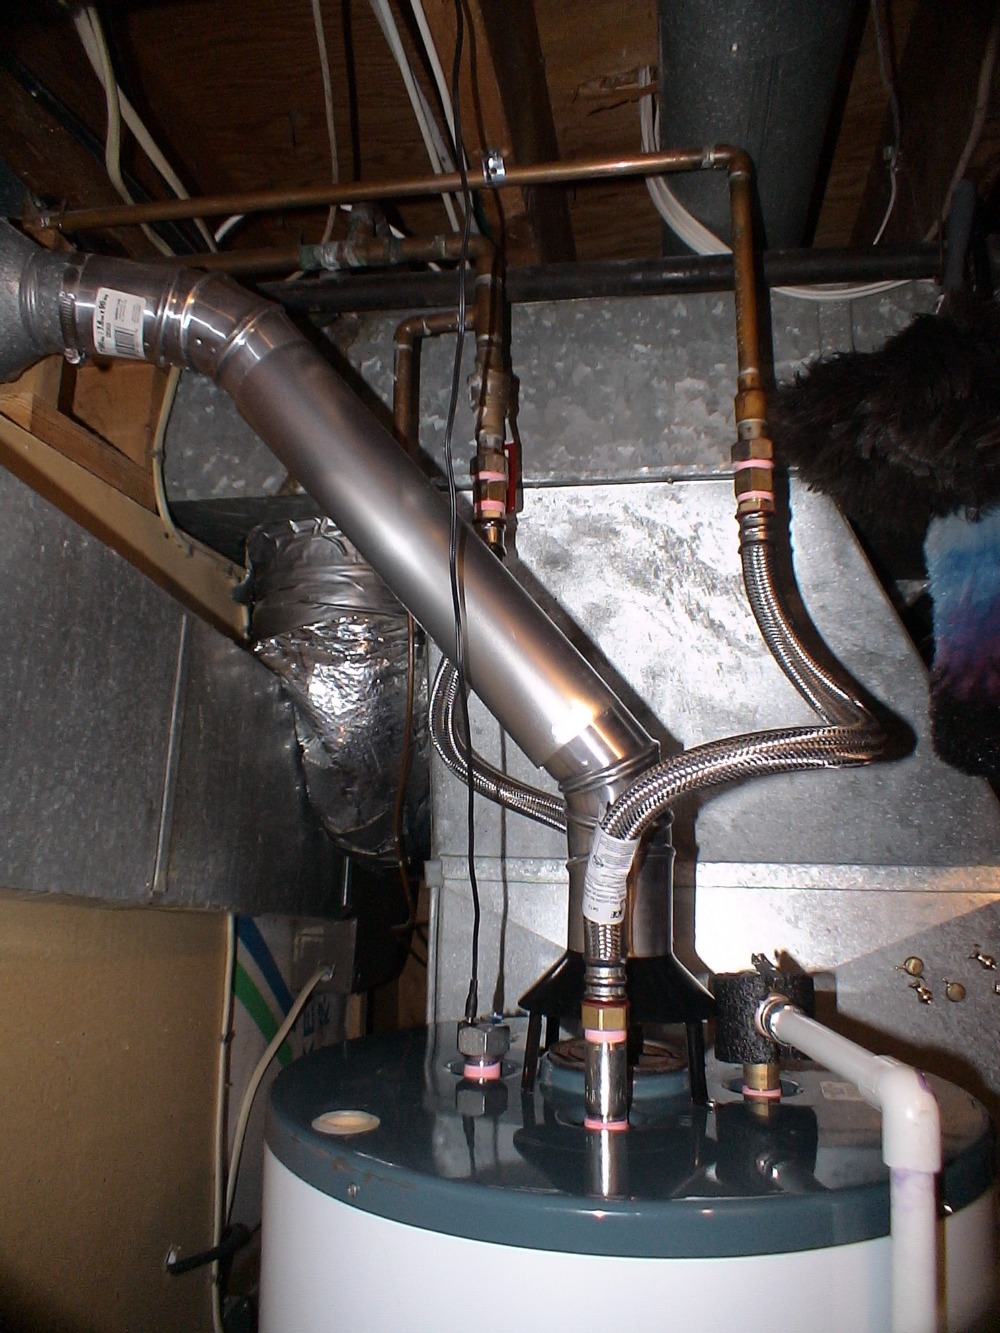
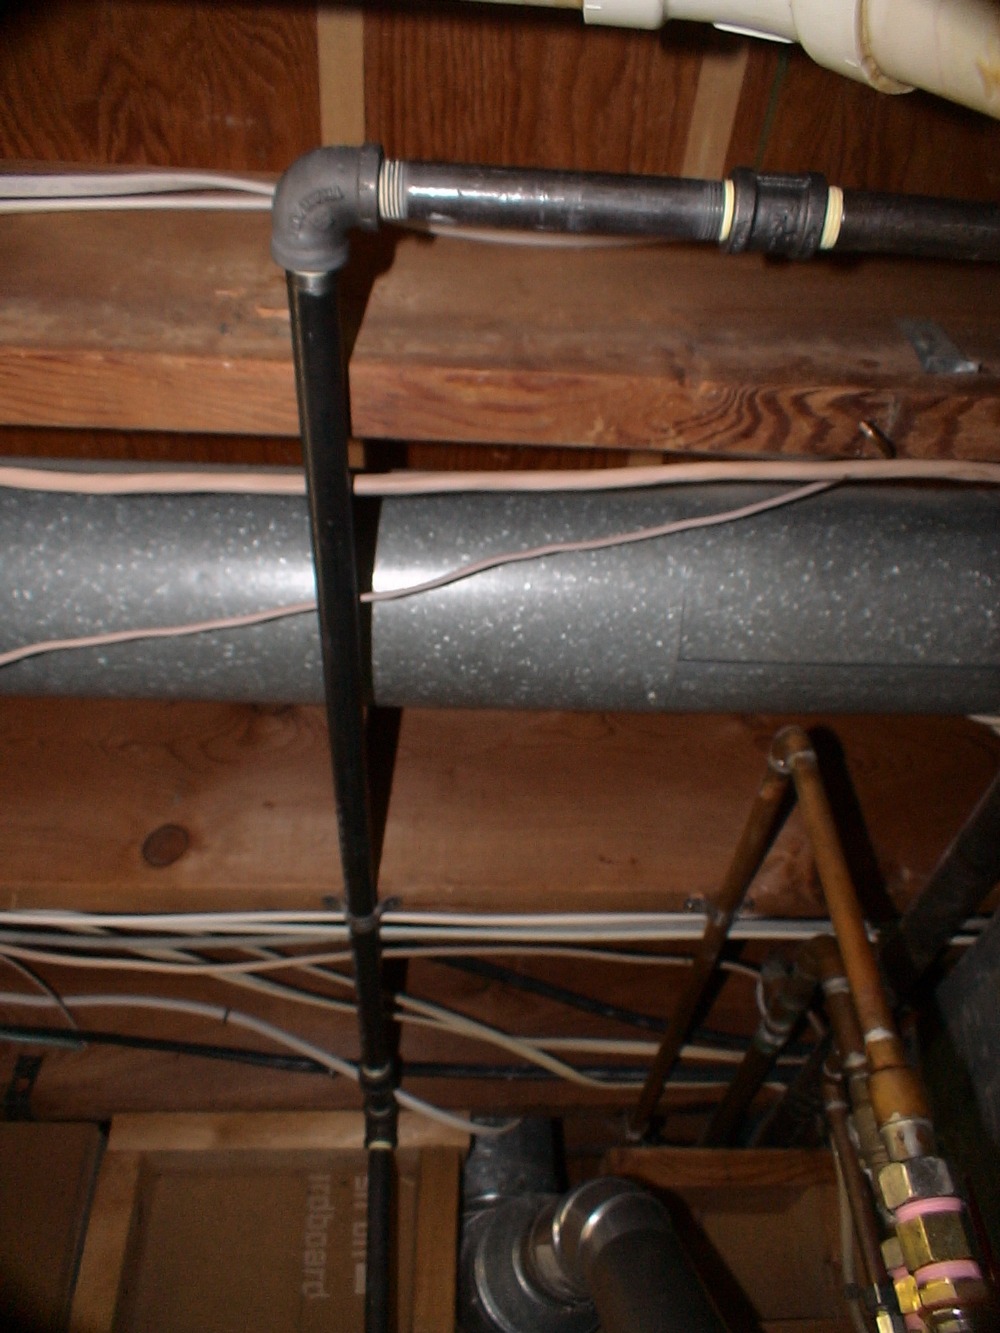
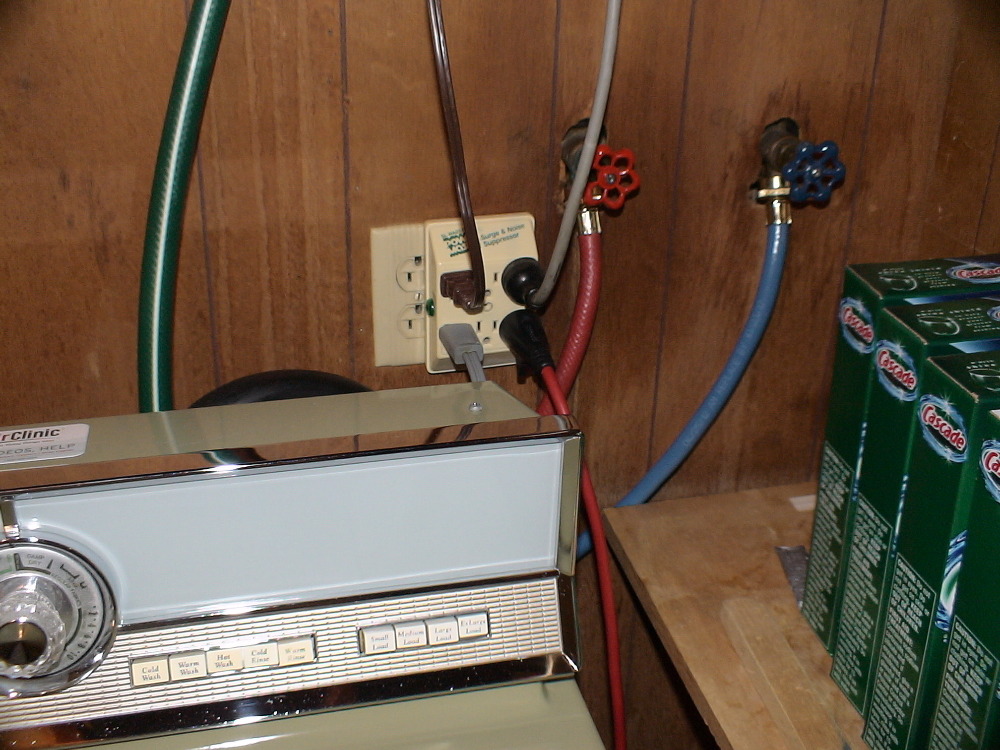
The plumber that installed the last heater installed the gas pipe in a stair-step fashion. Coming into view on the right side of the picture you will notice a double female connector which I installed. At this point he had installed an elbow and took the pipe back to approximately where the air duct is. Then he installed another elbow and the short piece of pipe you see in the foreground. After that he installed the elbow you see on the left side of the short piece, put on another elbow approximately were the pipe strap is on the joist in the background, pointed it downward to let it dangle in the room, put on a 'T' fitting for a dryer connection, a shut-off valve for the w/h, and a dirt trap on the end.
| ||
| Post# 618433 , Reply# 4 8/19/2012 at 16:51 (4,271 days old) by beekeyknee (Columbia, MO) | ||
|
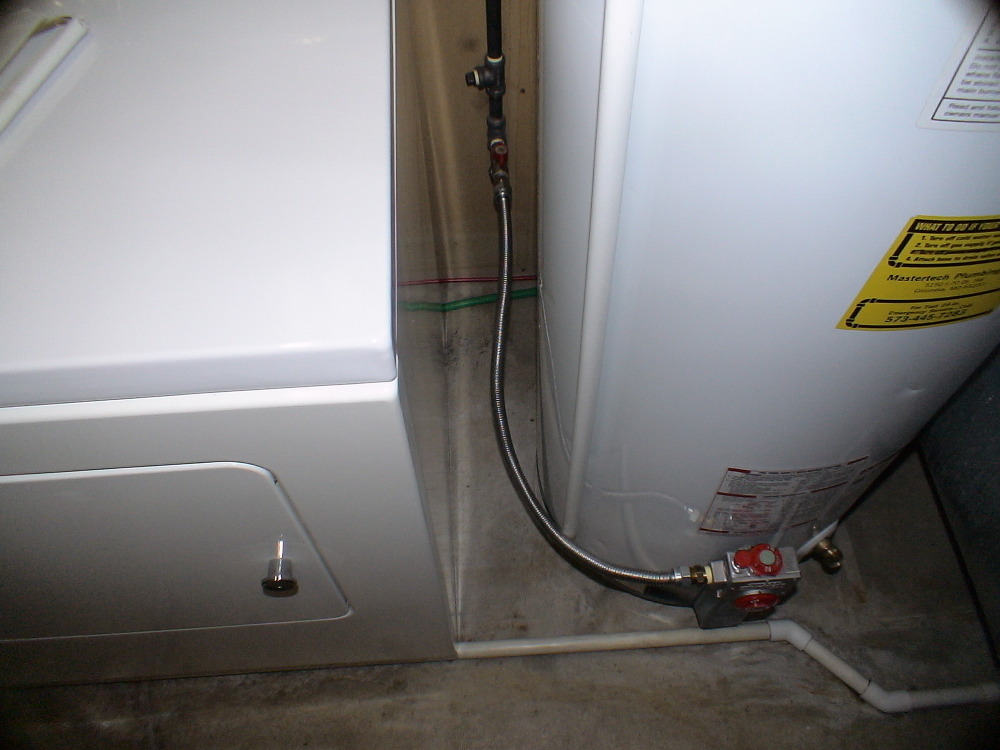
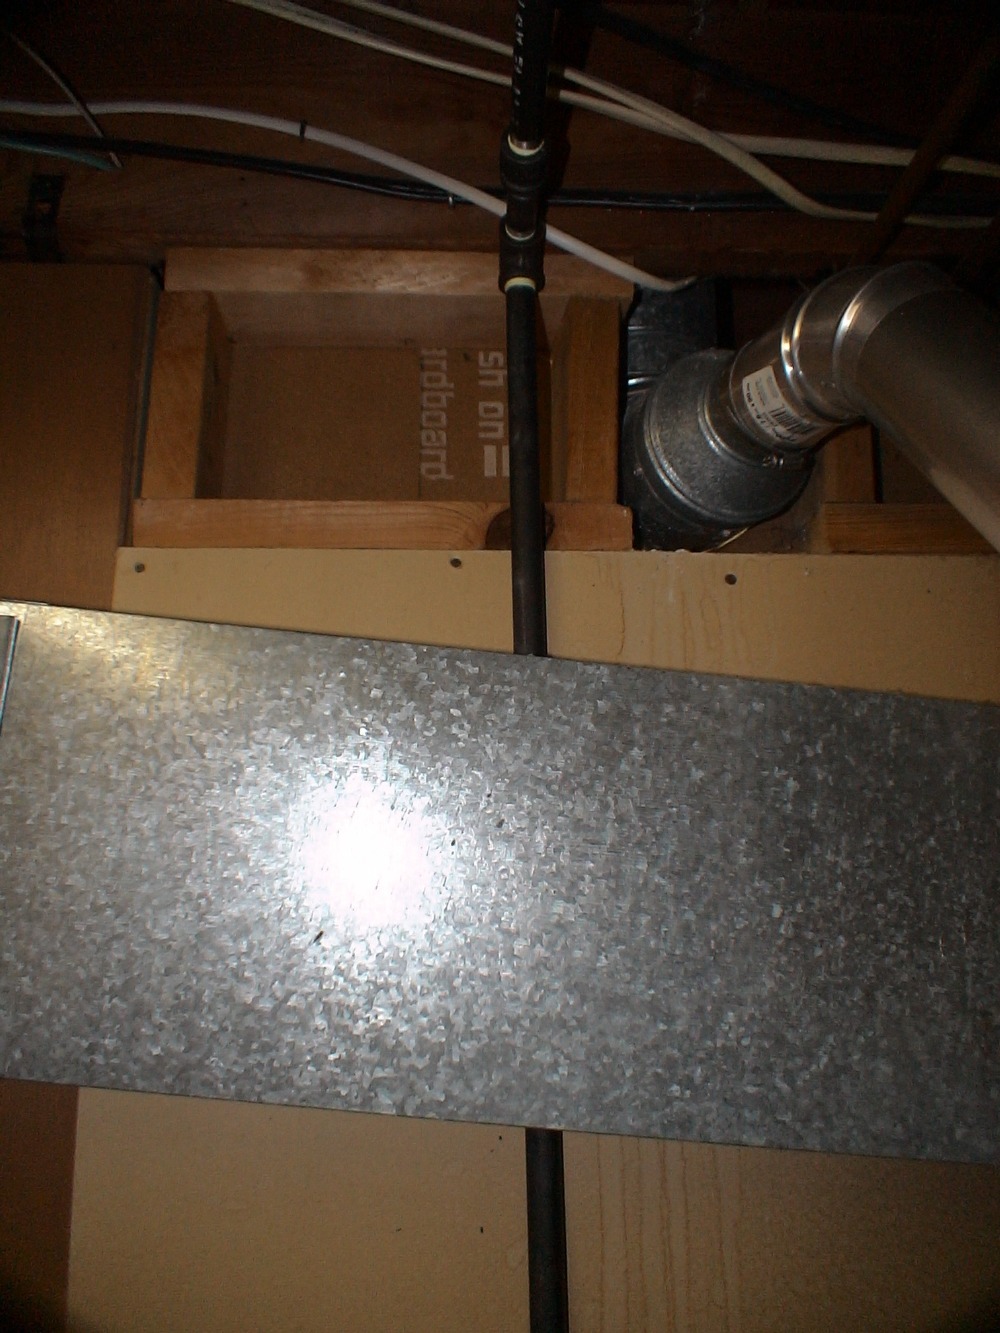
I didn't approve of this installation, so I changed the piping by adding the double female fitting, removing the stair-step configuration to a single right angle and running it back to drop it down behind the rectangular range hood vent and strapped it to the wall. The photo appears to be focused on the vent, but the point is the pipe being placed behind the vent and fastened to the wall. It is now secure and not dangling in the room to be in the way of the dryer and w/h.
| ||
| Post# 618434 , Reply# 5 8/19/2012 at 16:52 (4,271 days old) by beekeyknee (Columbia, MO) | ||
|
| ||
| Post# 618435 , Reply# 6 8/19/2012 at 16:53 (4,271 days old) by beekeyknee (Columbia, MO) | ||
|
| ||
| Post# 618436 , Reply# 7 8/19/2012 at 16:54 (4,271 days old) by beekeyknee (Columbia, MO) | ||
|
| ||
| Post# 618437 , Reply# 8 8/19/2012 at 16:55 (4,271 days old) by beekeyknee (Columbia, MO) | ||
|
| ||
| Post# 618438 , Reply# 9 8/19/2012 at 16:57 (4,271 days old) by beekeyknee (Columbia, MO) | ||
|
| ||
| Post# 618439 , Reply# 10 8/19/2012 at 16:59 (4,271 days old) by beekeyknee (Columbia, MO) | ||
|
| ||
| Post# 618440 , Reply# 11 8/19/2012 at 17:00 (4,271 days old) by beekeyknee (Columbia, MO) | ||
|
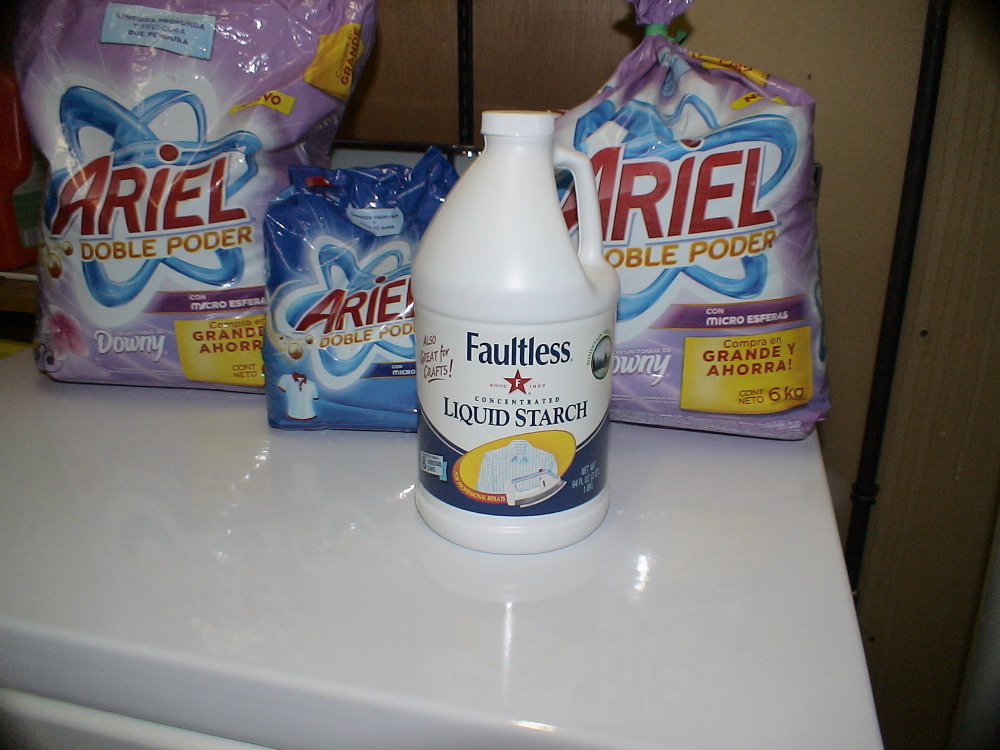
Off the topic, but a collection of Ariel detergent and some Faultless starch. The starch is made in Kansas City. I like to support products made in my state when I can. I used to buy dry Faultless starch in the pale aqua colored box, but I haven't seen it for quite awhile. It was the type my Grandmother used to cook on the stove. It had a great smell. A clean understated smell.
| ||
| Post# 618442 , Reply# 12 8/19/2012 at 17:03 (4,271 days old) by beekeyknee (Columbia, MO) | ||
|
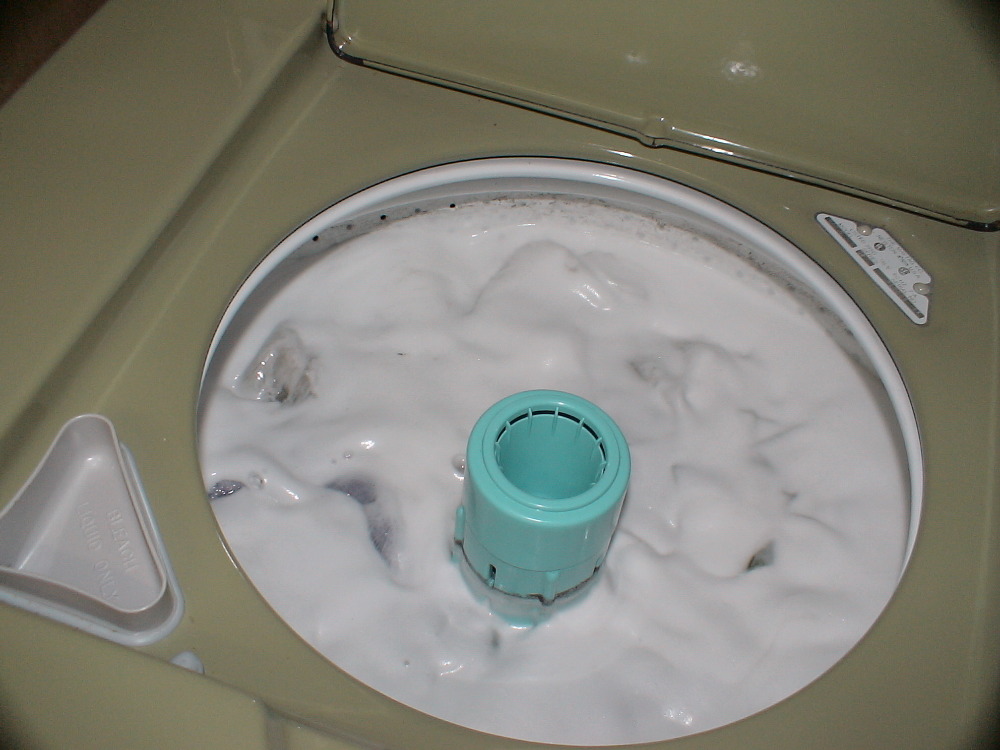
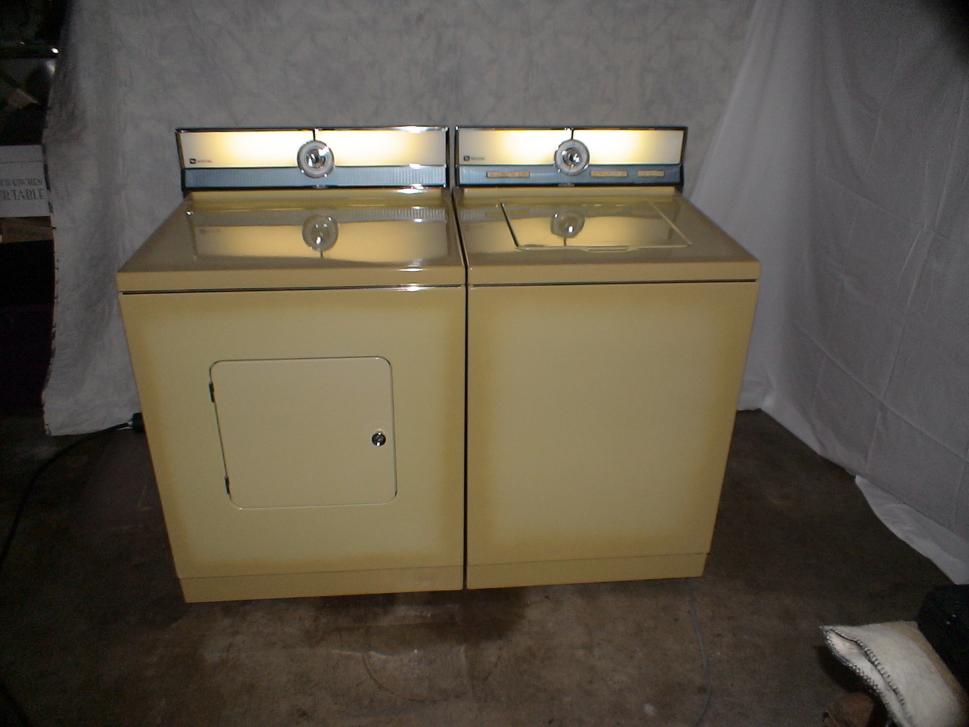
I removed and rebuilt the water valve in the Maytag. I had a new one, but I wanted to see if I could do it. Water had got under the plastic water valve holder inserts. I removed them and cleaned away the rust with 'The Works' toilet bowl cleaner and a wire brush. Then I filled the cores with silicone glue, pushed the valve holders back in their cores and screwed the valve back together. It's a one way fix, but nothing to lose. Cold, warm and hot all work properly. The machine fills at about 1.8 - 2.0 gpm.
Does anyone know if that is about right?. It seems like it fills about at the same speed as before the w/h clogged it up. This post was last edited 08/19/2012 at 17:48 | ||
| Post# 618443 , Reply# 13 8/19/2012 at 17:05 (4,271 days old) by beekeyknee (Columbia, MO) | ||
|
| ||
| Post# 618444 , Reply# 14 8/19/2012 at 17:06 (4,271 days old) by beekeyknee (Columbia, MO) | ||
|
| ||
| Post# 618445 , Reply# 15 8/19/2012 at 17:09 (4,271 days old) by beekeyknee (Columbia, MO) | ||
|
| ||
| Post# 618446 , Reply# 16 8/19/2012 at 17:10 (4,271 days old) by beekeyknee (Columbia, MO) | ||
|
| ||
| Post# 618447 , Reply# 17 8/19/2012 at 17:11 (4,271 days old) by beekeyknee (Columbia, MO) | ||
|
| ||
| Post# 618448 , Reply# 18 8/19/2012 at 17:14 (4,271 days old) by beekeyknee (Columbia, MO) | ||
|
| ||
| Post# 618449 , Reply# 19 8/19/2012 at 17:16 (4,271 days old) by beekeyknee (Columbia, MO) | ||
|
| ||
| Post# 618450 , Reply# 20 8/19/2012 at 17:18 (4,271 days old) by beekeyknee (Columbia, MO) | ||
|
| ||
| Post# 618451 , Reply# 21 8/19/2012 at 17:20 (4,271 days old) by beekeyknee (Columbia, MO) | ||
|
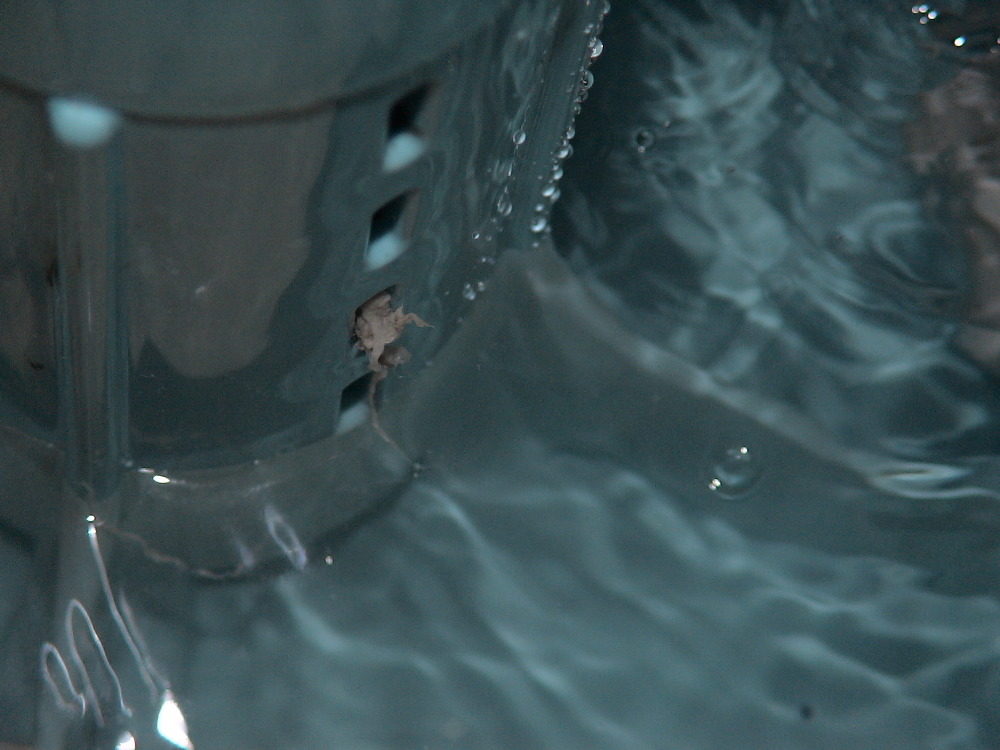
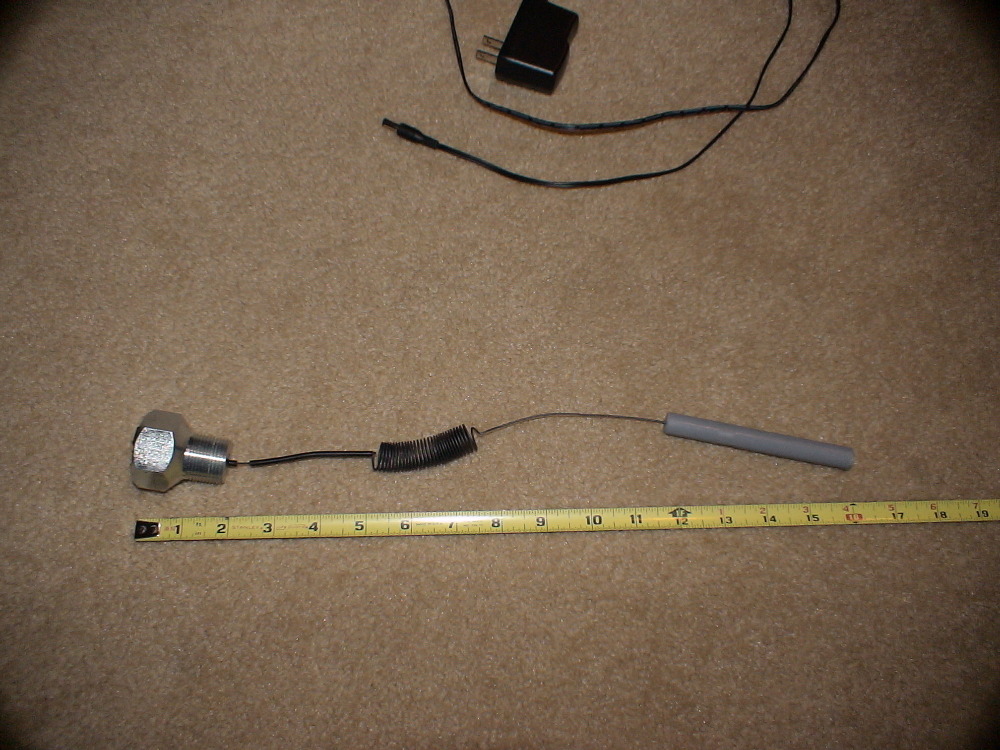
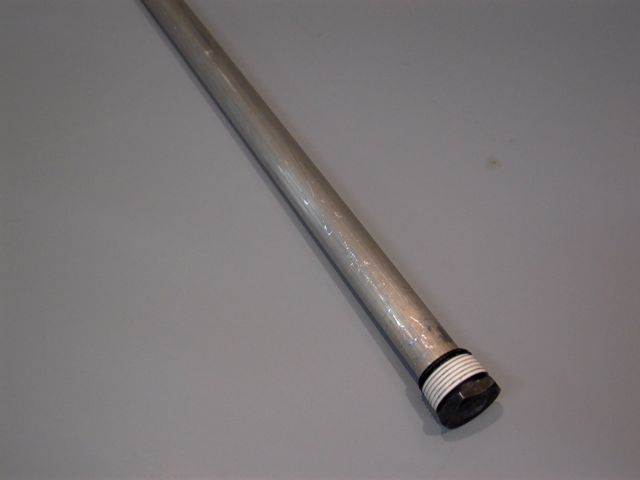
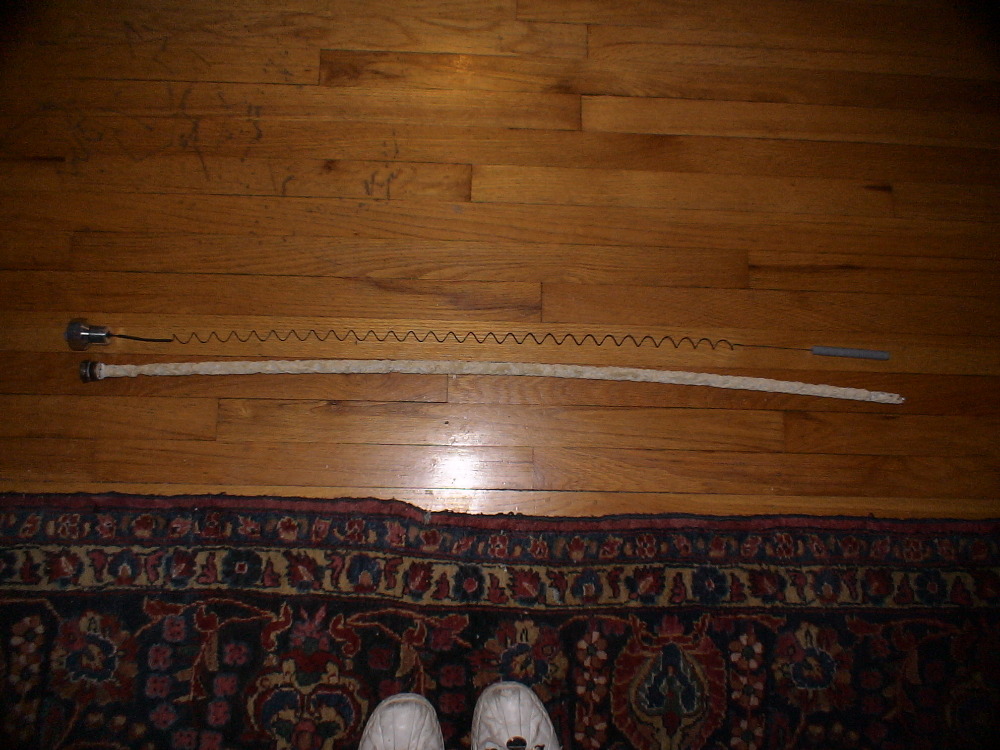
Spring anode element must be stretched to the length of the tank. I used the old anode for a guide. Instructions suggest stretching from the point where the rod enters the tank to about the height of the drain valve. The old rod held to the side of the tank was this length on this heater, so the old rod was a good guide. The spring is ceramic coated titanium. Considerable strength is needed to stretch the spring. It worked well with two people and the spring laid on the floor and stretched to the proper length with the old rod laying along side. Weight should hang close to but not touch the bottom of the tank.
| ||
| Post# 618452 , Reply# 22 8/19/2012 at 17:22 (4,270 days old) by beekeyknee (Columbia, MO) | ||
|
| ||
| Post# 618453 , Reply# 23 8/19/2012 at 17:23 (4,270 days old) by beekeyknee (Columbia, MO) | ||
|
| ||
| Post# 618454 , Reply# 24 8/19/2012 at 17:25 (4,270 days old) by beekeyknee (Columbia, MO) | ||
|
| ||
| Post# 618455 , Reply# 25 8/19/2012 at 17:27 (4,270 days old) by beekeyknee (Columbia, MO) | ||
|
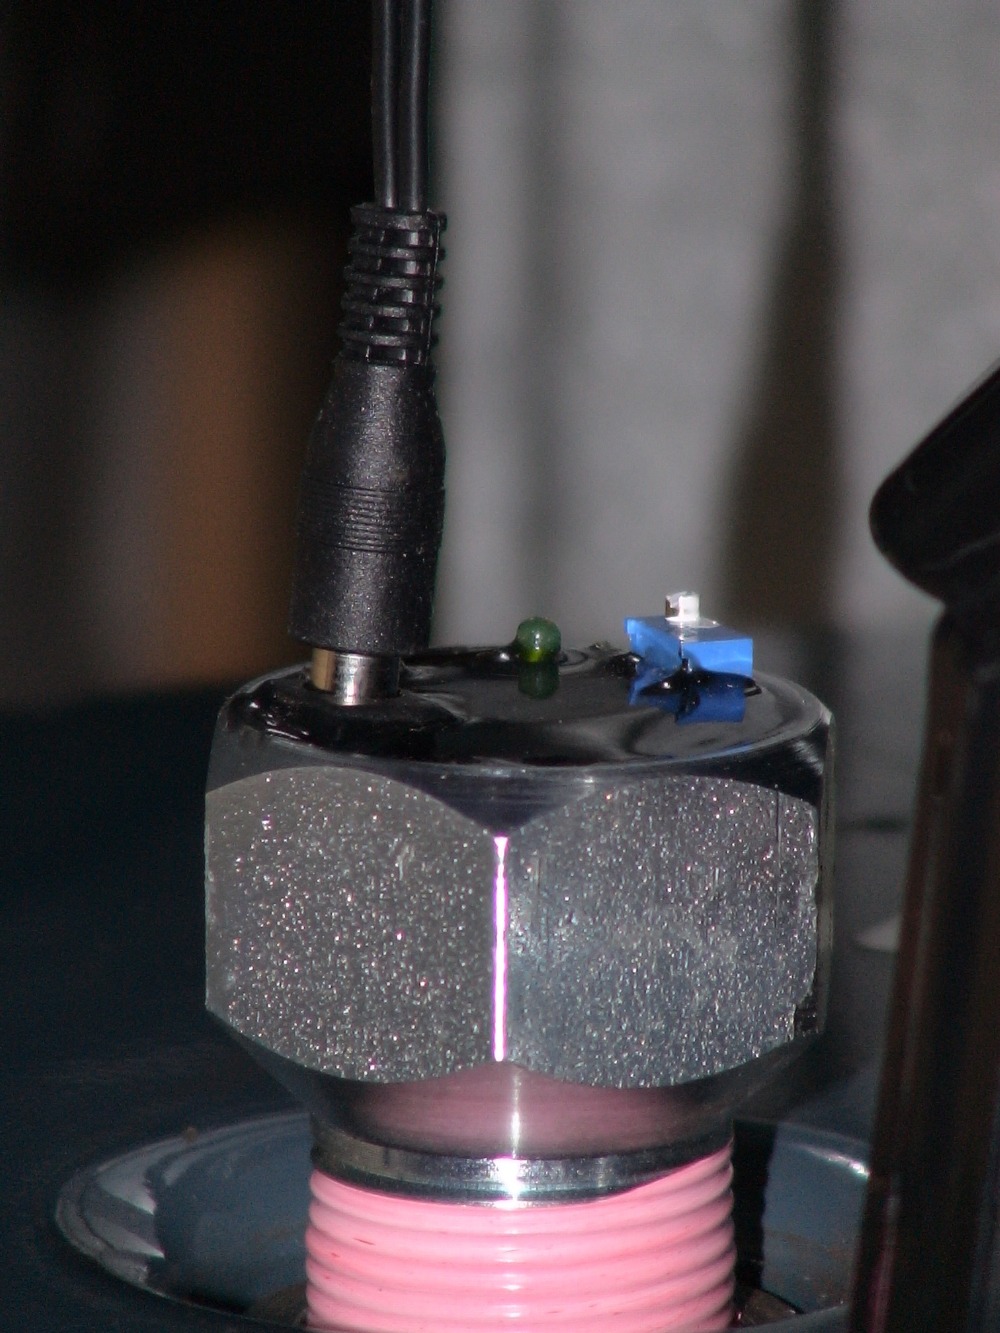
Different angle. This technology is called impressed current cathodic protection.
CLICK HERE TO GO TO beekeyknee's LINK 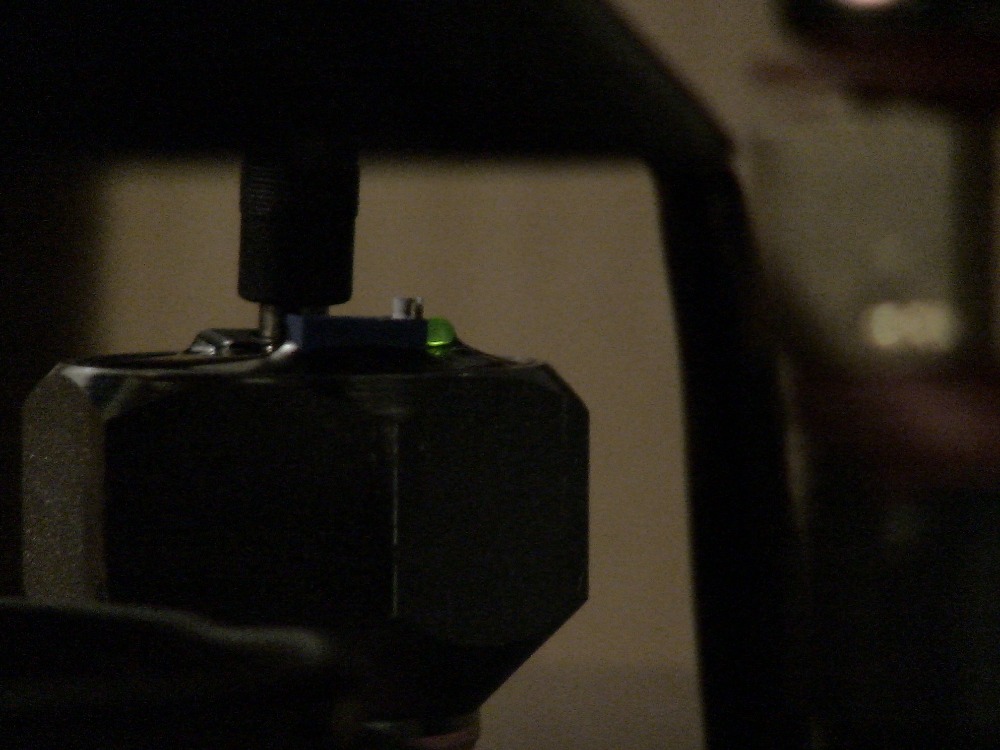
| ||
| Post# 618457 , Reply# 26 8/19/2012 at 17:29 (4,270 days old) by beekeyknee (Columbia, MO) | ||
|
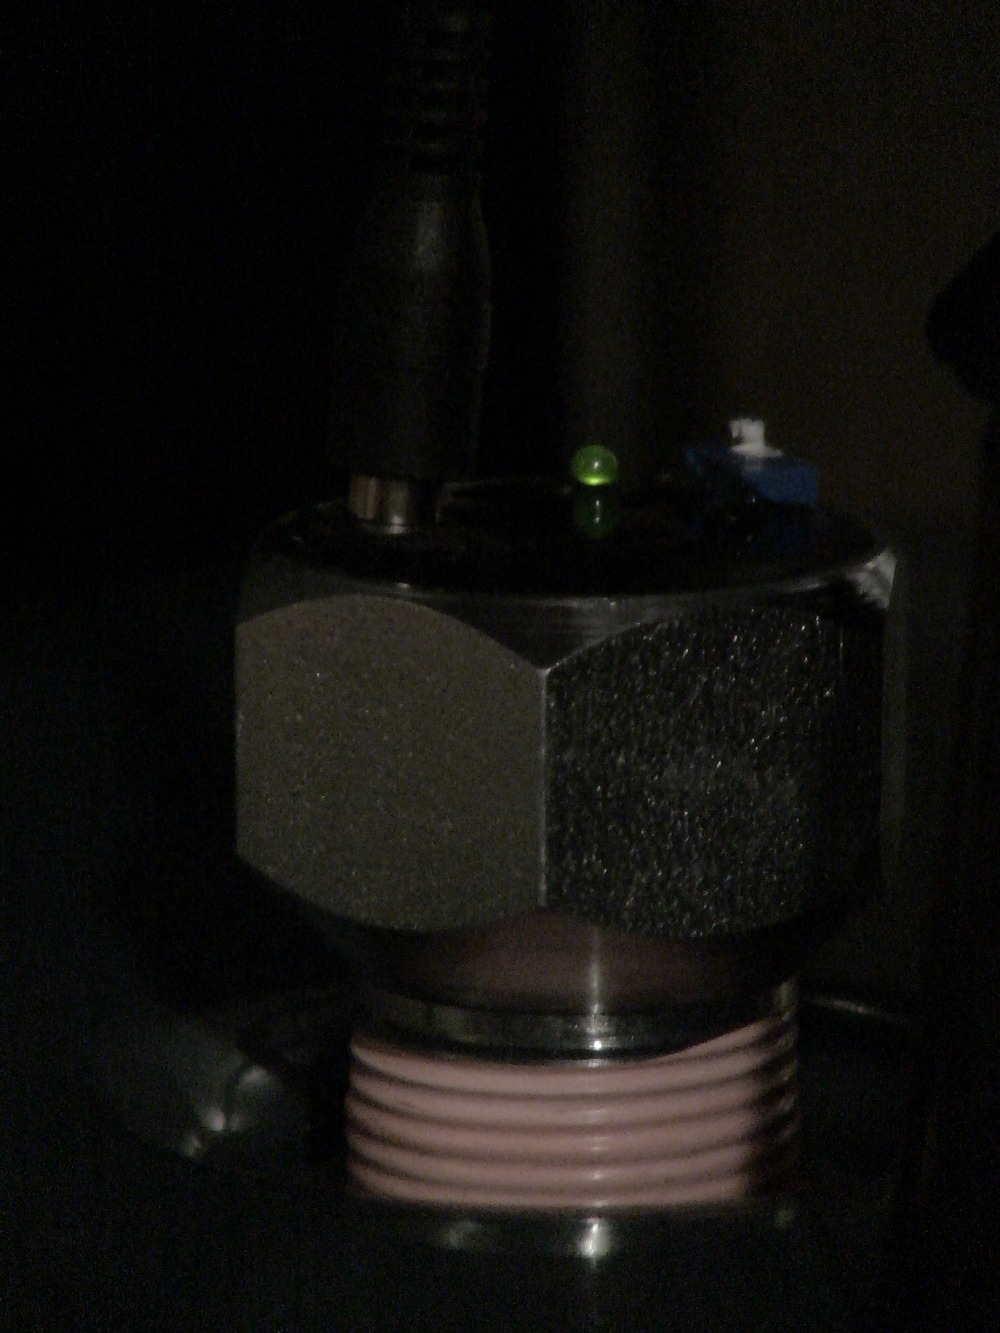
Unit must be plugged into surge suppressor. We are considering a whole house suppressor. Last year our line was struck by lightning. We lost several items, but it could have been worse. The anode, water softener, washing machine and dehumidifier are plugged into this. Of all the things plugged into this, the Maytag is the most durable, but it could be damaged and I would be very upset if it were.
| ||
| Post# 618460 , Reply# 27 8/19/2012 at 17:33 (4,270 days old) by beekeyknee (Columbia, MO) | ||
|
| ||
| Post# 618461 , Reply# 28 8/19/2012 at 17:39 (4,270 days old) by beekeyknee (Columbia, MO) | ||
|
An email from the inventor---
From the anode condition, it sounds as if your heater is still OK. If you get a powered anode, you can leave the softness setting at zero. There is one green LED that lights when you plug in the powered anode and indicates operation. The rest of the stuff on the face of the hex nut are controls that can be adjusted to increase or decrease output. These devices are self-adjusting for residential-type water heaters, so you should not even think of messing with those. The electrode is titanium and not subject to corrosion or breakage, but any device can fail, and a small number of these have done that, no more than 5 out of about a thousand, but it's a good idea to check the LED from time to time, and indeed, a good idea to check a water heater, as other things can develop. Randy Schuyler Water Heater Rescue | ||
| Post# 618464 , Reply# 29 8/19/2012 at 18:06 (4,270 days old) by beekeyknee (Columbia, MO) | ||
|
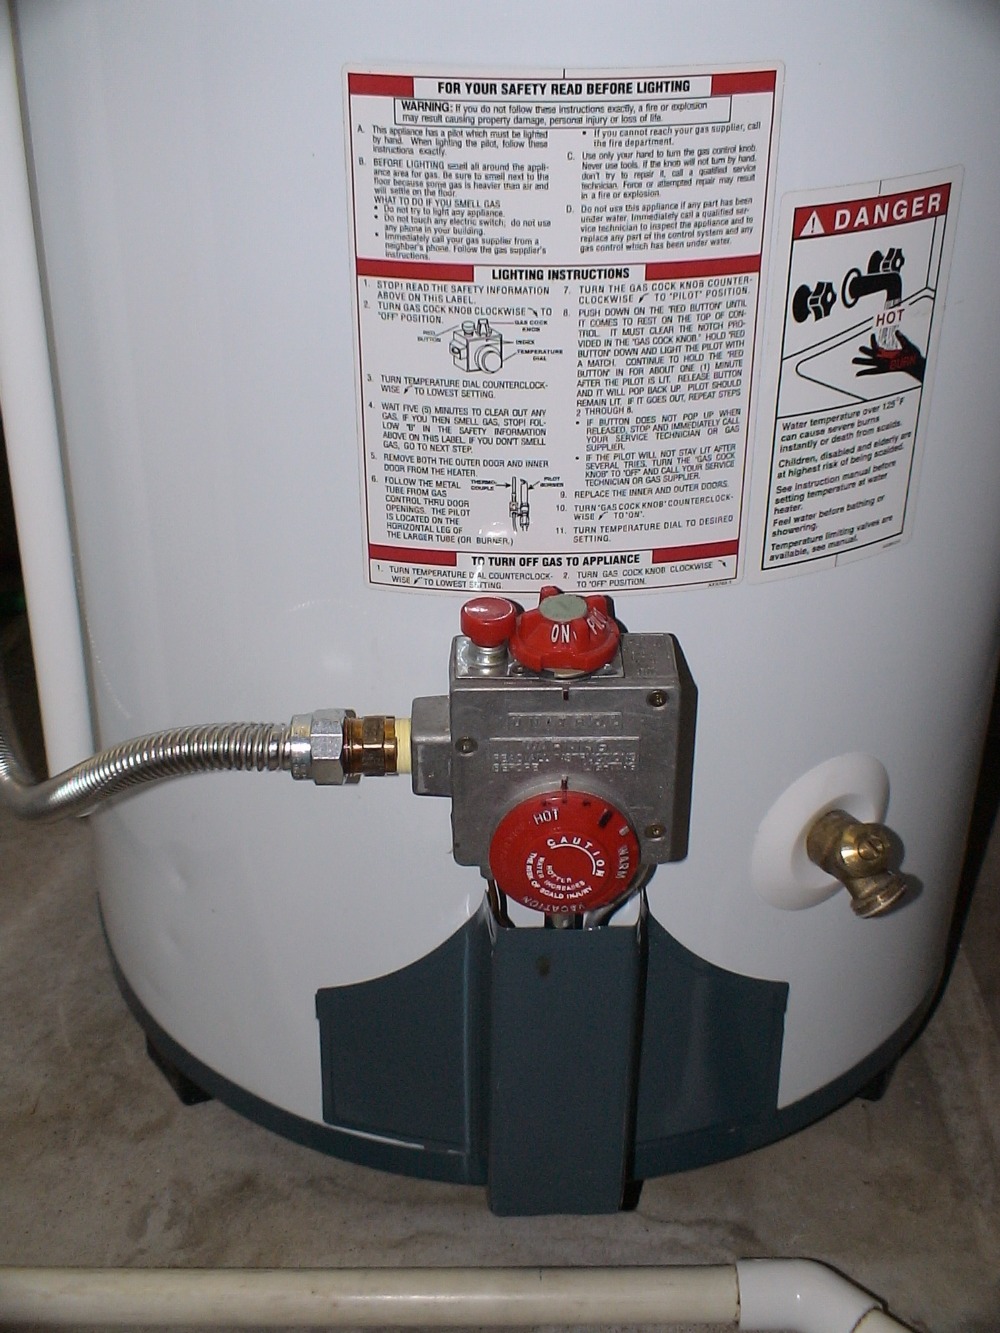
One thing I forgot to mention. The day after I installed this heater I got up to take a shower. The water was fairly warm at first, but after about 5 min. the water had turned almost cold.
I started to worry. As soon as I could I made my way to the utility room. The heater was out and wouldn't light. I followed the copper line from the thermocouple to the thermostat. I reached up to where it connects and found it was so loose I could turn the connection with my fingers. I tightened it lightly with a small crescent and it fired right back up. It's possible that the person that gave up the heater didn't know this and sent it away. This may explain it's great condition. Maybe it was set to the side and not used for years. | ||
| Post# 619970 , Reply# 30 8/25/2012 at 03:50 (4,265 days old) by beekeyknee (Columbia, MO) | ||
|
Is no one going to say anything about my w/h project? Are w/h's not worth saving or are they too boring because they aren't animated or is the thread too long and the premise too silly? Maybe there's nothing to discuss?
I would think some of you techie geeks out there would be interested in this. You do have to jump around quite a bit to get through it, but that's just the way it turned out. | ||
Post# 619971 , Reply# 31 8/25/2012 at 03:57 (4,265 days old) by pdub  (Portland, Oregon) (Portland, Oregon) |
||
 | ||
|
Post# 619976 , Reply# 32 8/25/2012 at 04:48 (4,265 days old) by ozzie908 (Lincoln UK) |
||
I found it interesting ...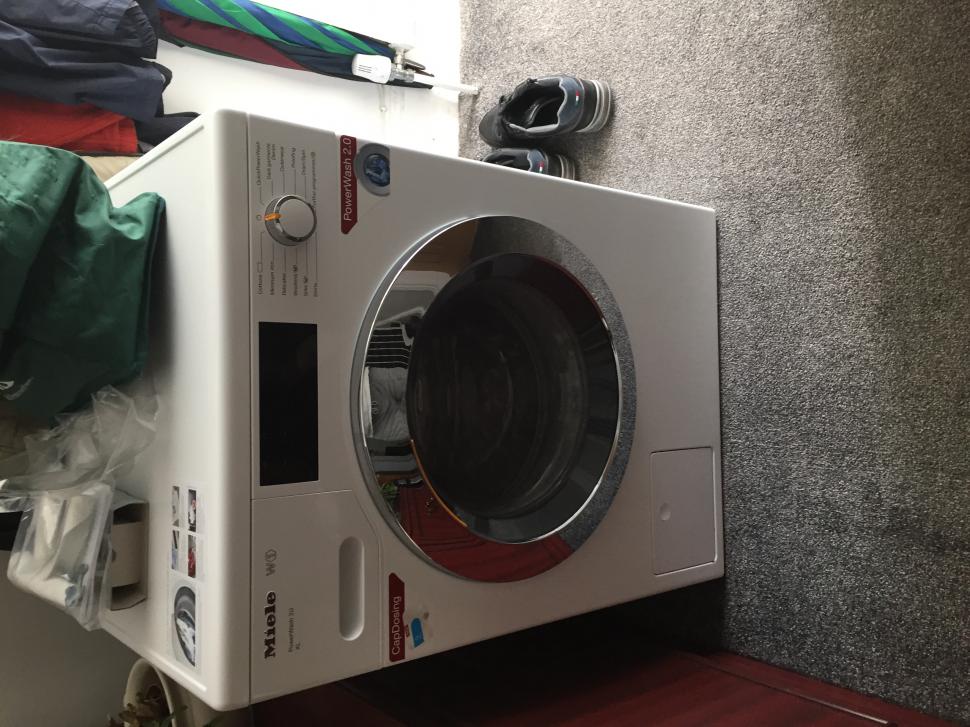 | ||
| Post# 620273 , Reply# 33 8/26/2012 at 02:56 (4,264 days old) by beekeyknee (Columbia, MO) | ||
|
Thanks, Patrick. I'm glad you enjoyed it.
Austin- I gave you a link to galvanic corrosion in the thread 'Aggravated Again'. There is also a link in, 'As The Water Heater Burns'. It's a link to cathodic protection. It is based on the ion exchange principle. It's used in softening water, electroplating, batteries, and so forth. Two elements placed in an electrolyte that have different numbers of electrons circling the element will make an exchange. This is a positive or negative effect, depending on what you want the outcome to be. In electroplating it's usually considered to be a positive effect, as well as in water softening. In batteries it's positive and negative. Positive in that it gives one an electromotive potential; negative in that the battery will eventually run down. In an impressed current cathodic protection system the sacrificial metal anode is replaced with and anode that has an external power supply. Instead of the anode dissolving and giving up it's electrons to protect the cathode, a steady constant supply of electrons for current is present to supply the protection to the cathode (in this place the water tank) and does not diminish over time as a sacrificial anode dissolves. This is especially important with softened water as it has somewhat more sodium in it than non softened water. Since sodium increases the conductivity of the water, thus increasing the sacrifice of the anode, one can see how the impressed current on the anode would be beneficial. This was the problem I was trying to solve, as our water is softened and the anode was disappearing at an alarming rate, rendering it useless. This, along with the other links I gave you in my other two threads, are about the only way I know to explain this to you. Here is one more link. CLICK HERE TO GO TO beekeyknee's LINK | ||
| Post# 620323 , Reply# 34 8/26/2012 at 10:39 (4,264 days old) by rickr (.) | ||
 | ||
| Post# 620365 , Reply# 38 8/26/2012 at 13:17 (4,264 days old) by beekeyknee (Columbia, MO) | ||
|
Thanks, Rick. I'm glad you enjoyed the thread. I imagine most w/h's could last for quite some time if properly installed and maintained, depending on the quality of the heater to begin with. I find that the older heaters were of higher quality and more dependable than the new ones, as is the case with most things these days.
| ||
| Post# 620422 , Reply# 40 8/26/2012 at 16:18 (4,264 days old) by beekeyknee (Columbia, MO) | ||
|
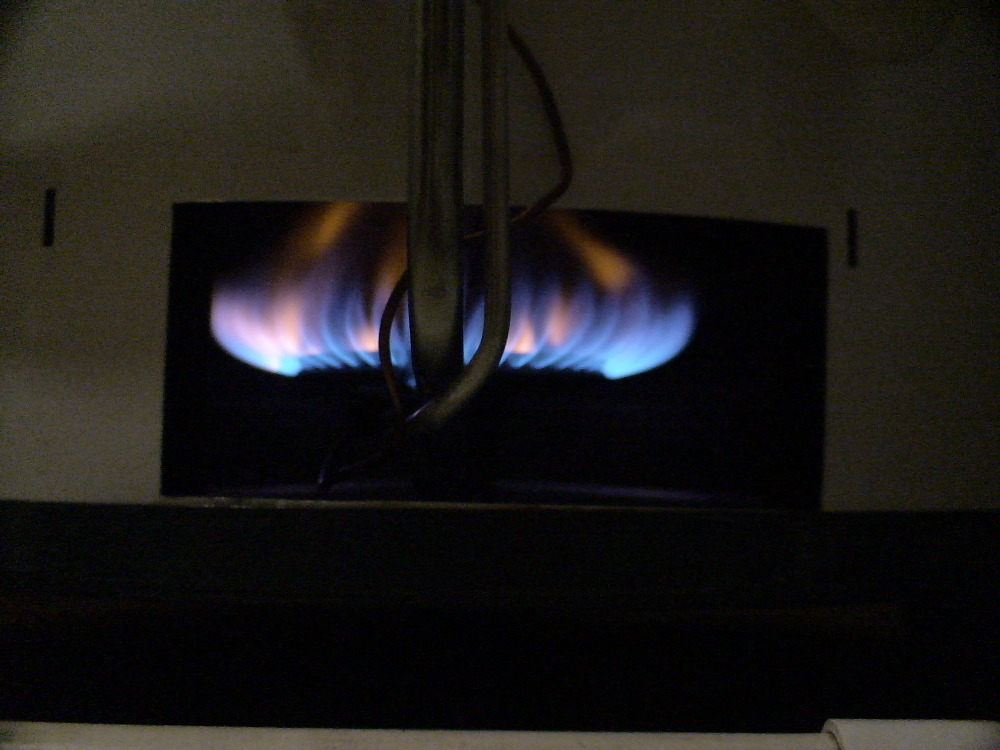
Yes, I'm afraid so. After 2002 a government mandate required all gas w/h's to have flame-lock. I don't like it. It's troublesome and I don't think they burn as hot.
But because some stupid people like to pour out tremendous amounts of VOC's in their houses and blow themselves up we're all forced to live with this "fool-proof" design. Personally I don't care if they blow themselves up. Thin the herd. Weed out the bad ones. Survival of the fittest or smartest in this case. Maybe the general IQ of the population would go up. We certainly need that. "But we're not all stupid! We don't all need nursemaiding! Why not just have a stupidity tax? Just tax the stupid people!" | ||
| Post# 620424 , Reply# 41 8/26/2012 at 16:22 (4,264 days old) by beekeyknee (Columbia, MO) | ||
|
| ||
| Post# 620432 , Reply# 43 8/26/2012 at 16:51 (4,264 days old) by beekeyknee (Columbia, MO) | ||
|
Yes, the LO-NOx does come into play along with the flame-lock. They seal the burner to help lower emissions and to keep the flame away from flammables. This seems to result in a smaller flame and causes pilot lights to go out. The recovery rate is lower because it burns slower and smaller. It's just another example of the aggravations placed on us by the government.
| ||
|
Post# 620523 , Reply# 45 8/27/2012 at 01:02 (4,263 days old) by hydralique (Los Angeles) |
||
|
Fido . . . Thanks for the explanation. I'm assuming the tank isn't too large, probably 30-60 gallons for an average home, and has some kind of a float valve to keep it filled plus an overflow just in case. What happens if a house has no attic space, how is this handled? | ||
| Post# 738543 , Reply# 50 3/1/2014 at 16:09 (3,712 days old) by JWPATE () | ||
|
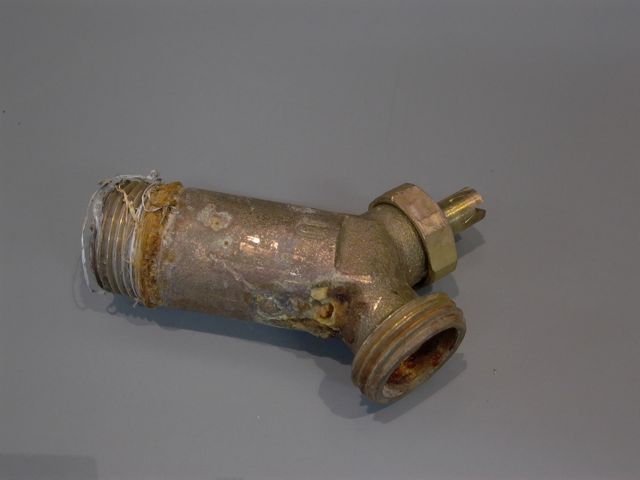
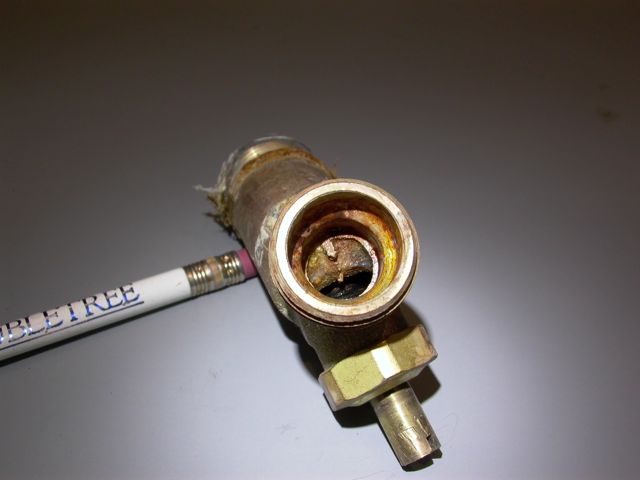
And what I found certainly did surprise me. This nasty looking mess is the inlet side of the tap. Really clogged up with silt, crud and corrosion. 
| ||
| Post# 738544 , Reply# 51 3/1/2014 at 16:14 (3,712 days old) by JWPATE () | ||
|
And look at the output end! That is less than half open. Not much way to get the kind of flow we need through a tap such as this one has become.
So we will be switching to another style.
| ||
| Post# 738593 , Reply# 53 3/1/2014 at 19:45 (3,711 days old) by beekeyknee (Columbia, MO) | ||
|
| ||
|
Post# 738602 , Reply# 55 3/1/2014 at 20:04 (3,711 days old) by Tomturbomatic (Beltsville, MD) |
||
|
Thanks WOW! Amazing. I will check out one of these electric anodes. | ||
| Post# 738604 , Reply# 56 3/1/2014 at 20:05 (3,711 days old) by beekeyknee (Columbia, MO) | ||
|
| ||
| Post# 738619 , Reply# 57 3/1/2014 at 21:07 (3,711 days old) by whirlcool (Just North Of Houston, Texas) | ||
|
We have about 12 feet of space above our hot water tank, it's near a corner but I think we could get a 6 foot cheater bar in there to turn. I'm wondering if it's too late to do anything with it. Because it's up in the attic, companies usually charge about $800-900 for installation alone. The current one cost a grand total of $1350. installed. | ||
| Post# 738646 , Reply# 58 3/2/2014 at 01:31 (3,711 days old) by norgeway (mocksville n c ) | ||
|
Its WONDERFUL to see.. Gas piped in iron pipe!! In NC you have to beg borrow and steal to get it done! Everyone hear is hooked on that damnable yellow flex and 2 pound systems! | ||
|
Post# 738843 , Reply# 59 3/2/2014 at 19:26 (3,710 days old) by sudsmaster (SF Bay Area, California) |
||

Perhaps the best way to inspect the innards of a water heate is to shut it off, drain it, and then poke a small flex camera into the opening to view the interior. I now have such a unit, and the next time I check the anode rod on my 30+ year old Monkey Ward 40 gallon, I'll be using it.
The heater works fine, doesn't leak, but tends to bump a bit when heating from time to time. I attribute this to sediment at the bottom, which I've tried several times to flush out. The camera will probably tell a better story. I worry that the cold water inlet tube may have deteriorated and pieces of it are bumping around the bottom of the tank. But then I haven't found any shreds thereof in the hot water faucet screens, either. Just in case I have a new cold water inlet tube ready to place into the heater the next time it's serviced. | ||
|
Post# 738888 , Reply# 60 3/2/2014 at 22:16 (3,710 days old) by sudsmaster (SF Bay Area, California) |
||
|
| ||
| Forum Index: | 
| Other Forums: |

|

|

|

|

|

 Comes to the Rescue!